
How To Set Up Nilfisk Pressure Washer
As an experienced user of cleaning equipment, I understand the importance of carefully setting up and configuring your tools to achieve optimal performance. Today, I would like to share my insights on the effective installation process of a top-notch cleaning device. In this article, I will guide you through the necessary steps to establish a well-functioning pressure washer from a leading manufacturer. By following these instructions, you will be able to seamlessly adapt your machine to your needs and achieve outstanding cleaning results.
Before we delve into the details of this setup process, it is essential to recognize the significance of investing in a reliable pressure washer. The market offers a vast range of options, but only a select few can provide the power, efficiency, and durability required for demanding cleaning tasks. This renowned manufacturer, known for its innovative solutions, has become synonymous with reliability and excellence in the industry.
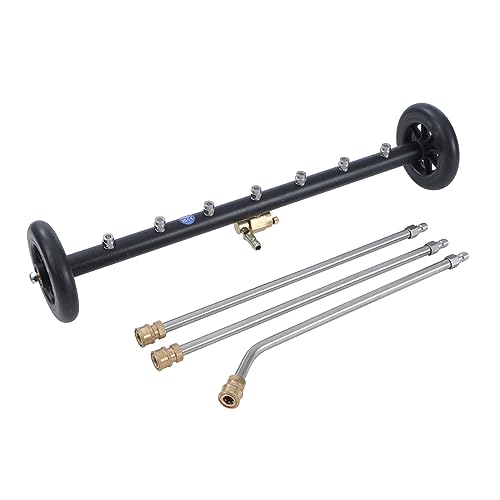
Firstly, it is crucial to carefully inspect and assemble all the components in order to ensure a seamless setup. This involves identifying the different parts of the pressure washer, such as the nozzle, hose, wand, and spray gun. By familiarizing yourself with these essential elements, you will be well-equipped to proceed with confidence to the next stage of the installation process.
Next, consider the installation location. It is essential to choose a suitable area that provides a stable platform for your pressure washer. Ideally, this space should be well-ventilated and conveniently located near a power source and water supply. Additionally, be mindful of the surface on which you plan to place the equipment. It should be level, sturdy, and capable of withstanding the weight and vibrations generated during operation.
Getting Started with Your Powerful Cleaning Machine
When it comes to starting your highly efficient cleaning device, there are a few key steps to follow for a successful setup. Let me guide you through the process, ensuring you have a smooth experience unleashing the full potential of your top-notch cleaning equipment.
Gathering the Essentials
Before diving into the assembly, it’s important to gather all the necessary components to ensure a seamless setup. Make sure you have the essential tools by your side, such as an adjustable wrench, a screwdriver, and a source of water for the pressure washer.
Assembly and Connection
Once you have all the essential tools ready, it’s time to assemble and connect your pressure washer. Begin by carefully attaching the high-pressure hose to the unit using the appropriate fittings and making sure they are tightly secured. Next, connect the water inlet hose to the water supply and ensure it is firmly attached.
Now, let’s move on to the spray gun and lance assembly. Gently insert the lance into the spray gun until you hear a click, confirming it is securely attached. It’s worth noting that some models allow for adjustable spray patterns, so make sure to adjust it according to your cleaning needs.
With the assembly complete, it’s time to connect the high-pressure hose to the spray gun. Align the quick-connect couplings and securely lock them in place, ensuring a tight connection without any leaks. Now, you’re one step closer to experiencing the remarkable cleaning power of your Nilfisk pressure washer!
Remember, safety is paramount! Before turning on the pressure washer, ensure that it is placed on a stable surface and that all connections are secure. Double-check the water supply valve to guarantee a smooth flow. Now, get ready to unleash the exceptional cleaning performance of your Nilfisk pressure washer and experience a whole new level of cleanliness!
Unveiling the Mighty Cleaning Companion
Step into the world of ultimate cleanliness as we embark on the unboxing journey of a powerful dirt-blasting device.
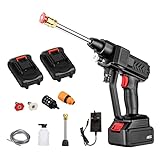
Today, I am thrilled to share my experience of unboxing the exceptional cleaning appliance from Nilfisk. This highly anticipated moment unveils a new chapter in my cleaning routine, promising efficiency and effectiveness like never before.
As I laid eyes on the unopened package, excitement surged through me. The sleek and sturdy exterior hinted at the remarkable capabilities that awaited inside. With bated breath, I eagerly delved into the unboxing process, unfastening the secure seals and carefully removing the protective layers that shielded my new cleaning companion. The ever-growing anticipation fueled my curiosity as I continued peeling back the layers, revealing the core components of this industry-leading pressure washer.
Upon extracting the contents, I was greeted with an array of precisely arranged parts, all meticulously designed to ensure seamless assembly and exceptional performance. The user manual, thoughtfully included, provided a comprehensive guide to assist me further in this thrilling journey.
| 1 | Main Unit |
| 2 | Nozzle Attachments |
| 3 | High-Pressure Hose |
| 4 | Trigger Gun |
| 5 | Detergent Bottle |
| 6 | Accessories |
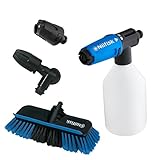
As I laid out the components before me, a sense of anticipation and excitement filled the air. Each piece perfectly crafted to interlock with the others, ensuring seamless assembly and effortless functionality.
With the unboxing complete, I am now ready to embark on the next phase of setting up my Nilfisk pressure washer. Stay tuned as we explore the step-by-step process of transforming this collection of parts into a powerhouse of cleaning prowess.
Understanding the Components of a High-Pressure Cleaning System
When it comes to operating a high-pressure cleaning system, it is essential to have a clear understanding of its various components. As a user, knowing the different parts of the pressure washer and their functions will allow you to maximize its performance and ensure a safe and efficient cleaning process.
The Pump:
One of the most critical components of a pressure washer is the pump. It is responsible for creating the high-pressure water stream that is used to remove dirt and grime from surfaces. The pump operates by drawing water from a water source and pressurizing it to the desired level.

The Nozzle:
The nozzle is the part of the pressure washer that determines the shape and intensity of the water spray. Different nozzle types are available, each designed for specific cleaning tasks. The nozzle’s size and angle can be adjusted to achieve the desired pressure and coverage area.
The Hose:
The hose is the conduit through which pressurized water flows from the pump to the nozzle. It needs to be strong and flexible to withstand the high-pressure water and maneuverability required during cleaning. The length of the hose determines how far you can work from the pressure washer without moving it.
The Trigger Gun:

The trigger gun is the control mechanism that allows you to start and stop the flow of water from the pressure washer. It also regulates the pressure level by adjusting the flow rate. The trigger gun usually has a safety lock to prevent accidental operation and ensure user safety.
The Detergent Injector:
In some pressure washers, a detergent injector is included as an additional component. This feature allows you to add cleaning agents or detergents to the water flow, enhancing the cleaning power and efficiency. The detergent injector is typically a separate attachment that can be connected to the pressure washer.
Conclusion:
Understanding the various components of a pressure washer is essential for successful operation and maintenance. The pump, nozzle, hose, trigger gun, and detergent injector all play crucial roles in achieving effective cleaning results. By familiarizing yourself with these components, you can confidently set up and operate your pressure washer while ensuring safety and optimal performance.

Connecting the Hoses and Cables
When setting up your Nilfisk pressure washer, one of the crucial steps is connecting the various hoses and cables. This ensures that the machine operates efficiently and effectively, allowing you to tackle your cleaning tasks with ease.
Firstly, locate the hose inlet on the pressure washer unit. It is usually positioned on the rear or side, depending on the model. Insert the end of the high-pressure hose into the inlet and make sure it is securely attached.
Next, identify the water source and connect the garden hose to it. Use a suitable connector to secure the garden hose to the water source, ensuring there are no leaks. Then, attach the other end of the garden hose to the water inlet on the pressure washer. Ensure it is tightly connected to prevent any water leakage.
Now, it’s time to connect the trigger gun to the high-pressure hose. The trigger gun is the component that allows you to control the flow of water and activate the pressure washer. Insert the end of the high-pressure hose into the gun’s inlet and twist it clockwise to ensure a tight and secure connection.
Finally, if your Nilfisk pressure washer has an onboard detergent tank, you can connect the detergent hose to it. This hose is responsible for drawing detergent from the tank and mixing it with the pressurized water. Follow the manufacturer’s instructions to connect the detergent hose properly.

Once all the hoses and cables are connected, double-check that each connection is tight and secure. This will prevent any potential issues during operation. It is essential to follow these steps carefully to ensure that your Nilfisk pressure washer functions optimally and delivers excellent cleaning results.
Adjusting the Pressure Settings
In this section, I will guide you through the process of customizing the intensity of your Nilfisk pressure washer without the need for any specialized tools. By following these simple steps, you will be able to modify the force and effectiveness of the water stream for optimal cleaning results.
Step 1: Begin by locating the pressure adjustment knob on your Nilfisk pressure washer. This knob controls the amount of pressure the machine produces, allowing you to tailor it to your specific cleaning needs. It is usually marked with symbols or numbers indicating the pressure level.
Step 2: To decrease the pressure, turn the knob counterclockwise. This will open the valve, allowing the water to flow through with less force. It is important to note that reducing the pressure too much may result in less effective cleaning and longer cleaning times.
Step 3: Conversely, if you want to increase the pressure, turn the adjustment knob clockwise. This will restrict the flow of water, causing it to exit the nozzle with greater force. Remember to adjust the pressure gradually and test the water stream after each adjustment to ensure it meets your desired cleaning requirements.

Step 4: Throughout the adjustment process, keep in mind the surface or object you intend to clean. Delicate materials may require lower pressure settings to prevent damage, while tougher stains or surfaces may require higher pressure for thorough cleaning.
Note: It is important to follow the manufacturer’s instructions and recommendations for the maximum pressure settings of your Nilfisk pressure washer. Exceeding these limits may result in equipment damage or personal injury.
Conclusion: By learning how to adjust the pressure settings on your Nilfisk pressure washer, you can optimize its performance for a variety of cleaning tasks. Remember to start with lower pressure settings and gradually increase if necessary, while always considering the surface or material being cleaned. With this knowledge, you can confidently tackle any cleaning project with your Nilfisk pressure washer.
Filling the Detergent Tank
In this section, I will guide you through the process of filling the detergent tank of your Nilfisk pressure washer. Filling the detergent tank is an important step before you start using the pressure washer as it allows you to apply cleaning solutions during your cleaning tasks. Follow the steps below to ensure proper filling of the detergent tank.
Step 1: Choose the Suitable Cleaning Solution
Before filling the detergent tank, make sure to choose a suitable cleaning solution for your cleaning needs. Select a cleaning solution that is compatible with the surfaces you intend to clean and is safe to use with your pressure washer. Read the manufacturer’s instructions for the cleaning solution to ensure proper usage.
Step 2: Prepare the Detergent Solution
In order to fill the detergent tank, you need to prepare the detergent solution. Follow the instructions provided on the cleaning solution packaging to prepare the solution. Typically, you will need to dilute the cleaning solution with water according to the recommended ratio. Use a measuring cup or container to accurately measure the required amounts of cleaning solution and water.
Note: It is important to follow the recommended ratio given by the cleaning solution manufacturer to avoid damaging the pressure washer or the surfaces you are cleaning.
Step 3: Fill the Detergent Tank
Now that you have prepared the detergent solution, it is time to fill the detergent tank of your Nilfisk pressure washer. Locate the detergent tank, which is usually a separate compartment specifically designed for holding cleaning solutions. Open the compartment carefully.
Using a funnel or a pour spout, pour the prepared detergent solution into the tank. Be cautious not to overfill the tank, as it may cause spills or leaks during operation. Check the markings on the tank or refer to the user manual to determine the maximum fill limit.
Note: Some Nilfisk pressure washer models may have an adjustable detergent flow control knob or switch, which allows you to adjust the amount of detergent being dispensed during operation. If your model has this feature, ensure it is set to the desired setting before starting your cleaning task.
Once the detergent tank is filled, securely close the compartment to prevent any leakage during use. Now you are ready to make use of the detergent functionality of your Nilfisk pressure washer and achieve effective cleaning results.
Safety Precautions and Operating Tips
Ensuring a safe and efficient operation of your pressure washer is paramount to achieving optimal results. In this section, I will share some important safety precautions and operating tips to keep in mind when using your Nilfisk pressure washer.
Prioritize safety: Before starting any cleaning task, it is crucial to prioritize your safety by wearing appropriate protective gear, such as safety goggles, gloves, and closed-toe shoes. Additionally, ensure that the area is clear of any obstacles or tripping hazards.
Familiarize yourself with the equipment: Take the time to thoroughly read the user manual provided by Nilfisk to familiarize yourself with the specific features and functions of your pressure washer. Understanding the equipment will not only make the setup process easier but also enable you to operate it efficiently and safely.
Inspect the pressure washer: Before each use, inspect the pressure washer for any signs of damage, such as frayed cords or leaks. If you notice any issues, do not attempt to use the washer and contact a professional for repairs.
Choose the appropriate nozzle: Nilfisk pressure washers come with a range of nozzles, each serving a specific purpose. Selecting the appropriate nozzle for your cleaning task is vital to ensure efficient and safe operation. Take into consideration factors such as the type of surface being cleaned and the level of pressure required.
Properly connect the water supply: Make sure to securely connect the pressure washer to a water source, following the manufacturer’s instructions. This will ensure a consistent water supply during operation and prevent any leaks or interruptions.
Start with low pressure: When beginning a cleaning task, it is recommended to start with low pressure and gradually increase it as needed. This approach prevents potential damage to delicate surfaces and helps you maintain control over the washer.
Maintain proper posture and grip: While operating the pressure washer, keep a stable posture and maintain a firm grip on the wand. This will provide better control over the equipment and minimize the risk of accidents or injuries.
Regular maintenance is key: To ensure longevity and optimal performance, regularly clean and maintain your Nilfisk pressure washer. This includes cleaning the nozzles, checking and replacing filters when necessary, and storing the equipment in a dry and secure place.
Note: Following these safety precautions and operating tips will not only protect you and others but also help maximize the lifespan and efficiency of your Nilfisk pressure washer.
Maintenance and Cleaning of the Power Washing Equipment
Welcome to the section on maintaining and cleaning your power washing equipment. In this section, I will share some valuable insights and tips on how to ensure the longevity and optimal performance of your Nilfisk pressure washer.
Regular Cleaning
A clean power washer is an efficient power washer. It is essential to clean your equipment after each use to remove any dirt, debris, or detergent residue that may have accumulated during the cleaning process. This not only keeps your pressure washer in good working condition but also prevents clogs and potential damage to the internal components.
Start by disconnecting the power supply and letting the machine cool down. Then, use a soft brush or cloth to remove any loose dirt and debris from the exterior surfaces. Be careful not to use abrasive materials or harsh chemicals that could damage the paint or other sensitive parts of the pressure washer.
Next, remove the nozzle and lance from the gun and inspect them for any blockages. Clean them thoroughly using a small wire brush or a pin to remove any debris that might be obstructing the flow of water. Additionally, check the detergent suction tube for any clogs and clean it if necessary.
Annual Maintenance
Performing regular maintenance on your Nilfisk pressure washer is crucial for its optimal performance and longevity. Ideally, an annual maintenance routine should involve checking and replacing any worn-out seals, o-rings, or gaskets, as well as inspecting and lubricating the pump and motor.
Refer to the user manual or contact the manufacturer for specific instructions on how to perform these tasks properly. Additionally, it is advisable to have your pressure washer serviced by a certified technician at least once a year to ensure that all components are in top-notch condition.
| Maintenance Tasks | Frequency |
|---|---|
| Cleaning the exterior surfaces | After each use |
| Inspecting and cleaning the nozzle and lance | After each use |
| Cleaning the detergent suction tube | After each use |
| Checking and replacing seals, o-rings, and gaskets | Annually |
| Inspecting and lubricating the pump and motor | Annually |
FAQ:
Where can I purchase a Nilfisk pressure washer?
You can purchase a Nilfisk pressure washer from various retailers, both online and offline. Some popular options include home improvement stores like Home Depot and Lowe’s, as well as online marketplaces like Amazon and eBay.
What types of surfaces can I clean with a Nilfisk pressure washer?
A Nilfisk pressure washer can be used to clean a wide range of surfaces, including driveways, sidewalks, patio furniture, decks, fences, cars, and more. However, it is important to adjust the pressure and nozzle setting according to the specific surface being cleaned to avoid potential damage.
How do I assemble a Nilfisk pressure washer?
Assembling a Nilfisk pressure washer is a fairly straightforward process. Start by attaching the high-pressure hose to the machine’s water outlet, then connect the other end of the hose to the spray gun. Next, connect the spray lance to the spray gun, and finally, connect the water inlet hose to a water source. Make sure all connections are secure before proceeding to use the pressure washer.
Can I use any detergent with a Nilfisk pressure washer?
No, not all detergents are suitable for use with a Nilfisk pressure washer. It is recommended to use only detergents specifically designed for pressure washers. These detergents are formulated to work effectively with the machine and help achieve optimal cleaning results. Using the wrong detergent may not only affect the cleaning performance but could also cause damage to the pressure washer or the surface being cleaned.
What maintenance steps should I follow for my Nilfisk pressure washer?
To ensure the longevity and optimal performance of your Nilfisk pressure washer, it is important to follow a few maintenance steps. Regularly check and clean the water filter, inspect and tighten all connections, and lubricate any moving parts as recommended by the manufacturer. It is also crucial to properly store the pressure washer in a clean and dry area when not in use and to winterize it if necessary, especially in regions with freezing temperatures.


