How To Drain A Karcher Pressure Washer For Winter

Greetings fellow pressure washer enthusiasts! Today, I want to share with you a step-by-step guide on how to effectively prepare your beloved high-pressure cleaning machine for the approaching chilly winter months. Now, we all know that during this time of the year, it is crucial to take extra care of our equipment to ensure its longevity and optimal performance when spring arrives.
As a proud owner of a remarkable power washing device, it is my duty to emphasize the importance of proper maintenance and storage, especially during the cold season. Throughout this article, I will be providing you with valuable tips, tricks, and expert advice on how to safeguard your pressure washer from potential damage caused by freezing temperatures, ice, and other harsh winter conditions.
Now, let’s dive into the nitty-gritty details and discover practical ways to safeguard your pressure washer’s fragile components. Remember, prevention is always better than cure, and investing a little time and effort now will undoubtedly save you from countless headaches and expensive repairs later on. So, without further ado, let’s unravel the secrets of efficiently draining our power washing equipment to combat the winter’s chill!
Getting Your Pressure Washer Ready for the Winter Season
As the temperature drops and winter approaches, it’s time to prepare your trusty pressure washer to withstand the harsh conditions. This essential maintenance will ensure that your pressure washer remains in top-notch condition throughout the winter months and is ready to deliver optimal performance when the warmer weather returns.
1. Winterizing your Pressure Washer: An Essential Step
Before stowing away your pressure washer for the winter, it’s crucial to winterize it properly. Winterizing involves draining any residual water from the unit, which can potentially freeze and cause damage. By following these steps and taking preventative measures, you can protect your pressure washer from freezing temperatures and potential issues such as cracked hoses, pumps, and fittings.
- Step 1: Removing Water from the System
- Step 2: Clearing the Detergent System
- Step 3: Storing the Pressure Washer
The first step is to disconnect the water supply and remove any attachments. Then, with the machine turned off, gently pull the trigger on the spray wand to relieve any built-up pressure. This action will allow the remaining water to drain out.
If your pressure washer has a detergent system, ensure that it is fully emptied and flushed with water. This step is crucial in preventing any residual detergent from clogging up the system or causing damage during winter storage.
Store your pressure washer in a suitable location away from extreme cold temperatures, moisture, and direct sunlight. Ideally, a climate-controlled area is the perfect spot for winter storage. Additionally, cover your pressure washer with a protective, breathable cover to shield it from dust and debris.
2. Keep an Eye on Maintenance and Precautionary Measures
Aside from draining and storing your pressure washer, there are a few other maintenance tasks you should consider before winter sets in. These steps will help prolong the lifespan of your machine and ensure it’s ready to go when spring arrives.

- Regular Cleaning and Inspections: Thoroughly clean the exterior of your pressure washer and inspect all components for any signs of wear or damage. Clean or replace any clogged filters, nozzle tips, or screens to optimize performance.
- Proper Fuel Stabilization: If your pressure washer operates on gasoline, adding a fuel stabilizer to the tank will prevent the fuel from deteriorating and causing starting issues after a prolonged period of inactivity.
- Checking Oil Levels: Ensure that the oil levels are topped up and check if the oil needs to be changed. Refer to your pressure washer’s user manual for specific instructions on oil type and maintenance.
By following these simple yet effective steps to prepare your pressure washer for winter, you can avoid potential damage and ensure its longevity. Remember, taking the time now to winterize your pressure washer properly will save you from headaches and costly repairs in the future.
The Significance of Winterizing Your High-Pressure Cleaner
As the colder months approach, it becomes imperative for me to acknowledge the importance of winterizing my high-pressure cleaner. This preventative maintenance process ensures the longevity and optimal performance of my equipment during the freezing winter conditions. Neglecting to winterize my pressure washer can lead to considerable damage, costly repairs, and diminished effectiveness when I intend to use it again come springtime.
Protecting Against Freezing Temperatures
One of the primary reasons for winterizing my high-pressure cleaner is to safeguard it against freezing temperatures. By properly preparing and draining the water from the machine, I can prevent the formation of ice within the internal components. When water freezes, it expands, potentially causing irreversible damage to various parts such as the pump, hoses, and seals. Actively taking measures to winterize my pressure washer ensures that no residual water is left behind to freeze and compromise the functionality of the machine.
Preventing Corrosion and Damage
Winterizing my high-pressure cleaner serves as an effective strategy in preventing corrosion and damage. By thoroughly removing all water and residual detergent from the system, I eliminate the risk of moisture-related issues, including rust and deterioration. Moisture that remains within the pressure washer during winter can cause internal components to corrode over time, leading to leaks, reduced performance, and potential breakdowns. Winterizing my equipment protects it from these harmful effects and preserves its durability.
| Advantages of Winterizing | Disadvantages of Not Winterizing |
|---|---|
| Extended lifespan of the high-pressure cleaner | Potential freeze damage to pump, hoses, and seals |
| Cost savings by avoiding expensive repairs | Moisture-related corrosion and deterioration |
| Optimal performance when the machine is next used | Decreased effectiveness and potential breakdowns |
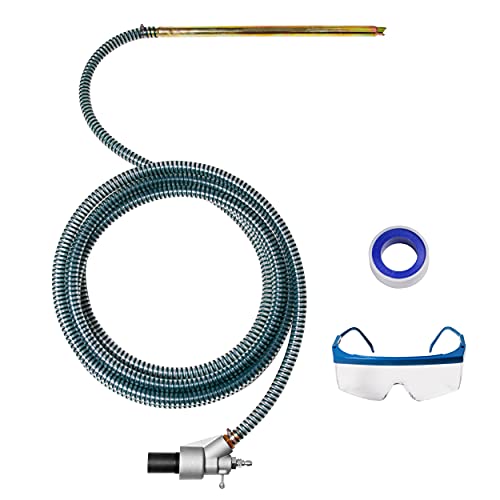
Step 1: Gather the Essential Tools and Materials
Before preparing your pressure washer for winter, it is important to gather all the necessary tools and materials for the task. Having everything ready will make the process smooth and efficient, ensuring your pressure washer is properly drained and protected from potential damage during the winter months.

To get started, you will need the following items:
| 1. | A set of basic hand tools such as screwdrivers and pliers |
| 2. | An adjustable wrench |
| 3. | A bucket or container to collect any residual water |
| 4. | A drain plug or valve compatible with your pressure washer |
| 5. | A clean cloth or towel |
| 6. | A suitable antifreeze solution for pressure washers |
Ensuring that you have all these tools and materials readily available will save you time and frustration during the winterization process. Furthermore, it is important to have the correct size and type of drain plug or valve for your specific pressure washer model. This will ensure a proper fit and prevent any leaks or complications.
Step 2: Disconnect the Power Source
When preparing your pressure washer for the winter season, it is important to take a cautious approach to ensure its longevity. One crucial step is to disconnect the power source, which helps safeguard the machine from any potential damage.
Why disconnecting the power source is necessary?
Disconnecting the power source not only protects your pressure washer but also minimizes any risks of electrical hazards. By disconnecting the power, you are effectively isolating the machine from its power supply, preventing any accidental starts or electrical issues that may occur during the winter months.
How to disconnect the power source?
Disconnecting the power source is a straightforward process that involves the following simple steps:

| Step | Description |
| 1 | Locate the power cord of your pressure washer. |
| 2 | Ensure the pressure washer is turned off and the switch is in the “off” position. |
| 3 | Gently unplug the power cord from the electrical outlet. |
| 4 | Inspect the cord for any signs of damage or wear. |
| 5 | Securely store the power cord in a safe and dry place. |
By following these steps, you can confidently disconnect the power source of your pressure washer, ensuring that it remains protected during the winter season.
Preparing for Winter: Step 3 – Removing the Water from Your Pressure Washer
As we get ready to face the cold winter months, it is crucial to properly store and maintain our pressure washers to ensure their longevity. In this step, I will guide you through the process of removing the water from your pressure washer to prevent any potential damage caused by freezing temperatures.
1. Release the Pressure
The first and most important step before draining the water from your pressure washer is to release any built-up pressure. This can be done by triggering the gun of the pressure washer and allowing the water to run freely for a few seconds. By doing so, we ensure that there is no pressure left inside the machine, which could lead to potential hazards during the draining process.
2. Locate the Drain Plug
Next, we need to locate the drain plug on your pressure washer. This plug is typically positioned at the bottom of the machine, but the exact location may vary depending on the model and brand. It is advisable to consult your pressure washer’s manual or contact the manufacturer if you are unsure about the specific location of the drain plug.
Once you have located the drain plug, prepare a suitable container or a low-lying area where the water can be safely drained. Ensure that it is capable of handling the volume of water that will be released from the pressure washer.

3. Remove the Water
Now that we have released the pressure and identified the drain plug, it’s time to remove the water from the pressure washer. Carefully unscrew or unplug the drain plug and allow the water to drain completely. Be cautious as the water may still be hot from previous use.
While draining the water, it is essential to keep a close eye on the process and ensure that all the water is successfully removed. It is also advisable to tilt the pressure washer slightly to aid in the complete drainage of water from the unit.
Once the water has been drained, replace the drain plug securely to prevent any leakage or damage.
By following these steps, you will successfully remove the water from your pressure washer, safeguarding it from potential freezing and damage during the winter months. Properly winterizing your pressure washer will not only extend its lifespan but also ensure that it performs optimally when you need it again in the future.
Step 4: Empty and Clean the Detergent Tank
When preparing your pressure washer for the winter season, it’s essential to ensure that the detergent tank is properly emptied and cleaned. This step is crucial in maintaining the longevity and efficiency of your equipment. By emptying and cleaning the detergent tank, you can prevent any leftover residue or clogs that may cause damage or impede the functionality of the pressure washer in the future.

To begin, locate the detergent tank on your pressure washer. It is typically situated near the main unit and has a separate compartment for the detergent solution. Empty the tank by carefully unscrewing the cap or removing the lid, depending on the design of your pressure washer. Dispose of any remaining detergent in an environmentally-conscious manner.
Once the tank is emptied, it’s time to clean it thoroughly. Start by rinsing the tank with clean water to remove any excess detergent. Use a sponge or brush to scrub the tank gently, paying attention to the corners and crevices where residue can accumulate. If necessary, you can mix warm water with a mild detergent to aid in the cleaning process, but avoid using abrasive cleaners or brushes that may damage the tank’s surface.
After scrubbing, rinse the tank again to remove any soap or dirt. Ensure all residues are eliminated, as they may clog the detergent flow or cause blockages during future usage. Thoroughly dry the tank with a clean, lint-free cloth or allow it to air dry completely before reassembling it onto your pressure washer.
| Tip: | For optimum maintenance, it is recommended to empty and clean the detergent tank after each use, not just during winterization. This practice helps prevent any buildup or contamination and ensures the smooth operation of your pressure washer. |
|---|
Step 5: Remove and Store Any Attachments or Accessories
When it comes to preparing your pressure washer for winter, it’s not just about draining the water and protecting the machine itself. Another crucial step is to remove and store any attachments or accessories that may be attached to your pressure washer.
Attachments and accessories such as nozzles, brushes, and extension wands are often used to enhance the cleaning performance of your pressure washer. However, leaving them attached during winter can lead to potential damage and deterioration due to the harsh weather conditions.

Why is it important?
By removing and storing attachments or accessories, you ensure their longevity and maintain their functionality. It’s important to remember that these components are often made of different materials and may not withstand freezing temperatures or excessive moisture.
Additionally, storing these items separately from your pressure washer minimizes the risk of misplacing or losing them. This way, when spring arrives and it’s time to bring out your pressure washer again, you’ll have everything you need readily available.
How to do it:
To remove and store attachments or accessories properly, follow these simple steps:
| Step | Action |
|---|---|
| 1 | Carefully disconnect each attachment or accessory from the pressure washer, ensuring not to damage any connecting parts. |
| 2 | Thoroughly clean each attachment or accessory, removing any dirt, debris, or residual water. |
| 3 | Dry them completely using a clean cloth or air-drying them in a well-ventilated area. |
| 4 | Once dry, store each attachment or accessory separately in a clean, dry, and secure location. |
| 5 | Label or organize the storage area, so you can easily find the attachments or accessories when you need them again. |
By taking the time to remove and store attachments or accessories, you not only prolong their lifespan but also ensure a smooth and efficient transition when it’s time to use your pressure washer again in the future.
Step 6: Protecting Your Pressure Washer from Freezing Temperatures
As winter approaches, it is crucial to take the necessary steps to protect your pressure washer from potential damage caused by freezing temperatures. By properly safeguarding your pressure washer during the winter months, you can ensure that it will be ready for use when the weather warms up again. In this section, I will guide you through the essential steps to help you protect your pressure washer from the harmful effects of freezing temperatures.

1. Remove any residual water from the pressure washer
- Turn off the pressure washer and unplug it from the power source.
- Detach the hose and trigger gun from the pressure washer.
- Hold the trigger gun with the nozzle pointing away from you and squeeze the trigger to release any remaining water.
- Allow the pressure washer to run for a few seconds to ensure that all water has been expelled.
2. Protect the pressure washer from frost
- Find a suitable indoor storage location for your pressure washer during the winter months.
- Ensure that the storage area remains above freezing temperatures.
- If indoor storage is not possible, consider using a weatherproof cover to protect your pressure washer from frost and other harsh weather conditions.
By following these steps, you can effectively protect your pressure washer from freezing temperatures and avoid costly damage. Remember, prevention is key when it comes to winterizing your pressure washer, so don’t skip this important step!
Step 7: Store Your Pressure Cleaner in a Secure Location
When it comes to preparing your pressure cleaner for the winter season, it is imperative to find a safe spot for storing it. This section provides guidance on selecting an appropriate location that ensures the longevity and protection of your valuable equipment.
First and foremost, consider finding a storage area that is sheltered from extreme temperature fluctuations and adverse weather conditions. Exposure to freezing temperatures can cause damage to the internal components of your pressure cleaner, so it is crucial to store it in a space where the temperature remains above freezing point.
Additionally, it is important to choose a location that is dry and well-ventilated. Moisture can lead to corrosion and mold growth, which can significantly impair the functionality of your pressure cleaner. Therefore, a dry and well-ventilated space, such as a garage or a dedicated equipment storage area, is highly recommended.
To further protect your pressure cleaner from potential damage, it is advisable to store it in an elevated position. Placing it on a sturdy shelf or a raised platform will prevent any accidental contact with water or other liquids that may accumulate on the floor.
Moreover, ensure that the stored location is secure and inaccessible to children or unauthorized individuals. Locking the storage area or keeping it in a locked room will prevent any unauthorized use or potential accidents.
Lastly, don’t forget to cover your pressure cleaner with a waterproof and breathable cover. This will provide an added layer of protection against dust, debris, and moisture.
By following these guidelines and storing your pressure cleaner in a safe location, you can prolong its lifespan and be ready to use it again when the winter season is over.