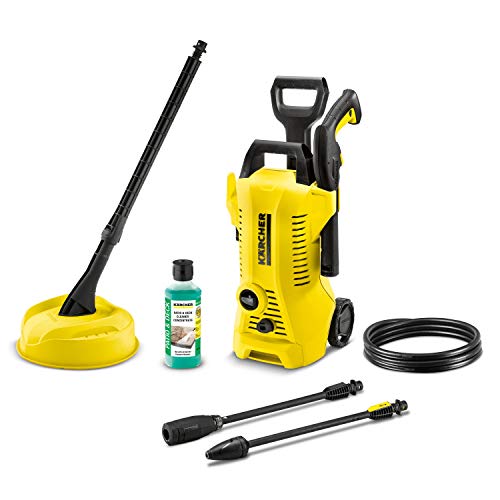
How To Remove Pump From Troy Bilt Pressure Washer

As a homeowner who takes pride in maintaining the cleanliness and appearance of my outdoor spaces, I have come to rely on my trusty pressure washer. This powerful machine helps me tackle a wide range of cleaning tasks, from washing my car to sprucing up the patio furniture. However, like any piece of equipment, it does require occasional maintenance and repairs.
One particular aspect of pressure washer maintenance that can seem daunting at first is removing the pump. The pump is a vital component that drives the water flow and pressure, ensuring optimal performance. Whether you need to replace a worn-out pump or troubleshoot an issue, knowing how to safely and correctly remove it is crucial.
In this guide, I will walk you through the step-by-step process of removing the pump from your Troy Bilt pressure washer without any hassle. By understanding the inner workings of your pressure washer and learning the correct techniques, you will be able to confidently handle pump removal as part of your regular maintenance routine.
So, grab your protective gear and let’s dive into the fascinating world of pressure washer pumps! With my guidance, you’ll soon gain the knowledge and skills to tackle this task with ease, ensuring that your trusty pressure washer continues to serve you well for years to come.
Disassembling the Pump Assembly on Your Troy Bilt Power Cleaner
In this section, I will guide you through the steps necessary to dismantle the pump assembly of your Troy Bilt power cleaner. By following these instructions, you will be able to access and remove the pump for maintenance or replacement purposes.
Gathering Required Tools
Before starting the disassembly process, it is important to gather the necessary tools to ensure a smooth and efficient procedure. Grab a set of wrenches, pliers, and a screwdriver to assist in removing the various components of the pump assembly.
Step-by-Step Pump Removal
Begin by disconnecting the power cleaner from any power source and ensuring that the machine is turned off. Locate the housing that encases the pump assembly and carefully remove any screws or fasteners securing it in place. Once the housing is detached, you will have access to the pump.
Next, identify the inlet and outlet connections on the pump. Using the appropriate tool, loosen the fittings connecting these hoses and carefully remove them. Take note of the placement and orientation of these hoses for reassembly later.
With the hoses disconnected, proceed to locate the mounting bolts that secure the pump to the frame of the power cleaner. Using your wrench or pliers, loosen and remove these bolts. Take care to support the weight of the pump assembly as you remove the final bolt.
Once the pump assembly is detached from the frame, gently lift it out of its housing, taking care not to damage any of the surrounding components. Place the pump assembly on a clean and stable surface to allow for further inspection or repairs.

Remember, when reassembling the pump or replacing it with a new one, always refer to the manufacturer’s instructions or consult a professional if necessary. Following these steps should enable you to safely remove the pump assembly from your Troy Bilt power cleaner.
Understanding the Pump Assembly
In this section, I will provide you with a comprehensive understanding of the pump assembly of your Troy Bilt pressure washer.
The pump assembly is a critical component of your Troy Bilt pressure washer that is responsible for pressurizing the water and ensuring a consistent and powerful stream of water for your cleaning tasks.
It is important to familiarize yourself with the various parts and functions of the pump assembly, as it will enable you to troubleshoot and maintain your pressure washer effectively.
The pump assembly consists of several key elements, including the pump head, manifold, valves, plungers, pistons, and seals.

The pump head is the main housing of the pump assembly, housing all the internal components, and connecting to the motor or engine of the pressure washer.
The manifold is a crucial part of the pump assembly that helps direct the flow of water, ensuring a smooth transition from the water inlet to the pump outlet.
The valves play a crucial role in controlling the flow of water within the pump assembly, allowing water to enter and exit at the correct times to create pressure.
The plungers and pistons work together to create the necessary pressure by reciprocating motion, drawing in water and then forcing it out through the outlet.
The seals are important for maintaining a tight and secure seal between moving parts, preventing leaks and ensuring optimal performance.

By understanding how each of these components works together, you will be better equipped to diagnose and address any issues that may arise with your pump assembly.
In the following sections, I will guide you through the steps of removing the pump from your Troy Bilt pressure washer, allowing you to perform necessary maintenance or repairs as required.
Gathering the Necessary Tools
When embarking on the task of disassembling a pump from your Troy Bilt pressure washer, it is essential to have the right tools at your disposal. This section will outline the various tools you will need to effectively and safely remove the pump.
1. Wrench Set
A quality set of wrenches is a must-have for this project. Different sized wrenches may be required to loosen and tighten various bolts and fittings on the pump. Make sure to have a combination of open-end and adjustable wrenches to accommodate different bolt sizes.
2. Screwdrivers
Having an assortment of screwdrivers is crucial in removing the pump. Phillips and flathead screwdrivers of different sizes will be needed to unscrew fasteners and detach components securely. It is recommended to have both manual and electric screwdrivers for convenience and flexibility.

| Tool | Quantity | Description |
|---|---|---|
| Wrench Set | 1 | A set of different sized wrenches for loosening and tightening bolts |
| Screwdrivers | Assortment | Both Phillips and flathead screwdrivers in various sizes for removing fasteners |
Other tools that might come in handy during the pump removal process are pliers, a rubber mallet, and a socket set. These tools can assist in tackling stubborn parts or reaching tight spaces that require additional force or precision.
Before starting the pump removal, ensure that all necessary tools are easily accessible. This will prevent delays during the disassembly process and help maintain a smooth workflow. Remember to prioritize safety and use caution when handling tools to minimize the risk of accidents or damage to the pump and other components.
Disconnecting the Power Washer
When it comes to disassembling your power washer, one of the essential steps is disconnecting the different parts of the machine. By following the correct procedures, you can safely separate the components and access the pump for maintenance or replacement. In this section, I will guide you through the process of disconnecting the various parts of your power washer.
1. Turning off the power
The first step in disconnecting the power washer is to ensure that it is completely powered off. Locate the power switch or button, typically found on the machine’s control panel. Turn it to the “off” position to cut off the electricity supply to the machine. This will prevent any potential accidents or injuries during the disconnection process.
2. Releasing pressure
Before proceeding with the disconnection, it is crucial to release any built-up pressure in the power washer. High-pressure water inside the machine can be dangerous if not properly released. To do this, locate the pressure relief valve and slowly turn it counterclockwise to relieve the pressure. Listen for any hissing sounds, indicating the release of pressure. Once all the pressure is released, proceed to the next step.

Now that the power is off and the pressure is released, you can safely disconnect the various parts of your power washer. Follow these steps carefully to ensure a smooth disconnection process and avoid any damage to your machine.
Draining the Water from the Pump
As I was preparing to remove the pump from my Troy Bilt pressure washer, I realized the importance of draining the water from the pump before starting any disassembly. This step is essential to prevent any damage to the pump and avoid potential accidents. Draining the water from the pump is a simple process that ensures a smooth and safe removal.
Gather the Necessary Tools
Before you begin draining the water from the pump, make sure you have all the tools you’ll need. This may include a bucket or container to collect the water, a pair of pliers or adjustable wrench to loosen any fittings, and a towel or rag to dry off any excess water.
Steps to Drain the Water
1. Start by locating the water inlet and outlet connections on the pump. These are usually located on opposite sides of the pump body. Identify which one is the inlet and which one is the outlet.
2. Using the pliers or adjustable wrench, carefully loosen and remove any fittings or hoses connected to the pump. Be sure to have the bucket or container ready to catch any water that may spray out.

3. Once all the connections are loosened, tilt the pump slightly to allow any remaining water to drain out. Be cautious not to tip the pump too much, as this may cause the motor oil to leak out as well.
4. Use the towel or rag to dry off any excess water from the pump and its surroundings. This will help prevent any rust or damage to the pump components.
5. After the pump is completely drained and dried, you can proceed with the next steps of removing it from the pressure washer.
Remember, draining the water from the pump is an important step to ensure the safety and integrity of the pump during the removal process. By following these simple steps, you can confidently proceed with disassembling your Troy Bilt pressure washer without causing any harm to the pump or yourself.
Removing the Pump Mounting Bolts
One crucial step in disassembling a pressure washer pump is removing the pump mounting bolts. These bolts secure the pump to the engine or frame of the pressure washer, and they need to be detached for pump removal. Removing the pump mounting bolts allows you to access and detach the pump from the rest of the machine.
| Tools needed: | – Wrench or socket set | – Screwdriver | ||
|---|---|---|---|---|
| Steps to follow: | 1. Locate the pump mounting bolts. These are typically positioned around the base of the pump where it connects to the engine or frame. | 2. Use a wrench or socket set to loosen the mounting bolts. These bolts are usually tightened quite securely, so you may need to apply significant force. | 3. Once the bolts are loosened, remove them completely using your hands or a screwdriver, depending on the type of bolts used. | 4. Keep the bolts in a safe place to ensure they are not misplaced or lost during the pump removal process. |
By removing the pump mounting bolts, you can easily separate the pump from the rest of the pressure washer. This step is crucial for pump maintenance or replacement, as well as for accessing other components of the pressure washer that may require attention.
Detaching the Pump from the Pressure Washer
When it comes to disconnecting the pump from your pressure washer, there are a few key steps to follow. This process will ensure a smooth and successful removal, allowing you to continue on with any necessary repairs or maintenance.
Step 1: Begin by locating the pump on your pressure washer. It is typically positioned near the engine and is responsible for generating the high-pressure water flow.
Step 2: Before proceeding, ensure that the pressure washer is turned off and the engine is completely cooled down to prevent any accidents or burns.
Step 3: Identify the fasteners securing the pump to the pressure washer frame. These may be in the form of bolts, screws, or clamps, depending on the specific model of your pressure washer.
Step 4: Carefully loosen and remove the fasteners using the appropriate tools. It is important to keep track of these fasteners to avoid misplacement or loss.
Step 5: Once the fasteners have been removed, gently lift and separate the pump from the pressure washer frame. Be cautious of any hoses or connections that may still be attached to the pump.
Step 6: If there are any remaining attachments, disconnect them using care and attention. This may include removing any hoses or electrical connections that are connected to the pump.
Step 7: With all attachments detached, you can now fully remove the pump from the pressure washer.
Remember to handle the pump with care to prevent any damage or leaks. Properly storing the pump and following the manufacturer’s instructions for maintenance will help ensure its longevity and optimal performance.
Inspecting the Pump for Damage or Wear
When it comes to maintaining the functionality of your pressure washer, one crucial aspect is regularly inspecting the pump for any signs of damage or wear. Conducting thorough inspections can help identify potential issues early on and prevent further damage to your equipment.
Identifying Signs of Damage
During the inspection process, look for visible signs of damage such as cracks, leaks, or loose connections. These issues can compromise the pump’s performance and may require immediate attention to avoid larger problems down the line.
Checking for Wear and Tear
In addition to damage, it’s essential to examine the pump for signs of wear and tear. Pay attention to the condition of seals, valves, and pistons as these components are prone to deterioration over time. Look out for corrosion, rust, or excessive wear that may affect the pump’s efficiency.
Regularly inspecting your pressure washer’s pump for damage or wear is an important step in ensuring its proper functioning and longevity. By identifying and addressing any issues early on, you can avoid costly repairs and guarantee optimal performance when using your Troy Bilt pressure washer.
Installing a New Pump or Reassembling the Pump
In this section, I will guide you through the process of installing a new pump or reassembling the pump on your Troy Bilt pressure washer. Whether you need to replace a malfunctioning pump or you have disassembled the pump for maintenance purposes, this step-by-step guide will help you complete the task successfully.
Step 1: Disassemble and Clean Parts
Before installing a new pump or reassembling the existing one, it is important to disassemble and clean the various components thoroughly. This will ensure that any debris, dirt, or contaminants are removed, allowing for smooth operation and optimal performance.
Tip: Utilize a mild detergent and water solution to clean the pump parts, ensuring all surfaces are free from grime or residue.
Step 2: Inspect and Replace Seals/Gaskets
During the disassembly process, carefully inspect the seals and gaskets for any signs of damage or wear. If any are found to be compromised, it is crucial to replace them with new ones to prevent leaks and maintain proper pressure.
Tip: Apply a thin layer of silicone grease on the new seals and gaskets before installing them to enhance their longevity and effectiveness.
Step 3: Align Pump Mounting Holes
When installing a new pump, ensure that the pump’s mounting holes align correctly with the corresponding holes on the pressure washer frame. This will guarantee a secure and stable connection.
Tip: Use a level or measuring tool to ensure the pump is positioned evenly on the frame.
Step 4: Reconnect Hoses and Attachments
Once the pump is properly aligned and mounted, reconnect all hoses and attachments, making sure they are securely fastened. Check for any potential leaks and tighten any connections as needed.
Tip: Use Teflon tape on threaded connections to create a watertight seal and prevent leaks.
Step 5: Test and Adjust Pressure
After the pump installation or reassembly is complete, turn on the pressure washer and test the water pressure. If necessary, adjust the pressure using the pressure regulator knob or valve until the desired level is achieved.
Tip: Refer to your Troy Bilt pressure washer’s user manual for specific instructions on adjusting pressure settings.
Congratulations! You have successfully installed a new pump or reassembled the pump on your Troy Bilt pressure washer. By following these steps, you can ensure smooth operation and prolong the life of your pressure washer. Enjoy the powerful cleaning performance it provides!
Connecting the Pressure Washer and Testing for Leaks
When setting up your pressure washer, it is important to properly connect all the necessary components in order to ensure optimal performance and prevent any leaks or issues. In this section, I will guide you through the process of connecting the pressure washer and testing for leaks, step by step.
Gather the necessary tools and equipment
- Wrench or pliers
- Hose connector
- Thread seal tape
- Water source
Before starting the process, ensure that you have all the necessary tools and equipment readily available. This will make the installation and testing process much easier and efficient.
Connect the pressure washer to a water source
The first step is to connect your pressure washer to a water source. This can be a garden hose or any other suitable water supply. To do this, carefully screw the hose connector onto the water inlet of the pressure washer. Use a wrench or pliers if needed to ensure a tight and secure connection. Make sure to check for any visible signs of damage or wear on the connector and replace it if necessary.
Apply thread seal tape on the connections
Before making the final connections, it is important to apply thread seal tape to the threads of the connections. This will help prevent any potential leaks. Start by wrapping the tape clockwise around the male threads of the hose connector. Make sure to cover the entire threaded area with a tight and even wrap of tape.
Repeat this process for any other connections that require thread seal tape, such as the connection between the pressure hose and the pressure washer.
Tighten all connections securely
Once the thread seal tape is applied, carefully connect each component, ensuring a secure and tight fit. Use a wrench or pliers if necessary to tighten the connections without overtightening and causing damage.
Test for leaks
After all the connections are made, it’s time to test for leaks. Turn on the water source and then the pressure washer. Check all the connection points, hoses, and fittings for any signs of leakage or dripping. Pay close attention to areas where the connections were made, as well as any visible joints or fittings.
If you notice any leaks, immediately turn off the pressure washer and tighten the problematic connection. If the leak persists, double-check the thread seal tape and replace it if necessary. Repeat the testing process until no leaks are detected.
By following these steps and properly connecting the pressure washer, you can ensure a leak-free operation and optimal performance. Taking the time to test for leaks before using the pressure washer will save you from unnecessary headaches and potential water damage.
Maintenance Tips to Keep Your Pump in Optimum Condition
In this section, I will share some valuable tips on how to properly maintain your pressure washer pump, ensuring its longevity and efficient performance. It is crucial to implement these maintenance practices regularly to keep your pump in tip-top shape.
Firstly, it is essential to regularly inspect your pump for any visible signs of wear or damage, such as leaks or cracks. Any irregularities should be promptly addressed to prevent further issues. Additionally, make sure all connections are secure and tight, as loose fittings can lead to loss of pressure or potential damage to the pump.
Next, it is vital to clean your pump after each use to remove any debris or dirt that may have accumulated during operation. This can be done by rinsing the pump with clean water and using a soft brush to gently scrub away any stubborn dirt. Avoid using abrasive materials or harsh chemicals that may corrode or damage the pump’s components.
Regularly changing the pump oil is another essential maintenance practice. The oil lubricates the internal components of the pump, ensuring smooth operation and minimizing friction. Refer to your pressure washer’s manual for specific instructions on when and how to change the pump oil, as different models may have varying requirements.
Inspecting and cleaning the pump’s inlet filter is also important for maintaining its optimal performance. A clogged or dirty filter can restrict water flow, leading to reduced pressure and potential damage to the pump. Remove the filter, rinse it with clean water, and ensure it is free from any blockages before reinstalling.
Lastly, it is advisable to store your pressure washer and pump in a clean and dry environment. Exposure to harsh weather conditions or moisture can cause corrosion and damage to the pump’s components over time. Consider using a cover or storing the equipment indoors when not in use to protect it and prolong its lifespan.
| Maintenance Tips | Importance |
|---|---|
| Regularly inspect for wear or damage | To prevent further issues |
| Clean pump after each use | To remove debris and dirt |
| Change pump oil regularly | To ensure smooth operation |
| Inspect and clean inlet filter | To maintain optimal performance |
| Store in a clean and dry environment | To prevent corrosion and damage |
FAQ:
Why would I need to remove the pump from my Troy Bilt pressure washer?
There could be various reasons why you might need to remove the pump from your Troy Bilt pressure washer. It might be damaged and in need of repair or replacement, or you may want to upgrade to a more powerful pump. Additionally, removing the pump can make it easier to access and clean other parts of the pressure washer, such as the engine or hose connections.
What tools do I need in order to remove the pump from my Troy Bilt pressure washer?
To remove the pump from your Troy Bilt pressure washer, you will likely need a few basic tools. These may include a wrench or socket set to loosen and remove the bolts holding the pump in place, pliers to disconnect any hose connections, and a screwdriver or Allen wrench to remove any additional fasteners. It is always a good idea to consult the owner’s manual or a specific guide for your pressure washer model to determine the exact tools required.