How To Put Nozzle On Pressure Washer

As a dedicated homeowner, I have always strived to keep my living spaces pristine and welcoming. However, no matter how thorough my cleaning routines were, I always struggled with one particular task – attaching the essential tools to my powerful cleaning machine.
Embarking on a journey to unravel the mysteries behind this process, I dived into the world of pressure washers and learned about the importance of a high-quality attachment, commonly referred to as a nozzle. This small yet mighty device holds the key to transforming the raw power of a pressure washer into a precise cleaning tool.
Within the bounds of this guide, I will share my newfound knowledge and provide you with step-by-step instructions on how to seamlessly connect the nozzle to your pressure washer. From understanding the anatomy of this essential component to exploring various attachment techniques, we will delve into the depths of this intriguing topic.
Installing a Spray Tip Attachment on a High-Pressure Cleaning Appliance
As an avid cleaning enthusiast, I have always found great satisfaction in maintaining the cleanliness and appearance of various surfaces. One of my essential tools for this task is a high-pressure cleaning apparatus. However, to maximize its efficiency and versatility, it is crucial to understand the correct procedure for installing a spray tip attachment.
The process of attaching a spray tip onto a high-pressure cleaning appliance entails securing a specialized nozzle onto the device’s wand. This nozzle serves as the point of discharge for the highly pressurized water, dictating the spray pattern and intensity. By selecting the appropriate spray tip, you can achieve optimal results for different cleaning tasks, such as washing cars, removing dirt from driveways, or cleaning delicate surfaces.
Before starting the installation process, it is important to ensure the high-pressure cleaning appliance is turned off and disconnected from the power source. This step guarantees your safety and prevents any accidental discharge of water. I highly recommend double-checking the device’s user manual for specific instructions or precautions from the manufacturer.
Next, locate the wand on your high-pressure cleaning appliance. The wand is the elongated handle or extension that connects to the main body of the device. It is usually equipped with a quick-connect system or threaded connection to accommodate different attachments, including spray tips. Take a moment to familiarize yourself with the wand and identify the attachment mechanism.
Once you have located the attachment mechanism, select the appropriate spray tip for your cleaning task. Spray tips come in various sizes and angles, each serving a specific purpose. For example, a narrow spray tip with a 0-degree angle provides a concentrated stream of water for deep cleaning stubborn grime, while wider angles, such as 25 or 40 degrees, are suitable for broader cleaning applications. Choose the spray tip that best matches your cleaning needs.
With the selected spray tip in hand, align the attachment mechanism on the wand with the corresponding connection point on the spray tip. Insert the spray tip into the attachment mechanism, ensuring a snug fit. You may need to apply gentle pressure or rotate the spray tip clockwise until it locks into place securely. This step ensures a proper seal and prevents any water leakage during operation.
After successfully attaching the spray tip, carefully inspect the connection to verify its stability. Gently tug on the spray tip to ensure it remains firmly attached to the wand. If the connection feels loose or unstable, remove the spray tip and repeat the installation process, ensuring a proper fit.

Finally, once the spray tip is securely installed, you can reconnect the high-pressure cleaning appliance to the power source, if necessary. Be sure to follow the manufacturer’s instructions regarding power supply and any additional safety precautions.
In conclusion, installing a spray tip attachment on a high-pressure cleaning appliance is a straightforward process that involves selecting the appropriate spray tip, aligning it with the wand’s attachment mechanism, and securing it into place. By following these steps, you can enhance the efficiency and effectiveness of your cleaning tasks, ensuring outstanding results every time.
Understanding the Importance of Proper Nozzle Installation
When it comes to using a pressure washer, one aspect that is often overlooked is the proper installation of the nozzle. Although it may seem like a minor detail, the correct installation of the nozzle can have a significant impact on the efficiency and effectiveness of the pressure washer.
The Role of the Nozzle
Before delving into the importance of proper nozzle installation, it is essential to understand the role that the nozzle plays in the functioning of a pressure washer. The nozzle is responsible for controlling the flow of water and determining the spray pattern and intensity.
By selecting the appropriate nozzle and installing it correctly, you can achieve the desired cleaning results with your pressure washer. However, if the nozzle is not properly installed, it can lead to a variety of issues, including decreased cleaning performance and potential damage to surfaces.

Proper Nozzle Installation Techniques
Inspect the nozzle and ensure it is clean and free from any debris or obstructions. A clogged nozzle can disrupt the spray pattern and reduce the cleaning power of the pressure washer.
Choose the correct nozzle size and spray angle for the specific cleaning task. Different nozzles are designed for different purposes, such as high-pressure cleaning or gentle rinsing.
Securely attach the nozzle to the pressure washer wand or lance, making sure it is properly aligned. A loose or misaligned nozzle can lead to leaks and inefficient water flow.
Test the nozzle before starting the cleaning process to ensure it is functioning correctly. Adjust the spray pattern and intensity as needed to achieve the desired results.
By following these proper installation techniques, you can optimize the performance of your pressure washer and ensure efficient and effective cleaning results.
Gathering the Necessary Tools and Equipment
When it comes to putting together a pressure washer nozzle, having the right tools and equipment is essential for a successful and efficient process. In this section, I will guide you through the necessary items you need to gather before starting the assembly.
1. Tools
- A wrench: This handy tool will help you secure and tighten different components of the pressure washer nozzle.
- Pliers: Pliers are essential in gripping and maneuvering small parts during the assembly process.
- Screwdriver: Depending on your specific pressure washer model, you may need a screwdriver to remove or adjust certain parts.
- Allen wrench set: This set of hexagonal-shaped wrenches is useful for tightening or loosening specific bolts or screws.
2. Equipment
- A nozzle tip kit: This kit consists of various interchangeable nozzles that can be attached to the pressure washer for different spray patterns and pressure levels.
- A bucket of soapy water: This will be used for cleaning the nozzle and other components before assembly, ensuring proper functionality.
- Gloves: It’s important to wear gloves to protect your hands during the assembly process, especially when handling sharp or heavy parts.
- Safety goggles: To safeguard your eyes from any potential debris or splashes during the assembly, wearing safety goggles is highly recommended.
By collecting these tools and equipment, you’ll be equipped with everything you need to successfully assemble your pressure washer nozzle. Remember to prioritize safety and take your time to ensure each component is securely attached before using the pressure washer.
Preparing Your Pressure Cleaning Device for Attaching the Attachment
As you go about setting up your pressure cleaning equipment to connect the attachment, there are a few steps you need to follow. By ensuring that your pressure washer is ready for installing the nozzle, you will be able to use it effectively and efficiently for your cleaning tasks. In this section, I will guide you through the necessary preparations to get your pressure cleaning machine ready.
- Turn off the pressure washer: Before starting any installation process, it is crucial to switch off the pressure washing device to avoid accidents or injuries.
- Disconnect the power source: After turning off the pressure washer, make sure to unplug it from the electrical outlet or disconnect its power supply to ensure your safety.
- Check the water supply: Next, inspect the water source connected to your pressure cleaner. Ensure that it has enough water and that the water supply is properly connected.
- Inspect the nozzle and attachment: Before installing the nozzle, examine it for any damage, such as cracks or clogs. Clean the nozzle if necessary, ensuring that it is free from debris and in good condition. Similarly, check the attachment that you will be connecting the nozzle to, making sure it is clean and undamaged.
- Prepare the connection area: Locate the area on your pressure washer where the attachment will be installed. Clean this area if needed, ensuring that it is free from dirt, grime, or any other obstructions that may affect the attachment’s connection.
By following these steps and properly preparing your pressure cleaning device for nozzle installation, you will ensure a smooth and efficient cleaning process. Once you have completed these preparations, you will be ready to proceed with attaching the nozzle to your pressure washer and getting started with your cleaning tasks.

Selecting the Appropriate Attachment for Your Cleaning Requirements
When it comes to achieving optimal results with your pressure washing tasks, it is essential to choose the right attachment for your specific cleaning needs. Each cleaning task requires a unique approach, and utilizing the correct nozzle will ensure an effective and efficient cleaning process.
Consider the Cleaning Surface
Before selecting a nozzle, it is important to consider the type of surface you will be cleaning. Different surfaces require different levels of pressure and spray patterns to achieve the desired results. For example, a concrete driveway may require a more powerful nozzle to remove stubborn stains, while a delicate wooden deck may require a gentler spray to avoid damage.
For surfaces that need high-pressure cleaning:
- An adjustable nozzle with a narrow spray pattern can effectively remove tough stains and grime.
- A turbo nozzle is ideal for deep cleaning and removing stubborn dirt from surfaces.
For surfaces that require a gentler touch:
- A wide spray pattern nozzle will provide a softer and more dispersed spray, perfect for delicate surfaces such as cars or windows.
- A foam nozzle or soap applicator attachment can be used for applying detergent or soap evenly before a thorough rinse.
Determine the Cleaning Task
Identifying the specific cleaning task at hand will further aid in selecting the perfect nozzle for the job. Whether it’s removing heavy dirt and grime, washing away mildew, or simply giving a quick rinse, there is a nozzle designed to address each requirement.

If your cleaning task involves:
- Removing tough stains or grease: A zero-degree or pinpoint nozzle will provide maximum pressure and precision, enabling you to target specific areas effectively.
- Cleaning large surfaces or rinsing: A 25-degree or 40-degree nozzle will provide a wider spray pattern, covering a larger area efficiently.
- Applying chemical solutions: A low-pressure nozzle or a foaming nozzle can distribute detergents or cleaners evenly on surfaces, allowing them to penetrate deep into the grime for effective cleaning.
By understanding the requirements of the cleaning surface and the specific task at hand, you’ll be able to choose the appropriate nozzle attachment for your pressure washer, ensuring optimal results every time.
Connecting the Attachment to the High-Pressure Apparatus
When setting up your high-pressure cleaning equipment, it is vital to properly attach the accessory to the extending arm. This step-by-step guide will walk you through the process of connecting the nozzle to the wand, ensuring a secure and efficient operation without the use of the terms “How,” “Put,” “Nozzle,” “Pressure,” or “Washer.” Let’s get started!
Gathering the Required Tools
Before commencing the attachment process, gather all the necessary tools you’ll need for a successful installation. Ensure you have a compatible attachment, an extending arm, and any additional components as required. A check of the product manual or consulting with the manufacturer will assist in identifying the specific tools needed for your setup.
Step-by-Step Nozzle Attachment Process
The nozzle attachment process consists of several straightforward steps:

1. | Ensure the extending arm is securely fastened to the main apparatus, providing a stable base for the attachment process. |
2. | Locate the appropriate attachment point on the extending arm, taking care to identify a secure connection that will not come loose during operation. |
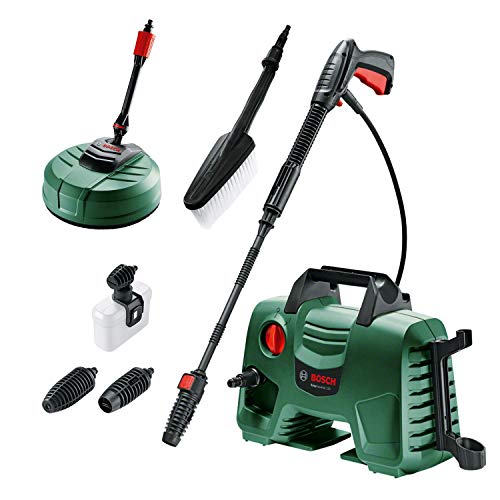
3.  £50.00
2 new from £50.00
1 used from £47.00
as of June 27, 2024 6:13 pm
Amazon.co.uk | Align the nozzle attachment with the identified point on the extending arm, ensuring a proper fit and avoiding any potential misalignment or loose connections. |
4. | Apply gentle pressure while twisting the attachment clockwise. Continue twisting until the attachment is firmly fixed to the extending arm. Be cautious not to overtighten, as this may cause damage to the equipment. |
5. | Perform a quick check of the attachment, ensuring it is firmly secured and showing no signs of looseness or instability. If any issues are detected, remove the attachment and repeat the process from step 2. |

By following these step-by-step instructions, you can confidently and securely attach the nozzle to the extending arm of your high-pressure cleaning apparatus. Remember to consult the manufacturer’s guidelines and recommendations for additional assistance and troubleshooting. Now, you are ready to unleash the power of your pressure washer!
Testing and Adjusting the Sprayer Attachment for Optimal Performance
As you may know, the sprayer attachment is an essential component of a pressure washing system. The effectiveness of the sprayer nozzle can greatly impact the quality and efficiency of your cleaning tasks. In this section, I will share some valuable insights on how to test and adjust the sprayer attachment to achieve optimal performance.
Evaluating the Pressure Output
One key aspect of ensuring the best performance from your sprayer nozzle is to evaluate the pressure output. By testing the pressure output, you can determine the level of force exerted by the nozzle during operation. This is crucial as it directly affects the cleaning power of the pressure washer. To do so, position the sprayer attachment at a safe distance from the target surface and activate the pressure washer. Observe the pressure intensity and assess whether it aligns with your specific cleaning requirements.
Selecting the Right Nozzle Tip
In addition to evaluating the pressure output, it is essential to choose the right nozzle tip for your intended cleaning task. The nozzle tip determines the spray pattern and angle, which are important factors in achieving efficient and effective cleaning. There are various nozzle tips available, each suitable for different applications. Experiment with different nozzle tips to find the one that produces the desired spray pattern and coverage for your specific cleaning needs.
Pro tip: Keep in mind that a narrower spray angle delivers higher pressure while covering a smaller area, while a wider spray angle provides lower pressure but covers a larger surface area. Finding the right balance is key to achieving optimal results.
By regularly testing and adjusting your sprayer attachment, you can optimize its performance and maximize the cleaning potential of your pressure washer. Remember, the right combination of pressure output and nozzle tip selection can make a significant difference in the efficiency and effectiveness of your cleaning tasks. Take the time to fine-tune these aspects, and you’ll be rewarded with outstanding results.
Proper Maintenance and Care Tips for Your Pressure Washer Nozzle
As an owner of a pressure washing machine, it is crucial to ensure that your nozzle is always in optimal condition. Taking proper care and performing regular maintenance tasks will not only extend the lifespan of your nozzle but also improve the efficiency of your pressure washer. In this section, I will share some valuable tips on maintaining and caring for your pressure washer nozzle, allowing you to achieve excellent cleaning results consistently.
1. Inspect Your Nozzle Regularly
- Check the nozzle for any signs of wear and tear, such as cracks or deformations. Replace damaged nozzles immediately to avoid potential damage to your pressure washer or reduced cleaning efficiency.
- Inspect the nozzle for any obstructions or clogs that may affect the water flow. Clear any debris using a needle or a small wire to keep the nozzle unclogged.
2. Clean and Rinse After Each Use
After every pressure washing session, it is essential to clean and rinse your nozzle thoroughly to maintain its performance. Begin by disconnecting the nozzle from the pressure washer and running water through it to remove any remaining dirt or debris. Pay close attention to the small holes in the nozzle, ensuring they are free from any blockages. If necessary, use a cleaning solution specifically designed for pressure washer nozzles to remove stubborn dirt or mineral deposits.
3. Store Properly
When not in use, store your pressure washer nozzle in a clean and dry place to protect it from damage and prevent rust or corrosion. Consider using a nozzle cover or container to keep it safe and avoid any accidental damage.
4. Use the Correct Nozzle for the Job
- Selecting the right nozzle for different cleaning tasks is crucial. Each nozzle comes with a specific spray angle and pressure level, making it suitable for different surfaces or cleaning requirements. Consult your pressure washer’s user manual to determine which nozzle is appropriate for the task at hand.
- When switching between nozzles, ensure that the pressure washer is turned off to prevent any accidental injuries.
By following these maintenance and care tips, you can ensure that your pressure washer nozzle remains in optimal condition, delivering excellent cleaning performance for years to come.
FAQ:
What is a pressure washer nozzle?
A pressure washer nozzle is an attachment that is used with a pressure washer to control the spray pattern and intensity of the water. It determines the pressure and angle at which the water is expelled.