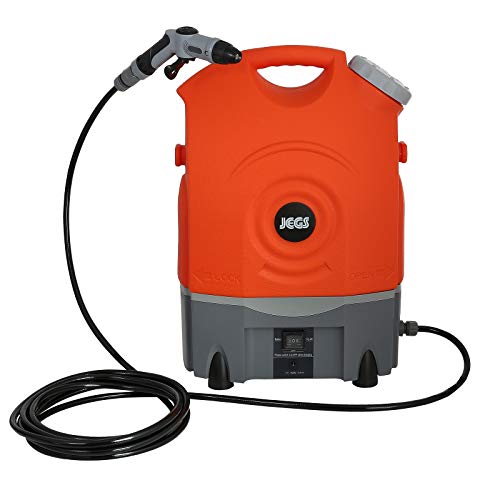
How To Remove Nozzle From Karcher Pressure Washer
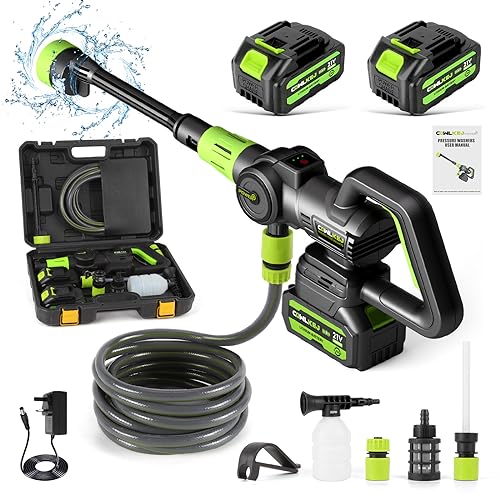
Greetings, fellow cleaning enthusiasts! Today, I want to share with you a quick and hassle-free method for taking off the spraying attachment from your robust and powerful cleaning contraption. As we all know, these highly efficient tools have become an indispensable part of our cleaning routines, effortlessly blasting away dirt and grime from various surfaces with their remarkable force. However, there may come a time when you need to detach the nozzle from your trusty Karcher pressure washer, be it for maintenance purposes or to switch to a different spraying tool.
In this guide, I will walk you through the simple steps required to separate the nozzle from your high-pressure cleaning equipment without causing any unnecessary strain or frustration. But before we dive into the specifics, let me assure you that you don’t need to be a technical wizard or possess any extraordinary skills to accomplish this task successfully. With a bit of patience and a few spare minutes, you’ll be able to detach and replace the nozzle effortlessly, allowing you to continue with your cleaning ventures in no time.
Now, let’s get down to business. The first thing you need to do is familiarize yourself with the construction of your Karcher pressure washer, paying close attention to the area where the nozzle is attached. Look for any visible signs or markings that indicate a release mechanism. Sometimes, it might be a small lever or button, while in other cases, a simple twist or turn may be all that is required. When you locate the release mechanism, take a moment to understand how it works before proceeding to the next step.
Understanding the Significance of Detaching the Attachment
When it comes to maintaining and optimizing the performance of your pressure washer, one of the essential tasks is the regular removal of the attachment. This vital step ensures the proper functioning and longevity of your machine, allowing it to continue delivering efficient cleaning results. Understanding the importance of removing the attachment will enable you to not only enhance the overall cleaning experience but also prevent potential damage or blockages from occurring.
By detaching the attachment from your pressure washer, you create an opportunity to inspect and clean both the attachment itself and the machine’s nozzle. This preventative maintenance step helps eliminate any debris, dirt, or mineral deposits that may have accumulated over time, hindering the proper flow of water. Additionally, removing the attachment allows for a thorough inspection of the nozzle, ensuring that it remains clear and unobstructed.
Regular removal of the attachment also allows for the examination of any potential wear or damage to both the attachment and the nozzle. By inspecting these components, you can identify any signs of deterioration, such as cracks, leaks, or worn-out parts. Detecting these issues early on is crucial for prompt repairs or replacements, preventing further damage to your pressure washer and potentially saving you from costly repairs in the future.
- Enhances cleaning performance and efficiency
- Prevents blockages and obstructions
- Ensures proper water flow
- Promotes longevity and durability of the machine
- Enables inspection and cleaning of the attachment and nozzle
- Identifies signs of wear, damage, or deterioration
- Allows for timely repairs or replacements
In conclusion, the importance of removing the attachment from your pressure washer cannot be overstated. By understanding the significance of this maintenance task, you can ensure optimal performance, prevent potential damage, and extend the lifespan of your machine. So, make it a habit to regularly detach the attachment, inspect the nozzle, and clean any accumulated debris to enjoy efficient and trouble-free cleaning with your pressure washer.
Preparing Your Pressure Washer for Nozzle Disconnection
In this section, I will guide you through the necessary steps to prepare your pressure washer for disconnecting the nozzle. I will provide you with concise and easy-to-follow instructions to ensure a smooth and hassle-free process.
- Step 1: Power off the pressure washer – Before beginning any maintenance or repair work, always ensure that your pressure washer is completely powered off. This will help prevent any accidental injuries and keep you safe throughout the process.
- Step 2: Disconnect the water supply – To proceed with nozzle removal, it is important to disconnect the water supply. Locate the water inlet valve or hose connection and turn it off to stop the flow of water into the pressure washer.
- Step 3: Relieve pressure – Depressure the system to avoid any sudden release of pressure while removing the nozzle. This step can be done by triggering the pressure washer’s gun or wand to release any build-up pressure. It is crucial to ensure there is no pressure in the system before proceeding further.
- Step 4: Remove any attached accessories – Before attempting to remove the nozzle, check for any additional accessories or attachments, such as spray wands or surface cleaners, and remove them if necessary. This will provide better access to the nozzle and simplify the disconnection process.
- Step 5: Inspect and clean the nozzle area – Take a moment to inspect the nozzle area for any dirt, debris, or grime. Use a soft brush or cloth to clean the surrounding surface, ensuring no obstructions that may interfere with the removal process.
- Step 6: Gather the necessary tools – Depending on your pressure washer model and design, you may require specific tools or wrenches to safely and efficiently remove the nozzle. Ensure you have the correct tools on hand before proceeding.
By following these steps and preparing your pressure washer for nozzle removal, you will be ready to proceed with the next stage of disconnecting and replacing the nozzle. Taking the time to properly prepare your pressure washer will help ensure a successful and problem-free maintenance or repair process.
Safely Turning Off the Power Washer
When it comes to properly shutting down your power washer after use, it is of utmost importance to follow the correct steps to ensure your safety and the longevity of the machine. In this section, I will guide you through the process of safely turning off the power washer, allowing for a smooth and hassle-free experience.

Step 1: Release Pressure
The first step in safely turning off the power washer is to release the pressure. This can be achieved by following the manufacturer’s instructions on how to properly release pressure from the machine. By doing so, you will prevent any potential accidents and make it easier to perform the next steps.
Step 2: Switch Off the Power
After releasing the pressure, it is time to switch off the power. Locate the power button or switch on your power washer and turn it off. This will ensure that no electricity is running through the machine, eliminating any potential risks or hazards.
Remember, safety should always be your top priority when operating any machinery. By following these simple steps, you can safely turn off your power washer and avoid any potential accidents or damage. Enjoy your power washing experience and remember to always exercise caution!
Detaching the Nozzle from the Spray Gun
When it comes to maintaining and servicing your pressure washer, one important task is detaching the nozzle from the spray gun. This step is essential for cleaning or replacing the nozzle, as well as for inspecting and maintaining the overall performance of your pressure washer.
To begin, ensure that your pressure washer is powered off and disconnected from any power source. Safety should always be a priority when working with any machinery.

Next, examine the spray gun for any mechanisms or locking systems that may be securing the nozzle in place. Different pressure washer models may have different locking mechanisms, such as buttons, slides, or twist locks. Locate and understand the specific mechanism on your spray gun.
- If your spray gun has a button or slide mechanism, press or slide it to release the nozzle. This mechanism is usually located near the base of the nozzle attachment. Once released, carefully twist the nozzle counterclockwise to detach it from the spray gun.
- For spray guns with a twist lock mechanism, hold the spray gun with one hand and use your other hand to twist the nozzle counterclockwise. Gradually apply pressure and twist until the nozzle loosens. Keep twisting until the nozzle is completely detached from the spray gun.
- Some spray guns may require additional steps, such as unlocking a safety latch or turning a collar. Consult your pressure washer’s manual for specific instructions on detaching the nozzle from the spray gun.
Once the nozzle is detached, it is important to inspect it for any damage or debris. Clean the nozzle thoroughly to remove any dirt or clogs that may affect its performance. If the nozzle is damaged or worn out, it may need to be replaced with a new one to ensure optimal spraying power.
Remember, proper maintenance and care will prolong the lifespan of your pressure washer and keep it performing efficiently. Detaching the nozzle from the spray gun is just one of the many steps you can take to ensure the longevity and effectiveness of your pressure washer.
Cleaning and Inspecting the Spray Tip
When it comes to maintaining your pressure washer, one crucial component that requires regular attention is the spray tip. This small yet essential part plays a significant role in delivering the right amount of pressure and water flow for your cleaning tasks. In this section, I will guide you through the proper cleaning and inspection procedures to ensure the optimal performance of your spray tip.
Gather the Necessary Tools
Before starting the cleaning process, gather the needed tools and materials. You will require a small brush with stiff bristles, a microfiber cloth, a bucket of warm water, and a mild detergent. The detergent should be suitable for use with pressure washers and should not contain any harsh chemicals that could damage the spray tip.

Cleaning Steps
Start by removing the spray tip from the nozzle assembly. Carefully twist it counterclockwise until it comes off. Place the spray tip in the bucket of warm water and detergent mixture. Gently scrub the tip using the brush to remove any dirt, debris, or clogs that may have accumulated.
Once you have thoroughly cleaned the spray tip, rinse it under running water to remove any remaining detergent. Inspect the tip for any signs of damage, such as cracks or excessive wear. If you notice any issues, it may be necessary to replace the spray tip to ensure optimal performance.
Inspecting the Spray Tip
After cleaning, carefully examine the spray tip for any obstructions or blockages. Use the brush or a pin to clear any debris that may have lodged inside the tip. Ensure that the spray holes are clean and free from any clogs that could hinder the water flow.
| Important Note: |
|---|
| Always handle the spray tip with care to avoid any damages or injuries. Pay attention to the manufacturer’s instructions regarding maintenance and replacement of the spray tip. |
By regularly cleaning and inspecting the spray tip, you can ensure that your pressure washer operates at its best performance. This simple maintenance practice will help prolong the lifespan of your equipment and provide consistent and efficient cleaning results.
Troubleshooting Common Issues during Nozzle Extraction
In this section, I will discuss some problems that can arise when trying to detach the nozzle from a Karcher pressure washer. Removing the nozzle is an important step when maintaining or replacing parts of the pressure washer, and it is crucial to be aware of potential issues that may occur during this process.

Difficulty in Detaching the Nozzle
One common issue that may arise is having difficulty in disconnecting the nozzle from the pressure washer. This can be caused by factors such as a tight or stuck connection, debris or dirt buildup, or a damaged nozzle attachment. To overcome this problem, it is advisable to apply gentle force while unscrewing the nozzle. If the nozzle remains tightly connected, using a lubricant such as WD-40 may help loosen the connection. Additionally, checking for any debris or dirt in both the nozzle and the attachment area and cleaning them thoroughly can improve the ease of removal.
Leaking or Dripping Nozzle Connection
Another issue that may occur during nozzle removal is a leaking or dripping connection. This can be caused by a damaged or worn-out O-ring in the attachment area. O-rings form a seal to prevent any water leakage, and if they are damaged or degraded, water may seep out while attempting to detach the nozzle. In such cases, inspecting the O-ring for any visible signs of damage and replacing it if necessary can resolve the issue. It is important to ensure that the new O-ring is properly lubricated before reattaching the nozzle.
Stripped or Damaged Attachment Threads

One more common problem that may be encountered is stripped or damaged attachment threads. These threads enable the secure connection of the nozzle to the pressure washer, and if they are worn or stripped, it can make it challenging to remove the nozzle or create a loose connection. In case of stripped or damaged threads, using a thread repair kit or seeking professional assistance can help resolve the issue and prevent further damage to the pressure washer.
Note: It is essential to follow the manufacturer’s instructions and safety guidelines while troubleshooting and working with the pressure washer to avoid any accidents or damage.
Properly Storing the Nozzle for Future Use
When it comes to maintaining your pressure washer, one important aspect that often gets overlooked is the proper storage of the nozzle. It is essential to store the nozzle correctly to ensure its longevity and functionality for future use.
After each use, I always make sure to clean the nozzle thoroughly to remove any dirt, debris, or residue that might have accumulated during the cleaning process. This step is crucial as it prevents clogging and ensures optimal performance when using the pressure washer next time. To clean the nozzle, I gently rinse it with water and use a small brush to remove any stubborn particles.
Once the nozzle is clean and dry, it is essential to store it in a safe and convenient place. I prefer using a small plastic container or a storage bag specifically designed for pressure washer accessories. This helps to protect the nozzle from any potential damage or loss and keeps it organized for future use.

Before storing the nozzle, I also make sure to label it properly. This allows for easy identification when I need to use it again, especially if I have multiple nozzles or attachments. I typically use a permanent marker to write a brief description or use color-coded labels to differentiate between various nozzle types.
In addition to proper cleaning and storage, it is also crucial to keep the nozzle away from extreme temperatures or direct sunlight. Exposure to high heat or UV rays can damage the nozzle’s materials over time, compromising its performance and durability. Therefore, I usually store the nozzle in a cool, dry place, away from any potential sources of heat or sunlight.
By following these simple steps, you can ensure that your nozzle remains in excellent condition for future use. Properly storing the nozzle not only extends its lifespan but also saves you time and money on replacements. Remember, a well-maintained nozzle is essential for achieving optimal cleaning results with your pressure washer.
FAQ:
What is a Karcher pressure washer?
Karcher pressure washer is a popular brand of high-pressure cleaning equipment used for various cleaning tasks such as washing cars, driveways, decks, and more. It uses high-pressure water to remove dirt, grime, and stains effectively.
Why would someone need to remove the nozzle from a Karcher pressure washer?
There can be several reasons why someone would need to remove the nozzle from a Karcher pressure washer. One common reason is to clean or replace a clogged or damaged nozzle. Another reason might be to change the type of nozzle for different cleaning tasks, such as switching from a high-pressure nozzle to a low-pressure nozzle for delicate surfaces.

Is it necessary to remove the nozzle before storing the Karcher pressure washer?
It is generally recommended to remove the nozzle from the Karcher pressure washer before storing it for several reasons. Firstly, removing the nozzle prevents any potential damage to the nozzle or lance during storage. Secondly, it avoids the possibility of the nozzle getting jammed or clogged over time, which could affect its performance. Lastly, removing the nozzle allows for better cleaning and maintenance of the lance and other components. Therefore, it is good practice to remove the nozzle when storing the Karcher pressure washer for an extended period or when not in use.