How To Clean Petrol Pressure Washer Carburetor

Greetings, fellow engine enthusiasts! Today, I want to delve into a topic that is of utmost importance for the smooth functioning of your beloved machinery. Have you ever encountered difficulties when it comes to keeping your engine’s fuel-supply system in top-notch condition? Fear not, for I am here to shed light on the secrets of maintaining your trusty carburetor!
One of the vital components responsible for fuel distribution and combustion regulation within your engine lies hidden behind the scenes, often neglected and forgotten. Yes, my friends, I am talking about that little marvel called the carburetor! This intricate device, with its delicate balance of air and fuel, ensures efficient engine performance and optimal power delivery.
However, over time, due to various factors such as regular usage, dust, debris, or even the occasional prank from our furry friends, our beloved carburetors may get clogged or suffer from reduced efficiency. Fear not, intrepid engine caretakers, for I am here to outline the necessary steps to revive and rejuvenate your engine’s beating heart – the carburetor!
Keeping Your Petrol Pressure Washer Running Smoothly: A Guide to Carburetor Maintenance
As a proud owner of a petrol pressure washer, ensuring its reliable performance is of utmost importance to me. One crucial component that plays a vital role in the proper functioning of the machine is the carburetor. The carburetor, often referred to as the heart of the engine, controls the fuel-air mixture for combustion, resulting in the necessary power to clean effectively.
To maintain the optimal performance of my pressure washer, it is essential to periodically clean and maintain the carburetor. Regular cleaning helps prevent clogs and build-ups, ensuring smooth fuel flow and efficient combustion.
When it comes to cleaning the carburetor, it’s crucial to pay attention to every nook and cranny. A thorough cleaning involves removing any accumulated dirt, debris, and varnish that may hinder the fuel flow and cause the engine to run poorly.
One method to clean the carburetor is by using a carburetor cleaning solution. This solution, when applied correctly, helps dissolve any stubborn deposits and effectively eliminates gunk, improving the carburetor’s overall performance. By following the manufacturer’s guidelines and carefully disassembling the carburetor, I can soak the parts in the cleaning solution, ensuring they are free from any contaminants.
In addition to using a carburetor cleaning solution, utilizing compressed air can also help remove any residual debris from the small passages and jets. A small blast of compressed air can effectively clear any obstructions, allowing for smooth fuel flow and optimum performance.
Once the cleaning process is complete, I carefully reassemble the carburetor, ensuring all components fit snugly and securely. It’s essential to pay close attention to gaskets and seals, as any leaks can adversely affect the engine’s performance. Additionally, I make sure to adjust the carburetor settings according to the manufacturer’s specifications to ensure an ideal fuel-air mixture.

Maintaining a clean carburetor is an integral part of keeping my petrol pressure washer in top shape. By periodically cleaning and maintaining the carburetor, I can ensure optimal performance and extend the lifespan of my beloved machine.
Understanding the Importance of Carburetor Maintenance
As an owner of a gasoline-powered machine or vehicle, it is crucial to comprehend the significance of regularly maintaining and caring for the carburetor system. Ensuring the optimal performance of this essential component can greatly enhance the overall efficiency and longevity of your engine.
The proper functioning of a carburetor relies on a delicate balance of air and fuel mixture, allowing the engine to operate smoothly. Over time, however, various factors such as accumulated dirt, debris, and residues from fuel can disrupt this balance, leading to decreased performance and potential engine issues.
Regularly cleaning and maintaining the carburetor system can prevent blockages, clogs, and malfunctioning, ultimately preserving the optimal performance of your machine or vehicle.
Carefully inspecting and cleaning the carburetor components can not only improve fuel efficiency but also avoid potential damage to other engine parts. Neglecting carburetor maintenance can lead to issues such as engine stalling, rough idling, or difficulty starting, which may require costly repairs or replacement.

By incorporating routine carburetor maintenance into your maintenance routine, you can effectively address potential issues before they escalate and minimize the likelihood of breakdowns or accidents. Whether you are a professional mechanic or an avid DIYer, understanding and performing carburetor maintenance is a vital step in ensuring the smooth operation and longevity of your gasoline-powered equipment.
Recognizing Indications of a Dirty Carburetor
When it comes to maintaining a petrol pressure washer, it is crucial to be aware of the signs that may indicate a dirty carburetor. As the heart of the engine, the carburetor plays a vital role in the combustion process by mixing air and fuel to ensure optimal performance. However, over time, dirt, debris, and varnish can accumulate, leading to a dirty carburetor. Understanding the indications of a dirty carburetor can help you prevent engine inefficiency, poor performance, and potential damage.
1. Inconsistent Engine Performance
If you have noticed that your petrol pressure washer’s engine is running unevenly or inconsistently, it could be a sign of a dirty carburetor. A dirty carburetor disrupts the proper air-fuel mixture, leading to rough idling, hesitation, or even stalling. These irregularities can significantly impact the overall efficiency and effectiveness of your pressure washer.
2. Difficult Starting
Difficulty starting the petrol pressure washer is another indication of a dirty carburetor. A carburetor clogged with debris or varnish restricts the flow of fuel into the engine, making it challenging to initiate the combustion process. If you find yourself struggling to start the engine or if it takes more attempts than usual, it may be time to inspect and clean the carburetor.
By being observant of these signs, you can proactively address a dirty carburetor, ensuring that your petrol pressure washer remains in optimal condition. Regular carburetor maintenance and cleaning will help you maintain a smoothly running engine, extend its lifespan, and ultimately enhance the performance of your pressure washer.

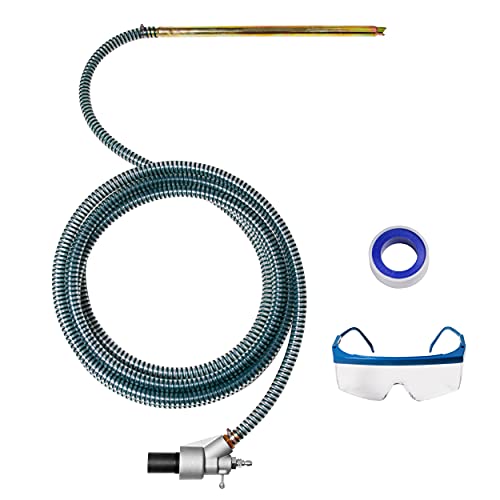
Gathering the Necessary Tools and Materials
Before starting the process of maintenance for your petrol pressure washer’s carburetor, it’s important to gather all the required tools and materials in one place. This ensures that the process goes smoothly and efficiently, without any unnecessary interruptions.
To begin, it’s crucial to have a set of basic hand tools such as a wrench, screwdriver, and pliers. These tools will come in handy for accessing and removing various components of the carburetor. Additionally, it’s advisable to have a clean cloth or rag to wipe away any dirt or residue that may accumulate during the cleaning process.
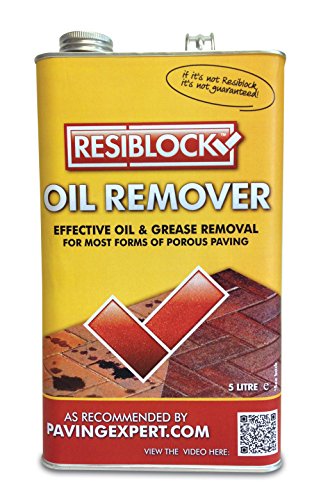
In addition to hand tools, you will need a carburetor cleaner solution. This solution is specifically designed to remove built-up deposits and contaminants from the carburetor’s internal components. It’s important to choose a cleaner that is compatible with petrol engines and carburetors to ensure optimal results.
Furthermore, a small container or bucket will be required to hold the carburetor parts while they soak in the cleaner solution. This container should be able to accommodate the different components without overcrowding them. This ensures that each part is thoroughly cleaned and reduces the risk of damage during the cleaning process.
Lastly, it’s recommended to have a well-ventilated and well-lit workspace to carry out the cleaning process. This ensures a safe and comfortable environment while working with chemicals and delicate components. Adequate ventilation helps dissipate any fumes that may be emitted during the cleaning process, while good lighting allows for better visibility of the carburetor’s intricate parts.

By gathering these necessary tools and materials before starting, you can approach the task of cleaning your petrol pressure washer’s carburetor with confidence, knowing that you have everything you need to complete the job effectively and efficiently.
Disconnecting and Removing the Carburetor
Gathering the Necessary Tools
Before we begin, it’s important to gather the required tools for this task. You will need a pair of pliers, screwdrivers (both flathead and Phillips), a wrench or socket set, and a clean towel or rag. Make sure to have these items prepared before proceeding.
Step-by-Step Process
Step 1: To ensure safety, I start by turning off the petrol supply and disconnecting the spark plug to prevent accidental ignition. This step is crucial to avoid any potential accidents during the carburetor removal process.
Step 2: Next, I carefully locate the carburetor, which is typically positioned near the engine. It is usually attached to the air filter housing or the fuel tank. Once located, I use the appropriate tool, such as a screwdriver or wrench, to loosen the clamps or screws holding the carburetor in place.
Step 3: With the clamps or screws loosened, I gently disconnect the fuel line from the carburetor. It’s important to note the positioning of the fuel line to ensure proper reassembly later on. I also disconnect any other necessary wires or connectors attached to the carburetor.

Step 4: After disconnecting all the necessary components, I carefully remove the carburetor from its housing. It may require some maneuvering to free it completely, but by taking it slow and being gentle, you can extract it without causing any damage.
Step 5: Once the carburetor is removed, I place it on a clean towel or rag to avoid any debris or dirt from contaminating the surrounding area. This will also provide a clean surface for further inspection and cleaning of the carburetor itself.
Note: It’s essential to handle the carburetor with care, as it is a delicate and vital component of your petrol pressure washer. Avoid any unnecessary force or rough treatment to prevent any potential damage.
By following these steps, you have successfully disconnected and removed the carburetor from your petrol pressure washer. Now, you can proceed to clean and maintain it properly, ensuring optimal performance for your machine.
Disassembling and Cleaning the Carburetor Components
When it comes to maintaining and ensuring the optimal performance of your petrol pressure washer, one crucial task is to disassemble and clean the various components of the carburetor. This process helps to remove accumulated dirt, debris, and other impurities that can hinder the carburetor’s functioning and result in poor engine performance. In this section, I will guide you through the steps involved in disassembling and cleaning the carburetor components, enabling you to keep your petrol pressure washer running smoothly.

Gathering the Necessary Tools
Before beginning the disassembly and cleaning process, gather the necessary tools to ensure a smooth and efficient procedure. Some essential tools you will need include a screwdriver set, a carburetor cleaner product, a small brush or toothbrush, safety goggles, and gloves. Having these tools prepared beforehand will help you work with ease and avoid any potential accidents or damages.
Step-by-Step Instructions
Step 1: Start by disconnecting the petrol pressure washer from the power source and allowing it to cool down completely. Safety should always be a top priority, and ensuring that the machine is not connected to any power source eliminates the risk of accidental starts or shocks.
Step 2: Locate the carburetor on your petrol pressure washer. It is typically situated near the engine and can be identified as a metal device connected to the fuel line and air intake system. Once located, use the appropriate screwdriver to loosen and remove any screws or bolts securing the carburetor in place.
Step 3: Gently separate the carburetor from the engine, taking care not to damage any surrounding components. Place it on a clean and organized work surface, ensuring that you have enough space to disassemble and clean the individual components comfortably.
Step 4: Now, we can begin disassembling the carburetor components. Carefully remove the air filter cover and air filter element, setting them aside for cleaning or replacement if necessary. Take note of how these parts are positioned for reassembly later.

Step 5: Next, using the appropriate screwdriver, carefully remove the carburetor bowl, being cautious not to damage the gasket or other elements attached. The bowl contains the fuel and can accumulate sediment over time, so it is essential to clean it thoroughly.
Step 6: With the carburetor bowl removed, you will be able to access the float and needle valve. These components regulate the flow of fuel into the carburetor. Carefully remove them, taking note of their orientation for proper reinstallation.
Step 7: Inspect each individual component for any signs of damage, wear, or blockages. Use the carburetor cleaner and a small brush or toothbrush to clean each part thoroughly. Pay special attention to any small orifices, jets, or passages that may be clogged with debris.
Step 8: Once all the components have been cleaned and inspected, reassemble the carburetor by following the steps in reverse order. Ensure that each component is properly aligned and securely fastened. Take care not to overtighten any screws or bolts to avoid damage.
By regularly disassembling and cleaning the carburetor components of your petrol pressure washer, you can maintain its performance and prolong its lifespan. This relatively simple maintenance task can prevent costly repairs and ensure that your pressure washer functions optimally whenever you need it. Remember to refer to the manufacturer’s guidelines and recommendations for specific details and precautions.
Thorough Cleaning with Carburetor Cleaner and Compressed Air
In this section, I will share my experience and tips on achieving a comprehensive cleaning of your petrol pressure washer’s carburetor using carburetor cleaner and compressed air.
An Effective Solution with Carburetor Cleaner
When it comes to deep cleaning the carburetor of your petrol pressure washer, using a reliable and powerful carburetor cleaner is essential. The cleaner is designed to remove various deposits and build-ups that can hinder the performance of the carburetor.
By using a suitable carburetor cleaner, you can effectively dissolve and eliminate dirt, grime, and other impurities from the carburetor’s components. It is important to follow the instructions provided by the cleaner manufacturer to ensure safe and efficient usage.
The Power and Precision of Compressed Air
While carburetor cleaner is effective in dissolving deposits, it is equally important to utilize compressed air for a thorough cleaning. Compressed air can dislodge any loosened debris and blow it away from hard-to-reach areas within the carburetor.
By connecting the compressed air nozzle to the appropriate fittings on the carburetor, you can direct bursts of compressed air into the different sections, including the float chamber, jets, and fuel passages. This process ensures a more complete removal of any remaining contaminants.
To ensure safety, it is vital to wear protective gear, such as goggles and gloves, when using compressed air. Additionally, make sure to regulate the pressure of the compressed air according to the specifications recommended by the pressure washer manufacturer.
In conclusion, combining the use of a high-quality carburetor cleaner along with compressed air can provide a thorough and effective cleaning of your petrol pressure washer’s carburetor. This method helps to remove accumulated dirt, grime, and debris from the carburetor’s components, optimizing its performance and ensuring the longevity of your pressure washer.
Reassembling and Reattaching the Cleaned Carburetor
Now that the carburetor has been thoroughly cleaned and all the components are ready, it’s time to put everything back together. This process involves carefully reassembling the various parts of the carburetor and then reattaching it to the pressure washer without any mistakes or omissions.
Begin by referring to the user manual or any notes you made during the disassembly process. This will help ensure that you reassemble the carburetor correctly, with all the parts in their proper places.
Inspect the gaskets and seals for any signs of damage or wear. Replace them if necessary to ensure a tight and secure fit.
Once the gaskets and seals are in place, carefully insert the cleaned jets and needles, making sure they are properly aligned and seated securely.
Reattach any linkage or control cables that were disconnected during the disassembly process, ensuring they are adjusted properly for smooth operation.
Next, carefully place the cleaned float and float bowl back into position, making sure the float moves freely and the bowl is secured tightly.
Before reattaching the carburetor to the pressure washer, double-check that all connections and hoses are clean, intact, and properly tightened.
Once you are confident that everything is in order, carefully reattach the carburetor to the pressure washer, aligning it with the mounting studs or brackets.
Secure the carburetor using the appropriate nuts or bolts, making sure to tighten them evenly and securely.
Finally, connect any fuel lines and ensure they are properly attached and free of leaks.
By following these steps and taking your time to ensure everything is reassembled correctly, you can confidently start up your pressure washer, knowing that your cleaned carburetor is working efficiently and effectively once again.
Testing and Fine-tuning the Performance of my Petrol Pressure Washer
When it comes to achieving optimal performance from my petrol pressure washer, it is essential to thoroughly test and fine-tune its various components. By doing so, I can ensure that my pressure washer operates efficiently and effectively, delivering the desired results each time I use it.
Evaluating the Engine and Pump
One of the key aspects to examine is the engine and pump of the pressure washer. Through careful inspection, I can assess their overall condition and identify any potential issues that may be affecting performance. I pay close attention to the fuel valve, spark plug, and air filter, as these components play a crucial role in the proper functioning of the engine. Additionally, I examine the pump for any signs of damage or wear that could hinder its performance.
Once I have visually inspected these components, I move on to testing their functionality. I start by starting the pressure washer and observing its idle and running speeds, making note of any irregularities or fluctuations. Using a tachometer, I measure the engine’s RPM (revolutions per minute) to ensure it is within the manufacturer’s specified range. This step allows me to identify potential issues such as low or excessive RPM, which can impact the pressure washer’s performance.
Fine-tuning the Controls and Nozzles
Another crucial aspect of optimizing my pressure washer’s performance involves fine-tuning the controls and selecting the appropriate nozzle for the task at hand. By adjusting the throttle control, I can regulate the engine speed and ensure it aligns with the desired pressure output. This adjustment allows me to achieve the necessary pressure for the specific cleaning job without straining the engine unnecessarily.
Furthermore, selecting the correct nozzle plays a significant role in optimizing performance. Different nozzles provide varying spray patterns and pressure levels, allowing for tailored cleaning based on the surface and grime. By experimenting with different nozzles and observing their impact on efficiency and effectiveness, I can determine the optimal choice for each cleaning task.
In conclusion, testing and fine-tuning the performance of my petrol pressure washer is an essential step in maintaining its optimal functioning. By evaluating the engine and pump, and making necessary adjustments to controls and nozzle selection, I can ensure that my pressure washer delivers peak performance and achieves the desired results for every cleaning task.
FAQ:
How often should I clean my petrol pressure washer carburetor?
It is recommended to clean your petrol pressure washer carburetor at least once a year, or more frequently if you notice any issues with its performance. Regular cleaning helps to maintain fuel efficiency and prevent clogging or damage.
What tools do I need to clean a petrol pressure washer carburetor?
You will need a screwdriver, wrench, carburetor cleaner, compressed air can, soft brush, and a container to collect any excess fuel or debris. These tools will help you disassemble, clean, and reassemble the carburetor properly.
What are the signs that indicate I need to clean my petrol pressure washer carburetor?
If your petrol pressure washer is experiencing starting issues, running rough, stalling, or losing power, it may be a sign that the carburetor is clogged or dirty. Cleaning the carburetor can often resolve these problems and improve the overall performance of your pressure washer.