
How Do You Connect A Hose To A Pressure Washer
As a handyman with vast experience in tackling household cleaning tasks, I am well aware of the importance of connecting a flexible tubing to a potent water-blasting contraption. It is an essential step to unleash the incredible power of the appliance, ensuring superior cleanliness and efficiency. However, this seemingly simple task requires careful attention to detail and a clear understanding of the mechanism involved.
When it comes to joining a flexible conduit to a forceful sprayer designed to eliminate dirt and grime, precision is of the utmost importance. Ensuring a secure and leak-free connection is not only crucial for optimal performance but also for the safety of both the operator and the machine. Therefore, having the right knowledge and employing the correct technique is vital to achieving the desired results while avoiding potential mishaps.
In this comprehensive article, I will guide you through the intricate process of attaching a hose to a high-powered pressure washer, using both theoretical expertise and practical know-how gained from years of hands-on experience. Additionally, I will share valuable tips and recommendations on selecting the appropriate fittings and accessories that will enhance the connection and guarantee a flawless operation.
Connecting a Hose to a High-Pressure Cleaning Device: A Step-by-Step Guide
Hello there!
Today, I’d like to share with you some valuable insights on the proper way to connect a hose to a high-pressure cleaning device. It’s essential to do this correctly to ensure optimal performance and prevent any potential damage.
Step 1: To begin, the first thing you’ll want to do is locate the hose connection point on your high-pressure cleaning device. This is typically found on the rear or side of the machine and is specifically designed to accommodate the hose attachment.
Step 2: Once you’ve located the hose connection point, ensure that the pressure washer is turned off and any power sources are disconnected or switched off to prevent accidents.
Step 3: Before connecting the hose, it’s crucial to inspect both the hose and the high-pressure cleaning device for any signs of damage or wear. Look out for cracks, leaks, or any other visible issues that may affect performance or safety. If any problems are observed, it’s best to replace the damaged parts before proceeding further.
Step 4: With the inspection complete and any necessary repairs made, it’s now time to connect the hose to the high-pressure cleaning device. Take the hose attachment and align it with the connection point, ensuring a secure fit.
Step 5: Once the hose attachment is aligned, push it firmly into the connection point. You should hear a clicking or snapping sound, indicating that the attachment is securely in place. Give it a gentle tug to confirm that it’s firmly attached.

Step 6: After ensuring the hose attachment is securely connected, it’s time to turn on the high-pressure cleaning device. Start by gradually increasing the water pressure to avoid any sudden surges or water hammer effects. This will help to prevent damage to both the unit and the hose.
Step 7: Finally, once the high-pressure cleaning device is turned on and water is flowing through the hose, check for any leaks or abnormal pressure fluctuations. If everything looks and sounds right, you’re good to go!
That wraps up our step-by-step guide on how to connect a hose to a high-pressure cleaning device. By following these instructions, you’ll have your pressure washer up and running smoothly in no time, ready to tackle any cleaning task that comes your way.
Understanding the Basics
When it comes to connecting a hose to a pressure washer, it is essential to grasp the fundamental principles of the process. Familiarizing yourself with the basic concepts will enable you to handle this task efficiently and effectively.
One key aspect to comprehend is the method of attachment. There are various ways to connect a hose to a pressure washer, and it is crucial to choose the appropriate method based on the specific equipment you are using. Understanding the different options available will make the connection process smoother.

Another essential element to consider is the importance of a secure connection. A tight and secure connection ensures that there are no leaks or interruptions in the flow of water, which can impact the overall performance of the pressure washer. Mastering the art of creating a solid connection will guarantee optimal results.
Furthermore, it is crucial to be aware of the various components involved in the connection process. Understanding the specific parts of both the pressure washer and the hose will allow you to identify any potential issues or necessary adjustments that may need to be made. This knowledge will give you confidence in handling any challenges that may arise.
In conclusion, gaining a solid understanding of the basics of connecting a hose to a pressure washer is a fundamental step towards achieving successful and efficient operation. By familiarizing yourself with the various attachment methods, ensuring a secure connection, and being knowledgeable about the involved components, you will be well-equipped to tackle this task with ease.
Choosing the Right Hose
In this section, I will guide you through the process of selecting the most suitable hose for your pressure washer setup. It’s important to choose the right hose that can withstand the high pressure and accommodate the water flow required for efficient cleaning.
1. Hose Length
The length of the hose plays a crucial role in determining the flexibility and reach of your pressure washer. It’s advisable to choose a hose that is long enough to reach all areas you need to clean without being too long that it becomes difficult to manage. Consider the size of your cleaning area and the distance from your pressure washer to ensure you have the proper length of hose.

2. Hose Diameter
The diameter of the hose affects the water flow rate, which in turn affects the cleaning efficiency of your pressure washer. Generally, a larger diameter hose allows for a higher flow rate, resulting in more cleaning power. However, it’s important to ensure that your pressure washer can handle the larger diameter hose before making a decision.
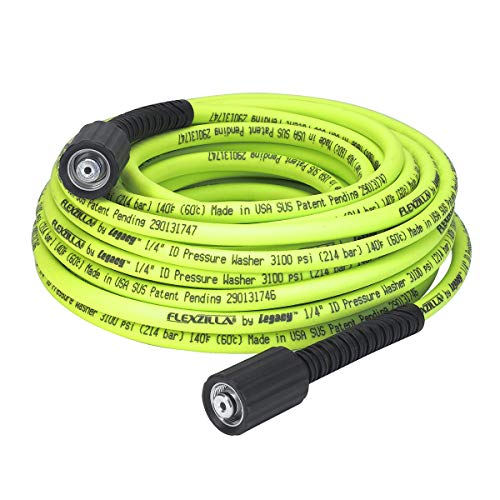
- A 1/4-inch diameter hose is suitable for light-duty cleaning tasks such as washing cars, windows, and small outdoor furniture.
- A 3/8-inch diameter hose is recommended for medium-duty cleaning tasks such as cleaning decks, driveways, and siding.
- A 1/2-inch diameter hose is ideal for heavy-duty cleaning tasks such as removing stubborn grime from concrete surfaces or large outdoor areas.
3. Hose Material
The material of the hose determines its durability and resistance to kinking, abrasion, and chemicals. Most pressure washer hoses are made of either PVC (Polyvinyl Chloride) or rubber. PVC hoses are lightweight and less expensive but may not be as durable as rubber hoses. On the other hand, rubber hoses are heavier but offer better flexibility and longevity. Consider your specific cleaning needs and budget when choosing the material of your hose.
Remember that investing in a high-quality hose that meets your pressure washer’s requirements is essential for optimal performance and longevity. By considering factors like length, diameter, and material, you can select the right hose that will provide efficient cleaning results for your pressure washer setup.
Checking Compatibility
When it comes to connecting a hose to a pressure washer, one of the essential factors to consider is ensuring compatibility between the two components. It is crucial to assess whether the hose you have matches the pressure washer’s specifications and requirements. This section will provide you with a step-by-step guide on how to check compatibility before connecting the hose to your pressure washer.
1. Determine the Hose Type
The first step in checking compatibility is identifying the type of hose you have. There are various types available, such as PVC, rubber, or reinforced hoses. Each type has its own unique features and capabilities, so it’s important to understand the specific characteristics of your hose.

2. Check the Hose Diameter
After determining the hose type, you need to check its diameter. Hose diameters can vary, and it’s crucial to ensure that the diameter matches the connector on the pressure washer. Using a hose with an incorrect diameter can result in poor water flow and potentially damage your pressure washer.
3. Examine the Pressure Ratings
Another aspect to consider is the pressure rating of both the hose and the pressure washer. Pressure ratings are measured in PSI (pounds per square inch) and indicate the maximum pressure the hose and the pressure washer can handle. It’s important to ensure that the hose can handle the pressure generated by the pressure washer to avoid any safety hazards or equipment malfunctions.
4. Assess the Connector Types
Lastly, it’s crucial to check the connector types of both the hose and the pressure washer. There are different types of connectors available, such as quick-connect, threaded, or twist connectors. Ensuring compatibility between the two will facilitate a secure and leak-free connection.
- Verify the connector type on the pressure washer.
- Verify the connector type on the hose.
- Ensure that the connector types are compatible.
By following these steps and thoroughly checking compatibility between your hose and pressure washer, you can ensure a proper and efficient connection. This will help you achieve optimal performance and extend the lifespan of both your hose and pressure washer.
Preparing the Equipment
Before beginning the connection process, it is important to properly prepare the necessary equipment for use. This involves ensuring that all components are in good working condition and ready to be connected.
Firstly, inspect the pressure washer to ensure that it is in proper working order. Check for any signs of damage or wear, such as leaks or loose connections. It is important to address any issues before connecting the hose, as they can affect the overall performance and efficiency of the pressure washer.
Next, gather all the necessary tools and materials for the connection process. This may include a wrench or pliers to tighten connections, Teflon tape to ensure a secure seal, and any adapters or connectors needed to fit the hose onto the pressure washer. Having everything readily available will make the connection process smoother and more efficient.
Additionally, it is important to familiarize oneself with the specific instructions provided by the manufacturer of the pressure washer. Each pressure washer may have slightly different requirements for hose connection, so it is essential to follow the guidelines provided to ensure a proper and secure connection.
- Closely read the manufacturer’s instructions.
- Inspect the pressure washer for any damage or wear.
- Gather all necessary tools and materials.
- Ensure the hose is free from any knots or kinks.
- Refer to the manufacturer’s instructions for specific hose connection requirements.
By taking the time to properly prepare the pressure washer and familiarize oneself with the manufacturer’s instructions, the process of connecting the hose will be easier, smoother, and result in a properly functioning pressure washer.
Preparing the Hose
When setting up a pressure washer for use, it is essential to properly prepare the hose before connecting it to the machine. This ensures efficient and effective cleaning while prolonging the lifespan of both the hose and the pressure washer. In this section, I will guide you through the necessary steps to prepare the hose before usage.

Gathering the Materials
Before beginning the hose preparation process, it is important to gather all the required materials. You will need a clean cloth, a bucket of warm water, mild detergent, and a soft-bristled brush. These materials will help you remove any dirt, debris, or residue that may be present on the hose.
Cleaning the Hose
The next step is to clean the hose thoroughly. Start by wiping the entire surface of the hose with a clean cloth to remove any loose dirt or dust. Then, fill the bucket with warm water and add a small amount of mild detergent. Use the soft-bristled brush to scrub the hose gently, paying extra attention to any stubborn stains or grime.
Rinse the hose thoroughly with clean water to remove any soap residue. It is crucial to ensure that no detergent remains on the hose, as it could interfere with the pressure washer’s performance and potentially damage the machine. Allow the hose to air dry completely before proceeding.
| Materials Needed | Cleaning Steps |
|---|---|
| Clean cloth | Wipe the hose surface to remove loose dirt or dust. |
| Bucket of warm water | Fill the bucket to prepare the cleaning solution. |
| Mild detergent | Add a small amount to the warm water. |
| Soft-bristled brush | Gently scrub the hose to remove stains or grime. |
By properly preparing the hose before connecting it to the pressure washer, you can ensure optimal performance and prolong its lifespan. Taking the time to clean and maintain the hose regularly will also contribute to the overall efficiency and effectiveness of your pressure washer.
Connecting the Hose to the Pressure Washer
When it comes to getting your pressure washer up and running, one crucial step is connecting the hose to the machine. This simple process sets the foundation for a successful and efficient cleaning experience. In this section, I will guide you through the steps of connecting the hose to the pressure washer, ensuring a secure and reliable connection.

Step 1: Prepare the Hose
The first step in connecting the hose to the pressure washer is to prepare the hose itself. Inspect the hose for any damages or signs of wear and tear. Ensure that there are no kinks or twists in the hose that could restrict water flow. If you notice any issues, it is crucial to address them before proceeding.
Step 2: Attach the Hose
Once you have inspected the hose and ensured its integrity, it’s time to attach it to the pressure washer. Locate the hose connection on the machine, which is typically labeled or easily identifiable. Take the end of the hose and match it to the fitting on the pressure washer, ensuring a proper fit.
- Insert the end of the hose into the fitting, pushing it firmly to create a tight seal.
- If your pressure washer has a locking mechanism, make sure to engage it to secure the hose in place.
- Double-check that the connection is secure by giving it a gentle tug. It should feel solid and not come loose.
Step 3: Test the Connection
Once the hose is securely connected to the pressure washer, it’s essential to test the connection before proceeding with any cleaning tasks. Turn on the water supply and briefly squeeze the trigger on the pressure washer wand to release any air pockets in the hose. Observe for any leaks or irregularities in water flow.
- If you notice any leaks, turn off the water supply and recheck the connection, ensuring it is tight and properly aligned.
- If the water flow is not consistent, it may be due to a blockage or obstruction in the hose. Take a moment to inspect and clear any debris.
By following these steps, you can confidently connect the hose to the pressure washer, ensuring a reliable and efficient cleaning experience. Remember to always prioritize safety and double-check the connection to avoid any accidents or damage while operating the pressure washer.
Securing the Connection
When it comes to joining two essential components together, the process of ensuring a secure connection is of utmost importance. The aim is to create a strong and reliable bond, capable of withstanding the pressures and demands of the task at hand. In this section, I will guide you through the steps necessary to achieve a successful connection between your hose and pressure washer, providing you with confidence and peace of mind as you tackle your cleaning projects.
Inspecting the Hose and Washer
Before beginning the connection process, it is vital to inspect both the hose and the pressure washer. Carefully examine the hose for any signs of damage, such as cracks, kinks, or leaks. These issues can compromise the effectiveness of the connection and may result in water leakage or loss of pressure. Similarly, inspect the pressure washer’s connection point for any debris or blockages that could hinder the coupling process. Cleaning the connection area ensures a clean and secure bond between the two components.
Firmly Attaching the Coupling
Once you have ensured the hose and pressure washer are in good condition, it is time to proceed with the connection. Begin by aligning the coupling on one end of the hose with the appropriate connection point on the pressure washer. Apply steady pressure while twisting the coupling clockwise to establish a tight and secure fit. Keep tightening until you feel resistance, ensuring that the coupling is properly seated. Avoid overtightening, as this can damage the threads and potentially cause leaks. It is essential to strike a balance between a secure connection and preventing any unnecessary strain.
Testing the Connection
In this section, I will discuss the importance of testing the connection between the hose and the pressure washer before starting to use it. It is crucial to ensure that the connection is secure and properly sealed to avoid any potential issues or accidents during operation.
First and foremost, I always recommend double-checking the connection to make sure it is tight and properly fastened. This will help prevent any leaks or water loss that could affect the performance of the pressure washer. A loose connection can also result in reduced water pressure, which may undermine the effectiveness of the cleaning tasks at hand.
Once the connection is secure, it is essential to test it for any potential leaks. I suggest turning on the pressure washer and spraying a small amount of water onto a nearby surface. By closely inspecting the connection, you can easily identify any signs of leakage, such as water dripping or spraying from the hose or pressure washer.
If any leaks are detected, it is crucial to address them promptly. This can be done by tightening the connection further or replacing any damaged or worn-out parts. Ignoring leaks can lead to water wastage, decreased efficiency, and potential damage to the pressure washer.
Another aspect that should not be overlooked is testing the flexibility of the hose connection. It is essential to ensure that the hose can move freely without any restrictions that could hamper your movements or impact the overall performance of the pressure washer. Testing the flexibility should involve maneuvering the hose in various directions to ensure that it can reach all intended areas without difficulty.
In conclusion, properly testing the connection between the hose and pressure washer is vital to ensure the efficiency, safety, and effectiveness of your cleaning tasks. By ensuring a secure and leak-free connection, you can more confidently tackle your pressure washing projects and achieve optimal results.
Proper Hose Maintenance
When it comes to maintaining your hose, there are several important factors to consider to ensure the longevity and optimal performance of your equipment. In this section, I will share some valuable tips and techniques that I have found helpful in caring for my pressure washer hose.
Regular Inspection: One of the most crucial aspects of hose maintenance is regularly inspecting it for any signs of wear, tear, or damage. This includes checking for leaks, cracks, or weak spots that may compromise the functionality of the hose. By conducting routine inspections, you can identify potential issues early on and address them before they escalate.
Proper Storage: Properly storing your hose is equally important, as improper storage can lead to kinks, twists, and damage to the hose. I recommend coiling the hose neatly and securing it in a cool and dry place, away from direct sunlight and extreme temperatures. Additionally, using hose reels or hangers can help prevent tangles and prolong the lifespan of your hose.
Preventing Clogs: Another vital aspect of hose maintenance is preventing clogs, which can hinder water flow and reduce the effectiveness of your pressure washer. To avoid clogs, it is essential to flush the hose after each use to remove any debris or residue that may accumulate. This can be done by running clean water through the hose until it runs clear.
Proper Handling: When using your pressure washer hose, it is crucial to handle it with care and avoid any rough or aggressive movements that could cause damage. Pulling or stretching the hose excessively, stepping on it, or running over it with heavy objects should be avoided to prevent punctures or ruptures. Additionally, using hose accessories, such as spray nozzles, with the appropriate pressure settings can help maintain the integrity of the hose.
Replacing Worn-Out Parts: Lastly, regularly inspecting and replacing worn-out parts, such as connectors or gaskets, is essential for maintaining the overall functionality and efficiency of your hose. These small components can significantly impact the performance of your pressure washer, so it is important to keep them in good condition.
By following these tips and incorporating them into your hose maintenance routine, you can ensure that your pressure washer hose remains in excellent condition, prolonging its lifespan and maximizing its performance.
FAQ:
What do I need to connect a hose to a pressure washer?
You will need a garden hose and a high-pressure hose to connect a hose to a pressure washer. The garden hose will connect to a water source, while the high-pressure hose will connect the pressure washer to the water source.
How do I connect the garden hose to the pressure washer?
To connect the garden hose to the pressure washer, first, make sure the pressure washer is turned off. Then, attach one end of the garden hose to the water inlet on the pressure washer. Ensure it is securely tightened to prevent any leaks.
What is the purpose of a high-pressure hose?
A high-pressure hose is designed to withstand the high water pressure generated by a pressure washer. It connects the pressure washer to the water source and allows the high-pressure water to flow from the pressure washer to the cleaning nozzle.
Can I use a regular garden hose instead of a high-pressure hose?
No, it is not recommended to use a regular garden hose instead of a high-pressure hose. A regular garden hose may not be able to handle the high water pressure from the pressure washer, and it may burst or leak. It is essential to use a high-pressure hose specifically designed for pressure washers.
Are there any additional accessories needed to connect a hose to a pressure washer?
Depending on the specific pressure washer model, you may need additional accessories such as hose connectors, couplers, or adapters to ensure a secure and proper connection between the hose and the pressure washer. It is recommended to refer to the instruction manual of your pressure washer for any necessary accessories.


