How To Use The Ryobi Pressure Washer

Welcome to the world of innovative cleaning solutions! If you’re searching for a weapon in the battle against dirt and grime, look no further. Here, we uncover the secrets to unlocking the true potential of a powerful tool that will revolutionize the way you clean. This is your ultimate guide to harnessing the power of the remarkable Ryobi Pressure Washer.
Picture this: A gentle yet unstoppable force that effortlessly removes years of built-up dirt, mold, or even the toughest stains from any surface. Take control of your cleaning routine and let the power of water do the hard work for you. The Ryobi Pressure Washer is the perfect companion for any homeowner or professional seeking a fast, efficient, and environmentally friendly cleaning solution.
Stand out from the crowd: Eliminate the need for chemical cleaners and scrubbing with our reliable, high-performance pressure washer. Cleaning has never been this easy or satisfying. With the ability to effectively clean driveways, patios, fences, cars, and even delicate surfaces, this versatile tool is truly a game-changer. Discover and harness the power of water pressure, as we dive into the practical use and maintenance of the amazing Ryobi Pressure Washer.
Getting Started with Your Ryobi Power Sprayer: A Complete Guide
Hello there! Are you ready to embark on a journey of transforming your outdoor spaces with the help of the remarkable Ryobi power sprayer? In this comprehensive guide, I will walk you through the step-by-step process of utilizing this powerful tool efficiently and effectively. Whether you’re looking to revitalize your patio, blast away dirt from your car, or rejuvenate your deck, this guide will equip you with all the knowledge you need to make the most out of your Ryobi power sprayer.
Step 1: Familiarizing Yourself with the Power Sprayer
Before diving into the exciting world of pressure washing, let’s take a moment to get acquainted with the various components of your Ryobi power sprayer. Understanding the features and functionalities of your tool will help ensure a smooth and seamless user experience. From the nozzle to the high-pressure hose, the Ryobi power sprayer incorporates a range of elements meticulously designed to deliver exceptional performance.
Step 2: Safety Precautions
As with any powerful tool, it is crucial to prioritize your safety while operating the Ryobi power sprayer. From wearing protective gear to properly positioning yourself, implementing safety measures will not only safeguard your well-being but also enhance the effectiveness of your pressure washing endeavors. This section will outline essential safety precautions for you to follow before, during, and after using your power sprayer.
Step 3: Preparing Your Work Area
To ensure optimal results, it’s important to set the stage before you begin pressure washing. Preparing your work area involves inspecting the surface to be cleaned, removing any potential obstacles, and selecting the appropriate cleaning solution. This step is the foundation for achieving outstanding outcomes and preserving the longevity of both your Ryobi power sprayer and the area you’re working on.
Step 4: Operating Your Power Sprayer
Now that you’re familiar with the power sprayer, armed with safety knowledge, and have prepared your work area, it’s time to unleash the true potential of the Ryobi power sprayer. In this step, I will guide you through the correct techniques, tips, and tricks for effectively operating your tool. From adjusting the pressure to controlling the spray pattern, you’ll learn how to achieve the desired results while minimizing any potential mishaps.
Step 5: Post-Cleaning Maintenance
As your pressure washing journey comes to a close, it’s essential to take proper care of your Ryobi power sprayer for sustained performance. This final step will highlight the best practices for cleaning, storing, and maintaining your power sprayer. By following these maintenance guidelines, you’ll ensure the longevity of your tool, allowing you to reap the full benefits of your investment for years to come.
By the end of this comprehensive guide, you will have the confidence and know-how to tackle any pressure washing task, equipped with your reliable Ryobi power sprayer. Let’s dive in and unlock the transformative power of this exceptional tool!
Understanding the Basics: Exploring the Fundamentals of a High-Pressure Cleaning Device
In this section, I will provide you with a comprehensive overview of a powerful cleaning tool commonly known as the Ryobi Pressure Washer. By delving into the underlying principles and functioning of this remarkable device, you will gain a deeper understanding of how it can assist you in your cleaning tasks.
1. Introduction to a Ryobi Pressure Washer
A Ryobi Pressure Washer is an advanced cleaning equipment designed to remove stubborn dirt, grime, and other contaminants from a variety of surfaces. It utilizes high-pressure water spray to effectively dislodge and wash away undesirable substances, restoring the cleanliness and visual appeal of various objects and areas.
2. Key Components and Mechanisms
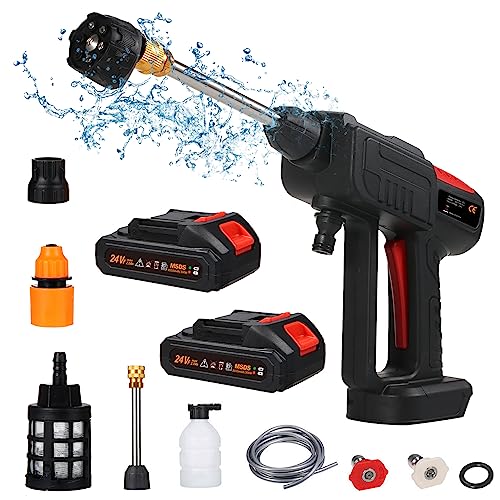
A Ryobi Pressure Washer consists of several essential components that work together harmoniously to deliver a powerful cleaning performance. These include:
- The Motor: It provides the necessary power to drive the pump, generating high-pressure water flow.
- The Pump: This vital part pressurizes the water, allowing it to spray out with immense force.
- The Nozzles: These interchangeable accessories determine the spray pattern and intensity, enabling targeted and versatile cleaning.
- The Hose: Connecting the pressure washer to a water source, the hose transports water into the pump for pressurization.
- The Wand/Lance: This extendable rod holds the nozzle and directs the high-pressure spray to the desired areas.
3. Operation and Functioning
Operating a Ryobi Pressure Washer involves a series of steps to ensure an efficient and effective cleaning experience:
- Connect the pressure washer to a water source using a hose.
- Adjust the nozzle to your preferred spray pattern and intensity.
- Power on the pressure washer using the designated switch.
- Squeeze the wand trigger to initiate the high-pressure spray.
- Maintain a consistent distance and angle while moving the wand along the surface being cleaned.
- Release the wand trigger to stop the water flow.
- Turn off the pressure washer and disconnect it from the water source.
Remember, always consult the user manual for detailed instructions specific to your Ryobi Pressure Washer model.

Safety First: Important Precautions and Guidelines for Operating a High-Pressure Cleaning Appliance
When it comes to operating a high-pressure cleaning appliance like the Ryobi Pressure Washer, prioritizing safety is crucial. In this section, I will highlight some essential precautions and guidelines to follow to ensure a safe operating experience.
- Always wear appropriate protective gear, such as safety goggles, gloves, and closed-toe shoes, to safeguard yourself from potential hazards.
- Prior to operating the pressure washer, carefully read and understand the instruction manual provided by the manufacturer to familiarize yourself with its features, controls, and safety considerations.
- Before starting the machine, inspect it for any visible damage or loose parts. Address any issues before using the pressure washer to prevent accidents or further damage.
- Ensure the work area is clear of any obstacles, debris, or clutter that may interfere with your movement or the operation of the pressure washer.
- When using the pressure washer, maintain a firm and balanced stance to enhance stability and control. Avoid overreaching or leaning too far, as it may lead to falls or other accidents.
- Before connecting the pressure washer to a power source, verify that the outlet or extension cord is suitable for the machine’s electrical requirements. Avoid using damaged or worn-out cords.
- When handling or storing the pressure washer, always disconnect it from the power source and allow it to cool down. Unplug the machine before performing any maintenance or cleaning tasks.
- Avoid pointing the nozzle at people, animals, or fragile objects, as the intense water pressure can cause harm or damage. Always direct the stream away from yourself and others.
- Relieve the pressure in the system by releasing the trigger before attempting to make any adjustments or replacing accessories. This will prevent accidental spray or unexpected startup.
- Never leave the pressure washer unattended while it is running. Turn it off when taking breaks or when the task is complete.
By adhering to these precautions and guidelines, you can operate the Ryobi Pressure Washer confidently and with peace of mind, ensuring a safe and effective cleaning experience.
Step-by-Step Setup: Setting up and Assembling the Power Washer
When it comes to getting your power washer ready for use, there are a few important steps to follow. In this section, I will guide you through the process of setting up and assembling your power washer, ensuring that you have all the necessary components in place and ready for action.
Step 1: Unboxing and Inspection
Before you can begin setting up your power washer, it’s important to unbox it and inspect all the included components to ensure that nothing is missing or damaged. Take the time to carefully examine the power washer, hose, spray gun, nozzles, and any other accessories that may be included in the package.

Step 2: Connecting the Water Supply
With your power washer unboxed and inspected, it’s time to connect the water supply. Locate the water inlet on the power washer, usually marked with a symbol or label. Attach one end of the garden hose to the water inlet, making sure it is securely fastened. Connect the other end of the garden hose to a water source, such as a faucet or spigot, ensuring a tight seal.
Step 3: Attaching the Spray Gun and Nozzle
Once the water supply is connected, it’s time to attach the spray gun to the power washer. Find the connection point on the power washer, typically located near the water inlet. Align the grooves on the spray gun with the corresponding grooves on the power washer, then firmly push the spray gun into place until you hear a click or feel it lock into position.
Next, select the appropriate nozzle for your cleaning task. The nozzles are typically color-coded, with each color representing a different spray pattern or level of pressure. Choose the nozzle that best suits your needs and attach it to the spray gun, ensuring it is securely fastened.

Step 4: Extending the Hose
If needed, extend the length of the hose to reach your desired cleaning area. Carefully uncoil the hose, making sure it is not tangled or twisted. If using an extension hose, attach it to the existing hose using the provided connectors, ensuring a tight seal.
Step 5: Powering On the Washer
With everything properly connected and assembled, it’s time to power on the washer. Locate the power button or switch on the power washer and turn it on. You may also need to engage the trigger lock on the spray gun for continuous operation.
Remember to always refer to the manufacturer’s instructions for specific setup and assembly steps for your particular model of power washer. Following these guidelines will help ensure a safe and efficient setup process.

Selecting the Right Nozzle: A Guide to Choosing the Correct Nozzle for Different Cleaning Tasks
When it comes to using the Ryobi Pressure Washer effectively, one of the key aspects to consider is selecting the right nozzle for your specific cleaning task. The nozzle you choose will determine the spray pattern and intensity of the water, allowing you to achieve the desired results.
Understanding Nozzle Types
First and foremost, it is essential to understand the different nozzle types available and their respective functions. The Ryobi Pressure Washer typically offers a variety of nozzles, including a 0-degree nozzle, 15-degree nozzle, 25-degree nozzle, 40-degree nozzle, and a detergent nozzle.
The 0-degree nozzle, also known as the pinpoint nozzle, delivers a concentrated, powerful stream of water. It is ideal for tackling tough stains or removing stubborn dirt from concrete surfaces.
The 15-degree nozzle, often referred to as the yellow nozzle, provides a concentrated stream with slightly more coverage. This nozzle is great for cleaning large areas that require more pressure, such as driveways or patios.
The 25-degree nozzle, known as the green nozzle, provides a wider spray pattern, allowing for effective cleaning of surfaces like cars or fencing without causing damage.

For less intense cleaning tasks, the 40-degree nozzle, also known as the white nozzle, is the appropriate choice. It provides a wide spray pattern that is gentle on delicate surfaces, making it suitable for cleaning windows or wooden furniture.
The detergent nozzle, often identifiable by its black color, is designed specifically for applying detergent or soap in a controlled manner. This nozzle allows for efficient pre-treatment before powering through dirt and grime with the other nozzles.
Selecting the Right Nozzle for Your Cleaning Task
Now that you are familiar with the different nozzle types and their functions, it is crucial to choose the correct nozzle for your specific cleaning task. Consider the surface you will be cleaning and the level of dirt or grime present.
If you need to remove a tough stain or deeply ingrained dirt, the 0-degree or 15-degree nozzle would be the most effective choice. However, exercise caution to avoid damaging delicate surfaces with the concentrated stream.
For general cleaning of moderately dirty surfaces, the 25-degree nozzle is a versatile option that provides a balance between cleaning power and surface safety.
When dealing with fragile surfaces or applying detergents, opt for the 40-degree or detergent nozzle. These nozzles ensure a wider and gentler spray pattern, minimizing the risk of damage.
| Nozzle Type | Spray Pattern | Recommended Cleaning Tasks |
|---|---|---|
| 0-degree (Pinpoint Nozzle) | Concentrated and powerful | Tough stains, stubborn dirt on concrete surfaces |
| 15-degree (Yellow Nozzle) | Concentrated with more coverage | Large areas, driveways, patios |
| 25-degree (Green Nozzle) | Wider spray pattern | Cars, fencing, general cleaning tasks |
| 40-degree (White Nozzle) | Wide spray pattern | Windows, wooden furniture, delicate surfaces |
| Detergent Nozzle (Black Nozzle) | Controlled application of detergent | Pre-treatment of surfaces before cleaning |
By understanding the different nozzle types and choosing the appropriate one for your cleaning task, you can ensure optimal performance and achieve the desired results when using the Ryobi Pressure Washer.
Mastering the Controls: Getting Familiar with the Control Panel of the Powerful Ryobi Pressure Washer
As a proud owner of the advanced Ryobi Pressure Washer, understanding its control panel is essential to harness the power of this remarkable cleaning tool. In this section, I will guide you through the various controls and features of the pressure washer, allowing you to navigate with confidence and unlock its full potential.
1. Control Trigger: At the core of the Ryobi Pressure Washer’s control panel is the control trigger, a powerful button that initiates the water flow. With a simple press, you can activate the strong water spray, which is ideal for removing dirt, grime, and stains from various surfaces.
2. Pressure Adjustment Knob: Next, we have the pressure adjustment knob. This handy feature allows you to regulate the intensity of the water jet according to the task at hand. By turning the knob, you can dial-up or dial-down the pressure to suit different surfaces and cleaning requirements, ensuring efficient and effective cleaning every time.
3. Nozzle Selector: The nozzle selector, located near the control trigger, offers a variety of spray patterns to tackle different cleaning tasks. Whether you need a narrow, concentrated stream for tough stains or a wide, fan-like spray for large surface areas, the nozzle selector provides flexibility and control over the water flow.
4. Detergent Tank: To enhance cleaning performance, the Ryobi Pressure Washer features a built-in detergent tank. This convenient reservoir allows you to easily apply cleaning solutions to surfaces, providing an extra boost in removing stubborn dirt and grime. With the ability to switch between water and detergent effortlessly, the pressure washer ensures versatile cleaning options.
5. Power Switch: Located near the control trigger, the power switch is responsible for turning the pressure washer on and off. With a simple flick, you can activate and deactivate the machine, ensuring a safe and controlled operation.
By familiarizing yourself with the control panel of the Ryobi Pressure Washer, you can confidently operate this powerful tool and achieve exceptional cleaning results. The control trigger, pressure adjustment knob, nozzle selector, detergent tank, and power switch are all key components that enable you to customize the cleaning experience and maximize efficiency.
Preparing the Surface: Tips for Properly Prepping the Area Prior to Operating the High-Pressure Cleaning Appliance
Before powering on the high-pressure cleaning machine, it is crucial to adequately prepare the surface that is going to be cleaned. This is a necessary step to ensure optimal results and avoid any potential damage to the area or the equipment. In this section, I will share some valuable tips and recommendations on how to properly prep the surface, allowing you to make the most out of your Ryobi pressure washer experience.
1. Clear the Area of Obstacles
Prior to starting your pressure washing task, it is essential to remove any obstacles that might obstruct your cleaning process or result in potential accidents. Inspect the area and identify objects such as furniture, plant pots, or loose debris that could impede your movement or get damaged during the cleaning process. Safely relocate these items out of the way to ensure a smooth and hassle-free cleaning experience.
2. Protect Delicate Surfaces
Not all surfaces are created equal, and some might be more delicate than others. It is vital to identify any areas that require special care and protection before operating the pressure washer. Delicate surfaces may include painted walls, wooden decks, or fragile landscaping features. Cover these areas with plastic sheets, drop cloths, or other suitable protective materials to prevent any damage from the powerful water stream. Additionally, remember to cover nearby electrical outlets or appliances to avoid any water damage or electrical hazards.
Techniques for Effective Cleaning: Best Practices for Different Surfaces and Stubborn Stains
When it comes to cleaning various surfaces and tackling stubborn stains, it is essential to employ the right techniques to achieve optimal results. In this section, I will share my tried and tested methods that can be applied with the versatile Ryobi pressure washer, ensuring efficient and effective cleaning without damaging the surfaces or wasting time and effort.
Cleaning Different Surfaces
Every surface requires specific attention and approach to ensure a thorough cleaning. Here are some best practices for cleaning different surfaces using the Ryobi pressure washer:
| Surface | Best Practices |
|---|---|
| Concrete | Start with a low-pressure nozzle and gradually increase the pressure. Use a sweeping motion to cover the entire surface evenly. |
| Wood | Use a wide-angle nozzle to prevent etching and damage. Keep the pressure low and maintain a distance to avoid gouging the wood. |
| Brick | Use a rotary nozzle for a thorough clean. Keep the pressure moderate and apply a detergent for better results. |
| Siding | Use a detergent specifically designed for siding. Start from the bottom and work your way up, rinsing thoroughly to prevent streaks. |
Tackling Stubborn Stains
Stubborn stains can be a daunting challenge, but with the right techniques, they can be effectively removed. Here are my recommendations for tackling different stubborn stains:
| Stain Type | Best Practices |
|---|---|
| Graffiti | Pre-soak the graffiti with a graffiti remover solution. Use a high-pressure nozzle to remove the paint, working in small sections. |
| Oil or Grease | Apply a degreaser before pressure washing. Scrub the affected area gently with a brush, then use a high-pressure nozzle to rinse away the residue. |
| Mold and Mildew | Apply a mold and mildew cleaner to the affected area. Allow it to sit for a few minutes, then use a high-pressure nozzle to remove the stains. |
| Rust | Apply a rust remover solution to the rusted area. Scrub the surface with a brush and use a high-pressure nozzle to rinse off the residue. |
By following these techniques, you can make the most of your Ryobi pressure washer and achieve excellent cleaning results on various surfaces while effectively tackling stubborn stains. Remember to always read the manufacturer’s instructions and take necessary safety precautions when operating the pressure washer.
Maintaining Your Ryobi Pressure Washer: Essential Tips for Keeping Your Machine in Top Condition
As a proud owner of a Ryobi pressure washer, I understand the importance of proper maintenance to ensure its longevity and optimal performance. In this section, I will share some essential tips and tricks that I have learned over the years to help you keep your pressure washer in top condition.
Good maintenance starts with regular cleaning of the pressure washer. By removing dirt, grime, and debris accumulated from previous use, you can prevent potential clogs and ensure the machine’s smooth operation. It is recommended to clean the exterior with a damp cloth and mild detergent while avoiding moisture exposure to electrical components.
In addition to external cleaning, it is crucial to maintain the internal components of your pressure washer. Regularly inspect and clean the nozzle, spray gun, and other attachments to remove any buildup. This will not only improve the performance of your machine but also extend its lifespan.
An often overlooked aspect of pressure washer maintenance is checking and changing the oil. Just like any other engine, the oil in your pressure washer needs to be regularly inspected and replaced. Follow the manufacturer’s guidelines on the oil’s viscosity and frequency of oil changes to ensure optimal lubrication and performance.
Another essential maintenance tip is to check and clean the air filter regularly. A clogged air filter can reduce the efficiency of your pressure washer and increase fuel consumption. Cleaning or replacing the filter as needed will enhance airflow and prevent potential engine damage.
Lastly, proper storage is essential for maintaining your Ryobi pressure washer. After each use, make sure to clear the water lines by running clean water through the machine. Store the pressure washer in a cool, dry place to prevent rusting and damage from extreme temperatures.
By following these essential maintenance tips, you can keep your Ryobi pressure washer in top condition and ensure its reliable performance for years to come. Remember, regular cleaning, inspection of internal components, oil changes, air filter maintenance, and proper storage are the key factors in extending the life of your machine and maximizing its efficiency.
Troubleshooting Common Issues: Solutions to the Most Frequently Encountered Problems
When using a high-pressure cleaning tool like the Ryobi pressure washer, it’s not uncommon to encounter certain issues that may disrupt your cleaning process. In this section, I will provide you with solutions to the most commonly faced problems, allowing you to have a hassle-free cleaning experience.
1. Loss of Pressure
Solution: Check the nozzle and inlet filter.
If you notice a sudden loss in pressure while using your pressure washer, the first step is to check the nozzle for any clogs or debris. Clean the nozzle using a small brush or a pin to dislodge any obstructions. Additionally, make sure to inspect the inlet filter and clean it if necessary. A clogged filter can restrict water flow and cause a decrease in pressure.
2. Leaking Water
Solution: Inspect and tighten all connections.
Leaking water can be frustrating and can interfere with the effectiveness of your pressure washer. Check all the connections, such as the garden hose connection, spray wand, and nozzle, for any loose fittings or damaged seals. Tighten the connections properly or replace any damaged parts to prevent water leakage.
Remember, it is essential to always follow the manufacturer’s guidelines and safety instructions when troubleshooting and fixing any issues with your Ryobi pressure washer. By addressing these common problems, you can ensure that your cleaning tasks will be completed efficiently, leaving your surfaces spotless and pristine.
Advanced Features and Accessories: Exploring Additional Functions and Upgrades for Enhanced Performance
As a proud owner of the powerful Ryobi pressure washer, it’s essential to understand the advanced features and accessories that can elevate your cleaning experience. In this section, I will share my insights on the various functionalities and upgrades available for your pressure washer, ensuring you maximize its potential and achieve outstanding results.
1. Variable Pressure Settings
One of the standout features of the Ryobi pressure washer is its ability to provide variable pressure settings. By adjusting the pressure level according to the task at hand, you can achieve tailored cleaning results. Whether you’re tackling delicate surfaces or stubborn stains, the ability to fine-tune the pressure ensures optimal performance while minimizing the risk of damage.
2. Interchangeable Nozzles
To further enhance the versatility of your Ryobi pressure washer, it is equipped with a range of interchangeable nozzles. Each nozzle is designed for different cleaning applications, such as a turbo nozzle for intense cleaning power or a soap nozzle for applying detergent. By using the appropriate nozzle, you can tackle various tasks with ease, from cleaning your driveway to washing your car.
Furthermore, these interchangeable nozzles are color-coded for quick identification, making it effortless to switch between them during your cleaning session.
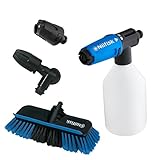
3. Accessory Compatibility
Another impressive aspect of the Ryobi pressure washer is its extensive compatibility with a wide range of accessories. From surface cleaners for efficient patio cleaning to extension wands for reaching high areas, there are numerous add-ons available to customize your pressure washer according to your specific needs. These accessories can significantly expand the capabilities of your Ryobi pressure washer, allowing you to tackle a variety of cleaning tasks effectively.
To help you understand the compatibility of accessories, refer to the table below:
| Accessory | Compatible Models |
|---|---|
| Surface Cleaner | All Ryobi pressure washers |
| Extension Wand | All Ryobi pressure washers |
| Gutter Cleaner | Ryobi RY14122, RY141900, RY141612, RY80588 |
| Foam Cannon | Ryobi RY14122, RY141900, RY141700 |
By exploring these advanced features and utilizing compatible accessories, you can take your cleaning routine to the next level with the Ryobi pressure washer, achieving exceptional results with ease. Remember to always refer to the user manual for detailed instructions on utilizing the advanced functionalities and accessories specific to your model.