
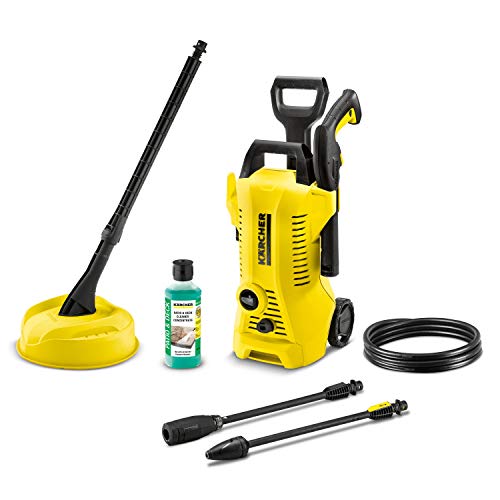
How To Use Soap With Honda Pressure Washer
Imagine stepping outside and turning heads in awe as you drive down the street in your sparkling, pristine Honda. The secret to maintaining that showroom shine is closer than you think. Today, I’m excited to share with you my personal journey of discovering the perfect solution for effortlessly cleaning my vehicle, by using an exceptional cleaning tool.
Allow me to introduce you to an indispensable tool that will revolutionize your cleaning routine – a high-quality pressure washer. With its powerful water force and cutting-edge technology, a pressure washer offers a versatile solution for tackling even the toughest grime and dirt on your beloved Honda. Whether it’s stubborn mud, road salt, or general dirt and filth, this cleaning companion will make quick work of it all.
Now, you might be wondering, “How does this pressure washer work its magic?” Well, it’s all about the clever combination of water and specially formulated cleaning agents. By pairing your pressure washer with a gentle and effective soap, you can amplify its cleaning power and effortlessly remove dirt, grease, and stains. The result? A glistening, showroom-worthy vehicle that turns heads wherever you go.
But here’s the secret ingredient – your soap selection matters! Opting for a high-quality, trusted soap tailored specifically for your Honda ensures optimal cleaning performance without compromising the integrity of your vehicle’s paint finish. These soaps are designed to be gentle yet effective, providing a luxurious foam that clings to the surface, breaking down dirt particles for an effortless and thorough cleaning experience.
Understanding the Mechanism Behind the Honda Pressure Washer and its Soap Dispenser
As an enthusiast and user of the Honda pressure washer, I would like to share my insights on the fascinating workings of this powerful cleaning tool and its soap dispenser. This knowledge will provide you with a deeper understanding of how the machine efficiently combines the use of water and detergent to effectively clean various surfaces.
The Functionality of the Honda Pressure Washer
First and foremost, let’s explore the core features of the Honda pressure washer. With its robust engine and high-pressure pump, this machine generates a forceful spray of water that can remove even the toughest dirt and grime. The pressure created by the washer is adjustable, allowing you to tailor it to specific cleaning tasks.
Furthermore, the Honda pressure washer is equipped with a soap dispenser. This feature is designed to enhance the cleaning process by providing an effective way to apply soap or detergent to the surface being cleaned. By utilizing the soap dispenser, you can easily and evenly distribute the cleaning solution onto the targeted area, maximizing its cleaning power.
Optimizing the Use of the Soap Dispenser
Now, let’s delve into how the soap dispenser of the Honda pressure washer can be optimized to achieve the best cleaning results.
Firstly, it is crucial to select the appropriate detergent for the specific cleaning task at hand. Different surfaces and types of dirt may require different cleaning solutions. Therefore, it is essential to choose a soap or detergent that is compatible with the surface and effectively tackles the dirt or grime you are dealing with.
Once you have the suitable detergent, using the soap dispenser is fairly simple. The dispenser is typically located near the spray wand. You can fill it with the desired amount of detergent, ensuring that it is properly mixed with water according to the manufacturer’s instructions.

When it comes to using the soap dispenser, it is important to understand that the cleaning solution should be applied before using the high-pressure water spray. This allows the detergent to penetrate and loosen the dirt, making it easier to remove. After applying the soap, it is recommended to let it sit for a few minutes to allow the cleaning solution to work its magic.
In conclusion, the soap dispenser of the Honda pressure washer is a valuable tool that significantly enhances the cleaning process. Understanding the functionality of the pressure washer and optimizing the use of the soap dispenser will undoubtedly result in a thorough and efficient cleaning experience.
Understanding the Functionality and Advantages of the Soap Dispenser
When it comes to effectively cleaning various surfaces, using soap in conjunction with a Honda pressure washer can significantly enhance the cleaning process. The soap dispenser, a vital component of the pressure washer, provides a convenient and efficient way to apply soap onto surfaces. In this section, I will discuss how the soap dispenser works and the benefits it brings to the cleaning process.
1. Dispenser Mechanism
The soap dispenser is designed to deliver soap in a precise and controlled manner. It operates by drawing soap from a liquid soap container, which is typically attached to the pressure washer unit. The soap is then mixed with water in the correct ratio before being dispensed through the pressure washer’s nozzle. This mechanism ensures an even distribution of soap onto the surface, maximizing its cleaning effectiveness.
2. Enhanced Cleaning Power
The soap dispenser plays a crucial role in improving the cleaning power of a Honda pressure washer. By adding soap to the cleaning solution, the pressure washer can effectively break down and remove stubborn dirt, grime, and stains from various surfaces. Soap acts as a detergent, lifting and separating dirt particles from the surface, allowing the pressure washer’s high-pressure water flow to rinse them away effortlessly. This enhanced cleaning power results in a more thorough and efficient cleaning process.

3. Versatility in Cleaning
The inclusion of a soap dispenser in a Honda pressure washer provides users with the flexibility to tackle a wide range of cleaning tasks. Different surfaces require different cleaning solutions, and with the soap dispenser, you can easily switch between using soap and plain water. This versatility allows for effective cleaning on various surfaces, such as vehicles, outdoor furniture, fences, decks, and more. Whether you need to remove grease from a driveway or clean mold from a patio, the soap dispenser is an invaluable tool in achieving optimal cleaning results.
Overall, understanding how the soap dispenser works and recognizing its benefits can greatly enhance your cleaning experience with a Honda pressure washer. The dispenser’s precise mechanism, improved cleaning power, and versatility make it an essential component for any cleaning task. So, make sure to utilize the soap dispenser to achieve maximum cleaning efficiency and effectiveness on a wide range of surfaces.
Overview of the Key Features and Functions of the Honda Pressure Washer
As an avid user of the Honda Pressure Washer, I wanted to share an overview of its remarkable features and functions. This powerful machine offers a multitude of benefits, making it an indispensable tool for various cleaning tasks.
1. Versatility
The Honda Pressure Washer is a highly versatile piece of equipment that can handle a wide range of cleaning projects. Whether you need to remove stubborn dirt and grime from your driveway, clean your car, or wash the exterior of your house, this pressure washer has got you covered.
2. Reliable Engine Performance
One of the standout features of the Honda Pressure Washer is its reliable engine performance. Powered by a high-quality Honda engine, this pressure washer provides consistent power, ensuring efficient cleaning operations. The engine’s reliability and durability contribute to the overall longevity of the machine.

3. Adjustable Pressure Settings
Another fantastic feature of the Honda Pressure Washer is its adjustable pressure settings. This allows you to customize the pressure output based on the specific cleaning task at hand. Whether you need a gentle spray for delicate surfaces or a powerful jet for tough stains, this pressure washer offers flexibility to meet your needs.
4. Easy Maneuverability
With its well-designed construction and sturdy wheels, the Honda Pressure Washer offers excellent maneuverability. You can effortlessly move it around your outdoor space, making it convenient to reach different areas that require cleaning. The ergonomic handle further enhances ease of use and provides comfortable grip during operation.
5. Quick and Convenient Setup
Setting up the Honda Pressure Washer is a breeze, thanks to its user-friendly design. It comes with clear instructions and intuitive controls, ensuring a hassle-free setup process. Whether you are a seasoned user or a beginner, you will appreciate the simplicity of getting the machine up and running in no time.
| Features | Benefits |
|---|---|
| Versatility | Can handle various cleaning tasks |
| Reliable Engine Performance | Consistent power and durability |
| Adjustable Pressure Settings | Customizable pressure output for different surfaces |
| Easy Maneuverability | Effortless movement and comfortable grip |
| Quick and Convenient Setup | Hassle-free and user-friendly |
Choosing the Right Soap for Your Honda Pressure Washer
When it comes to using a pressure washer, finding the right soap is crucial for achieving optimal cleaning results without damaging the surfaces you are working on. In this section, I will share some insights on how to choose the perfect soap for your Honda pressure washer.
Consider the Surface
Before selecting a soap, it is important to consider the type of surface you will be cleaning. Different surfaces may require specific cleaning solutions to tackle the dirt and grime effectively. For example, a gentle soap may be suitable for delicate surfaces like car paint, while a heavier-duty cleaner might be needed for removing stubborn stains on concrete or brick.

Check the Manufacturer’s Recommendations
To ensure the longevity and optimal performance of your Honda pressure washer, it is advisable to consult the manufacturer’s recommendations regarding the cleaning products to be used. They may provide specific guidelines on the type of soap that is compatible with the pressure washer, helping you avoid any potential damage or warranty issues.
Note: Always refer to the user manual or contact the manufacturer directly for accurate information on approved cleaning solutions.
Additionally, it is essential to follow the manufacturer’s instructions regarding the dilution ratio of the soap. Using too little soap may result in ineffective cleaning, while using too much could lead to excessive foam production and potential damage to the pressure washer.
Remember: The right soap can make all the difference in achieving optimal cleaning results while preserving the longevity of your Honda pressure washer. By considering the surface you are cleaning and following the manufacturer’s guidelines, you can select the perfect soap to enhance your cleaning performance.
Different types of cleaning solutions ideal for effective pressure washing
When it comes to achieving optimal results with a pressure washer, using the right cleaning solutions is crucial. By using suitable soap, you can enhance the effectiveness of your pressure washing and achieve cleaner and more sparkling surfaces. In this section, I will discuss various types of cleaning solutions that are specifically designed for pressure washing tasks.

One category of cleaning solution that works well with pressure washers is the detergent-based soap. These soaps are formulated with powerful ingredients that help break down stubborn dirt, grime, and grease, providing a deep and thorough clean. They are particularly effective for tackling tough stains on a wide range of surfaces, including concrete, brick, and vinyl siding.
Another type of soap suitable for pressure washing is eco-friendly soap. These environmentally-friendly options are made from biodegradable ingredients, ensuring that they do not harm the environment or pose any health risks to you or your family. Eco-friendly soaps are safe to use on various surfaces and are an ideal choice for those who prioritize sustainability.
For specific cleaning tasks, such as removing mildew or mold, using an anti-bacterial soap can be highly effective. These soaps contain ingredients that kill bacteria, fungi, and other harmful microorganisms, making them ideal for sanitizing outdoor surfaces like decks, fences, and patios.
In addition to these specialized cleaning solutions, there are also multi-purpose soaps available in the market. These soaps are designed to be versatile and can be used for a range of pressure washing tasks. They offer a good balance between effectiveness and cost-efficiency, making them a popular choice for regular cleaning and maintenance.
Overall, choosing the right soap for pressure washing is essential for achieving optimal results. Consider the type of surface you are cleaning and the specific cleaning requirements to select the most suitable soap for the job. Whether it’s a detergent-based soap, eco-friendly option, antibacterial formula, or a multi-purpose cleaner, using the right soap will ensure that your pressure washing efforts are successful.

Factors to Consider When Choosing the Right Cleaning Solution for Your Honda Power Washer
When it comes to maintaining the cleanliness of your Honda power washer, selecting the right cleaning solution is crucial. The cleaning solution you use can affect the overall performance and longevity of your Honda power washer, as well as the cleanliness and safety of the surfaces you clean. Therefore, it is important to consider several factors when choosing the appropriate soap for your Honda power washer.
1. Surface Compatibility
One of the primary factors to consider is the compatibility of the cleaning solution with the surfaces you intend to clean. Different cleaning solutions are formulated to tackle specific types of dirt and stains on various surfaces, such as concrete, wood, or vehicles. Therefore, it is vital to select a soap that is suitable for the surfaces you will be cleaning with your Honda power washer.
2. Environmental Impact
As an environmentally conscious individual, it is essential to consider the environmental impact of the cleaning solution you choose. Look for soaps that are biodegradable and eco-friendly, as they will minimize pollution and harm to the ecosystem. Additionally, eco-friendly soaps are often safer to use around plants, pets, and children, making them a better choice for residential cleaning projects.
By considering these factors, you can ensure that the cleaning solution you select for your Honda power washer is not only effective in removing dirt and stains but also compatible with the surfaces you will be cleaning and environmentally friendly.
Preparing Your Honda Pressure Washer for Soap Application
In this section, I will guide you through the necessary steps to prepare your Honda pressure washer for the application of soap. By following these steps, you will be able to ensure a successful and effective cleaning process without causing any damage to your pressure washer or the surface you are cleaning.

Gather the Proper Equipment
Before you can begin applying soap with your Honda pressure washer, it is important to gather all the necessary equipment. This includes a soap applicator nozzle, a suitable soap detergent, a bucket or container for mixing the soap solution, and any additional accessories or attachments specific to your pressure washer model.
Check the Water Supply
Next, you need to ensure that your Honda pressure washer is properly connected to a water supply. Check that the water source is turned on and that there are no kinks or blockages in the hose or connections. Inspect the inlet screen for any debris or clogs that may affect the water flow.
Inspect and Clean the Nozzles
Before using the soap applicator nozzle, it is important to inspect and clean all the nozzles on your pressure washer. Remove any dirt, debris, or built-up residue that may interfere with the proper functioning of the nozzles. This will help ensure a consistent and even distribution of soap during the cleaning process.
Mix the Soap Solution
Now it’s time to mix the soap solution. Follow the instructions provided by the manufacturer of the soap detergent to ensure the correct dilution ratio. Use a bucket or container to mix the soap and water, making sure to agitate the solution gently to create a uniform mixture.
Attach and Adjust the Soap Applicator Nozzle
Once the soap solution is ready, attach the soap applicator nozzle to your Honda pressure washer. Make sure it is securely fastened and aligned with the nozzle outlet. Adjust the nozzle setting to the desired soap application rate, usually indicated by symbols such as “low,” “medium,” or “high.”
Test and Adjust
Before starting the actual cleaning process, it is advisable to test the soap application on a small inconspicuous area. This will allow you to evaluate the effectiveness of the soap solution and make any necessary adjustments to the soap application rate or technique.
Begin Soap Application
With the preparation complete, you can now start applying soap with your Honda pressure washer. Move the nozzle in a steady and controlled manner, keeping a consistent distance from the surface. Apply the soap evenly, covering the entire area you wish to clean.
Remember to follow the instructions provided by your Honda pressure washer and soap detergent manufacturers for any specific guidelines or precautions. By properly preparing your pressure washer for soap application, you can achieve superior cleaning results with ease and confidence.
Steps for Properly Setting Up and Priming Your Pressure Washer
In this section, I will guide you through the necessary steps to ensure a successful setup and priming process for your pressure washer. It is important to follow these steps carefully in order to achieve optimal performance and avoid any potential damage or malfunctions.
Before beginning the setup process, gather all the necessary materials and equipment. This may include a water source, hoses, nozzles, and any additional accessories required for your specific pressure washer model.
To start, locate a suitable water source and ensure that it is capable of providing a constant supply of clean water. Connect the inlet hose to the water source and check for any leaks or damage. It is important to use a hose with the appropriate length and diameter for your pressure washer model.
Next, attach the other end of the inlet hose to the pressure washer. Make sure the connection is secure and tight to prevent any leaks during operation. Check and clean the inlet filter if necessary, as a clogged filter can affect the pressure washer’s performance.
Once the water inlet is properly connected, it is time to prime the pressure washer. This involves purging air from the system and ensuring a steady flow of water. Refer to your pressure washer’s manual for specific instructions on how to prime the machine, as the steps may vary depending on the model.
| Steps for Priming the Pressure Washer |
|---|
| 1. Turn off the pressure washer and make sure it is securely placed on a stable surface. |
| 2. Connect the high-pressure hose to the pressure washer and the spray gun. |
| 3. Turn on the water source and slowly open the water supply valve. Allow water to flow through the system for a few seconds to remove any air. |
| 4. Once water is flowing smoothly, turn on the pressure washer. |
| 5. Squeeze the trigger on the spray gun to release any remaining air from the system. You should see a steady stream of water emerging from the nozzle. |
| 6. Continue releasing the trigger until you are confident that all air has been expelled and a consistent flow of water is achieved. |
By carefully following these steps, you will ensure that your pressure washer is set up properly and primed for efficient operation. This will help you achieve the desired cleaning results while maintaining the longevity and performance of your Honda pressure washer.
Ensuring proper connection and adjustment of the soap nozzle
When it comes to effectively cleaning your surfaces, using soap with your Honda pressure washer can make a significant difference. However, it is crucial to ensure that the soap nozzle is connected and adjusted properly for optimal performance. In this section, I will guide you through the steps to ensure the proper connection and adjustment of the soap nozzle.
1. Check the nozzle compatibility
Before you start, it is important to make sure that the soap nozzle you have is compatible with your Honda pressure washer. Refer to the user manual or manufacturer’s instructions to identify the appropriate soap nozzle for your specific pressure washer model. Using an incompatible nozzle can cause damage and affect the overall cleaning process.
2. Connect the soap nozzle
Once you have identified the correct soap nozzle, it’s time to connect it to your pressure washer. First, make sure the pressure washer is turned off and the spray wand is free from any pressure. Then, locate the nozzle attachment area, which is typically near the end of the spray wand. Gently insert the soap nozzle into the attachment area until it clicks or secures in place. This ensures a tight connection and prevents any leaks during the cleaning process.
3. Adjust the soap flow
Proper adjustment of the soap flow is crucial to achieve the desired cleaning results. Most pressure washers have an adjustable dial or knob located on the detergent tank or near the spray wand. Start by setting the soap flow at a low level and gradually increase it as needed. Take note of the manufacturer’s recommendations regarding the soap-to-water ratio to avoid using excessive soap or diluting it too much. Adjusting the soap flow allows you to effectively apply the soap onto the surfaces without wasting any product.
By following these steps to ensure the soap nozzle is properly connected and adjusted, you can have confidence in getting the most out of your Honda pressure washer when using soap. A secure connection and appropriate soap flow will help you achieve optimal cleaning results and maintain the longevity of your pressure washer.
Transforming Your Cleaning Experience: Enhancing Power and Efficiency
As a proud owner of a Honda pressure washer, I constantly seek ways to optimize its performance and achieve superior cleaning results. One remarkable feature that sets Honda pressure washers apart is their ability to effortlessly apply soap while washing various surfaces. In this section, I will share my personal tips and insights on how to effectively and efficiently apply soap with your Honda pressure washer, elevating your cleaning experience to a whole new level.
Step 1: Choosing the Right Soap
Before we dive into the details of applying soap, let’s first consider the importance of selecting the appropriate soap solution for different cleaning tasks. Whether you need to remove stubborn dirt, eliminate oil stains, or rejuvenate an outdoor surface, it is crucial to choose a soap that is tailored to your specific cleaning needs. Be sure to check the detergent recommendations provided by Honda for optimal performance.
Step 2: Preparing the Soap Solution
Now that we have the right soap, it’s time to prepare the soap solution for application. Follow these simple steps to ensure a well-mixed and ready-to-use soap solution:
- Dilution: Mix the recommended amount of soap concentrate with water in a suitable container.
- Stirring: Use a stir stick or spoon to thoroughly blend the soap concentrate with water. This will ensure an even distribution of soap particles.
- Homogeneity: Continue stirring until the soap solution achieves a uniform consistency, without any visible clumps or separation.
Step 3: Connecting the Soap Nozzle
With our soap solution prepared, it’s time to connect the soap nozzle to the Honda pressure washer. Follow these steps to securely attach the soap nozzle to the spray gun:
- Detach: Remove the current nozzle from the spray gun by twisting it counterclockwise.
- Attach: Take the soap nozzle and align the threads with those on the spray gun. Gently push the nozzle onto the spray gun and twist it clockwise until it is securely fastened.
- Test: Turn on the pressure washer and test the soap nozzle by squeezing the trigger. Ensure that the soap solution is being dispensed properly, without any leaks or interruptions.
Step 4: Applying the Soap Solution
Now that everything is set up, it’s time to start applying the soap solution onto the desired surface. Follow these guidelines for effective soap application:
- Distance: Ensure that you maintain a suitable distance between the surface and the spray nozzle, typically around 2 to 3 feet. This will allow for optimal coverage and prevent potential damage.
- Motion: Move the spray nozzle in a back-and-forth motion or in a sweeping pattern to evenly distribute the soap solution across the surface. This will maximize its cleaning power and enhance the overall efficiency.
- Dwell Time: Let the soap solution dwell on the surface for a few minutes, allowing it to break down dirt, grime, and stains effectively. However, avoid letting the soap solution dry on the surface, as it may cause streaking.
By following these steps and utilizing the soap application feature of your Honda pressure washer, you can achieve remarkable cleaning results with minimal effort. Experience the power, versatility, and convenience that come with incorporating soap into your pressure washing routine, as your Honda pressure washer seamlessly transforms ordinary cleaning tasks into extraordinary achievements!


