
How To Use Cleaning Solution With Pressure Washer
Imagine a world where mountains of dirt and grime are effortlessly swept away, revealing a pristine and sparkling surface. Picture yourself basking in the satisfaction of a job well done, as your surroundings come alive with newfound brilliance. This is the power of utilizing the optimal cleansing solution in tandem with a state-of-the-art pressure washing machine.
As a passionate advocate for cleanliness and efficiency, I have dedicated countless hours to unraveling the secrets of harnessing the true potential of pressure washers. Through my tireless pursuit of knowledge and experimentation, I have discovered a myriad of ways to elevate your cleaning routine to unimaginable heights.
Prepare to be transported to a realm where dirt and grime tremble in the face of cleaning superiority. With the aid of a carefully selected cleaning solution, you hold the key to effortlessly eradicating stubborn stains, banishing mold and mildew, and rejuvenating even the most weathered surfaces. This guide will equip you with the essential tips and techniques to maximize the effectiveness of your pressure washer, elevating your cleaning regime to a level of unparalleled excellence.
Join me on this exhilarating journey as we delve into the art of using a cleaning solution with a pressure washer. Together, we will unlock the transformative power that lies within these seemingly everyday tools, empowering you to conquer any cleaning challenge that comes your way.
Mixing the Perfect Cleaning Solution for Optimal Pressure Washer Performance
When it comes to maximizing the effectiveness of your pressure washer, the proper mixture of cleaning solution plays a critical role. As an experienced user of pressure washers, I have learned the importance of finding the right balance and ingredients for the cleaning solution. In this section, I will share my insights on how to mix a cleaning solution that will enhance the performance of your pressure washer and ensure outstanding results.
Understanding the Key Elements
To create the perfect cleaning solution for your pressure washer, it is essential to grasp the key elements involved in the process. Firstly, it is crucial to select the appropriate cleaning agents that are safe to use with your machine. These agents can vary depending on the type of surface you intend to clean and the specific stains or dirt you need to remove. Secondly, understanding the proper dilution ratios is vital to achieve the desired level of cleaning power without damaging the surfaces.
Selecting Suitable Cleaning Agents
Determining the right cleaning agents for your pressure washer can be overwhelming due to the wide range of options available. However, it is important to choose agents that are specifically designed for pressure washers to guarantee optimal compatibility and performance. Some common cleaning agents include degreasers, detergents, and specialized solutions for removing mold, mildew, or stubborn stains. Researching and following the manufacturer’s recommendations will help you make an informed decision.
Determining Dilution Ratios

Once you have selected the appropriate cleaning agent, it is crucial to determine the correct dilution ratio. Dilution ratios are specified by the cleaning agent manufacturer and are typically expressed as a percentage (e.g., 1:10, 5%, or 1 part cleaner to 10 parts water). Following these ratios is vital to avoid damaging the surfaces you are cleaning while ensuring the cleaning solution retains its effectiveness. Using too little cleaning agent may result in a weak solution, while using too much could cause unnecessary residue or potential harm to the surface.
Mixing the Cleaning Solution
To mix the cleaning solution, start by preparing a bucket or container of clean water. Adding the water before the cleaning agent helps ensure a proper dispersal of the chemicals. Carefully measure the cleaning agent according to the recommended dilution ratio and add it to the water. Use a stir stick or gentle swirling motion to mix the solution thoroughly. Avoid creating excessive foam or bubbles, as this can interfere with the pressure washer’s performance. Once well mixed, the cleaning solution is ready to be used with your pressure washer.
Remember, proper mixing of the cleaning solution is a crucial step in optimizing the performance of your pressure washer. By understanding the key elements, selecting suitable cleaning agents, determining accurate dilution ratios, and mixing the solution correctly, you can confidently tackle any cleaning project with outstanding results!
Choosing the Right Cleaning Solution
When it comes to cleaning surfaces effectively and efficiently, selecting the appropriate cleaning solution is crucial. The right choice not only ensures optimal cleaning results, but also helps to protect the surface you are working on. Here, I will share my insights on how to choose the right cleaning solution for your pressure washer without compromising its performance and longevity.

Cleaning Needs Assessment
Before diving into the world of cleaning solutions, it is important to assess your cleaning needs. Understanding the nature of the surface you are cleaning and the specific dirt or grime you are dealing with will guide you towards the suitable cleaning solution. Is it grease and oil stains that need to be tackled? Or perhaps mold and mildew are your main concerns? Identifying your cleaning requirements is the first step in selecting the right cleaning solution.
Consider the Surface Compatibility
Not all cleaning solutions are created equal, and different surfaces have different tolerances. It is crucial to consider the compatibility of the cleaning solution with the surface you will be working on to avoid any damage or discoloration. Some surfaces may require mild and gentle cleaning solutions, while others may benefit from stronger formulas. Always check the manufacturer’s recommendations for your surface and choose a cleaning solution that is safe and suitable.
Tip: To ensure compatibility, it is recommended to test the cleaning solution on a small inconspicuous area of the surface before proceeding with the full cleaning process.
Environmental Impact
As responsible individuals, it is important to consider the environmental impact of the cleaning solution we use. Some cleaning solutions contain harsh chemicals that can be harmful to the environment and aquatic life. Choosing eco-friendly and biodegradable cleaning solutions not only minimizes the ecological footprint but also ensures a safer working environment. Look for certifications and labels indicating that the cleaning solution is environmentally friendly.
Note: While eco-friendly cleaning solutions are generally safer, always follow the recommended safety guidelines and precautions mentioned on the product’s packaging.
In conclusion, selecting the right cleaning solution for your pressure washer involves understanding your cleaning needs, considering surface compatibility, and being mindful of the environmental impact. By following these guidelines, you can achieve effective and safe cleaning results while prolonging the lifespan of your pressure washer.
Step-by-Step Guide: Applying Cleanser with High-Pressure Appliance
In this section, I will guide you through the process of effectively applying a specialized cleanser using a high-pressure cleaning device. With my personal experience and expertise, I will provide you with step-by-step instructions on how to achieve optimal results for your cleaning tasks.
To start, prepare your cleaning area by removing any loose debris or objects that may obstruct the cleaning process. This can be done by sweeping or using a broom, ensuring a clear and safe working environment.
Next, fill the cleansing solution reservoir of your high-pressure appliance with the appropriate cleaner. It is essential to select a cleanser that is specifically designed for use with high-pressure washers to ensure compatibility and avoid any potential damage to the equipment.
Once the cleanser is added, connect the pressure washer to a power source and turn it on. Familiarize yourself with the controls and adjust the pressure settings according to the surface you will be cleaning. It is crucial to follow the manufacturer’s instructions regarding pressure settings for optimal cleaning and to prevent any damages.

Now, hold the pressure washer wand firmly in your hand, ensuring a comfortable grip. Using a sweeping motion, start from the top and work your way down the surface you are cleaning. This method helps to evenly distribute the cleaning solution and ensures thorough coverage.
As you move the wand, maintain a consistent distance from the surface. This distance can vary depending on the manufacturer’s recommendations, the type of surface being cleaned, and the pressure setting being used. Adjust accordingly to achieve the desired results.
If you encounter stubborn stains or heavily soiled areas, you may need to switch to a narrower spray nozzle attachment. This attachment concentrates the cleaning solution, providing enhanced cleaning power for more challenging areas. Remember to follow the manufacturer’s instructions when changing attachments.
After applying the cleanser to the entire surface, allow it to dwell for the recommended time specified on the cleanser packaging. This dwell time gives the cleanser the opportunity to break down dirt, grime, and other contaminants, enhancing the effectiveness of the cleaning process.
Finally, rinse the surface thoroughly using the pressure washer to remove the loosened dirt and the cleaning solution. Ensure that all areas are adequately rinsed to prevent any residue or streaks from remaining. Take care when rinsing near delicate surfaces or areas that require special attention.

| Key Points: |
|---|
| – Prepare the area by removing loose debris. |
| – Fill the pressure washer’s cleansing solution reservoir. |
| – Familiarize yourself with the equipment’s controls and adjust pressure settings. |
| – Hold the pressure washer wand firmly and use a sweeping motion from top to bottom. |
| – Maintain a consistent distance from the surface and adjust as needed. |
| – Switch to a narrow spray nozzle for stubborn stains or heavily soiled areas. |
| – Allow the cleanser to dwell for the recommended time. |
| – Thoroughly rinse the surface using the pressure washer. |
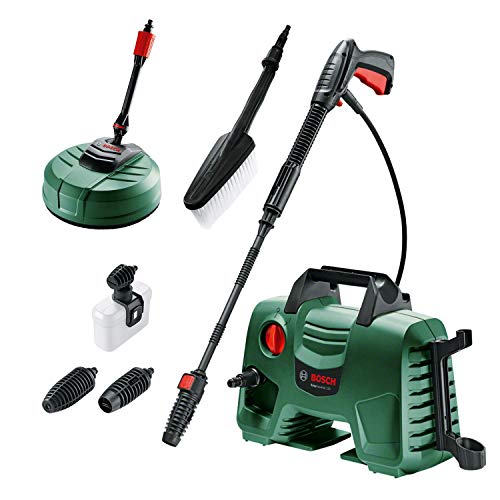
Getting Ready for the Job: Preparing Your Equipment
When it comes to tackling any cleaning task, it’s crucial to have the right tools and equipment. Prepping the pressure washer before use is just as important as selecting the appropriate cleaning solution. In this section, I will share my personal tips and steps to ensure your pressure washer is ready to perform at its best and achieve optimal cleaning results.
1. Check and Assemble the Components
Before starting any cleaning job, it’s essential to inspect your pressure washer for any damage or missing parts. Check the hoses, connectors, trigger gun, and nozzles to ensure they are in good condition. If you notice any cracks, leaks, or signs of wear, it’s best to replace them before proceeding. Assemble the components according to the manufacturer’s instructions, making sure everything is securely connected.
2. Connect the Water Source
Now that your pressure washer is checked and assembled, it’s time to connect it to a water source. Locate a suitable outdoor faucet or water supply and attach the provided garden hose to the pressure washer’s water inlet. Make sure the connection is tight and free from any leaks. Turn on the water supply gently to avoid sudden pressure surges and let the water flow through the system for a few seconds to remove any air pockets.
3. Prime the Pressure Washer
Priming the pressure washer is essential for ensuring proper water flow and preventing any damage to the equipment. Follow the manufacturer’s instructions to prime your specific model. This typically involves turning on the pressure washer, allowing water to circulate through the system, and purging any trapped air. Depending on your pressure washer, this step might involve squeezing the trigger gun or engaging a specific priming mechanism.
4. Take Safety Precautions
Safety should always be a top priority when using any power equipment. Before starting the pressure washer, ensure you are wearing appropriate protective gear such as safety glasses, gloves, and closed-toe shoes. Clear the area of any obstacles or tripping hazards and keep bystanders at a safe distance. Familiarize yourself with the pressure washer’s controls and safety features, including the emergency stop button and pressure adjustment settings.

- Inspect the pressure washer for any damage or missing parts
- Assemble the components according to the manufacturer’s instructions
- Connect the pressure washer to a suitable water source
- Prime the pressure washer to ensure proper water flow
- Take necessary safety precautions before starting the equipment
By following these preparatory steps, you’ll be ready to tackle any cleaning task with your pressure washer and achieve excellent results. Having a well-prepped pressure washer not only ensures efficient cleaning but also prolongs the life of your equipment. Before moving forward, make sure you are familiar with the specific cleaning solution you will be using and how to effectively apply it with your pressure washer.
Preparing the Solution Mixture
When it comes to effectively cleaning surfaces using a pressure washer, one crucial step is preparing the solution mixture. This step involves combining different ingredients to create a powerful cleaning solution that will effectively remove dirt, grime, and stains. In this section, I will guide you through the process of preparing the solution mixture for optimal cleaning results.
First and foremost, it is important to gather all the necessary ingredients and equipment before starting. This may include a bucket, measuring cups, gloves, and the cleaning agents of your choice. Selecting the right cleaning agents is crucial, as they will determine the effectiveness of the solution in tackling specific cleaning tasks.
Once you have gathered all your ingredients and equipment, it is time to precisely measure and mix them together. Be sure to follow the instructions provided on the cleaning agent’s packaging, as each product may have different dilution ratios. Remember, too much or too little of a particular ingredient can affect the cleaning efficiency.
A recommended approach is to start by adding the cleaning agent to the bucket, followed by the appropriate amount of water. It is generally advised to add the cleaning agent first to prevent suds or foaming caused by adding water to concentrated solutions. Use measuring cups or spoons to accurately measure the cleaning agent and maintain the desired ratio.

Once both the cleaning agent and water are in the bucket, gently stir the solution using a suitable utensil until they are well combined. Take care not to create excessive foam or splashing during the mixing process. The end result should be a homogeneous solution ready to be used with your pressure washer.
Before proceeding to use the cleaning solution, it is essential to test it on a small, inconspicuous area of the surface you intend to clean. This will help determine if the solution causes any unwanted effects or damage. If the test is successful and no adverse reactions occur, you can proceed to use the solution confidently with your pressure washer.
- Gather all the necessary ingredients and equipment.
- Select the appropriate cleaning agents for your specific cleaning tasks.
- Measure the cleaning agent and water accurately according to the instructions.
- Add the cleaning agent to the bucket first, followed by the water.
- Stir the solution gently until well combined.
- Test the solution on a small, inconspicuous area before using it on the entire surface.
Applying the Mixture to the Surface
When it comes to executing the process of distributing the cleaning mixture onto the intended surface, there are a few crucial steps that need to be followed for optimal results. It is essential to approach this task with precision and attention to detail in order to effectively clean and restore the target area. In this section, I will outline the procedure I find most effective for applying the solution using a pressure washer.
Preparation is Key
Before applying the cleaning mixture, it is essential to prepare the pressure washer and the surface being treated. Firstly, ensure that the pressure washer is securely connected to a water source and ready for operation. Next, make sure that the surface to be cleaned is clear of any loose debris or objects that may impede the application process. This step is crucial to avoid any potential damage or ineffective cleaning.
Even and Consistent Application
Once the preparation is complete, it is time to apply the cleaning solution to the surface. Begin by adjusting the pressure washer’s nozzle to a suitable setting, ensuring a balanced combination of power and gentleness. Then, start spraying the cleaning mixture onto the surface in a methodical and even manner, covering the entire area to be cleaned.
I recommend starting from the top of the surface and working your way down, allowing the solution to dwell on the surface for a short period of time. This will ensure that the cleaning agents have enough time to penetrate and loosen any stubborn dirt or grime. Use long, sweeping motions to ensure an even distribution of the solution, making sure not to overlook any areas.
During the application process, it is crucial to maintain a consistent distance between the pressure washer nozzle and the surface. This will help avoid any potential damage or streaking caused by too much pressure or being too close. Adjust the distance accordingly based on the sensitivity of the surface being cleaned.
Once the entire surface has been evenly coated with the cleaning solution, allow it to sit for the recommended duration as instructed by the specific cleaning product being used. This dwell time will further enhance the effectiveness of the solution and maximize cleaning results.
In conclusion, applying the cleaning mixture onto the surface using a pressure washer requires careful preparation and a methodical approach. By following the steps outlined above, you can ensure an even and consistent application that will optimize cleaning efficiency and achieve satisfactory results.
Common Mistakes to Avoid When Utilizing Cleaning Solution with a High-Pressure Sprayer
When it comes to effectively using cleaning agents alongside a powerful pressure washer, it’s essential to be aware of certain common errors that can easily be made. Understanding and avoiding these mistakes will not only ensure efficient cleaning but also prolong the lifespan of your equipment.
The first pitfall to steer clear of is the incorrect dilution of cleaning solution. It’s crucial to follow manufacturer instructions carefully and create the appropriate mixture to achieve the desired cleaning results without causing damage. Over-diluting can lead to ineffective cleaning, while under-diluting may result in residue buildup or harm the surface being cleaned.
Another mistake to avoid is using the wrong cleaning solution for the task at hand. Different surfaces and materials require specific types of cleaning agents. Using an incompatible solution can lead to insufficient cleaning, potential damage, or even dangerous chemical reactions.
One common oversight is neglecting to perform a patch test before applying the cleaning solution to the entire surface. This simple step helps determine if the solution is suitable and safe for the specific material or surface. Skipping this precaution can lead to irreversible damage or discoloration that could have been avoided.
It is also essential to avoid leaving the cleaning solution on the surface for too long. Allowing the solution to dry or dwell excessively can result in discoloration, streaks, or even etching. Remember to follow the recommended dwell time provided by the manufacturer to achieve optimal cleaning results without any adverse effects.
Finally, a frequently made mistake is not rinsing off the cleaning solution thoroughly. Failure to rinse can leave behind residue or chemical substances that may damage the surface or attract dirt and grime in the future. Take the time to thoroughly rinse the area after cleaning to ensure a truly pristine finish.
Using the Incorrect Dilution Ratio
When it comes to utilizing cleaning solutions with a pressure washer, it is crucial to understand the importance of achieving the correct dilution ratio. Utilizing the incorrect dilution ratio can have detrimental effects on the overall efficacy of the cleaning process and may even lead to potential damage.
From personal experience, I have learned that finding the right dilution ratio involves a delicate balance. Using too much cleaning solution can result in excessive suds, thereby reducing the effectiveness of the pressure washer. On the other hand, using too little cleaning solution may not sufficiently break down dirt and grime, rendering the cleaning process ineffective.
One significant aspect to consider is the specific cleaning solution being used. Different cleaning solutions may have different recommended dilution ratios based on their concentration and targeted cleaning surfaces. It is essential to carefully read the instructions provided by the manufacturer to ensure the proper dilution ratio is achieved.
Moreover, it is crucial to understand the importance of pre-testing the cleaning solution on a small, inconspicuous area before applying it to the entire surface. This allows for adjustments in the dilution ratio if needed and helps prevent any potential damage that might occur due to the incorrect dilution ratio.
In summary, selecting the correct dilution ratio is a vital step in effectively utilizing cleaning solutions with a pressure washer. Ensuring the proper balance is achieved between too much and too little solution will result in optimal cleaning performance and help maintain the integrity of the surfaces being cleaned.
Why It’s Important to Test the Cleaning Solution on a Small Area First
When using a pressure washer and a cleaning solution, one crucial step that should not be overlooked is testing the solution on a small area before proceeding with the entire cleaning task. It may seem unnecessary or time-consuming, but this simple precaution can save you from potential damages and costly repairs in the long run.
The Importance of Patch Testing
Before applying a cleaning solution to a large surface, it is vital to determine its compatibility and effectiveness by conducting a patch test. This involves applying the solution to a small, inconspicuous area and evaluating its impact on the surface material. By doing so, you can observe if the solution causes any adverse reactions, such as discoloration, staining, or damage.
During the patch test, carefully observe the area for any unwanted changes in color, texture, or appearance. Take note of any negative effects that may occur, such as fading, etching, or discoloration. By conducting a test on a small area, you can assess the suitability of the cleaning solution and make necessary adjustments before proceeding further.
How to Perform a Patch Test
Performing a patch test is relatively simple and can be done in a few easy steps:
- Select a small, inconspicuous area on the surface where you plan to clean.
- Dilute the cleaning solution according to the manufacturer’s instructions.
- Apply a small amount of the diluted solution to the chosen area.
- Allow the solution to sit for the recommended time.
- Rinse the area thoroughly with clean water and examine for any negative effects.
By following these steps and evaluating the results, you can determine if the cleaning solution is suitable for use on the entire surface. If any adverse reactions occur during the patch test, it is essential to reassess the cleaning solution or seek an alternative to prevent potential damage when proceeding with the larger cleaning task.
In conclusion, testing a cleaning solution on a small area before using it with a pressure washer is a crucial step to avoid unwanted damage. By conducting a patch test, you can ensure the compatibility and effectiveness of the solution, leading to a successful cleaning process without any unwanted surprises.
Leaving the Solution on the Surface for Too Long
When using a cleaning solution with a pressure washer, it is important to be mindful of the amount of time the solution is left on the surface. Leaving the solution on the surface for too long can have negative impacts on both the cleaning process and the surface being cleaned.
1. Maintain the recommended contact time
Each cleaning solution has a recommended contact time specified by the manufacturer. This refers to the amount of time that the solution needs to stay in contact with the surface to effectively remove dirt, grime, and stains. It is important to carefully follow these instructions to maximize the cleaning power and avoid potential damage.
2. Avoid prolonged contact
While it may be tempting to leave the cleaning solution on the surface for an extended period, it is crucial to avoid prolonged contact. Most cleaning solutions are designed to work quickly and efficiently, and leaving them on for too long can result in adverse effects. These effects may include discoloration, corrosion, or damage to the surface being cleaned.
- Be mindful of the weather conditions
- Consider the surface material
- Test a small inconspicuous area
- Work in small sections
It is essential to take into account the weather conditions when using a cleaning solution with a pressure washer. High temperatures or direct sunlight can accelerate the drying process of the solution, potentially leading to unsatisfactory cleaning results or surface damage. Additionally, different surface materials may have different tolerances to cleaning solutions, so it is important to consider their reaction to prolonged exposure.
Before applying the cleaning solution to the entire surface, it is always recommended to test a small inconspicuous area. This will allow you to assess the compatibility of the solution with the surface material and observe any potential adverse reactions. If no adverse effects occur, you can proceed with confidence.
For large surfaces, it is advisable to work in small sections. Applying the cleaning solution and rinsing it off promptly ensures that the solution does not sit on the surface for too long. This approach helps to achieve consistent cleaning results while minimizing the risk of damage.
In conclusion, while using a cleaning solution with a pressure washer is an effective way to remove dirt and stains, it is crucial to be mindful of the contact time and avoid leaving the solution on the surface for too long. By following the recommended guidelines and considering factors such as weather conditions and surface material, you can achieve optimal cleaning results without compromising the integrity of the surface being cleaned.
Tips to Maximize the Effectiveness of Cleaning Solution on Your Pressure Washing Tasks
In this section, I will share some insights on how to enhance the efficiency and power of the cleaning solution while using a pressure washer, resulting in better cleaning results and a more satisfying pressure washing experience. It is crucial to pay attention to the details and follow these tips to achieve the best outcome for your cleaning tasks.
1. Optimal Dilution Ratios
When utilizing cleaning solutions with a pressure washer, it’s essential to understand the importance of dilution ratios. Experimenting with different dilutions can help you find the perfect balance between effectiveness and safety for your specific cleaning needs. You want to ensure the right concentration of the cleaning solution to achieve maximum cleaning power without damaging the surfaces you are working on.
2. Pre-Treating Stubborn Stains
For tough and stubborn stains, pre-treating the affected areas before pressure washing can significantly improve the cleaning process. Consider using specific stain removers or spot treatments to break down and loosen the stains, allowing the cleaning solution applied with the pressure washer to work more efficiently. This step can save you time and effort in the long run, especially when dealing with deeply embedded dirt or grime.
By following these tips, you can take your pressure washing tasks to the next level. Remember, finding the right combination of cleaning solution, dilution ratios, and pre-treatment techniques will help you achieve superior cleaning results while maintaining the integrity of the surfaces you are working on.
Enhancing Results with Hot Water
When it comes to achieving optimal cleaning results, incorporating hot water into your pressure washing routine can make a significant difference. As a highly effective and versatile cleaning method, hot water can help remove stubborn dirt, grime, grease, and stains more efficiently compared to using cold water alone.
One of the main advantages of using hot water with a pressure washer is its ability to break down and dissolve tough substances effectively. The heat from the water helps to loosen the bonds between dirt particles and the surface being cleaned, making it easier to remove them. Additionally, hot water can enhance the cleaning power of detergents and cleaning solutions, allowing them to penetrate deeper and work more effectively.
Not only does hot water help to improve the cleaning process, but it also contributes to a more thorough and hygienic outcome. The elevated temperature can kill bacteria, viruses, and other harmful microorganisms that may be present on surfaces, helping to create a cleaner and healthier environment. Additionally, hot water can leave surfaces looking brighter and more rejuvenated, providing a noticeable difference in the overall appearance.
When using hot water with a pressure washer, it is important to exercise caution and follow the manufacturer’s guidelines. Some pressure washers are designed specifically for use with hot water, while others may only be suitable for cold water. Make sure to check the specifications of your pressure washer to ensure it is compatible with hot water use.
- Choose an appropriate cleaning solution or detergent that complements the use of hot water. Different surfaces and stains may require specific cleaning agents, so be sure to select the right product for the task.
- Preheat the water before starting the pressure washing process. This can be done by connecting your pressure washer to a hot water source, such as a water heater or boiler. Allow the water to reach the desired temperature before proceeding.
- Ensure that your pressure washer is equipped with the necessary attachments and nozzles suitable for hot water use. These may vary depending on the specific model, so refer to the user manual for proper guidance.
- During operation, maintain a safe distance from delicate surfaces or materials that may be sensitive to heat. Heat can cause certain materials to warp, melt, or become damaged, so exercise caution when working around such items.
- After completing the pressure washing process with hot water, allow the surface to cool down before inspecting the results. Hot surfaces can be more sensitive to touch and may require some time to return to a safe temperature.
By incorporating hot water into your pressure washing routine, you can maximize the effectiveness of your cleaning efforts and achieve better results. Remember to prioritize safety and follow the necessary precautions when using hot water with your pressure washer to ensure a successful and satisfactory cleaning experience.
FAQ:
What is a cleaning solution and why is it necessary to use it with a pressure washer?
A cleaning solution is a specially formulated detergent that is designed to remove dirt, grime, and stains from various surfaces. It is necessary to use a cleaning solution with a pressure washer because it helps to break down and loosen stubborn debris, making it easier for the water pressure to remove it.
How do I choose the right cleaning solution for my pressure washer?
Choosing the right cleaning solution for your pressure washer depends on the surface you are cleaning and the type of dirt or stain you are trying to remove. It is important to read the manufacturer’s instructions and guidelines for your pressure washer to determine the recommended cleaning solutions. Additionally, consider factors such as the pH level of the cleaning solution and whether it is safe for use on the surface you intend to clean.


