How To Use Challenge Pressure Washer

Greetings! Have you ever faced the task of impeccably cleaning stubborn dirt, grime, and algae from various surfaces? Look no further, as this article will equip you with the essential knowledge on exerting maximum performance with a powerful cleaning device commonly known as the Challenge Pressure Washer.
As an avid user, I have been confronted with numerous challenges in my quest for an immaculately clean home environment. Through trial and error, I have discovered effective techniques and tips that not only showcase the versatility of this outstanding appliance but also optimize its performance for different cleaning tasks. In the paragraphs below, I will share my experiences and guide you through the proper utilization of the Challenge Pressure Washer.
Prepare to embark on an adventure of transforming filthy surfaces into sparkling ones, while relieving yourself from the stresses of laborious scrubbing and brushing!
Safely Operating a Challenging Pressure Cleaning Machine
When it comes to utilizing a powerful pressure cleaning appliance, ensuring safety should be the utmost priority. In this section, I will guide you through the process of operating a challenging pressure washer with caution and without compromising personal wellbeing or damaging the surrounding environment.
It is crucial to familiarize yourself with the various components of the pressure cleaning machine before starting. Start by examining the nozzles, hoses, and triggers, and understanding their respective functions. This knowledge will enable you to handle the pressure washer effectively, minimizing the potential for accidents or mishaps.
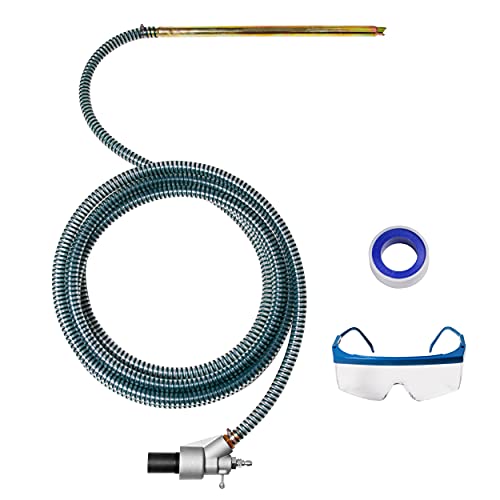
- Begin by securing a proper water supply that meets the manufacturer’s recommendations. Inspect the hose for any damages or leaks, and ensure it is tightly connected to the pressure washer.
- Before turning on the pressure washer, ensure that all connections and fittings are secure. This will prevent any sudden disconnections or unexpected bursts of water pressure during operation.
- Equip yourself with appropriate protective gear, including safety glasses, gloves, and closed-toe shoes. These will safeguard you against any potential injury from flying debris or accidental contact with high-pressure water streams.
- Prior to activating the machine, inspect the area you plan to clean. Remove any loose objects or debris that could potentially be propelled by the strong water stream. This will prevent any damage to property or bystanders.
- When operating the pressure washer, always maintain a firm grip on the spray gun and be mindful of its direction. Avoid pointing the nozzle towards yourself or others, as the high-pressure water can cause serious harm.
- It is essential to maintain a safe distance from surfaces you are cleaning. Start with a reasonable distance and gradually move closer if necessary. This will prevent any unintended damage to delicate materials or surfaces due to excessive pressure.
- Remember to continuously inspect the machine for any signs of overheating or malfunction. If you notice anything unusual, promptly turn off the pressure washer and seek professional assistance.
By following these safety guidelines, you can confidently operate a challenging pressure cleaning machine while minimizing risks and achieving effective results. Prioritizing safety not only ensures personal wellbeing but also prolongs the lifespan of the pressure washer, allowing for its continued reliable performance.
Understanding the Fundamentals of a Challenge Pressure Washer
When it comes to operating a Challenge pressure washer, it is crucial to have a solid understanding of its basic components and functionality. In this section, I will walk you through the key aspects of a Challenge pressure washer, providing you with an overview of how it works and how to utilize it effectively.
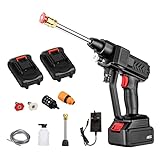
First and foremost, it is essential to comprehend the essential elements that make up a Challenge pressure washer. These machines consist of various parts, including a motor, a pump, a high-pressure hose, and a spray gun. Each component plays a critical role in ensuring the washer’s proper functioning and delivering optimum cleaning performance.
The motor serves as the powerhouse of the pressure washer, providing the necessary energy to operate the pump. This pump is responsible for pressurizing the water and forcing it through the high-pressure hose. The high-pressure hose acts as a conduit, transferring the pressurized water from the washer to the spray gun, where it is released in a controlled and targeted manner.
Now that we have covered the basic components, it is essential to understand the fundamental principles behind the operation of a Challenge pressure washer. Essentially, these machines work by creating a powerful stream of pressurized water that can effectively remove dirt, grime, and other residues from various surfaces.
When using a Challenge pressure washer, it is essential to consider the different nozzles available. These nozzles come in various sizes and spray patterns, each designed for specific cleaning tasks. By selecting the appropriate nozzle, you can adjust the spray pattern and pressure accordingly, ensuring optimal cleaning results without causing damage to the surface being cleaned.
Additionally, it is crucial to understand the importance of proper maintenance and safety when using a Challenge pressure washer. Regular maintenance, such as cleaning the nozzles and inspecting the hoses for any signs of wear, is essential to ensure its longevity and optimal performance. Furthermore, always prioritize safety by wearing protective gear, such as safety goggles and gloves, to prevent any accidents or injuries.
- Understand the basic components of a Challenge pressure washer, including the motor, pump, high-pressure hose, and spray gun.
- Comprehend the fundamental principles behind the operation of a Challenge pressure washer.
- Consider the different nozzles available and their specific uses.
- Maintain the pressure washer regularly and prioritize safety when using it.
By gaining a solid understanding of the basics of a Challenge pressure washer, you will be equipped with the knowledge necessary to operate and utilize it effectively for all your cleaning needs.
Selecting the Perfect Cleaning Solution for Your High-Pressure Cleaning Device
When it comes to achieving optimal cleaning results with your powerful high-pressure cleaning equipment, selecting the right cleaning solution is crucial. As a user, I have learned that the choice of a cleaning solution can significantly impact the effectiveness and efficiency of the pressure washer. Here are some key considerations to keep in mind while choosing the perfect cleaning solution for your pressure washer.
- Surface Compatibility: It is vital to consider the compatibility of the cleaning solution with the surface you are planning to clean. Different surfaces and materials require specific cleaning solutions that are safe and effective in removing dirt, grime, and stains without causing any damage or discoloration.
- Cleaning Power: The cleaning solution’s strength plays a crucial role in tackling tough stains and debris. Depending on the cleaning task at hand, you may need a heavy-duty cleaning solution for stubborn stains or a mild detergent for regular maintenance cleaning.
- Environmental Impact: Being mindful of the environmental impact is essential when selecting a cleaning solution. Opt for environmentally friendly and biodegradable options that are safe for plants, animals, and water sources, minimizing pollution and harm to the ecosystem.
- Chemical Composition: Understanding the chemical composition of the cleaning solution is important to ensure it doesn’t contain any harmful or corrosive substances. Look for solutions that are free from bleach, ammonia, and phosphates, as they can damage surfaces and pose health risks.
- Safety Precautions: Always prioritize your safety and the safety of others when selecting a cleaning solution. Follow the manufacturer’s instructions and wear appropriate protective gear, such as gloves and goggles, when handling and working with the cleaning solution.
By considering these factors, you can make an informed decision and select a cleaning solution that not only maximizes the cleaning performance of your pressure washer but also promotes safety and environmental responsibility.
Getting Started: Easy Steps for Setting Up Your Tough Cleaning Machine
As you embark on your cleaning journey with the powerful Challenge Pressure Washer, it’s important to ensure a smooth setup process to make the most of this efficient and versatile equipment. In this step-by-step guide, I will share my personal experience and provide you with an easy-to-follow roadmap for setting up your Challenge Pressure Washer.
Step 1: Unboxing and Familiarizing Yourself
Upon receiving your Challenge Pressure Washer, carefully unbox the package and take a few moments to familiarize yourself with the various components. Inspect the parts, including the pressure nozzle, spray gun, hose, and detergent applicator. This initial assessment will give you a good understanding of the equipment and its capabilities.
Step 2: Connecting the Hose

Once you have a clear idea of the parts, locate the water inlet on the pressure washer. Connect one end of the hose to this inlet and ensure a secure fit. Pay attention to any connectors or adapters that may be required. Remember, a properly connected hose is crucial for a reliable water supply during operation.
Step 3: Attaching the Spray Gun
After successfully connecting the hose, it’s time to attach the spray gun to the other end. Align the nozzle with the gun and gently slide it into place, ensuring a firm connection. Double-check the attachment to prevent any potential leaks or disconnections during use. The spray gun will serve as your main control center for adjusting pressure and directing water flow.
Step 4: Selecting and Installing the Appropriate Nozzle
To accomplish different cleaning tasks efficiently, your Challenge Pressure Washer may come with multiple nozzles. Choose the appropriate one based on the intensity and area of cleaning required. Once selected, firmly insert the nozzle into the spray gun. Make sure it is securely in place to prevent any accidental detachment while operating the machine.

Step 5: Connecting the Detergent Applicator (If Applicable)
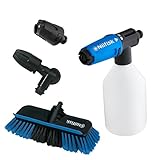
If your Challenge Pressure Washer includes a detergent applicator, take advantage of this feature for enhanced cleaning results. Connect the applicator to the designated area on the spray gun, following the provided instructions. This optional accessory allows you to effortlessly apply detergents or cleaning solutions, maximizing the effectiveness of your pressure washing tasks.
By following these step-by-step instructions in setting up your Challenge Pressure Washer, you can confidently embark on your cleaning endeavors. Now that you’re equipped with the knowledge to assemble and prepare your pressure washer, it’s time to unleash its power and tackle any tough cleaning challenges that come your way!
Preparing Your Challenge Power Cleaner
When it comes to getting started with your brand-new Challenge power cleaner, one of the first steps in using it is to assemble the machine. Assembling your pressure washer properly ensures it will operate efficiently and safely. In this section, I will guide you through the process of assembling your Challenge power cleaner, providing you with the necessary steps and tips to get you up and running in no time.
Before diving into the assembly process, it’s crucial to acquaint yourself with all the components that come with your Challenge power cleaner. Familiarize yourself with the various parts such as the handle, nozzles, trigger gun, hose, and any additional attachments or accessories. Ensure you have all the necessary components within reach before proceeding with the assembly.

Firstly, I recommend establishing a clean and spacious area to carry out the assembly process. Lay out all the parts in front of you and refer to the instruction manual to identify which components need to be attached first. Typically, this includes attaching the handle to the main body of the power cleaner using the provided screws or levers.
Once the handle is securely attached, move on to connecting the hose to the power cleaner. Begin by locating the hose connection point on the machine and firmly inserting the hose into it. Ensure the connection is tight to prevent any water leaks during operation. If your power cleaner has a quick-connect feature, make sure to follow the specific instructions for that model.
Next, it’s time to attach the nozzle to the trigger gun. Different nozzle types may be included with your Challenge power cleaner, offering various spray patterns and water pressure options. Choose the appropriate nozzle for your cleaning needs and firmly attach it to the trigger gun, following the instructions provided in the manual.
Finally, double-check all the connections and ensure everything is securely fastened. Take a moment to inspect the power cord, making sure it’s not damaged and can reach a power outlet safely. At this point, you are ready to power up your Challenge power cleaner and begin using it to tackle your cleaning tasks with confidence.
Remember, proper assembly of your Challenge power cleaner is essential for its optimal performance and longevity. Following the instructions and taking the time to assemble it correctly will ensure a smooth and successful cleaning experience.

Connecting the Pressure Washer to a Water Source and Power Outlet
When setting up your pressure washer, it is crucial to properly connect it to both a water source and a power outlet. This ensures that the machine operates efficiently and effectively, allowing you to complete your cleaning tasks with ease.
First and foremost, locate a suitable water source near the area you plan to use the pressure washer. This can be an outdoor faucet, a garden hose, or even a nearby water reservoir. Ensure that the water source provides a steady flow of water and has adequate pressure to power the pressure washer. It is important to note that using a larger diameter garden hose will result in better water flow and overall performance.
Next, attach one end of the garden hose to the water inlet connection on the pressure washer. It is advisable to use high-quality connectors to prevent leaks and ensure a tight seal. To guarantee a secure connection, firmly tighten the connector using your hands or the appropriate tool. Make sure the connection is secure, as any loose fittings can result in water leakage and decrease the effectiveness of the pressure washer.
After connecting the garden hose to the pressure washer, locate a suitable power outlet nearby. Check the voltage requirements specified in the pressure washer’s user manual to ensure the outlet can provide the necessary power. Once you have identified a compatible power outlet, plug in the pressure washer’s power cord firmly. Avoid using extension cords unless absolutely necessary, as they may reduce power and potentially damage the machine.
Once both the water source and power outlet are connected, ensure that there are no kinks or twists in the garden hose. Straighten any bends or loops to facilitate smooth water flow. Similarly, ensure that the power cord is free from any obstructions or tangles that could interfere with the pressure washer’s operation.

Before using the pressure washer, turn on the water source and allow the water to flush through the system for a few seconds. This helps remove any air trapped in the system and ensures a consistent flow of water. Additionally, check for any leaks at the connections and promptly address them if found.
With the pressure washer properly connected to both a water source and power outlet, you are now ready to tackle your cleaning tasks. Remember to always follow the manufacturer’s instructions for safe and efficient operation, and never leave the pressure washer unattended during use.
Expert Hacks for Maximizing the Effectiveness of Your Challenger Power Sprayer
As a seasoned user of the Challenger Power Sprayer, I have discovered some insider tips and tricks to ensure optimal performance and efficiency. These techniques will help you achieve the best results without struggling or wasting time. Here are my expert hacks for making the most of your Challenger Power Sprayer:
1. Mastering the Nozzle Selection
One of the key factors in achieving efficient cleaning with the Challenger Power Sprayer is selecting the right nozzle for the task at hand. Different surfaces and levels of dirt require different spray patterns and pressure levels. By understanding the range of nozzles available and their specific functions, you can ensure that your sprayer is always prepared for any cleaning challenge.
2. Strategic Positioning for Maximum Coverage
When using the Challenger Power Sprayer, it’s crucial to position yourself strategically to maximize coverage and minimize the effort required. Start by identifying the area you want to clean and plan a path that allows for smooth and efficient movement. By avoiding excessive overlapping and unnecessary back-and-forth movements, you can save time and energy while achieving excellent results.
- Begin spraying from the farthest end and gradually work your way back.
- Keep a consistent distance from the surface being cleaned to ensure even coverage.
- Use sweeping motions for larger areas and circular motions for more stubborn stains.
3. Time-Saving Pre-Treatment Techniques
Pre-treating surfaces before using the Challenger Power Sprayer can significantly enhance its cleaning power and save you valuable time. Here are a few pre-treatment techniques that I have found to be highly effective:
- Apply a suitable cleaning agent or detergent to the surface and let it sit for a few minutes to loosen dirt and grime.
- Scrub the surface lightly with a soft-bristle brush to further loosen stubborn stains.
- Rinse off the pre-treated area with water before using the power sprayer. This will help remove any loose debris, allowing the sprayer to focus on deep cleaning.
By incorporating these pro tips into your cleaning routine, you can ensure that your Challenger Power Sprayer operates at its full potential, making your cleaning tasks efficient and hassle-free.
Mastering the Art of Proper Technique: Unlocking the Potential of the Spray Wand
When it comes to using the spray wand for your pressure washer, it is essential to have a thorough understanding of the proper techniques to maximize its effectiveness. In this section, I will share my personal experiences and insights on how to utilize the spray wand efficiently to achieve optimal results.
1. Selecting the Right Nozzle
One of the crucial factors in utilizing the spray wand effectively is choosing the correct nozzle for the task at hand. By carefully considering the size, angle, and pattern of the nozzle, you can achieve various levels of water pressure and coverage. Experimenting with different nozzle options will help you find the perfect fit for your specific cleaning needs.
2. Maintaining the Appropriate Distance
Understanding the right distance between the spray wand and the surface you are cleaning is key to avoid any damage or inefficiency. Depending on the material or the level of grime, you may need to adjust the distance accordingly. By finding the sweet spot that allows the water to effectively remove dirt without causing any harm, you can achieve optimal cleaning results.
| Nozzle Type | Recommended Use | Angle | Distance |
|---|---|---|---|
| Fan Nozzle | General cleaning and rinsing | 45° | 12-18 inches |
| Dirt Blaster Nozzle | Tough stains and stubborn dirt | 0° | 6-12 inches for concrete or hard surfaces 24-36 inches for delicate surfaces |
| Rotary Nozzle | Removing heavy moss or grime | 15° | 6-12 inches |
By referencing the table above, you can easily determine the appropriate nozzle type, recommended use, angle, and distance for a variety of cleaning situations.
Mastering the art of proper technique with the spray wand is crucial for achieving satisfactory results and prolonging the life of your pressure washer. Remember, practice makes perfect, so don’t be afraid to experiment and fine-tune your approach. With patience and attention to detail, you will soon become a pro in utilizing the spray wand efficiently for all your cleaning tasks.