
How To Use A Jet Pressure Washer To Add Paint
It is an undeniable truth that craftsmanship lies in the details. However, sometimes those very details require a touch of finesse that only a chosen few possess. Painting surfaces to perfection is a skill that can transform any ordinary object into a work of art. But have you ever wondered how to bring that vibrancy and elegance with the sheer force of a high-pressure stream?
Discovering the Untapped Potential
Imagine harnessing the immense potential of a formidable technique, one that paves the way for incredible creativity and superiority. With the utilization of a dynamic pressure washing system, the ability to add depth, color, and life to any surface is within your reach. Venture into the world of juxtapositions and play with the vast range of possibilities, as you manipulate the boundaries of everyday objects.
Embracing the Elemental Symphony
Before you embark on this thrilling journey, understanding the elements that comprise this symphony of colors is crucial. Imagine the raw power of water, an emblem of nature’s force, harmoniously combined with the elemental essence of pigments. This fusion creates an explosion of aesthetics, giving your artworks a new lease of life. With the mastery of your brush, this elemental symphony dances elegantly across surfaces, leaving a mesmerizing trail in its wake.
Embark on a journey where the power of water unveils a new realm of artistic possibilities. Stand at the precipice of innovation and let the high-pressure stream be your guide to immersing surfaces in the captivating allure of vibrant pigments. With every stroke, you embrace the transformative power of water, turning ordinary into extraordinary, and mundane into extraordinary beauty. Are you prepared to unleash your creative potential and become a master of this innovative technique?
Adding Color with a High-Pressure Water Sprayer
When it comes to transforming the look of your surfaces, there are innovative techniques that can bring a fresh burst of color without the need for traditional painting methods. In this section, I will share my personal experience and approach to using a powerful and efficient high-pressure water sprayer to apply vibrant pigments on a variety of surfaces.
Choosing the Right Pigments
Selection of suitable pigments is the first step in achieving the desired effect through high-pressure water spraying. It is essential to pick pigments that are meant for this specific application, as they need to withstand the force of the sprayer and adhere effectively to surfaces. Dark, light, metallic, or even pearlescent pigments can be considered depending on the desired outcome.
Preparing the Surface
Before applying any color, it is crucial to prepare the surface properly. This involves thoroughly cleaning the area to be painted to ensure optimal adhesion. Any loose debris, dirt, or previous layers of paint should be removed completely, providing a clean canvas for the new pigments to adhere to. Additionally, it’s important to protect any surrounding areas that should not be painted.
By following these steps and utilizing the power of a high-pressure water sprayer, you can effortlessly add vivid color and depth to a variety of surfaces. It’s a creative and efficient way to transform spaces, and the end result can be truly mesmerizing.

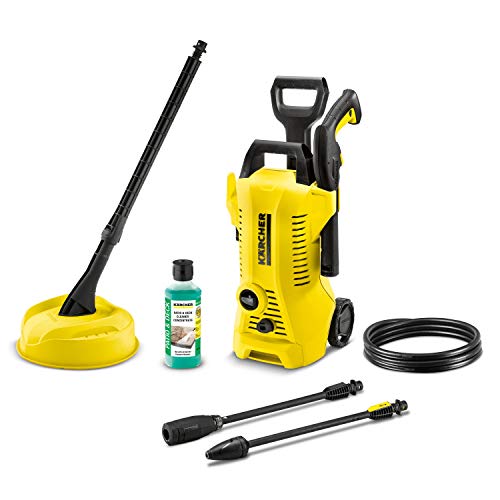
Understanding the Power Jet Cleaning Appliance
When it comes to providing a thorough cleaning experience, the power jet cleaning appliance is a game-changer. With its incredible force and precision, it effortlessly removes dirt and grime from various surfaces, ensuring a pristine finish. In this section, I will explore the features and functionality of this innovative cleaning tool, shedding light on its inner workings and highlighting its numerous benefits.
At its core, the power jet cleaning appliance harnesses the power of high-pressure water to effectively clean surfaces. Its intelligent design allows for remarkable control, enabling users to adjust the pressure for different cleaning tasks. Whether you need to tackle stubborn stains on your patio, remove algae from your roof, or clean your car’s exterior, this versatile appliance is up to the challenge.
One key aspect to consider is the nozzle, a crucial component that determines the direction and force of the water flow. The power jet cleaning appliance typically comes with a variety of nozzles, each serving a specific purpose. From a concentrated jet nozzle for deep cleaning to a wider spray nozzle for larger surface areas, these interchangeable nozzles allow for maximum flexibility and efficiency in your cleaning endeavors.
Furthermore, the power jet cleaning appliance is designed with user convenience in mind. Its ergonomic handle provides a comfortable grip, minimizing fatigue during long cleaning sessions. Additionally, the appliance is equipped with a reliable motor that ensures consistent water pressure, allowing for uninterrupted and efficient cleaning.
Lastly, it is important to note the safety measures incorporated into the power jet cleaning appliance. The device is equipped with a trigger lock mechanism, preventing accidental operation and ensuring the user’s safety. Additionally, the appliance may include features such as a thermal cut-off system to prevent overheating, further enhancing its reliability and safety.

In summary, the power jet cleaning appliance is a versatile and powerful tool that utilizes high-pressure water to remove dirt and grime with precision. Equipped with adjustable pressure settings, various nozzles, and user-friendly features, this cleaning appliance revolutionizes the way we tackle cleaning tasks. Whether you are a homeowner, a professional cleaner, or simply someone who appreciates a clean and well-maintained environment, the power jet cleaning appliance is an invaluable asset.
Preparing the Surface for Painting
When it comes to painting a surface using a jet pressure washer, proper preparation plays a crucial role in achieving a successful and long-lasting finish. In this section, I will guide you through the essential steps to prepare the surface before applying paint using a jet pressure washer.
1. Cleaning the Surface
Before starting the painting process, it is important to thoroughly clean the surface to remove any dirt, dust, or debris. Using a jet pressure washer with an appropriate nozzle attachment, I recommend directing the water stream evenly across the surface, ensuring that all areas are adequately cleaned. Pay special attention to any stubborn stains or residues that may require additional scrubbing or cleaning solutions.
2. Removing Loose Paint and Flaking Areas
Next, it is crucial to remove any loose paint or flaking areas from the surface. This can be done by using a scraping tool or wire brush to gently scrape off the loose paint. Be careful not to damage the underlying surface while doing this. Once all loose paint has been removed, carefully inspect the surface for any remaining areas that may need further attention.
By following these steps, you can ensure that the surface is properly prepared for painting using a jet pressure washer. Taking the time to clean and remove loose paint will help create a smooth and even surface, allowing the paint to adhere properly and provide a beautiful and long-lasting finish.

Selecting the Right Kind of Paint for Your Project
When it comes to choosing the appropriate type of paint for your project, there are several factors that must be considered. As an experienced user of jet pressure washers, I have learned a few tips and tricks to help you make an informed decision. In this section, I will share my expertise on how to select the perfect paint for your specific needs.
Consider the Surface
One of the first things you should consider when selecting paint is the surface you will be painting. Different surfaces require different types of paint. For example, if you are painting wood, you will need a different type of paint than if you were painting metal or concrete. Take into account the texture, porosity, and condition of the surface to determine the best paint for optimal adhesion and longevity.
Examine the Environmental Conditions
The environmental conditions in which you will be using your jet pressure washer and applying the paint are crucial factors to consider. Factors such as temperature, humidity, and exposure to sunlight can affect the performance and durability of the paint. For areas with extreme temperature fluctuations, it is important to select a paint that can withstand such conditions without cracking or peeling.
- Check the temperature range in which the paint can be applied as well as its ability to resist fading when exposed to UV rays.
- Consider choosing a paint with mold and mildew resistance if you live in a humid climate.
Choose the Right Finish
The finish of the paint can greatly affect the overall look and feel of your project. Different finishes offer different levels of durability, sheen, and smoothness. Consider the desired aesthetic appeal as well as the level of durability required for your specific project. The most common paint finishes include:
- Gloss: Provides a shiny, reflective surface that is easy to clean and offers great durability. Ideal for high-traffic areas.
- Semi-Gloss: Offers a slightly shiny surface and is also easy to clean. Provides good durability and is suitable for areas with moderate activity.
- Satin: Has a smooth finish with a low sheen. Provides excellent durability and is ideal for areas with less traffic.
- Eggshell: Has a soft, velvety finish that is less shiny than satin. Offers good durability and is perfect for walls and ceilings.
- Matte: Provides a flat finish without sheen. Offers good coverage but may not be as durable as other finishes.
By considering these essential factors, you can confidently select the right paint that will not only complement your project but also withstand the power of a jet pressure washer.

Setting up the High-Pressure Spray Device
When it comes to preparing the high-pressure spray device for use, there are several important steps to follow in order to ensure a successful paint application. In this section, I will guide you through the process of setting up the equipment and getting it ready for painting without using any specific terms.
- Step 1: Checking the Equipment
- Step 2: Connecting the Hoses
- Step 3: Inspecting the Nozzle
- Step 4: Priming the Device
- Step 5: Adjusting the Pressure
By carefully following these steps, you can ensure that your high-pressure spray device is properly set up and ready for use. This will ultimately help you achieve the desired paint application results. Now, let’s dive into the details of each step.
Applying the Paint with the High-Pressure Water Sprayer
When it comes to enhancing the appearance of surfaces, there exists an effective method that involves utilizing a powerful water sprayer instead of traditional painting techniques. This innovative approach harnesses the force of high-pressure water to evenly distribute a coat of paint. In this section, I will guide you through the process of applying paint using a high-pressure water sprayer, providing you with practical tips and techniques to achieve outstanding results. So, let’s dive in!
Preparation: Before starting the paint application process, it’s crucial to prepare the surface adequately. This involves cleaning the area to remove any dirt, debris, or old paint that may hinder the adhesion and longevity of the new paint. Additionally, ensure that the surface is dry and free from any moisture or contaminants that could affect the paint’s performance.
Selecting the Paint: Choosing the right paint for your project is essential to achieve the desired results. Consider factors such as the surface type, weather resistance, and finish desired. It’s recommended to opt for high-quality paint that is compatible with the high-pressure water sprayer application method.

Dilution and Mixing: Depending on the specific product and manufacturer’s instructions, you may need to dilute the paint before applying it with the high-pressure water sprayer. Follow the recommended dilution ratios, and thoroughly mix the paint to ensure a consistent and even distribution when sprayed onto the surface.
Adjusting the Sprayer Settings: Properly adjusting the sprayer settings is crucial to achieving optimal paint coverage. Experiment with different nozzle sizes and sprayer pressure levels to find the right combination that provides the desired texture and thickness of the paint. It’s advisable to conduct test sprays on a small inconspicuous area to fine-tune the settings before applying paint to the entire surface.
Paint Application: When applying the paint, maintain a consistent distance between the sprayer nozzle and the surface to ensure a uniform coat. Start spraying from one edge of the surface and work your way across, ensuring overlap between each stroke to avoid any streaks or unevenness. It’s important to maintain a steady and controlled movement to prevent excessive buildup of paint in certain areas.
Multiple Coats: Depending on the desired finish and coverage, it may be necessary to apply multiple coats of paint. Allow each coat to adequately dry before applying the next layer. This will help achieve a more even and polished result.
Clean-up and Maintenance: After completing the paint application process, it’s crucial to properly clean and maintain the high-pressure water sprayer. Follow the manufacturer’s instructions for maintenance, ensuring that all paint residues are removed from the sprayer components to prevent clogs and ensure future usability.
By following these steps and taking the time to prepare, select the right paint, adjust the sprayer settings, and apply the paint with precision, you can effectively add color and rejuvenate various surfaces using a high-pressure water sprayer. Embrace this innovative approach to achieve remarkable results and transform your spaces with a fresh and vibrant appearance.
Tips and Tricks for Achieving a Flawless Final Coat
1. Diligent Preparation:
Before diving into the application process, it is crucial to prepare the surface properly. This involves thoroughly cleaning the area and removing any debris, grease, or loose paint that may hinder the paint’s adhesion. A clean and smooth surface is the key to ensuring a successful painting job.
2. Choose the Right Paint:
The type of paint used plays a significant role in achieving a perfect finish. Opt for high-quality paints specifically formulated for your desired application. Whether it is exterior paint, latex paint, or enamel paint, selecting the right product will enhance both the durability and overall appearance of the final coat.

3. Practice Proper Technique:
When applying paint with a jet pressure washer, it is essential to maintain a steady and even distance from the surface. This ensures consistent coverage and prevents the paint from pooling or running. By using controlled sweeping motions and overlapping each pass, you can achieve a professional-looking finish.
4. Time Your Applications:
Timing is everything when it comes to achieving an even finish. Take note of the weather conditions and plan your paint application accordingly. Extreme heat or cold can affect the paint’s drying time and its ability to adhere properly. Aim for optimal temperature and humidity levels to ensure a flawless final coat.
5. Patience During Drying:
Allowing each coat to dry thoroughly is essential for a perfect finish. Rushing this process can result in uneven texture or premature damage to the paint’s surface. Be patient and follow the manufacturer’s recommended drying time between each coat, ensuring a smooth and flawless outcome.
Implementing these tips and tricks throughout your painting project will undoubtedly enhance the final results. By focusing on diligent preparation, selecting high-quality paint, practicing proper technique, timing your applications, and exercising patience during the drying process, achieving a flawless final coat is within your reach.
Cleaning and Maintenance of the High-Pressure Water Jet Device
As an avid user of high-pressure water jet devices, I understand the importance of regular cleaning and maintenance to ensure optimal performance and longevity. In this section, I will share my personal insights on how to effectively clean and maintain your high-pressure water jet device, without relying on technical jargon or specific product names.
1. General Cleaning
- Start by disconnecting the water jet device from the power source and allowing it to cool down before cleaning.
- Gently remove any visible dirt, debris, or paint residue from the exterior of the device using a soft cloth or brush.
- Inspect the nozzle for any clogs or blockages and carefully remove them using a small tool or pin, being cautious not to damage the nozzle.
- For stubborn stains or grime, prepare a mild cleaning solution by mixing water with a gentle detergent. Dip a cloth or sponge into the solution and wipe the surface of the device thoroughly.
- Rinse the device with clean water to remove any traces of the cleaning solution, ensuring no residue is left behind.
- Allow the device to completely dry before reassembling and storing it in a clean and dry location.
2. Regular Maintenance
Maintaining the high-pressure water jet device is essential to prolong its lifespan and prevent any potential issues. Here are a few key maintenance tasks to keep in mind:
- Regularly check and change the fuel or power source of the device as per the manufacturer’s instructions.
- Inspect the hoses, fittings, and connectors for any signs of wear, leaks, or damage. Replace them immediately if necessary.
- Check the water filters regularly and clean or replace them to ensure a consistent flow of clean water.
- Keep the device stored in a clean and dry environment when not in use, protecting it from exposure to harsh weather conditions.
- If the device has any detachable parts, such as spray tips or wands, clean them thoroughly after each use and store them in a safe place to prevent loss or damage.
- Consider scheduling regular professional servicing to ensure the internal components of the device are functioning optimally.
By incorporating these cleaning and maintenance practices into your routine, you can maximize the efficiency and reliability of your high-pressure water jet device, allowing it to perform at its best for years to come.
Safety Precautions for Working with High-Pressure Cleaning Equipment
When using powerful cleaning tools, such as a high-pressure jet washer, it is crucial to prioritize safety to prevent accidents and injuries. In this section, I will outline important safety precautions that should be followed when operating a high-pressure jet washer, also known as a pressure cleaner or power washer, to ensure a safe working environment.
Familiarize Yourself with the Equipment
- Prior to operating a pressure washer, it is essential to thoroughly read and understand the manufacturer’s manual for the specific model you will be using.
- Identify the various components of the pressure washer, such as the spray gun, nozzle, high-pressure hose, and the pressure washer unit itself.
- Learn how to properly assemble, connect, and disassemble the equipment.
Protective Gear
Wearing appropriate personal protective equipment (PPE) is crucial when working with a high-pressure jet washer. Here are some essential items to consider:
- Protective eyewear or goggles to shield your eyes from flying debris or splashes.
- Heavy-duty gloves to safeguard your hands from potential injuries.
- Non-slip footwear to maintain stability on wet or slippery surfaces.
- Avoid loose-fitting clothing that can get entangled in the equipment.
- Consider wearing ear protection if the pressure washer produces excessive noise.
Select the Appropriate Nozzle and Pressure
Choosing the right nozzle and pressure setting for your cleaning task is essential to ensure safety and effectiveness. Here are a few recommendations:
- Use a wide-angle or fan spray nozzle instead of a concentrated or pencil jet nozzle to prevent surface damage.
- Start with the lowest pressure setting and gradually increase if necessary, keeping in mind the type of surface you are cleaning.
- Test the pressure and angle on a small inconspicuous area before proceeding with the entire surface.
Beware of the Recoil and Water Stream
Always be cautious of the recoil effect caused by the force of the water stream. Here’s what to keep in mind:
- Maintain a firm grip on the spray gun at all times to prevent it from being forcefully pulled or jerked.
- Avoid pointing the spray gun at yourself, others, or any electrical equipment.
- Be cautious of the water stream’s impact on surfaces, as it can cause damage or dislodge loose materials.
By following these safety precautions, you can use a high-pressure jet washer efficiently while minimizing risks and ensuring a safe working environment.
FAQ:
What is a jet pressure washer?
A jet pressure washer is a high-powered cleaning tool that uses a focused stream of water at high pressure to clean surfaces efficiently. It is commonly used for tasks like removing dirt, grime, and mold from various surfaces such as driveways, decks, and vehicles.
Can a jet pressure washer be used for adding paint?
No, a jet pressure washer cannot be used to add paint. Its main purpose is to remove dirt and grime from surfaces. For painting, traditional brushes, rollers, or sprayers are the recommended tools.


