How To Strip Paint Off Deck With Pressure Washer

Discover an effective and time-saving technique to revitalize your outdoor deck and remove unwanted layers of color. By harnessing the force of a specially designed equipment, you can bring new life to your wooden structure without the need for vigorous manual labor or harmful chemicals.
Prepare to uncover the beauty hidden beneath layers of previous paint coatings and weathered effects as you embark on this transformative journey. With the assistance of a high-pressure washing system, you can effortlessly rejuvenate your deck, revealing its natural splendor and vibrant character.
Embrace the power of precision and efficiency as you embark on a mission to restore your deck to its former glory. By utilizing the mighty force of a pressure washer, you can bid farewell to worn-out and faded appearances, allowing the original beauty of your deck to shine through. With each pass of the nozzle, layers of old paint will be gently stripped away, leaving behind a clean canvas ready to be revived.
Unleash the potential of your outdoor space and embark on a journey of restoration and renewal. Through the skillful use of a pressure washer, you can effortlessly remove unwanted layers of paint and unearth the raw charm of your deck. Get ready to witness a remarkable transformation as you restore your deck to its former natural glory.
Removing Paint from a Wooden Terrace Using a High-Pressure Machine
Have you ever wondered how to effectively remove old paint from your wooden terrace without resorting to time-consuming and back-breaking manual scraping? In this guide, I will share my experience and tips on using a high-pressure machine to effortlessly strip paint off your deck, giving it a fresh and clean look.
1. Prepare the area: Before starting the paint removal process, it is essential to prepare the surrounding area. Clear any furniture, plants, or other obstacles that may obstruct the machine’s movement. Cover nearby plants and surrounding surfaces to protect them from paint chips and debris.
2. Safety first: Remember to prioritize your safety when working with a high-pressure machine. Wear protective clothing, including goggles, gloves, and a dust mask, to shield yourself from flying paint chips and dust particles.
3. Choose the right nozzle: Selecting the proper nozzle for your high-pressure machine is crucial. A nozzle with a narrow spray pattern will provide more concentrated power and efficiently remove paint. However, be cautious not to use too much pressure that can damage the wood.
4. Test on a small area: Before tackling the entire deck, it is wise to test the machine on a small, inconspicuous spot. Adjust the pressure and distance until you find the optimal settings for paint removal without causing damage to the wood surface.
5. Work systematically: Start at one end of the deck and work your way towards the other end, moving in even strokes. Spray the water at a slight angle against the paint, following the direction of the wood’s grain. This method will help lift the paint effectively.
6. Take breaks: Stripping paint off a deck can be a labor-intensive task. Remember to take regular breaks to avoid fatigue and prevent the machine from overheating. Hydrate yourself and rest to maintain your energy levels throughout the process.
7. Clean the deck: Once you have removed the paint from the entire deck, use a broom or a leaf blower to sweep away any loose paint chips and debris. Rinse the deck with water to remove any remaining residue.
8. Assess the wood condition: After paint removal, inspect the wood for any signs of damage or areas that require additional attention. Sand down any rough spots or uneven areas before considering the next step of refinishing or reapplying a protective sealant.
By following these steps and using a high-pressure machine appropriately, you can strip paint off your deck efficiently and achieve stunning results. Remember to prioritize safety, work systematically, and take breaks as needed. Enjoy the satisfaction of unveiling a beautifully restored wooden terrace!
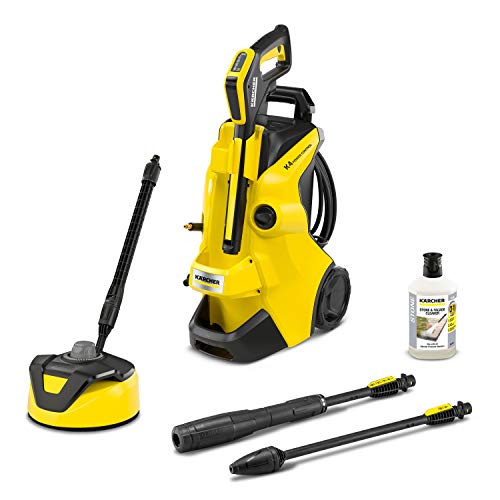
Choosing the Best Pressure Cleaner for the Task
When it comes to embarking on a DIY paint stripping project for your deck, selecting the appropriate pressure cleaner is crucial for achieving optimal results. As someone who has had experience with different types of pressure washers, I understand the importance of choosing the right equipment for the job at hand.

First and foremost, consider the power source of the pressure cleaner. While some models run on electricity, others rely on gasoline or diesel engines. Electric pressure washers are often more suitable for smaller projects, as they are generally more compact and offer lower pressure levels. On the other hand, gas and diesel-powered pressure washers provide higher pressure levels and are better suited for tackling larger areas or more stubborn paint coatings.
The pressure rating is another key factor to consider when selecting a pressure cleaner. It determines the force with which water is sprayed onto the deck surface. Higher pressure ratings, measured in pounds per square inch (PSI), can effectively remove thick layers of paint, but they may also damage the underlying wood if used improperly. For more delicate decks or less stubborn paint coatings, a pressure cleaner with a lower PSI rating could be a safer option.
Additionally, pay attention to the flow rate of the pressure cleaner, measured in gallons per minute (GPM). A higher flow rate will allow for quicker paint removal, particularly on larger areas. However, keep in mind that a high flow rate may also consume more water, so it’s important to strike a balance between efficiency and conservation.
Finally, consider whether you prefer a pressure cleaner with various nozzle options. Different nozzles can alter the spray pattern and impact the cleaning power. For instance, a narrow spray pattern can deliver stronger pressure for more focused paint removal, while a wider spray pattern may cover a larger surface area with less force. Having the flexibility to switch between nozzles can significantly enhance your ability to adapt to different sections of your deck.
- Take into account the power source: electric, gas, or diesel.
- Consider the pressure rating in terms of PSI: higher pressures are suitable for tough paint coatings, but may damage the wood.
- Pay attention to the flow rate measured in GPM: higher flow rates allow for faster paint removal.
- Decide if having various nozzle options is important for your specific paint stripping needs.
By carefully considering these factors, you can make an informed decision and choose the perfect pressure cleaner that will efficiently remove the paint from your deck, leaving it ready for a fresh new finish.

Preparing the Deck for Surface Revitalization
When it comes to revitalizing the appearance of your outdoor space, it’s essential to start with proper preparation. Before diving into the task at hand, taking the time to adequately prepare your deck for paint stripping can make all the difference in achieving desirable results.
First and foremost, ensure that you have the necessary safety gear, such as gloves and protective eyewear, to shield yourself from any potential hazards during the process. Additionally, carefully inspect your deck for any loose nails or screws that may need to be tightened or replaced.
Next, it’s important to clear the deck of any furniture, plants, or other belongings that could obstruct your progress. By removing these items, you create a safer and more efficient workspace. Store them in a secure location until the completion of the project.
Once the deck is cleared, give it a thorough cleaning to remove any dirt, debris, or mildew that may have accumulated over time. This can be accomplished by using a broom to sweep away loose particles, followed by a gentle detergent solution and a stiff brush to scrub away stubborn stains.
After cleaning, allow the deck to fully dry before proceeding to the next step. This ensures that the paint stripping process will be more effective and allows for better adherence of any new coatings you may choose to apply later on.

By properly preparing your deck prior to paint stripping, you set the stage for a successful revitalization project. Taking the time to attend to these initial steps not only improves the overall outcome but also ensures a safer and more enjoyable experience along the way.
Ensuring Safety Measures
When it comes to removing old layers of paint from your deck using a pressure washer, it is crucial to prioritize safety to avoid any accidents or injuries. In this section, I will share some essential safety measures that you should consider before starting the paint stripping process.
First and foremost, it is important to wear appropriate protective gear to shield yourself from any potential hazards. This includes safety goggles to protect your eyes from flying debris, a face mask to prevent inhalation of paint particles, and sturdy gloves to safeguard your hands from the pressure washer’s powerful spray.
Additionally, it is advisable to work in a well-ventilated area to minimize the inhalation of fumes and avoid suffocation. If your deck is located in a confined space, consider using fans or opening windows and doors to improve ventilation during the paint stripping process.
| Safety Measure | Description |
|---|---|
| Secure the area | Clear the deck of any obstructions, such as furniture or plants, to ensure a safe working environment. |
| Protect surrounding surfaces | Cover nearby plants, windows, and outdoor furniture with plastic sheets or tarps to minimize damage from paint chips and debris. |
| Inspect the pressure washer | Before use, check the pressure washer for any damage or leaks. Make sure all connections are secure and in working order. |
| Follow manufacturer’s instructions | Read and understand the user manual provided by the pressure washer manufacturer to operate the machine safely and effectively. |
| Maintain proper posture | When using the pressure washer, maintain a comfortable and balanced stance to prevent strains or injuries. |
| Use appropriate spray nozzles | Select the correct spray nozzle for the desired stripping technique and adjust the pressure accordingly to avoid excessive force. |
By taking these safety measures into account, you can minimize the risks associated with using a pressure washer to strip paint off your deck and ensure a safe and successful paint removal process.
Selecting the Appropriate Pressure Washer Nozzle
As an experienced DIY enthusiast or professional, you recognize the importance of selecting the right tools for the job. When it comes to using a pressure washer to effectively remove layers of old paint from your deck, choosing the appropriate nozzle is crucial. The nozzle you select will determine the intensity and shape of the water spray, allowing you to achieve the desired results efficiently and accurately.
There are various types of pressure washer nozzles available, each with its own unique spray pattern and intensity. The key is to understand the different nozzle options and how they can be utilized to strip paint effectively without damaging the surface of your deck.
| Nozzle Type | Spray Pattern | Recommended Use |
|---|---|---|
| 0-Degree Nozzle | Highly concentrated and narrow spray | Best for targeting precise areas or removing tough, stubborn paint spots |
| 15-Degree Nozzle | Medium to high concentration with a narrow spray | Great for stripping paint from larger areas and providing more control than a 0-degree nozzle |
| 25-Degree Nozzle | Broader spray pattern with medium intensity | Ideal for general paint stripping on large surfaces without risking damage |
| 40-Degree Nozzle | Wide spray pattern with low intensity | Used for light-duty paint removal and general cleaning of delicate surfaces |
| Detergent Nozzle | Provides a low-pressure, wide spray for applying cleaning solutions | Recommended for applying paint strippers or deck cleaners before pressure washing |
Choosing the right nozzle for your pressure washer will largely depend on the condition of your deck and the thickness of the paint you wish to strip. It’s essential to start with a less aggressive nozzle option and gradually increase intensity if needed, always being mindful of the deck’s surface material. Remember, using too high of a spray pressure or a narrow nozzle on a delicate surface can result in unwanted damage.
By understanding the spray patterns and recommended uses of different pressure washer nozzles, you can confidently select the appropriate nozzle for your paint stripping project. This knowledge will help you achieve the desired outcome of having a beautifully stripped deck ready for a fresh coat of paint or other finishing touches.
Applying the Paint Remover
When it comes to removing paint from a deck, one of the most effective methods is to apply a paint stripper. This step is crucial in preparing the surface for a fresh coat of paint or stain. In this section, I will guide you through the process of applying the paint remover to your deck, ensuring the best possible results.
1. Preparation
Prior to applying the paint stripper, it is essential to prepare the deck adequately. Begin by clearing the area of any furniture, plants, or obstacles that may obstruct the process. Additionally, ensure that the deck is dry, as applying the paint remover on a wet surface will diminish its effectiveness. By taking these necessary precautions, you set the stage for a successful paint removal process.
2. Safety Measures
Safety should always be a top priority when working with paint strippers. Before applying the product, put on protective eyewear, gloves, and a mask to avoid direct contact with any potentially harmful chemicals. It is also advisable to work in a well-ventilated area to minimize exposure to fumes. By following these safety measures, you can complete the task without compromising your well-being.
3. Application Process
Begin by carefully reading and following the instructions provided by the manufacturer of the paint stripper. Different products may have variations in their application techniques, so it is crucial to be familiar with the specific guidelines. Generally, the paint stripper is applied using a brush or roller, ensuring an even and thorough coverage. Follow the recommended waiting time, allowing the product to penetrate and loosen the paint effectively.
Once the recommended waiting period has passed, use a scraper or a pressure washer (with a low-pressure nozzle attachment) to remove the loosened paint. Start at one end of the deck and work your way systematically across, using smooth and controlled motions. It is important to remember not to use excessive pressure when using the pressure washer, as this may damage the surface of the deck.

After the majority of the paint has been removed, inspect the deck for any remaining traces. If necessary, you may need to repeat the application process on stubborn areas or use a brush or scrubbing pad for finer details. Take your time to ensure that all paint has been effectively removed, providing a clean surface for the next step in the deck restoration process.
- Clear the deck of any obstacles and ensure that it is dry.
- Put on protective gear such as gloves and a mask.
- Read and follow the instructions provided by the paint stripper manufacturer.
- Apply the paint stripper using a brush or roller, ensuring even coverage.
- Allow the recommended waiting time for the paint stripper to work.
- Use a scraper or a pressure washer with a low-pressure nozzle to remove the stripped paint.
- Inspect the deck for any remaining traces and repeat the process if necessary.
By properly applying the paint stripper, you can effectively remove the old paint from your deck, preparing it for a fresh new finish. This step is essential in the overall restoration process, ensuring a smooth and beautiful deck that will stand the test of time.
Allowing the Paint Stripper to Set
When it comes to removing paint from your deck, using a pressure washer is not the only step involved in the process. To achieve the best results, it is important to allow the paint stripper to set on the surface before proceeding further.
Understanding the Purpose
The purpose of allowing the paint stripper to set is to let it effectively break down the layers of paint on your deck. By giving it enough time to work, you ensure that the stripper penetrates the paint and reaches the surface underneath. This allows for easier removal and prevents any leftover traces of paint on your deck.
Recommended Time and Conditions
The time required for the paint stripper to set can vary depending on the brand and type you are using. It is crucial to follow the manufacturer’s instructions and recommendations for the specific paint stripper you have chosen. In general, a minimum of 10-15 minutes is ideal for the stripper to effectively do its job.
Additionally, it is important to consider the weather conditions while allowing the paint stripper to set. Ideally, choose a day with mild temperatures and avoid applying the stripper under direct sunlight. High temperatures can cause the stripper to dry up quickly, making it less effective in loosening the paint.
| Tip |
| Consider covering the treated area with a plastic sheet or tarp to prevent the stripper from drying too quickly in hot weather conditions. |
During the waiting period, it is advisable to keep an eye on the stripper to ensure it does not dry up completely. If needed, you can apply additional coats of the paint stripper to maintain its effectiveness. Remember to follow the manufacturer’s recommendations for multiple applications.
By allowing the paint stripper sufficient time to set and work on the painted surface of your deck, you maximize the chances of successful paint removal. This step sets the foundation for an efficient and thorough stripping process, leaving your deck ready for the next stages of restoration or refinishing.
Using the Power of High Pressure Cleaning to Eliminate Residual Paint
When it comes to revitalizing the appearance of your outdoor surfaces, such as decks and patios, embracing the power of a pressure washer can offer remarkable results. Let me share my personal experience of utilizing this effective cleaning tool to effectively eliminate any leftover paint after the stripping process.
Tackling Stubborn Paint Residues:
Once the initial paint stripping has been completed using alternative methods, such as scraping or sanding, you may notice residual paint particles clinging to the surface. By harnessing the forceful jets of water produced by a pressure washer, these stubborn paint residues can be swiftly removed.
Adjusting Pressure and Nozzle for Optimal Results:
It is important to note that the pressure applied by the washer should be adjusted to ensure it is neither too weak nor too strong for the surface being treated. Experiment with different nozzle attachments and adjust the pressure settings accordingly to achieve the best outcome.
The Targeted Precision of a Turbo Nozzle:
For areas where the residual paint is particularly stubborn, a turbo nozzle attachment can be employed to enhance the cleaning power. The concentrated stream of water produced by the turbo nozzle can effectively target and remove even the most steadfast paint remnants.
Keeping Safety in Mind:
While using a pressure washer can yield excellent results, it is crucial to prioritize safety throughout the process. Protective eyewear should be worn to shield your eyes from any debris that may be dislodged during the cleaning. Additionally, being mindful of the direction of the water spray and keeping a safe distance from the surface can prevent unintended damage.
Finishing Touches for a Polished Look:
Once the residual paint has been successfully removed, you can go the extra mile to restore the beauty of your deck by utilizing other cleaning methods, such as applying a specialized deck cleaner or using a mild detergent solution. This final step will help achieve a clean and polished appearance.
By harnessing the power of a pressure washer, you can effectively remove any stripped paint remnants from your deck, ultimately contributing to a refreshed and rejuvenated outdoor space.
Cleaning Up the Deck Surface
When it comes to revitalizing your deck and bringing back its natural beauty, one of the crucial steps is cleaning up the deck surface. By removing any dirt, grime, and old stains, you’ll create a fresh canvas for any future treatments or refinishing. In this section, I’ll share my personal experiences and tips on how to effectively clean your deck surface without using a pressure washer.
The Importance of a Clean Deck
Having a clean deck surface is not only aesthetically pleasing, but it also ensures the longevity and durability of the wood. Over time, dirt, debris, and organic matter can accumulate, leading to mold, mildew, and rotting. By regularly cleaning your deck, you can prevent these issues and extend its lifespan.
Choosing the Right Cleaning Solution
Before getting started, it’s essential to select the appropriate cleaning solution for your deck surface. Different types of wood and finishes may require different cleaning agents, so it’s crucial to read the manufacturer’s recommendations or consult with a professional if you’re unsure. Additionally, make sure to choose an eco-friendly cleaner to minimize any potential harm to the environment.
Note: Avoid using harsh chemicals or bleach-based products as they can damage the wood and surrounding vegetation.
Once you have your cleaning solution ready, mix it according to the instructions provided. It’s advisable to start with a mild concentration and gradually increase if necessary.
Effective Cleaning Techniques
Now that you have your cleaning solution prepared, it’s time to tackle the deck surface. Grab a stiff-bristle brush or a deck scrubber and dip it into the cleaning solution. Begin scrubbing the surface, focusing on areas with visible stains, dirt, or discoloration.
Tip: Work in small sections to ensure thorough cleaning and prevent the cleaning solution from drying too quickly.
Apply firm pressure while scrubbing, especially on stubborn stains. For hard-to-reach areas or narrow gaps between the deck boards, use a small brush or toothbrush to get into every nook and cranny.
Once you’ve scrubbed the entire deck surface, rinse it thoroughly with water. A garden hose or a bucket of water can be used for this purpose. Make sure to remove all traces of the cleaning solution to avoid any residue or discoloration.
Note: Avoid using a pressure washer directly on the deck surface, as it can cause splintering or gouging if not used properly.
After rinsing, allow the deck surface to dry completely before proceeding with any further treatments, such as staining or sealing. This will ensure that the wood is ready to absorb the desired finish, allowing for a more even and long-lasting result.
In conclusion, cleaning up the deck surface is a crucial step in maintaining and revitalizing your outdoor space. By following the right cleaning techniques and using suitable cleaning solutions, you can achieve a clean and vibrant deck that will be the envy of the neighborhood.
Assessing the Stripped Deck for Further Treatment
As I evaluate the deck after the stripping process, I am filled with anticipation about the possibilities for further treatment. Without the layers of paint obscuring the wood’s natural beauty, I can now assess its condition and determine the next steps to enhance its durability and aesthetics.
Evaluating the Wood’s Integrity: With the old paint removed, I can closely examine the deck’s surface for any signs of damage or decay. I inspect the wood for cracks, splinters, or loose boards that may require repair before proceeding with any new treatments. Paying attention to these details ensures the deck’s structural integrity and longevity.
Considering the Wood Type: Understanding the type of wood used to construct the deck is essential in determining the most suitable treatment options. Each wood species possesses unique characteristics, such as hardness, natural color, and resistance to rot and insects. Identifying the wood type helps me select the appropriate stain or sealant that will complement its inherent qualities and provide optimal protection.
Assessing Moisture Levels: Moisture content plays a vital role in the deck’s overall health and the success of future treatments. Using a moisture meter, I measure the wood’s moisture levels to ensure they are within the recommended range. If the readings indicate excessive moisture, I allow the deck to dry thoroughly before proceeding with any sealing or staining. This step prevents potential issues such as warping, mold growth, and poor adhesion of the new treatment.
Addressing Previous Finishes: Prior to applying a new treatment, it is important to evaluate any remnants of previous finishes that may still be present on the deck. I check for traces of paint, stain, or sealant that were not completely removed by the pressure washer. These areas may require additional sanding or scraping to achieve a smooth and uniform surface, ensuring proper adhesion of the new treatment.
Preparing for Future Treatments: After a comprehensive assessment, I consider the desired outcome for the deck’s appearance and protection. Depending on personal preference, I may choose to apply a protective sealant, a vibrant stain, or a combination of both. Furthermore, I acknowledge the importance of regular maintenance and establish a maintenance plan to preserve the deck’s beauty and prolong its lifespan.
In conclusion, evaluating the stripped deck for further treatment involves assessing its condition, identifying the wood type, checking moisture levels, addressing remnants of previous finishes, and planning for future treatments. This thorough evaluation allows for informed decision-making and ensures that the deck remains a source of pride and enjoyment for years to come.
Recommended Maintenance Tips for a Fresh-Looking, Stripped Deck
When it comes to preserving the natural beauty and longevity of your outdoor living space, proactive deck maintenance is key. After successfully stripping the existing paint from your deck, implementing a regular maintenance routine is crucial to keep it looking stunning and in optimal condition for years to come.
1. Protect and Seal the Wood
To safeguard your newly stripped deck, it is essential to protect and seal the wood to prevent moisture penetration, sun damage, and general wear and tear. Applying a high-quality wood sealer or stain with UV protection will not only enhance the aesthetics but also provide long-lasting durability. Remember to choose a product compatible with your deck’s wood type and climate conditions.
2. Clean Thoroughly and Regularly
Maintaining a clean deck is vital in preventing the buildup of dirt, mold, mildew, and other debris that can lead to discoloration and even structural damage. Cleaning your deck regularly using a gentle cleaner or a mild solution of warm water and soap will help to remove stubborn stains and prevent further deterioration. Avoid using abrasive materials or tools that may damage the wood fibers and finish.
Pro Tip: Consider using a soft-bristle brush or a deck brush for effective cleaning. For hard-to-reach areas between deck boards, a pressure washer with a low-pressure nozzle can be used, but make sure to maintain a safe distance to avoid damaging the wood.
3. Regular Inspection
Performing routine inspections of your deck is essential to catch any potential issues before they become major problems. Regularly check for loose boards, cracks, or splits in the wood, and address them promptly to prevent further damage or safety hazards. Additionally, inspect the hardware such as screws and nails, ensuring they are secure and not corroded.
Note: If you notice any signs of moisture intrusion or rot, it is recommended to consult a professional for further assessment and repairs.
By following these recommended maintenance tips, you can extend the life of your newly stripped deck and enjoy its beauty and functionality for years to come. Remember, prevention and regular care are key to maintaining a fresh and inviting outdoor space.