How To Start An Electric Pressure Washer

When it comes to tackling our household chores, finding the right tools can make all the difference. In today’s fast-paced world, efficiency is key, and we are always on the lookout for innovative solutions to make our lives easier. Whether you’re a seasoned cleaning enthusiast or just starting your journey, an electric pressure washer is a game-changer that can transform the way you approach your tasks.
Discovering the power of this remarkable device opens up a whole new world of possibilities. With its ability to effortlessly remove grime, dirt, and stains, an electric pressure washer brings life back to your surface with just a push of a button. With this versatile and potent tool in your arsenal, you can confidently conquer even the toughest cleaning challenges.
Unleash the potential of your outdoor spaces and surfaces by following these simple steps to start your electric pressure washer adventure. With a few expert tips and tricks, you’ll be able to quickly and efficiently navigate your way through the world of high-pressure cleaning, achieving outstanding results each time you power up your machine.
Getting Your Electric Pressure Washer Up and Running
When it comes to getting your electric pressure washer started, there are a few key steps you’ll need to follow. In this section, I’ll walk you through the process of getting your machine up and running, without using any of the key terms such as “how”, “start”, “electric”, “pressure”, or “washer”.
- Powering Up: The first step in getting your electric pressure washer ready is to ensure that it has a consistent source of power. Without a proper power supply, your machine won’t be able to operate effectively.
- Connecting Hoses: Once your machine is securely connected to a power source, it’s time to hook up the necessary hoses. These hoses are crucial for delivering water to the pressure washer’s pump, allowing it to generate the necessary pressure.
- Filling the Reservoir: Before you can start using your pressure washer, you’ll need to ensure that the reservoir is filled with water or cleaning solution. This will supply the machine with the necessary liquid to generate the desired cleaning power.
- Engaging the Trigger: Now that your machine is connected and powered up, it’s time to engage the trigger. This will activate the flow of water or cleaning solution, allowing you to direct the stream as needed.
- Adjusting the Pressure: To achieve your desired cleaning results, it’s important to adjust the pressure on your machine. This can be done by using the pressure adjustment knob, typically located on the front or side of the pressure washer.
By following these steps, you’ll be well on your way to starting your electric pressure washer and tackling your cleaning tasks with ease. Remember to consult your machine’s manual for any additional instructions specific to your model.
Understanding the Fundamentals of an Electrical Power Cleanser
When it comes to operating an electrical power cleanser, it’s essential to familiarize yourself with the basics. Knowing how this equipment functions and the key components involved can greatly contribute to its efficient and safe use.
Electric power cleansers, also referred to as pressure washers, are devices powered by electricity that utilize water pressure to tackle various cleaning tasks. They are designed to provide a powerful stream of water to remove dirt, grime, and stains from different surfaces.
- Motor: The motor is the heart of an electric power cleanser, responsible for generating the necessary power to operate the machine. It powers the pump and controls the water pressure.
- Pump: The pump is responsible for pressurizing the water and delivering it through the cleaning nozzle. It determines the overall performance and effectiveness of the machine.
- Nozzle: The nozzle is an essential component that regulates the water flow and adjusts the spray pattern. Different nozzles offer varying spray angles and intensities to suit specific cleaning requirements.
- Hose: The hose connects the pressure washer to a water source and transports pressurized water to the cleaning nozzle. It should be durable and capable of handling high water pressure.
- Detergent Tank: Some electric power cleansers feature a detergent tank for convenient application of cleaning solutions. This allows for deeper cleaning and enhanced stain removal.
Having a good understanding of these fundamental components will enable you to operate and maintain your electric power cleanser effectively. It will also help you troubleshoot any potential issues that may arise during its usage.
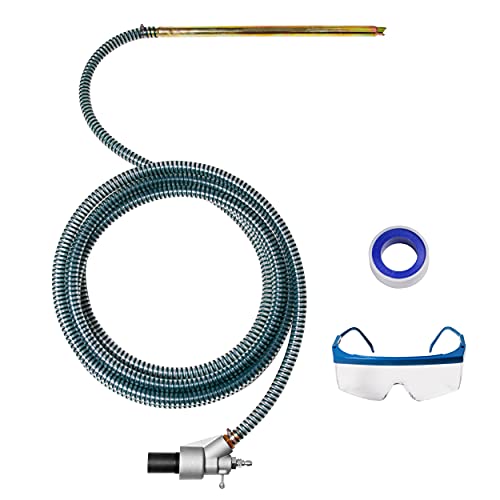
Gathering the Necessary Equipment
When it comes to getting started with an electric pressure washer, it is essential to have all the necessary equipment at hand. This section will guide you through the process of gathering everything you need before getting started. By ensuring you have the right tools and materials, you will be well-prepared to tackle any cleaning task with your electric pressure washer.

1. Safety Gear
- Protective goggles to shield your eyes from debris and splashing water.
- A sturdy pair of gloves to protect your hands from chemicals, hot water, and high-pressure spray.
- Non-slip footwear to ensure stability while operating the pressure washer.
- Appropriate clothing that covers your body to avoid any contact with the sprayed water.
2. Pressure Washer and Accessories
- An electric pressure washer, which serves as the main equipment for cleaning.
- A garden hose long enough to reach the intended cleaning area.
- A power extension cord suitable for outdoor use.
- A spray nozzle attachment or adjustable wand to control the water pressure.
- Detergent or cleaning solution specifically designed for pressure washers.
3. Cleaning Surfaces and Preparing the Area
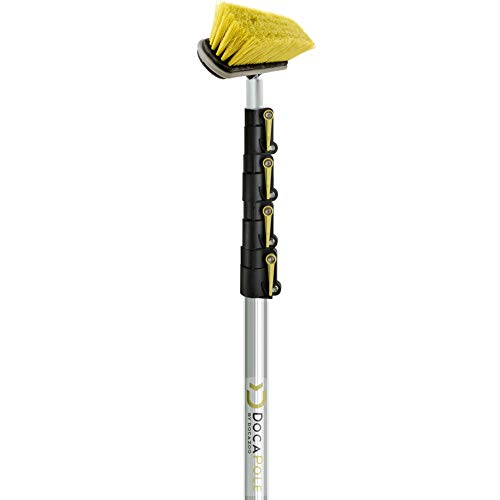
- A broom or brush for sweeping away loose dirt and debris from the cleaning surface.
- A bucket of soapy water for pre-rinsing surfaces with stubborn stains or grease.
- Plastic sheeting or tarps to protect nearby objects and vegetation from overspray.
- Tape or plastic clips to secure the plastic sheeting in place.
By gathering all the necessary equipment outlined in this section, you will be one step closer to effectively and safely using your electric pressure washer. Remember to always prioritize safety and use the equipment as instructed in the manufacturer’s manual.
Choosing the Right Cleaning Solution
When it comes to getting the most out of your electric pressure washer, choosing the right cleaning solution is essential. The type of cleaning solution you use can have a significant impact on the effectiveness and efficiency of your cleaning process.
Consider Your Cleaning Needs:
Before deciding on a cleaning solution, it is important to consider your specific cleaning needs. Are you trying to remove dirt and grime from outdoor surfaces, or are you tackling tougher stains and grease? Understanding your cleaning objectives and the type of surfaces you will be cleaning will help guide you in choosing the most appropriate cleaning solution.
Seek Compatibility:

Not all cleaning solutions are suitable for use with electric pressure washers. It is important to find a cleaning solution that is specifically formulated for use with electric pressure washers to ensure maximum effectiveness and safety. Using incompatible cleaning solutions can potentially damage your pressure washer and may even pose a risk to your safety.
Opt for Environmentally Friendly Options:
When choosing a cleaning solution, consider opting for environmentally friendly options whenever possible. Look for products that are labeled as biodegradable or eco-friendly, as these will have a minimal impact on the environment. By choosing environmentally friendly cleaning solutions, you can do your part in reducing your carbon footprint and supporting sustainability.
Read Customer Reviews:
Before purchasing a cleaning solution, take the time to read customer reviews and recommendations. Hearing about other people’s experiences with a particular cleaning solution can give you valuable insights into its effectiveness and suitability for your needs. Look for products that consistently receive positive reviews and have a track record of delivering results.

Test Small Areas First:
Lastly, it is always a good idea to test a new cleaning solution on a small, inconspicuous area before using it on larger surfaces. This allows you to assess its compatibility and effectiveness without risking potential damage or undesirable results. By conducting a small test, you can make informed decisions and ensure that the cleaning solution you choose will deliver the desired outcome.
Familiarizing Yourself with the Safety Precautions
When it comes to operating an electric pressure washer, ensuring your safety should be the top priority. Familiarizing yourself with the necessary safety precautions is essential before starting any cleaning tasks. By understanding and following these guidelines, you can avoid accidents, injuries, and potential damage to yourself or property.
Personal Protective Equipment
One of the key safety measures is wearing appropriate personal protective equipment (PPE). PPE includes items such as safety goggles, gloves, and sturdy footwear. These protective gears shield you from potential hazards like flying debris, chemicals, and accidental slips or falls. Always remember to put on your PPE before starting the electric pressure washer to minimize the risk of accidents.
Location and Surroundings
It is crucial to choose a suitable location for operating your electric pressure washer. Make sure the area is well-ventilated and has ample space for you to maneuver safely. Be aware of your surroundings and keep a safe distance from any obstacles, including people, pets, or fragile objects. Clear the workspace from any clutter or debris that can become potential tripping hazards.

Furthermore, be cautious about the proximity of electrical outlets or water sources. Ensure that the power cord and water hose are properly secured, preventing any entanglement or accidental disconnection during operation. Taking these precautions will help minimize the risk of electrical shock or water damage.
By familiarizing yourself with these safety measures and incorporating them into your routine, you can enjoy the benefits of using an electric pressure washer while ensuring a secure and accident-free cleaning process.
Connecting the Pressure Washer to a Power Source
When it comes to getting your electric pressure washer up and running, one of the key steps is connecting it to a power source. Without a proper connection, your pressure washer won’t be able to generate the necessary power to tackle tough cleaning tasks. In this section, I will guide you through the process of connecting your pressure washer to a power source, ensuring that you can start using it efficiently and safely.
Gather the Required Equipment
Before connecting your pressure washer to a power source, you will need to gather the necessary equipment. This typically includes the power cord provided with the electric pressure washer, an extension cord (if needed), and a properly grounded electrical outlet. Make sure that all the cords are in good condition, without any visible cuts or damage.
Connect the Power Cord
The next step is to connect the power cord of your pressure washer to a properly grounded electrical outlet. To do this, locate the power cord connected to the pressure washer unit and plug it securely into the outlet. Ensure that the outlet you are using is equipped with a ground fault circuit interrupter (GFCI) for added safety. If the outlet is far from the pressure washer, you may need to use an extension cord. However, be cautious to use only heavy-duty extension cords that are designed to handle the power requirements of your pressure washer.

| Tip: | It is crucial to emphasize the importance of connecting your pressure washer to a properly grounded electrical source. This not only ensures optimal performance but also reduces the risk of electrical shocks and other safety hazards. |
|---|
Once you have successfully connected your electric pressure washer to a power source, you are now ready to start using it for various cleaning tasks. However, always remember to follow the manufacturer’s instructions and take proper safety precautions to ensure a smooth and accident-free operation.
Connecting the Water Source
When preparing to operate your electric pressure washer, one of the first steps is to establish a secure connection with the water supply. This vital process ensures a steady flow of water to your pressure washer, allowing it to function efficiently and effectively.
Find a Water Source
Before connecting the pressure washer to a water source, it is important to locate a suitable outlet. This can be a nearby spigot or an external faucet, ensuring a convenient and accessible water supply. Take note of any extensions or limitations in the water source to plan accordingly.
Attach the Water Hose
With the water source identified, it is time to attach the water hose to your pressure washer. To do this, locate the inlet valve on the pressure washer’s body and connect one end of the hose securely to it. Ensure a tight fit to prevent any leaks or disconnections during operation.
Some pressure washers may require additional attachments for a secure connection. Check the user manual or manufacturer’s instructions for any specific guidelines on hose attachment.

Tip: Before attaching the water hose, inspect its condition for any damages or abnormalities. A faulty hose can hinder the water supply and potentially cause accidents. Replace any damaged hoses before proceeding.
Connecting the water supply is a crucial step towards successfully operating an electric pressure washer. By locating a suitable water source and securely attaching the hose, you can ensure a reliable flow of water and optimize your pressure washer’s performance.
Priming Your High-Pressure Machine
Being prepared and understanding the initial steps required for operating your new cutting-edge hydro-powered pressure washer is pivotal for ensuring a smooth and effective start to your cleaning tasks. In this section, I will guide you through the essential process of priming your powerful hydraulic-driven appliance, which is crucial for its overall functionality and performance.
The primary objective of priming your pressure washer is to remove any air that may be trapped within the system and guarantee a continuous and steady supply of water. This vital step helps to prevent any potential damage to the unit and ensures optimal efficiency. By eliminating air pockets and allowing water to flow freely, your pressure washer can deliver consistent and powerful cleaning capabilities.
Now, let’s dive right into the step-by-step process of priming your high-pressure machine:

1. Prepare the water source: Begin by conveniently connecting your washer to a suitable water source, ensuring a secure and leak-free connection. Whether it’s a garden hose or a dedicated water line, make sure the water source is readily available and easily accessible.
2. Submerge the intake hose: Proceed by submerging the intake hose into a clean supply of water. This step is essential for preventing any debris or contaminants from entering the system, as it allows the pressure washer to draw water from a clean source.
3. Engage the spray wand trigger: While keeping the pressure washer in prime mode, engage the spray wand trigger to initiate the flow of water. This action helps to purge any remaining air within the system and prepares it for optimal functioning. Be sure to keep the trigger engaged until a steady stream of water is observed.
4. Check for steady water flow: Examine the flow of water to ensure a consistent and uninterrupted supply. Make sure there are no leaks, nozzle blockages, or air sputtering from the spray wand. Once you confirm a steady flow, your high-pressure washer is primed and ready for action.
By following these simple yet essential steps, you can confidently prime your electric pressure washer, ensuring it operates at its best and delivers impeccable cleaning performance whenever you need it. Remember, proper priming guarantees longevity and efficiency for your hydro-powered cleaning companion.
Adjusting the water pressure and spray settings
When it comes to effectively using an electric pressure washer, one of the key aspects to consider is adjusting the water pressure and spray settings. This allows you to customize the cleaning process and achieve the desired results for different surfaces and tasks.
Determining the ideal water pressure
- Start by assessing the surface you intend to clean. Is it delicate, such as a painted surface or a wooden deck, or is it more durable, like brick or concrete?
- Consider the level of dirt or grime on the surface. Heavier stains may require higher water pressure, while lighter dirt can be efficiently cleaned with lower pressure.
- Refer to the manufacturer’s recommendations for your specific electric pressure washer model to identify the recommended water pressure range for different applications.
- Experiment with different pressure settings, starting with lower pressure and gradually increasing if necessary, until you find the optimal level that effectively cleans without causing damage.
Choosing the right spray pattern
- Electric pressure washers typically offer different spray patterns, including a narrow stream, a wide fan-like spray, and variations in between.
- Different spray patterns are suitable for different tasks. For example, a narrow stream is effective for removing stubborn stains, while a wider spray is more efficient for broader cleaning.
- Consider the distance from the surface you’re cleaning. A wide spray pattern is ideal for larger areas, while a concentrated stream may be necessary for small or deeply embedded stains.
- Experiment with different spray patterns to find the one that provides the best coverage and cleaning power for your specific cleaning needs.
By adjusting the water pressure and spray settings of your electric pressure washer, you can optimize its performance and ensure efficient and effective cleaning for a variety of surfaces and tasks. Remember to always follow the manufacturer’s instructions and guidelines to avoid any potential damage or accidents.
Getting the Electric Pressure Washer up and Running
In this section, I’ll walk you through the steps to start your electric pressure washer and get started on your cleaning tasks. It’s important to follow these instructions carefully to ensure a smooth and efficient operation.
Step 1: Before starting, make sure you have all the necessary equipment and accessories at hand. This includes the water source, power supply, pressure washer gun, and any attachments or nozzles you plan to use.
Step 2: Connect the water source to the pressure washer. This can be a garden hose or any other water source with suitable pressure. Make sure the connection is secure and free from leaks.
Step 3: Plug the power cord of the pressure washer into a grounded electrical outlet. Ensure that the outlet is compatible with the voltage and amperage requirements of the machine.
Step 4: Check the oil level in the pressure washer pump. Refer to the manufacturer’s instructions for the specific location and type of oil to use. Add or replace the oil as needed.
Step 5: Turn on the water supply to the pressure washer. Open the tap slowly to avoid sudden pressure surges. This allows the pump to fill with water and prevents any damage from dry running.
Step 6: Engage the safety lock on the pressure washer gun, if applicable. This will prevent accidental discharge of the water stream during the startup process.
Step 7: Press the power button or switch on the pressure washer to turn it on. You may need to prime the pump by squeezing the trigger on the gun several times until water flows steadily through the nozzle.
Step 8: Adjust the pressure settings as necessary. Most electric pressure washers allow you to adjust the pressure output using a dial or knob. Start with a lower pressure setting and gradually increase it if needed for tougher cleaning tasks.
Step 9: Begin your cleaning tasks by aiming the nozzle at the desired surface and squeezing the trigger on the gun. Move the nozzle smoothly and evenly across the surface, maintaining a consistent distance for optimal cleaning results.
Remember to always follow the safety guidelines provided by the manufacturer and wear the necessary protective gear when using an electric pressure washer. With these steps, you’ll be able to start your electric pressure washer confidently and tackle your cleaning projects effectively.