How To Start A Subaru Pressure Washer

Have you recently acquired a Subaru power cleaner and are wondering how to get it up and running? Look no further, as I’m here to guide you through the process step by step. With a few simple instructions, you’ll have your power cleaner ready to tackle any tough cleaning job in no time.
Before we dive into the details, let me assure you that starting your Subaru power cleaner is a breeze. With its durable design and powerful performance, this machine is engineered to make your cleaning tasks effortless and efficient. Whether you’re cleaning your car, patio, or even dealing with stubborn stains, the Subaru power cleaner is your go-to solution.
Let’s get started with the basics. To begin, ensure that the power cleaner is placed on a flat surface and adequately fueled up. Check the fuel gauge and make sure you have enough gasoline to last the duration of your cleaning session. Additionally, ensure that the oil level is sufficient by examining the oil dipstick. If needed, top up the oil to the recommended level.
Now, it’s time to prime the power cleaner. Locate the primer bulb, typically situated near the engine, and press it three to five times. This action will help to draw fuel into the carburetor, facilitating a quick and smooth start. Once primed, make sure the choke lever is set to the closed position, denoted by the “C” symbol. This step aids in starting the engine, especially if it’s cold or hasn’t been used for a while.
With everything in place, firmly grip the starter rope handle and give it a strong pull. The engine should ignite, and you’re well on your way to a successful cleaning session. To ensure optimal performance, let the engine warm up for a few minutes before proceeding with your cleaning task. This short interval allows the power cleaner to reach its peak efficiency, guaranteeing exceptional results every time.
Understanding the Fundamentals of Operating a Subaru Power Cleaner
When it comes to utilizing a high-quality power cleaner like the Subaru model, it is essential to comprehend the basic principles behind its operation. By understanding how the machine functions, you can ensure optimal performance and longevity for your cleaning tasks. In this section, I will explain the fundamental aspects of operating a Subaru power cleaner, highlighting key components and techniques without explicitly mentioning the specific brand or model.
To begin, it’s important to familiarize yourself with the various components of a power cleaner. These typically include a motor or engine, a pump, hoses and nozzles, a detergent tank, and a wand or spray gun. Each of these elements plays a crucial role in generating the necessary pressure and flow of water for effective cleaning. By understanding the purpose and function of these components, you can effectively control and manipulate the cleaning process.
- The motor or engine provides the power and drive necessary to operate the power cleaner.
- The pump is responsible for increasing the water pressure, enabling efficient cleaning by dislodging dirt and grime.
- Hoses and nozzles serve as conduits for water flow and allow for adjustable spray patterns, enabling versatility in tackling different cleaning tasks.
- The detergent tank provides a convenient reservoir for storing cleaning solutions, enhancing the cleaning effectiveness for stubborn stains and grease.
- The wand or spray gun is the tool that allows you to control the application of pressurized water and detergent on the surface being cleaned.
Once you have a good understanding of the components, it is important to learn the proper operating techniques for a power cleaner. This includes familiarizing yourself with the control panel, understanding the various pressure settings and spray patterns, and knowing how to handle the wand or spray gun effectively. Adhering to the manufacturer’s guidelines and safety precautions is crucial to ensure a smooth and successful cleaning process.
By grasping the fundamentals of a power cleaner, you can confidently operate any Subaru model or similar pressure washer, optimizing its performance and ensuring outstanding cleaning results. With an understanding of the key components and operating techniques, you are now equipped to tackle a wide range of cleaning tasks efficiently and effectively.

Checking the Fuel and Oil Levels
As an owner of a Subaru pressure washer, it is crucial to regularly check the fuel and oil levels before starting it up. This ensures that your pressure washer operates smoothly and efficiently, preventing potential damage and extending its lifespan.
Inspecting the Fuel Level
Before powering on your pressure washer, it is essential to ensure that an adequate amount of fuel is present in the tank. This ensures a consistent fuel supply to the engine, allowing it to function optimally. I usually use a fuel gauge or visually inspect the fuel level by peeking into the tank. It is important to note that running the pressure washer with insufficient fuel can lead to engine stalling or poor performance.
Tip: Consider using a fuel stabilizer if you plan to store your pressure washer for an extended period. This helps prevent fuel deterioration and keeps the engine ready for immediate use.
Checking the Oil Level
Proper lubrication is vital for the longevity and smooth operation of the pressure washer’s engine. Therefore, always check the oil level before starting the machine. To do this, I locate the oil dipstick, pull it out, and wipe it clean with a cloth. Then, I reinsert the dipstick fully, remove it again, and check the oil level. It should be between the designated markers on the dipstick.
Tip: Use the recommended oil type for your specific Subaru pressure washer model and consult the owner’s manual for detailed instructions on how to check and change the oil.

By regularly checking the fuel and oil levels, you can ensure that your Subaru pressure washer is always ready to perform at its best. Taking a few moments to inspect these essential components can save you from potential headaches and costly repairs in the long run.
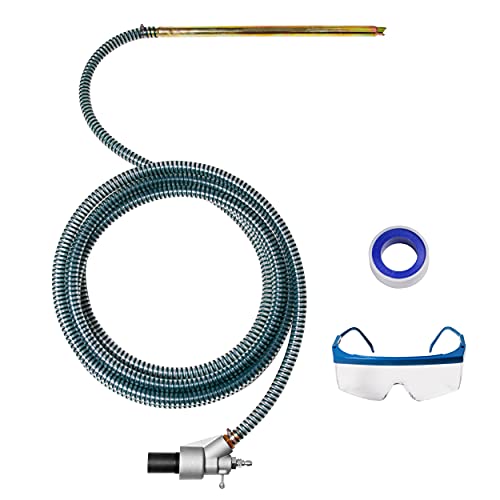
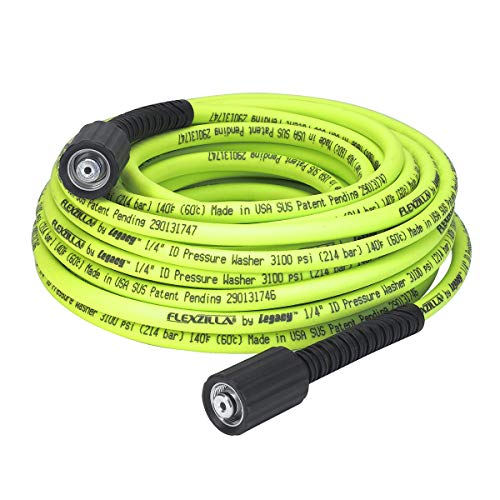
Connecting the Water Supply
When it comes to getting your Subaru pressure washer up and running, one of the first steps you’ll need to take is connecting the water supply. This crucial step ensures that your pressure washer has a steady and reliable source of water to power its cleaning capabilities.
Locating the Water Inlet
Before you can connect the water supply, you’ll need to locate the water inlet on your Subaru pressure washer. This is typically found on the side or back of the machine and is marked clearly. Once you’ve identified the water inlet, you’re ready to move on to the next step.
Attaching the Water Hose
Now that you’ve found the water inlet, it’s time to attach the water hose. Start by ensuring that the water supply is turned off. Then, take one end of the water hose and securely connect it to the water inlet on the pressure washer. Make sure the connection is tight to prevent any leaks.
Once the water hose is securely attached, you can turn on the water supply. This will allow water to flow into the pressure washer, ready to be used for cleaning purposes.

Note: It’s important to check the user manual or specific instructions provided with your Subaru pressure washer for any additional steps or precautions related to connecting the water supply. Following the manufacturer’s guidelines will help ensure safe and proper operation of the machine.
To summarize, connecting the water supply to your Subaru pressure washer involves locating the water inlet, attaching the water hose, and checking for any additional instructions specific to your machine. By following these steps and guidelines, you’ll be ready to unleash the cleaning power of your pressure washer.
Adjusting the Nozzle for the Desired Pressure
When using a Subaru pressure washer, it is crucial to understand how to adjust the nozzle to achieve the desired water pressure. This section will guide you through the process of finding the optimal pressure for your specific cleaning needs, without the use of any specific terms.
To begin, it is important to note that adjusting the nozzle of a Subaru pressure washer allows you to customize the force and intensity of the water spray. This is essential as different cleaning tasks require different levels of pressure. By adjusting the nozzle, you can ensure that the water pressure is neither too gentle nor too forceful, providing you with the ideal balance for effective cleaning results.
Step 1: To get started, locate the nozzle adjustment mechanism on the pressure washer. This is usually situated at the end of the spray wand or lance. It may be a rotating collar, a dial, or a similar mechanism designed for adjusting the nozzle’s position.

Step 2: Once you have located the adjustment mechanism, begin by turning it in one direction. This will alter the position of the nozzle, affecting the water pressure. A clockwise turn may increase the pressure, while a counterclockwise turn may decrease it. Remember to make gradual adjustments to find the optimal pressure level.
Note: It may be helpful to refer to the user manual specific to your Subaru pressure washer for any additional instructions or guidance on adjusting the nozzle.
Step 3: As you make adjustments, it is important to test the water pressure regularly. You can do this by spraying a small area and observing the force and effectiveness of the water spray. If the pressure is too weak, you can turn the adjustment mechanism slightly in the opposite direction; if it is too strong, you can readjust accordingly.
Step 4: Continue adjusting the nozzle until you achieve the desired pressure for your cleaning task. This might involve finding a balance between removing dirt or grime effectively without causing any damage to the surface being cleaned.
Remember, finding the right nozzle adjustment is a trial-and-error process. It may take a few attempts to achieve the perfect balance of pressure for your specific cleaning needs.

In conclusion, by adjusting the nozzle of your Subaru pressure washer, you can fine-tune the water pressure to suit your individual requirements. Follow the steps outlined in this section and experiment with different adjustments until you find the optimal pressure for successful and efficient cleaning.
Preparing the Subaru Power Cleaner for Operation
Before using the power cleaner, it is important to prime the machine to ensure smooth and efficient functioning. This step is crucial for starting the Subaru power cleaner and getting it ready for operation.
Checking the Fuel Level
Firstly, make sure to check the fuel level in the power cleaner’s tank. It is essential to have enough fuel to start and operate the machine. If the fuel level is low, fill it up with suitable gasoline or diesel fuel according to the manufacturer’s recommendations.
Priming the Fuel System
Next, the fuel system needs to be primed to ensure a proper flow of fuel to the engine. To do this, locate the fuel pump or primer bulb on the power cleaner. Press the primer bulb multiple times until you feel resistance, indicating that the fuel system is primed and ready for operation.
By priming the fuel system, you are ensuring that the power cleaner receives an adequate fuel supply, which is necessary for starting and running the machine smoothly.

Once the fuel system is properly primed, you can proceed to start the Subaru power cleaner by following the manufacturer’s instructions. This process will vary depending on the specific model. Make sure to refer to the user manual for detailed guidance on starting the machine safely and effectively.
Remember, priming the Subaru power cleaner is an essential step that shouldn’t be overlooked. By taking the time to prime the fuel system, you are ensuring optimal performance and longevity of your power cleaner.
Pulling the Starter Cord to Initiate the Engine
When it comes to starting the Subaru pressure washer, one important step is pulling the starter cord to initiate the engine. This process is crucial in getting the machine up and running, as it kickstarts the engine and allows it to power the washer effectively. In this section, I will guide you through the procedure of pulling the starter cord, ensuring a smooth start every time.
1. Prepare the pressure washer: Before pulling the starter cord, make sure the pressure washer is in the correct position and securely placed on a stable surface. Check that all connections are tight and that there is enough fuel and oil in the engine to prevent any issues during startup.
2. Locate the starter cord: The starter cord is usually positioned on the side or the top of the pressure washer engine. Look for a grip or handle that is connected to a cord or rope. This is the part you will be pulling to initiate the engine.

3. Secure your grip: Once you’ve located the starter cord, grasp the handle firmly with one hand. Ensure that your grip is strong enough to withstand the pulling motion without slipping. Having a firm grip will maximize your chances of starting the engine smoothly.
4. Engage the safety lever: Many Subaru pressure washers have a safety lever that needs to be engaged before pulling the starter cord. This lever is usually located near the grip or handle. Pressing or pulling it will activate the safety mechanism, allowing you to start the engine.
5. Pull the starter cord: With your grip secure and the safety lever engaged, pull the starter cord firmly and quickly in a single motion. The cord should be pulled outwards, away from the engine. Use your arm and upper body strength to generate enough force for a successful start. Avoid yanking or pulling too slowly, as this can hinder the engine from igniting.
6. Repeat if necessary: If the engine doesn’t start on the first attempt, release the starter cord back to its original position and repeat the pulling motion. Sometimes, multiple pulls may be required to get the engine running. Be persistent but avoid overexerting yourself.
Remember, pulling the starter cord is an essential step in starting your Subaru pressure washer. By following these steps carefully, you will be able to initiate the engine successfully and proceed with your cleaning tasks efficiently.
Letting the Engine Reach Optimal Operating Temperature
When it comes to starting a Subaru pressure washer, one important step that should not be skipped is allowing the engine to warm up properly. This is a crucial part of the process as it ensures that the engine reaches its optimal operating temperature before starting any cleaning tasks. By allowing the engine to warm up, you are giving it the necessary time to reach its most efficient performance levels, which ultimately leads to better overall cleaning results.
The Importance of Allowing the Engine to Warm Up
One may wonder why letting the engine warm up is so important. Well, just like any other mechanical device, a pressure washer’s engine needs time to warm up and reach its ideal operating temperature. When the engine is cold, the oil viscosity is higher, meaning it is thicker and does not flow as easily. This can result in poor lubrication and increased wear on the engine’s components.
Steps on Letting the Engine Warm Up
Now that we understand the importance of letting the engine warm up, let’s go through the steps on how to properly do it:
| Step 1: | Ensure that the pressure washer is placed on a flat and stable surface. |
| Step 2: | Connect the water supply and ensure that the hoses and fittings are secure. |
| Step 3: | Check the oil level and make sure it is at the recommended level. |
| Step 4: | Turn the fuel valve on and ensure that there is enough fuel in the tank. |
| Step 5: | Prime the engine by following the manufacturer’s instructions. |
| Step 6: | Set the choke to the appropriate position based on the temperature conditions. |
| Step 7: | Start the engine by pulling the starter cord gently but firmly. |
| Step 8: | Allow the engine to idle for a few minutes, allowing it to warm up gradually. |
| Step 9: | Monitor the engine’s temperature gauge or indicator to ensure it reaches the optimal operating temperature. |
By following these steps and allowing the engine to warm up properly, you are ensuring that your Subaru pressure washer performs at its best and delivers optimal cleaning results. Remember, taking the time to let the engine warm up is a small investment that can go a long way in protecting and prolonging the life of your pressure washer.
Operating the Subaru Pressure Washer
When it comes to using the Subaru pressure washer, mastering its operation is key to achieving optimal performance and efficiency. In this section, I will guide you through the step-by-step process of using this powerful cleaning tool.
Before starting the Subaru pressure washer, it is important to ensure that all necessary safety precautions are in place. This includes wearing appropriate personal protective equipment such as safety glasses and gloves. Additionally, it is crucial to familiarize yourself with the different parts and controls of the pressure washer.
To begin, make sure the pressure washer is securely connected to a water source and that the water supply is turned on. Next, locate the fuel valve and ensure it is in the “on” position. Depending on the model, you may need to prime the pump by squeezing the primer bulb several times until fuel is visible in the bulb.
With the engine ready, it’s time to start the pressure washer. Locate the recoil starter and firmly grasp the handle. Give it a quick and decisive pull to start the engine. If you encounter any difficulty starting the engine, refer to the manufacturer’s manual for troubleshooting tips.
Once the engine is running smoothly, it is time to adjust the pressure settings according to the cleaning task at hand. Most Subaru pressure washers have adjustable pressure settings that allow you to tailor the water pressure based on the surface you are cleaning. High-pressure settings are suitable for tough stains and grime, while lower pressure settings are ideal for more delicate surfaces.
Now that the Subaru pressure washer is up and running, it’s time to put it to work. Point the spray gun at the desired surface and squeeze the trigger to start spraying. Move the spray gun back and forth in a sweeping motion, ensuring even coverage of the surface. Remember to maintain a safe distance from the surface to avoid any potential damage.
Once the cleaning task is complete, release the trigger and allow the pressure washer to run for a few minutes without spraying to flush out any remaining detergent or debris. Finally, turn off the pressure washer by switching off the engine and closing the fuel valve.
Operating a Subaru pressure washer may seem daunting at first, but with practice and adherence to safety guidelines, you will soon become proficient in using this powerful cleaning tool. Follow the steps outlined in this section to operate the pressure washer effectively and achieve excellent cleaning results.
Properly Shutting Down and Maintaining Your Subaru Pressure Washer
As an experienced user of Subaru pressure washers, I want to share some valuable insights on how to safely and effectively shut down and maintain your equipment. Properly ending a cleaning session and taking care of your pressure washer will not only extend its lifespan but also ensure consistently excellent performance. In this section, we will discuss the necessary steps to shut down your pressure washer, as well as provide guidance on maintenance routines to keep it in top condition.