
How To Start A Pressure Washer That Has Been Sitting
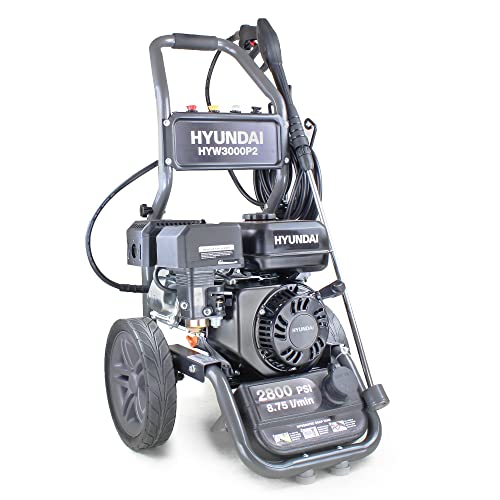
Recently, I found myself facing a daunting task – reviving my pressure washer after it had been idle for quite some time. The thought of troubleshooting and trying to start it up seemed overwhelming at first. However, with a little research and some trial and error, I managed to bring my pressure washer back to life. Today, I would like to share my experience and guide you through the steps I took to wake up my dormant machine.
Firstly, it’s important to understand that when a pressure washer has been inactive for an extended period, certain components may become unresponsive or clogged. This can lead to difficulties starting it up again. However, with a careful and systematic approach, you can diagnose and address these issues effectively. By following the steps outlined in this guide, you will be well on your way to getting your pressure washer up and running in no time.
One of the primary tasks you will need to undertake is inspecting and cleaning the fuel system of your pressure washer. Over time, fuel may degrade and clog up the carburetor or fuel lines, causing starting problems. By removing any old fuel, cleaning the carburetor, and ensuring proper fuel flow, you can eliminate these potential roadblocks. Additionally, checking the spark plug for any signs of wear or damage is crucial, as a faulty spark plug can also hinder your pressure washer’s start-up process.
Revitalizing a Dormant Power Cleanser
Gazing upon a dormant machine whose purpose is to cleanse surfaces with forceful water jets, one might ponder about the complex process of reawakening such a dormant marvel. In this section, I will guide you through the steps to bring your idle pressure washer back to life.
Inspecting and Cleaning the Machine
Before attempting to revive the motionless powerhouse, it is important to carefully examine its various parts. Start by meticulously inspecting the exterior for any signs of damage or wear. Ensure that the nozzle is clear of debris and that the hose connections are secure. For the internal components, gently remove any accumulated dust or dirt using a soft cloth or brush.
Preparing the Machine for Resuscitation
The next step involves preparing the pressure washer for a fresh start. Begin by checking the fuel and oil levels, replenishing as necessary with the appropriate fluids. It is crucial to consult the machine’s manual to ensure the use of the correct type and quantity of fuel and oil. Additionally, verify that the spark plug is functioning correctly, removing and cleaning it if necessary.
Caution: Always exercise caution when handling flammable fluids and ensure proper ventilation.
With these preliminary steps complete, you are now ready to progress to the next stage of reviving your dormant power cleanser.
Cleaning the Fuel Tank and Lines
When a pressure washer has been inactive for a prolonged period of time, it is important to properly clean the fuel tank and lines before attempting to start the machine. This ensures that any old, stagnant fuel and debris are removed, allowing for optimal performance and avoiding potential damage to the pressure washer.
Before starting the cleaning process, it is essential to gather the necessary tools and materials: a wrench or pliers, a clean rag, a fuel container, a fuel line cleaner, and a replacement fuel filter if needed. Additionally, it is advisable to wear protective gloves to prevent any contact with fuel or cleaning agents.

Firstly, the fuel tank should be emptied of any remaining fuel from the previous usage or storage. This can be done by connecting a clean fuel container to the fuel tank’s outlet and carefully draining the fuel. It is crucial to do this in a well-ventilated area away from any potential sources of ignition.
Once the tank is empty, use a wrench or pliers to remove the fuel line from both the tank and the carburetor. Inspect the fuel line for any signs of damage or blockage, such as cracks, leaks, or clogs. If any issues are detected, it is recommended to replace the fuel line to ensure proper fuel flow.
Next, use a clean cloth to wipe the interior of the fuel tank, removing any dirt, debris, or residue from old fuel that may have accumulated. Take care not to scratch or damage the tank’s surface during this process. A fuel line cleaner can also be used to dissolve any stubborn deposits, following the manufacturer’s instructions.
After cleaning the fuel tank, reattach the fuel line to both the tank and the carburetor, ensuring a secure connection. It is advisable to replace the fuel filter at this point if it shows signs of wear or if it has not been replaced recently. This will help to prevent any contaminants from entering the carburetor and potentially causing damage.
Once the fuel tank and lines have been cleaned and checked for proper functioning, it is recommended to fill the tank with fresh fuel. Be sure to use the appropriate type of fuel specified by the pressure washer’s manufacturer. This will help to ensure optimal performance and longevity of the machine.

In conclusion, properly cleaning the fuel tank and lines of a pressure washer that has been sitting unused is an essential step before attempting to start the machine. This process involves emptying the tank, inspecting the fuel line, wiping the interior of the tank, and replacing the fuel filter if necessary. By following these steps, you can ensure that your pressure washer is ready to deliver optimal performance when it is next used.
Checking the Oil Level
Once I have prepared my pressure washer for use after it has been idle for a while, one of the first things I always do is check the oil level. The oil plays a crucial role in ensuring the proper functioning and longevity of the machine, so it is important to ensure that it is at the correct level before starting it up.
To check the oil level, I start by locating the oil dipstick on the pressure washer. It is usually located near the engine and is easily identifiable by its bright color or the oil symbol. I then remove the dipstick and wipe it clean with a cloth or paper towel.
After wiping the dipstick, I reinsert it back into the oil reservoir completely and then remove it again to inspect the oil level. The dipstick usually has markings that indicate the minimum and maximum oil levels. I compare the oil level on the dipstick with these markings to determine if additional oil needs to be added or if it is at the optimal level.
If the oil level is below the minimum mark, I add the recommended type and amount of oil for my specific pressure washer. It is important to use the correct type of oil as specified in the owner’s manual to ensure compatibility and proper lubrication of the engine. I slowly pour the oil into the oil reservoir, taking care not to overfill it.

On the other hand, if the oil level is at or slightly above the maximum mark, I may need to drain some oil to bring it down to the recommended level. This can be done by using a suitable container to catch the excess oil as it comes out of the drain plug underneath the pressure washer. I take care to follow the manufacturer’s instructions for draining the oil to avoid any damage or spills.
Checking the oil level is a crucial step in maintaining the performance and longevity of a pressure washer. By ensuring the oil is at the correct level, I can be confident that the engine will be properly lubricated and ready to deliver optimal power and efficiency during use.
Inspecting the Spark Plug
When it comes to preparing a pressure washer that has been idle for some time, one crucial aspect to check is the spark plug. In this section, I will guide you through the process of inspecting the spark plug to ensure optimal performance and maximum efficiency.
The spark plug is an essential component of the pressure washer’s engine, responsible for igniting the fuel-air mixture needed for combustion. Over time, the spark plug can accumulate deposits, become worn out, or even fail completely, resulting in a loss of power and efficiency.
To inspect the spark plug, start by disconnecting the spark plug wire and removing the spark plug from its socket using a spark plug wrench. Carefully examine the spark plug for any signs of damage or wear, such as cracks, corrosion, or fouling.

If the spark plug appears damaged, it is recommended to replace it with a new one. However, if it shows signs of fouling, such as a black, oily residue, it can be cleaned and reused. Use a wire brush or spark plug cleaner to remove any deposits from the spark plug, ensuring that the electrode and insulator are clean and free of debris.
| Signs of Spark Plug Damage: | Signs of Spark Plug Fouling: |
|---|---|
| – Cracks | – Black, oily residue |
| – Corrosion | – Build-up of deposits |
| – Worn electrodes | – Rust or discoloration |
Before reinserting the spark plug, it is beneficial to check the spark plug gap. This gap refers to the distance between the center and ground electrode. Use a spark plug gap tool to ensure the gap meets the manufacturer’s specifications. Adjust the gap by carefully bending the ground electrode if necessary.
Once you have inspected, cleaned, or replaced the spark plug and ensured the proper gap, reinsert it into the spark plug socket. Tighten it gently with the spark plug wrench, making sure not to overtighten. Finally, reconnect the spark plug wire to complete the inspection process.
By regularly inspecting and maintaining the spark plug, you can ensure reliable starting and efficient operation of your pressure washer. A clean and correctly functioning spark plug will contribute to better overall performance and prolong the lifespan of your equipment.
Priming the Pump
When it comes to getting a pressure washer back into working condition after it has been idle for some time, one crucial step is priming the pump. This process is essential to ensure the proper functioning of the pressure washer by creating suction and preparing it for use. However, it is important to note that priming the pump may vary depending on the specific model and manufacturer’s instructions.

Understanding the Priming Process
Priming the pump involves the initial preparation of the pressure washer by filling the pump and associated hoses with water or a suitable detergent solution. This process helps remove any air pockets that might have formed during the washer’s idle period, ensuring a steady flow of fluid for optimal performance.
Steps to Prime the Pump
Before priming the pump, it is crucial to consult the manufacturer’s manual for specific instructions. However, some general steps can be followed to ensure a successful priming process:
- Prepare the Water Source: Connect the pressure washer to a water supply using a suitable garden hose. Ensure that the water source provides sufficient flow and pressure for the pressure washer.
- Fill the Detergent Tank (If Applicable): If your pressure washer has a detergent tank, fill it with the recommended detergent solution. This step is necessary if you plan to use a detergent during pressure washing.
- Turn on the Water Supply: With the water supply connected and ready, turn on the water source to allow water to flow into the pressure washer.
- Engage the Trigger Lock: Engage the trigger lock on the pressure washer wand to prevent accidental spray or water loss during the priming process.
- Start the Pressure Washer: Start the pressure washer following the manufacturer’s instructions. This step will activate the pump and begin the priming process.
- Monitor the Pump: Keep a close eye on the pump as it begins to draw water from the source and remove any remaining air from the system. Observe the flow of water to ensure it becomes steady and consistent.
- Release the Trigger Lock: Once the pump is adequately primed and water flow is steady, release the trigger lock to allow water to flow through the wand.
- Begin Pressure Washing: With the pump primed and the water flowing smoothly, you are now ready to start pressure washing. Remember to follow safety guidelines and adjust the pressure settings according to the surface being cleaned.
By following these steps and ensuring proper priming of the pressure washer’s pump, you can effectively prepare the equipment for use again after a period of inactivity. Remember to always consult the manufacturer’s manual and take any necessary safety precautions during the priming process.
Adjusting the Pressure Regulator
When it comes to getting your pressure washer back up and running after it has been idle for a while, one crucial step is adjusting the pressure regulator. This component plays a vital role in controlling the output pressure of the washer, ensuring that it is at the optimal level for your cleaning needs.
As I have learned from my own experience, neglecting to adjust the pressure regulator properly can result in either too much or too little pressure, which can affect the effectiveness of your cleaning tasks. Therefore, it is essential to familiarize yourself with the process of adjusting the pressure regulator to achieve the desired output.

To begin, locate the pressure regulator on your pressure washer. It is usually a knob or dial that you can turn to adjust the pressure level. Before making any adjustments, it is crucial to ensure that the pressure washer is turned off and disconnected from any power sources to avoid any accidents.
Once you have located the pressure regulator, gently turn it either clockwise or counterclockwise to increase or decrease the pressure, respectively. It is recommended to make small adjustments and test the pressure by starting the pressure washer and using it on a small surface before making any significant changes.
As you adjust the pressure regulator, pay close attention to the pressure gauge, if your pressure washer is equipped with one. This gauge will give you a visual indication of the pressure being exerted by the washer. Adjust the regulator until you reach the desired pressure level.
Keep in mind that the optimal pressure level may vary depending on the type of surface or task you are tackling. For example, different surfaces may require different pressure levels for effective cleaning. Additionally, certain tasks such as removing stubborn stains may require higher pressure, while more delicate tasks may require lower pressure.
In conclusion, properly adjusting the pressure regulator of your pressure washer is a crucial step in ensuring optimal cleaning results. By familiarizing yourself with the location of the regulator and making careful adjustments, you can customize the pressure output to suit your specific needs and achieve excellent cleaning results.

Starting the Engine and Allowing it to Warm Up
When it comes time to get the engine running on your pressure washer that has been idle for some time, there are a few steps you can take to ensure a smooth start. It’s important to follow these procedures to avoid potential issues and to give your engine the chance to warm up properly before diving into any heavy-duty cleaning tasks.
Taking Safety Precautions
Prior to starting the engine, it’s crucial to review and implement necessary safety precautions. This includes wearing appropriate protective gear, such as safety glasses and gloves, to safeguard against any potential hazards. Additionally, ensure that the pressure washer is placed on a stable surface and that all connections are secure before proceeding.
Starting the Engine
Now that safety measures are in place, it’s time to start the engine. Begin by turning the ignition key or flipping the start switch, depending on the model of your pressure washer. Listen for the sound of the engine attempting to start and make sure to follow any specific instructions outlined in your owner’s manual.
If the engine fails to start after a few attempts, it’s essential to take a step back and assess the situation. Check the fuel level and ensure it is sufficient for proper operation. Additionally, inspect the spark plug to ensure it is clean and in good condition. If any issues are identified, address them before continuing with the starting process.
Once the engine successfully starts, allow it to run for a few minutes. This will help warm up the internal components and ensure smooth operation. Avoid immediately engaging in high-pressure cleaning tasks during this warming-up period, as it is important to give the engine time to reach its optimal operating temperature.
| Summary of Starting the Engine and Letting it Warm Up |
|---|
| – Implement necessary safety precautions before starting the engine |
| – Turn the ignition key or flip the start switch to begin engine startup |
| – Check fuel level and inspect the spark plug if the engine fails to start |
| – Allow the engine to run for a few minutes to warm up |
| – Avoid immediate engagement in high-pressure cleaning tasks until the engine is fully warmed up |
FAQ:
What should I do if my pressure washer has been sitting for a long time and won’t start?
If your pressure washer has been sitting for a long time and won’t start, there are a few things you can try. First, check the fuel level and make sure there is enough gas in the tank. If the fuel is old, you may need to drain it and replace it with fresh fuel. Next, check the spark plug and make sure it is clean and not damaged. If necessary, replace the spark plug. It is also important to check the air filter and clean or replace it if it is dirty. Lastly, check the oil level and make sure it is at the appropriate level. If the oil is old or low, change or add oil as needed. These simple steps should help you get your pressure washer started again.
What can I do to start a pressure washer that has been sitting for several months?
If your pressure washer has been sitting for several months, there are a few additional steps you can take to help get it started. Firstly, drain the old fuel from the tank and replace it with fresh fuel. Old fuel can become stale and make it difficult for the engine to start. Secondly, consider using a fuel stabilizer to prevent the fuel from deteriorating in the future. Next, try cleaning the carburetor. Use a carburetor cleaner to remove any built-up deposits or clogs. Additionally, check the fuel lines to ensure they are clear and not clogged. Finally, if the engine still fails to start, it may be necessary to clean or replace the carburetor altogether. By following these steps, you should have a better chance of starting your pressure washer after months of sitting idle.


