
How To Start A Honda Petrol Pressure Washer
Picture this: You’re faced with a dirty surface that seems impervious to regular scrubbing and cleansing. You crave a powerful solution that will effortlessly obliterate the pesky grime, leaving your pristine surfaces gleaming in the sunlight. In your quest for ultimate cleanliness, you stumble upon a remarkable Honda petrol pressure washer, a marvel of engineering and a trusty companion on your quest for spotless brilliance.
Now, before you can tame this ferocious beast, it is imperative to acquaint yourself with the art of awakening its roaring power. Summoning the heart and soul of this mechanical marvel is a process that demands finesse, precision, and a touch of intuition. Delicate yet mighty, this gas-powered pressure washer holds the key to unlocking a world of cleanliness that will undoubtedly leave you astounded.
As you stand before this resilient machine, abundant with untapped potential, a wave of excitement surges through your veins. With each pull of the starter cord, you can almost taste the sense of accomplishment as the engine roars to life, vibrating with readiness to tackle any mess in its path. The symbiotic harmony of fuel and air ignites a symphony of power, promising to be your steadfast ally in the battle against the relentless forces of dirt and grime.
But, my friend, do not approach this task lightly. The path to awakening a Honda petrol pressure washer demands unwavering attention to detail. The fuel must flow gracefully through the veins of this mechanical masterpiece, invigorating its internal combustion chamber with the promise of exceptional performance. Only then can you witness the mesmerizing dance of pressurized water, cascading forth with an intensity unmatched by anything you’ve ever witnessed.
Getting Your Honda Petrol Pressure Washer Up and Running
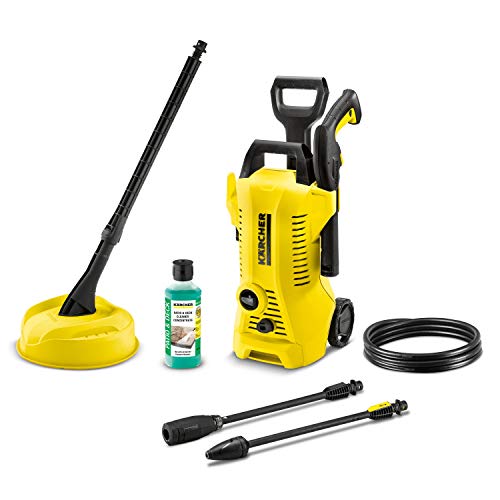
So you’ve got your hands on a powerful Honda petrol pressure washer and you’re ready to unleash its cleaning capabilities. In this guide, I’ll walk you through the steps to start and operate your pressure washer effectively and safely.
Gathering the Necessary Equipment
Before we dive into starting the pressure washer, let’s make sure you have everything you need. Apart from the pressure washer itself, you’ll require fuel, engine oil, a garden hose with a suitable connector, and a source of water supply. Make sure all necessary items are within reach to avoid interruptions during the starting process.
Starting Your Honda Petrol Pressure Washer
| Step | Procedure |
| 1 | Ensure the pressure washer is on a level surface and in a well-ventilated area. |
| 2 | Check the fuel level and fill up if needed using a fuel that is compatible with your Honda engine. Avoid using old or stale fuel. |
| 3 | Check the engine oil level and top up if required. Use the recommended oil type mentioned in the user manual. |
| 4 | Connect the garden hose to the pressure washer’s water inlet and ensure it is tightly secured. |
| 5 | Turn on the water supply and allow it to flow freely through the hose and pressure washer. |
| 6 | Move the fuel switch to the “On” position. If your pressure washer has a primer bulb, press it a few times to aid the fuel flow. |
| 7 | Locate the starter rope or electric start button, depending on your pressure washer model. |
| 8 | Pull on the starter rope firmly or press the electric start button to ignite the engine. |
| 9 | Allow the engine to warm up for a few minutes before operating the pressure washer at full power. |
By following these steps, you’ll be able to start your Honda petrol pressure washer confidently and be ready to tackle a variety of cleaning tasks. Remember to always consult your user manual for specific instructions and safety guidelines.
Understanding the Fundamentals of a Honda Gasoline Power Washer
As someone who has recently discovered the incredible benefits of using a Honda gasoline power washer, I found it imperative to delve into the intricacies of this powerful cleaning tool. In this section, I will provide you with a comprehensive overview of the basic components and operations of a Honda gasoline power washer, allowing you to have a deeper understanding and appreciation for its functionality.
1. Engine: At the heart of every Honda gasoline power washer lies a reliable and durable engine. This engine utilizes gasoline as its fuel source, converting it into mechanical energy to power the washer’s cleaning capabilities. The engine’s efficiency and performance are vital in ensuring optimal cleaning results.
2. Pump: Working hand in hand with the engine is the pump, which plays a crucial role in generating the high-pressure water stream produced by the power washer. By utilizing pistons or plungers, the pump pressurizes the water flow, allowing it to efficiently remove dirt, grime, and other stubborn stains from various surfaces.

3. Nozzles: The cleaning versatility of a Honda gasoline power washer is enhanced by its assortment of nozzles. These interchangeable attachments determine the spray pattern and intensity of the water stream, allowing you to customize your cleaning approach based on the task at hand. Whether you need a concentrated jet for tough stains or a wide fan spray for general cleaning, the choice of nozzle is essential.
4. Detergent System: To further bolster the cleaning efficiency, many Honda gasoline power washers come equipped with a detergent system. This feature enables you to conveniently apply cleaning solutions or detergents to surfaces, loosening and eliminating tough stains and grime effectively.
5. Accessories: Honda recognizes the need for additional accessories to enhance the versatility and convenience of their gasoline power washers. From extension wands and surface cleaners to brushes and hoses, these accessories provide you with the tools necessary to tackle a wide range of cleaning tasks with ease.
In conclusion, familiarizing yourself with the basics of a Honda gasoline power washer is fundamental to harnessing its true potential. By understanding the engine, pump, nozzles, detergent system, and accessories, you can confidently operate this cleaning tool and achieve exceptional results in various cleaning applications.
Checking the Fuel and Oil Levels
When preparing to use a Honda petrol pressure washer, one of the essential steps is to ensure that both the fuel and oil levels are sufficient. Before starting the machine, it is crucial to check these levels to maintain optimal performance and avoid potential damage.

Fuel Level:
Begin by locating the fuel tank, typically situated near the engine. Gently unscrew the fuel cap and carefully inspect the fuel level. To accurately determine the quantity of fuel, it is recommended to use a flashlight or shine natural light into the tank. Ensure that the fuel level is above the minimum line but does not exceed the maximum capacity.
If the fuel level is low, fill the tank with the appropriate type of petrol as specified by the manufacturer. Take care not to spill fuel during the process, as it can be hazardous and potentially damage the surrounding area. Once filled, securely screw the fuel cap back onto the tank.
Oil Level:
Maintaining the proper oil level is crucial for the longevity and efficiency of the Honda petrol pressure washer. To check the oil level, locate the oil cap, typically located on top of the engine. Remove the cap and wipe the dipstick clean with a cloth or paper towel.

Insert the dipstick fully into the oil reservoir, ensuring a secure fit. Remove the dipstick and observe the oil level. The dipstick is often marked with indicators such as “Full” and “Add” to help determine the oil level. Ideally, the oil level should be between these two markings.
If the oil level is low, carefully add the recommended oil type in small increments, periodically checking the level with the dipstick until it reaches the optimal range. It is essential not to overfill the oil reservoir to avoid potential engine damage.
Once the fuel and oil levels have been checked and adjusted if necessary, the Honda petrol pressure washer is ready to be started and used effectively for various cleaning tasks.
Connecting the Water Source
When it comes to getting started with your Honda petrol pressure washer, one of the first steps you need to take is connecting the water source. This is an essential part of the setup process that ensures your pressure washer has a steady supply of water to operate efficiently and effectively. In this section, I will guide you through the necessary steps to connect the water source to your pressure washer.
Gather Your Equipment
- Water hose
- Water source (faucet or hose bib)
- Pressure washer inlet connection
- Adjustable wrench (if necessary)
Before you begin, make sure you have all the required equipment on hand. You will need a water hose long enough to reach from your water source to your pressure washer, a water source such as a faucet or hose bib, and the pressure washer inlet connection.

Connect the Water Hose
- Start by connecting one end of the water hose to the water source. Ensure that the connection is secure to prevent any leaks.
- Once the water hose is connected to the water source, attach the other end to the pressure washer’s inlet connection. Make sure the connection is tight to avoid any water leakage.
- If necessary, use an adjustable wrench to tighten the connections further. Be careful not to overtighten, as this may cause damage to the fittings.
- Once the water hose is securely connected to both the water source and the pressure washer, turn on the water source to allow the water to flow through the hose.
By following these simple steps, you can successfully connect the water source to your Honda petrol pressure washer. Ensure that all connections are tight and secure to prevent any leaks during operation. With a properly connected water source, you are now ready to move on to the next steps of starting your pressure washer.
Setting Up the Pressure Washer Properly
When it comes to using a petrol-powered pressure washer, setting it up correctly is crucial for optimal performance and safety. In this section, I will guide you through the necessary steps to ensure that your pressure washer is set up properly, allowing you to achieve the best results.
To begin, it is important to carefully review the manufacturer’s instructions and safety guidelines specific to your pressure washer model. These instructions will provide essential information on how to assemble and set up the machine, as well as any specific precautions to take.
Once you have familiarized yourself with the instructions, the first step in setting up your pressure washer is to ensure a stable foundation. This can be done by placing the pressure washer on a flat and level surface, away from any potential hazards or obstacles. This will help to prevent any tipping or moving during operation.
Next, connect the high-pressure hose to the pressure washer. This hose is responsible for delivering the water at high pressure to the nozzle. Ensure that the hose is securely attached to both the pressure washer and the nozzle to prevent any leaks or loss of pressure during use.
Now, it’s time to connect the water supply. Locate the water inlet on your pressure washer and attach the appropriate garden hose. Make sure that the hose is tightly connected to the inlet to avoid any water leakage. Additionally, ensure that the water supply is turned on and that there is sufficient water flow before starting the machine.
Before starting the pressure washer, it is advisable to perform a quick inspection of all the connections and components. Check for any loose or damaged parts, such as fittings or O-rings, and replace them if necessary. This will help to prevent any potential accidents or malfunctions during operation.
Finally, it’s time to power up the pressure washer. Refer to the manufacturer’s instructions on how to start the engine or motor of your specific model. Typically, this involves pulling the starter cord, engaging the ignition switch, or following any other prescribed method. Once the machine is started, allow it to warm up for a few minutes before beginning your cleaning tasks.
By following these steps and properly setting up your petrol pressure washer, you can ensure that it operates efficiently and safely. Remember to always prioritize your safety and carefully read and adhere to the manufacturer’s instructions for your specific model.
Priming the Pump for Optimal Performance
When it comes to operating your Honda petrol pressure washer efficiently, priming the pump is an essential step. And let me tell you, it can make a world of difference in achieving optimal performance and getting the job done effectively. So, let’s dive into the process of priming the pump and ensure that your pressure washer operates at its best!

Understanding the Importance of Priming
Priming the pump, in simple terms, means preparing it for operation by ensuring that the internal components are filled with water before starting the engine. This step is crucial to create a continuous flow of water, enabling the pressure washer to deliver the desired cleaning power.
By priming the pump, you eliminate any air pockets that may have formed inside, allowing the water to flow smoothly and preventing any potential damage to the pump. It is a vital preparatory step that guarantees efficient performance and extends the lifespan of your pressure washer.
The Step-by-Step Process
Step 1: Find a water source close to your pressure washer. You can use a garden hose or a water container, depending on your setup.
Step 2: Submerge the suction hose or intake filter into the water source. This ensures that the pump receives a constant supply of water during operation.
Step 3: Open the water supply valve, allowing the water to flow through the system and fill the pump chamber.

Step 4: Once you see a consistent stream of water coming out of the pump outlet or nozzle, it means the pump is fully primed.
Step 5: Now, you are ready to start the engine and begin using your Honda petrol pressure washer to tackle those tough cleaning tasks.
Remember, proper priming of the pump is necessary each time you start your pressure washer. It may seem like an extra step, but trust me, it will save you time and ensure efficient operation in the long run.
Starting the Engine of a Honda Gasoline Pressure Washing Machine
When it comes to starting the engine of your Honda gasoline pressure washing machine, there are a few essential steps that need to be followed in order to ensure a smooth and successful start. By following these instructions, you can confidently and safely start the engine of your pressure washer, allowing you to effectively clean a variety of surfaces with ease.
1. Check the fuel level: Before starting the engine, make sure to check the fuel level to ensure that there is enough gasoline to support the running of the machine. This can be done by visually inspecting the fuel tank or using a dipstick to measure the level of gasoline.
2. Engage the choke: Once you have confirmed that there is enough fuel, locate the choke lever or knob, which is usually situated near the engine. Engage the choke by either pulling the lever or turning the knob to the designated position, which helps to enrich the fuel-air mixture for a smoother start in colder temperatures or after long periods of idle.
3. Set the throttle: After engaging the choke, locate the throttle lever, which controls the speed of the engine. Set the throttle to the “Start” or “Idle” position, depending on the specific model of your pressure washer. This will ensure that the engine starts at a lower speed, reducing the risk of a sudden surge in power.
4. Prime the fuel system: Some Honda gasoline pressure washing machines are equipped with a primer bulb, typically located on the side of the engine. Gently press the primer bulb several times to prime the fuel system, allowing fuel to flow into the carburetor and aid in the starting process.
5. Pull the starter cord: Once you have completed the previous steps, position yourself behind the pressure washer and firmly hold onto the starter grip. Slowly pull the starter cord in a smooth and controlled manner until you feel resistance. Then, give a quick and decisive pull to start the engine. Avoid pulling the cord violently or excessively, as this can damage the starter mechanism.
6. Adjust the choke and throttle: As the engine starts, you may need to gradually adjust the choke and throttle settings to achieve optimal performance. If the engine struggles or idles roughly, gradually decrease the choke setting. Additionally, if the engine runs too fast or doesn’t respond well, adjust the throttle position accordingly.
By following these steps, you should be able to start the engine of your Honda gasoline pressure washing machine efficiently and effectively. Remember to always refer to the manufacturer’s manual for any specific instructions or precautions related to your particular model, as operating procedures may vary. Now, you are ready to tackle any cleaning task with the power of your pressure washer!
Achieving the Optimal Pressure for Effective Cleaning
When it comes to cleaning, it is essential to have the right amount of pressure to effectively remove dirt and grime from various surfaces. In this section, I will guide you on how to achieve the optimal pressure for your cleaning needs with your trusty Honda petrol pressure washer.
Understanding the Importance of Optimal Pressure
Before delving into the specifics of achieving optimal pressure, it is crucial to understand why it matters. Having the right pressure ensures that you are effectively removing dirt, stains, and other unwanted elements without causing damage to the surface you are cleaning. It strikes the perfect balance between being powerful enough to get the job done and gentle enough to protect the integrity of the material.
To determine the optimal pressure for your cleaning task, consider factors such as the surface material, the level of dirt or grime buildup, and the sensitivity of the area being cleaned. While higher pressure can remove stubborn stains, too much pressure can damage delicate surfaces, while insufficient pressure may leave behind dirt.
Using the Pressure Adjustment Settings
Most Honda petrol pressure washers come equipped with pressure adjustment settings, allowing you to control the output and achieve the desired pressure. These settings typically range from low to high pressure, allowing you to customize the cleaning power based on your specific needs.
To determine the optimal pressure, start by using a lower setting and gradually increase it until you find the sweet spot where the dirt and grime are effectively removed without causing damage. Keep in mind that different surfaces may require different pressure levels, so make adjustments accordingly.
If you are unsure about the optimal pressure for a particular surface, it is always a good idea to start with a lower setting and perform a test spot. This allows you to see how the surface reacts to the pressure before proceeding with the entire cleaning process.
Referencing the Manufacturer’s Guidelines
Additionally, it is important to consult the manufacturer’s guidelines for your Honda petrol pressure washer. These guidelines often include recommendations on the optimal pressure settings for different tasks and surface materials. By following these recommendations, you can ensure that you are using your pressure washer in a way that maximizes its effectiveness and longevity.
In conclusion, achieving the optimal pressure for cleaning with your Honda petrol pressure washer is crucial for effective and safe cleaning. By understanding the importance of optimal pressure, utilizing the pressure adjustment settings, and referencing the manufacturer’s guidelines, you can confidently tackle any cleaning task with the right amount of pressure.
| Pressure Adjustment Settings | Optimal Pressure Range |
|---|---|
| Low | Delicate surfaces, light dirt |
| Medium | Moderate dirt, most common surfaces |
| High | Stubborn stains, heavy dirt buildup |
Maintaining and Caring for Your Honda Gasoline Power Washer
As an owner of a Honda gasoline power washer, I understand the importance of proper maintenance and care to ensure its long-term functionality and optimal performance. In this section, I will share my personal experience and provide valuable tips on how to effectively maintain and care for your Honda gasoline power washer.
Regular Cleaning: The first step in maintaining your Honda gasoline power washer is to regularly clean it after each use. This includes removing any dirt, debris, or residue that may have accumulated during operation. Use a mild detergent and a soft cloth or sponge to gently clean the exterior surfaces. Avoid using abrasive materials or harsh chemicals that may damage the paint or other components.
Inspecting and Cleaning the Fuel System: To ensure proper fuel delivery and prevent clogs, it is important to regularly inspect and clean the fuel system. Start by checking the fuel tank for any debris or sediment and clean it if necessary. Next, inspect the fuel lines and ensure they are free from blockages. Clean or replace any clogged fuel filters to maintain optimal fuel flow.
Checking and Changing the Oil: Like any other engine, the Honda gasoline power washer requires regular oil checks and changes to ensure smooth operation. Check the oil level before each use and top it up if needed. Also, remember to change the oil as per the manufacturer’s recommendations or after a certain number of hours of operation. Use the recommended oil type and follow the proper procedures for oil changes.
Inspecting and Replacing Spark Plugs: The spark plug plays a crucial role in the ignition process of your Honda gasoline power washer. Regularly inspect the spark plug for any signs of wear, such as carbon deposits or a worn electrode. If necessary, replace the spark plug to maintain proper ignition and fuel efficiency.
Storing the Power Washer: Proper storage is essential for the longevity of your Honda gasoline power washer. When not in use, make sure to drain the fuel tank and run the engine until it runs out of fuel. This helps prevent fuel-related issues and gumming of the carburetor. Store the power washer in a dry and well-ventilated area, away from extreme temperatures and moisture.
Conclusion: By following these maintenance and care tips, you can ensure that your Honda gasoline power washer operates efficiently and lasts for years to come. Regular cleaning, inspecting and cleaning the fuel system, checking and changing the oil, inspecting and replacing spark plugs, and proper storage are all essential steps in keeping your power washer in optimal condition. Remember, taking care of your Honda gasoline power washer now will save you time and money in the long run.
Troubleshooting Common Issues and Tips for Smooth Operation
As I have gained experience using my Honda petrol pressure washer, I have encountered various issues that can arise during its operation. In this section, I will share some common problems you may encounter and provide tips to ensure a smooth and efficient operation of your pressure washer.
1. Starting Difficulties
If you are facing difficulties in starting your pressure washer, there could be a few reasons behind it. Firstly, ensure that there is sufficient fuel in the tank and that the fuel valve is open. Secondly, check the spark plug to ensure it is clean and properly connected. Additionally, make sure that the choke is appropriately set for starting in cold weather. Finally, if the engine is flooded, try pulling the starter cord several times to clear the excess fuel.
2. Loss of Pressure
If you notice a significant loss of pressure while using your pressure washer, there are a few things you can check. First, inspect the nozzle tip for any blockages or debris that may be hindering the flow of water. Cleaning or replacing the nozzle tip can often resolve this issue. Second, check the inlet filter to ensure it is clean and not clogged. Clean or replace the filter if necessary. Finally, verify that the hose connections are secure and that there are no leaks or kinks in the hose.
3. Overheating
Overheating can lead to several problems with your pressure washer, including reduced performance and potential damage to the engine. To prevent overheating, ensure that the water supply is sufficient and that the inlet filter is clean and unclogged. Additionally, avoid running the pressure washer for extended periods without giving it breaks. If you notice signs of overheating, allow the machine to cool down before continuing to use it. Regularly inspecting and cleaning the cooling fins of the engine also helps to prevent overheating.
- Regularly inspect and clean the spark plug to ensure proper ignition.
- Use the appropriate fuel and oil mixture as specified in the manufacturer’s instructions.
- Always wear protective gear, such as safety goggles and gloves, while operating the pressure washer.
- Store the pressure washer in a cool and dry place to avoid any potential damage.
- Refer to the manufacturer’s manual for specific troubleshooting tips and maintenance guidelines.
By following these troubleshooting tips and implementing proper maintenance practices, you can overcome common issues and achieve optimal performance from your Honda petrol pressure washer. Remember that safety is paramount, so always prioritize the correct operation and maintenance of your pressure washer.


