
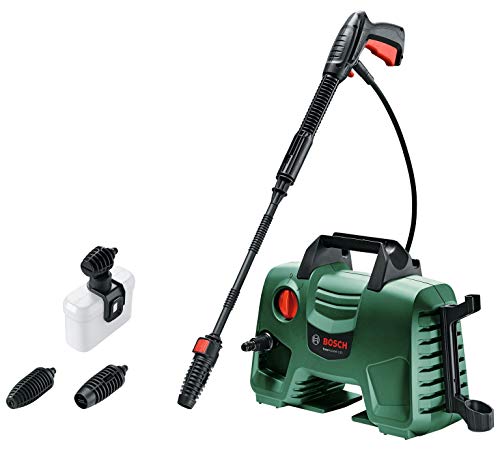
How To Start A Homelite Pressure Washer
When it comes to tackling tough outdoor cleaning tasks, having a reliable and efficient cleaning machine is essential. But what happens when you’re facing a dirty patio or a grimy deck and don’t know how to get started with your powerful cleaning equipment? No worries – I’ve got you covered!
In this article, I’ll guide you through the step-by-step process of getting your top-notch, forceful washing device up and running. Whether you’re a newcomer to the world of outdoor cleaning or simply looking for a refresher, these tips will equip you with the knowledge and confidence to handle any cleaning project with ease.
First off, don’t be intimidated by the thought of operating a high-performance pressure washing unit. With a little know-how, you’ll be amazed at how effortlessly you can achieve professional results. The key to a successful start lies in understanding the correct setup and assembly of your cleaning apparatus. So, let’s dive in and explore the essential steps for kick-starting your impressive cleaning arsenal!
Before delving into the specifics, it’s crucial to remember that safety should always be your top priority. Handling a potent cleaning machine comes with some inherent risks, including potential hazards to yourself and your surroundings. Therefore, make sure to read the manufacturer’s instructions and familiarize yourself with safety precautions before proceeding.
Now, let’s begin our journey towards mastering the art of starting your advanced and high-performing pressure cleaner. Get ready to unleash the power and efficiency of your cleaning equipment as we navigate through the crucial setup process, ensuring a seamless experience every time you undertake an outdoor cleaning project.
Getting Your Homelite Pressure Washer Up and Running
So you’ve got your brand new Homelite pressure washer and you’re excited to get started. In this section, I’ll walk you through the step-by-step process of getting your pressure washer up and running smoothly, without any detailed technical jargon.
Step 1: Preparation
Before diving into operating your pressure washer, it’s important to take a few minutes to prepare. Assess the area where you’ll be using the pressure washer and ensure it’s free from any obstacles or debris that could interfere with the machine’s movement. Make sure your water source is connected securely and turned on. Also, double-check that you have adequate fuel or a charged battery, depending on the model of your Homelite pressure washer.
Step 2: Familiarize Yourself with the Controls
Take a moment to familiarize yourself with the different controls and features of your Homelite pressure washer. Locate the on/off switch, the choke if applicable, the trigger, and any other buttons or dials. This will help you feel more confident and in control when starting and operating your pressure washer.
Step 3: Pre-Start Check
Before starting the engine, make sure all connections are secure and that everything is in proper working order. Check the oil level and add more if needed. Ensure that the spark plug and air filter are clean and in good condition. Additionally, check for any leaks or damage to the hoses or pressure wand. Being thorough with your pre-start check will help prevent any potential issues during operation.
Step 4: Starting the Engine
Now it’s time to start the engine. If your Homelite pressure washer has a choke, engage it. Turn the on/off switch to the “on” position. Find a firm footing and hold onto the handle securely. Finally, pull the starter cord or push the electric start button, depending on your model. The engine should start smoothly, and you can then release the choke if needed.
Step 5: Warm-Up and Operation

Allow the engine to warm up for a few minutes to reach its optimal operating temperature. While waiting, ensure that the pressure washer’s nozzle is set to a low-pressure or detergent setting. Once warm, you can begin using your Homelite pressure washer. Remember to always follow the manufacturer’s instructions for operating the machine, and use caution and proper safety measures.
By following these simple steps, you’ll have your Homelite pressure washer running smoothly and ready to tackle any cleaning task that comes your way. Remember to always prioritize safety and refer to the user manual for any specific instructions or troubleshooting.
Understanding the Basics of Efficiently Operating a Homelite Pressure Cleaning Appliance
In this section, I will guide you through the fundamental concepts and techniques required to efficiently operate a robust Homelite pressure cleaning appliance. By gaining a deeper understanding of the underlying principles, you will be able to optimize your cleaning process and achieve remarkable results.
1. Familiarize Yourself with the Equipment
- Take the time to inspect the various components of your Homelite pressure cleaner.
- Understand the purpose and function of each part, such as the pump, engine, nozzle, trigger, and hose.
- Ensure that all connections are secure and that there are no signs of damage.
2. Comprehend the Power Behind Pressure
Pressure is the key to effective cleaning with a Homelite pressure washer. This force is generated by the engine, driven by electricity or gasoline, which powers the pump creating the necessary pressure. Remember:
- Higher pressure allows for more thorough cleaning of tough grime and stains.
- However, different surfaces require different levels of pressure to avoid damage.
- Always refer to the manufacturer’s guidelines or consult professionals to determine the appropriate pressure levels.
3. Master the Art of Nozzle Selection
The nozzle is a crucial component that determines the spray pattern and the amount of pressure delivered. Consider the following:

- A narrow nozzle delivers a concentrated, intense stream, perfect for stubborn dirt or grime.
- A wider nozzle disperses the pressure over a larger area, making it suitable for delicate surfaces.
- Experiment with different nozzle attachments to find the right one for each cleaning task.
4. Safety Measures and Precautions
Proper safety precautions ensure both your well-being and the longevity of your equipment. Prioritize safety by:
- Wearing protective gear such as gloves, goggles, and appropriate clothing.
- Using the pressure washer on stable surfaces to prevent accidents.
- Keeping a safe distance from electrical sources and avoiding spraying directly at people or animals.
By understanding these fundamental aspects of operating a Homelite pressure cleaner, you can unleash its full potential to tackle various cleaning tasks efficiently and effectively.
Checking for Proper Fuel and Oil Levels
When preparing to use your Homelite pressure washer, it is essential to ensure that the fuel and oil levels are correct. Maintaining the appropriate levels of fuel and oil is crucial for the efficient operation of the pressure washer and to prevent any potential damage.
First, you need to check the fuel level. Before starting the pressure washer, it is essential to have enough fuel to power the engine. You can check the fuel level by inspecting the fuel tank or gauge, depending on your pressure washer model. Make sure the fuel level is sufficient for the task at hand, avoiding excessive or inadequate levels that could affect the machine’s performance.
Next, it is crucial to check the oil level. The oil plays a vital role in lubricating the engine, ensuring smooth operation and preventing potential damage. To check the oil level, locate the oil dipstick on the pressure washer’s engine. Remove the dipstick, wipe it clean with a cloth, and reinsert it back into the oil reservoir without screwing it in. Pull out the dipstick again, and check the oil level against the markers or indicator on the dipstick. Ensure that the oil level falls within the recommended range, neither too low nor overfilled.

Regularly monitoring and maintaining proper fuel and oil levels not only contributes to the longevity of your Homelite pressure washer but also ensures optimal performance when tackling various cleaning tasks. By taking a few moments to check the fuel and oil levels before use, you can confidently operate your pressure washer and achieve excellent results.
Connecting the Water Source to the Pressure Washer
In this section, I will guide you through the essential steps on how to properly connect the water source to your pressure washer. This is a crucial initial task that ensures the efficient functioning of your equipment without any interruptions. Follow these instructions to ensure a smooth start and a successful pressure washing experience.
Step 1: Prepare the water source
Before connecting the water source, make sure it is readily accessible and turned on. Locate a water faucet or a hose bib near the area where you will be operating the pressure washer. Check for any obstructions or debris in the water source that could interfere with the water flow.
Step 2: Attach the water inlet connection
Using a proper water inlet connection, attach the pressure washer’s water inlet port to the water source. Ensure a secure and tight connection to prevent any leaks during operation. Make sure to use the appropriate adapter or connector if necessary, taking into account the specifications of your pressure washer and the water source.
Step 3: Test the water flow
Turn on the water source and allow the water to run through the pressure washer. Check for any leaks or irregular water flow. Adjust the water pressure if needed to match the requirements of your pressure washer model. It is essential to have a consistent water supply to maintain optimum performance.
Step 4: Secure the water inlet connection
Once you have confirmed proper water flow, securely tighten any connections to eliminate the risk of leaks during operation. Ensure that all fittings and seals are in good condition. A secure and leak-free water inlet connection is crucial for the pressure washer’s functionality.

Step 5: Test for proper operation
After completing the water source connection, start your pressure washer and check for proper operation. Verify that water is flowing smoothly through the system and that the pressure washer is working efficiently. Make any necessary adjustments or repairs before proceeding with the actual usage.
By following these steps to connect the water source to your pressure washer correctly, you will have a solid foundation for using your Homelite pressure washer effectively and achieving excellent results in your cleaning tasks.
Securing the High-Pressure Hose and Spray Gun
Ensuring a Safe and Stable Connection
When it comes to operating a pressure washer, one of the most crucial aspects is properly securing the high-pressure hose and spray gun. A secure connection guarantees efficient and safe functioning of the equipment. In this section, I will guide you through the necessary steps to secure the high-pressure hose and spray gun, providing you with the confidence and knowledge to handle your Homelite pressure washer effectively.
Step 1: Aligning the Threads
Before connecting the high-pressure hose to the spray gun, it is essential to align the threads properly. Look for the matching threads on both the hose and the spray gun, ensuring they fit together smoothly. Misaligned threads may result in leaks or damage to the equipment. Therefore, take your time to align them correctly for a secure connection.

Pro Tip: Applying a thin layer of lubricant on the threads can facilitate easy alignment and reduce the risk of cross-threading.
Step 2: Tightening the Connection
Once the threads are aligned, it is time to tighten the connection between the high-pressure hose and the spray gun. Use a firm grip to hold both the hose and the spray gun, then turn them clockwise until they are securely fastened. Be cautious not to overtighten as this can lead to difficulties in disconnecting the hose later on.
Pro Tip: To ensure a watertight seal, check if the connection is snug by giving it a gentle tug. If there is no movement or signs of leakage, the connection is secure.
Step 3: Testing the Connection
After securing the high-pressure hose and spray gun, it is essential to test the connection before starting the pressure washer. Turn on the water supply and inspect the joint for any signs of leakage. If you notice any leaks, try tightening the connection further. If the issue persists, inspect the hose and spray gun for any damage or wear and consider replacing them if necessary.
Pro Tip: If the connection remains leak-free, squeeze the spray gun trigger to release any trapped air in the hose. This step ensures a smooth and consistent flow of water during operation.
Securing the high-pressure hose and spray gun is a vital part of setting up your Homelite pressure washer. By aligning the threads, tightening the connection, and testing for leaks, you can ensure a safe and effective operation of your pressure washer, allowing you to tackle your cleaning tasks with ease.
Adjusting the Water Pressure and Spray Pattern
When it comes to getting the most out of your Homelite pressure washer, one essential step is setting the water pressure and spray pattern. By fine-tuning these settings, you can ensure optimal cleaning power and efficiency for various surfaces and tasks. In this section, I will guide you through the process of adjusting the water pressure and spray pattern to meet your specific needs.
Step 1: Assessing the Surface
Before you begin, it’s crucial to understand the surface you’ll be cleaning. Different surfaces require different water pressure levels and spray patterns. For example, a higher pressure and narrow spray pattern might be suitable for concrete driveways and sidewalks, while a lower pressure and wider pattern may be more suitable for delicate surfaces like wooden decks. Take a moment to evaluate the surface at hand and determine the appropriate pressure and pattern accordingly.
Step 2: Adjusting the Water Pressure
Once you have assessed the surface, it’s time to adjust the water pressure on your Homelite pressure washer. Locate the pressure adjustment knob or dial, usually located near the pump or engine. Begin by turning the knob or dial clockwise to increase the pressure or counterclockwise to decrease it. Make small adjustments and test the pressure until you reach the desired level. Remember, it’s best to start with a lower pressure and gradually increase it if needed to avoid causing damage to the surface.
Keep in mind that the recommended water pressure for most residential cleaning tasks is typically between 1000 to 2000 pounds per square inch (psi), but refer to your Homelite pressure washer’s manual for specific guidelines.
Step 3: Changing the Spray Pattern
With the water pressure adjusted, you can now focus on selecting the appropriate spray pattern. Most Homelite pressure washers offer various nozzle tips or a spray wand with an adjustable nozzle to control the pattern. These patterns may include a narrow, concentrated spray for stubborn stains or a wider fan-like spray for larger surface areas. Experiment with different nozzle tips or adjust the spray wand’s nozzle to find the pattern that works best for your cleaning task. Remember to test the spray pattern on a small inconspicuous area first to ensure it is suitable for the surface.
By taking the time to set the water pressure and spray pattern correctly, you can optimize the performance of your Homelite pressure washer and achieve superior cleaning results. Remember to always prioritize safety and consult your pressure washer’s manual for specific instructions tailored to your model. Happy cleaning!
Preparing the Pump for Optimal Performance
In this section, I will guide you through the essential steps to prime the pump of your pressure washer, ensuring its proper operation. By following these instructions, you will establish the necessary flow of water and create a reliable pressure source for your cleaning tasks.
Step 1: Checking the Water Inlet
Before starting, make sure the water inlet valve is fully open. This valve regulates the water supply to the pump and must be in the open position for proper priming. Check for any obstructions or kinks in the water hose that might impede the flow and solve them before proceeding.
Step 2: Filling the Pump with Water
Next, locate the pump inlet, which is typically marked with an arrow or indicator. Remove the pump’s cap or plug and pour water into the inlet until it reaches the recommended level or fills the pump chamber. This water filling process ensures that the pump is adequately lubricated and that there are no air pockets within the system.
Depending on the pressure washer model, you might need to repeat this step multiple times to fill all the pump chambers effectively. Take your time and ensure each chamber is filled adequately.
Step 3: Bleeding Excess Air
After filling the pump with water, you need to release any excess air trapped within the system. To do this, turn on the pressure washer engine or motor briefly, allowing it to run idle for a few moments. This action will force any air bubbles to escape through the water outlet nozzle.
Once you notice a steady stream of water without air bubbles, you can proceed to connect the necessary nozzles or pressure washer accessories securely.
| Important Note: |
|---|
| Always remember to turn off the pressure washer engine or motor before connecting or disconnecting any accessories to avoid accidental discharges. |
By accurately priming your pressure washer’s pump following these steps, you can ensure optimal performance and obtain the desired pressure for your cleaning tasks. Priming allows water to flow smoothly through the system, preventing potential damage to the pump and ensuring a longer lifespan for your pressure washer.
Preparing the Engine for Use: Getting Your Homelite Pressure Washer Up and Running
When it comes to starting the engine of your Homelite pressure washer and letting it warm up, there are a few key steps you need to follow to ensure optimal performance. In this section, I will guide you through the process, providing valuable tips and tricks to help you get your pressure washer running smoothly and efficiently.
Step 1: Priming the Engine
Before starting the engine, it is important to prime it first. This ensures that the fuel moves through the system and reaches the engine, enabling it to ignite and start up smoothly. To prime the engine, locate the primer bulb on your pressure washer and press it several times until you see fuel filling the bulb. This helps to create the necessary suction for fuel delivery.
Step 2: Setting the Choke
After priming the engine, it’s time to set the choke. The choke helps regulate the air-to-fuel mixture during engine startup, ensuring that it receives the proper amount of fuel. Depending on the model of your Homelite pressure washer, the choke may be a lever or a dial. Consult your user manual to identify the location and position of the choke. Generally, the choke should be in the “on” or “closed” position when starting a cold engine.
Once the choke is set, locate the ignition switch or pull cord to start the engine. Give it a firm pull or turn the switch to the “on” position. With the engine running, gradually open the choke to the “off” or “open” position, allowing a proper air-to-fuel ratio for smooth and efficient operation.
This process may vary slightly depending on the specific model of your Homelite pressure washer, so always refer to the user manual for detailed instructions and safety precautions. Remember to handle fuel and engine-related tasks carefully, ensuring proper ventilation and safety measures to prevent accidents or damage to the equipment.
Remember: Warm-ups are crucial for any pressure washer engine, as they allow the internal components to reach operating temperature and function optimally. Skipping or rushing through this important step may result in reduced performance and potential damage to the engine. Take the time to let your Homelite pressure washer warm up properly before diving into your cleaning tasks.
Engaging the Trigger and Initiating the Cleaning Process
When it comes to using a Homelite pressure washer effectively, engaging the trigger and starting the cleaning process are crucial steps that require careful attention. By understanding the correct methods and techniques, you can ensure a successful cleaning experience and achieve optimal results.
1. Priming the Pressure Washer
Before engaging the trigger, it is important to prime the pressure washer to ensure proper functioning. To do this, make sure the water source is connected and turned on. Then, squeeze the trigger on the spray gun to remove any trapped air from the system. This will allow the water to flow smoothly and avoid any potential issues during the cleaning process.
2. Adjusting the Nozzle and Spray Pattern
Once the pressure washer is primed, it’s time to adjust the nozzle and spray pattern according to the cleaning requirements. Depending on the surfaces you are cleaning, you may need a narrow or wide spray pattern. This can be easily adjusted by rotating the nozzle or using interchangeable nozzles provided with the pressure washer. By choosing the appropriate spray pattern, you can maximize efficiency and achieve the desired cleaning results.
- Rotating the Nozzle: Rotate the nozzle to the left for a narrow, concentrated spray pattern ideal for stubborn stains and hard-to-reach areas. Rotate the nozzle to the right for a wider spray pattern suitable for larger surface areas.
- Interchangeable Nozzles: If your pressure washer comes with interchangeable nozzles, select the one that corresponds to your desired spray pattern. Attach the chosen nozzle securely to the spray gun.
3. Engaging the Trigger and Starting the Cleaning Process
With the pressure washer primed and the nozzle adjusted, it is now time to engage the trigger and start the cleaning process. To do this, grip the spray gun firmly and position it at a comfortable distance from the surface to be cleaned. Slowly squeeze the trigger to initiate the water flow. As the water begins to flow, move the spray gun in a sweeping motion across the surface, ensuring even coverage and effective cleaning.
Remember to maintain a consistent distance between the spray gun and the surface to avoid causing any damage or inconsistencies. Additionally, always be mindful of safety precautions, such as wearing protective goggles and gloves, when operating the pressure washer.
By adhering to these steps and guidelines, you can confidently engage the trigger and start the cleaning process with your Homelite pressure washer. Enjoy the satisfying experience of restoring cleanliness and freshness to various surfaces.
Shutting Down the Pressure Washer Safely
When it comes to ensuring the safe operation of a pressure washing machine, knowing how to properly shut it down is just as important as starting it up. In this section, I will guide you through the steps to shut down your pressure washer in a safe and efficient manner, so you can avoid any potential accidents or damage.
Step 1: Release Pressure
Before shutting down the pressure washer, make sure to release the pressure from the system. This can be done by turning off the engine and letting the machine idle for a few minutes. Alternatively, you can also engage the trigger gun to release any remaining pressure in the system. Remember to wear appropriate safety gear, such as gloves and goggles, during this process.
Step 2: Turn Off and Disconnect
Once the pressure has been released, turn off the engine or motor of the pressure washer. Disconnect it from the power source by unplugging the cord or shutting off the power switch. This step is crucial to prevent any accidental starts or electrical hazards.
Note: Never leave a pressure washer unattended while it is still plugged in or connected to the power source. It is essential to ensure that it is completely powered off before you leave it.
Step 3: Drain Remaining Water
Draining any remaining water from the pressure washer is essential to protect the internal components from freezing or corrosion. Start by disconnecting the water source and then engage the trigger gun to drain any water from the system. Take care to direct the water away from yourself and any nearby objects.
Caution: If you live in an area with freezing temperatures, it is crucial to follow the manufacturer’s instructions for winterizing your pressure washer to prevent any damage.
By following these simple steps, you can safely shut down your pressure washer and ensure its longevity. Remember to always prioritize your safety and the proper maintenance of your equipment to maximize its efficiency and performance.
Maintaining and Storing Your Homelite Pressure Washer
As a proud owner of a Homelite Pressure Washer, it is essential to understand the importance of properly maintaining and storing this powerful cleaning machine. In this section, I will share valuable tips and techniques to ensure the longevity and efficient performance of your pressure washer, allowing you to tackle various cleaning tasks effortlessly.
Regular Cleaning and Inspection
To keep your Homelite Pressure Washer in optimal condition, it is crucial to perform regular cleaning and inspection. After each use, make sure to remove any dirt, debris, or other particles that may have accumulated on the machine’s surface. Use a soft cloth and a mild detergent to wipe the exterior clean. Pay close attention to the nozzle, wand, and hose, as these parts are prone to clogging and damage. Inspecting the components for any signs of wear or damage is also essential.
Lubrication and Maintenance
Lubrication is an essential aspect of maintaining your pressure washer. Regularly lubricate the moving parts, such as the engine, pump, and fittings, to ensure smooth operation and prevent unnecessary wear and tear. Consult the user manual or contact Homelite for guidance on the appropriate lubricants to use. Additionally, make it a habit to check the oil levels regularly, and change the oil as recommended by the manufacturer.
| Component | Maintenance |
|---|---|
| Nozzles, Wand, and Hose | Inspect for damage and clean regularly |
| Fuel System | Drain and replace fuel regularly |
| Pump | Flush and clean to remove debris |
| Filters | Replace as recommended by the manufacturer |
Furthermore, pay attention to the fuel system by draining and replacing the fuel regularly to prevent engine damage. Clean the pump periodically to remove any debris or contaminants that may affect its performance. Don’t forget to replace the filters as recommended by the manufacturer to ensure optimal filtration and prevent clogging.
Lastly, always follow the instructions provided by Homelite for winter storage. Properly store your pressure washer in a clean, dry location away from extreme temperatures. Keep it covered to protect it from dust and other environmental elements. By following these maintenance and storage practices, you will ensure that your Homelite Pressure Washer remains in excellent condition and ready to serve you whenever the need arises.
FAQ:
Do I need any specific tools or equipment to start a Homelite pressure washer?
No, you don’t need any specific tools or equipment to start a Homelite pressure washer. However, you may need a few basic tools like a wrench or pliers to attach the hoses securely. It’s also a good idea to have safety goggles, gloves, and ear protection for your own safety.
Can I use any type of detergent with a Homelite pressure washer?
No, it is essential to use only detergents that are specifically designed for pressure washers. Using any other type of detergent or cleaning solution may damage the pump or other components of the pressure washer. Always follow the manufacturer’s recommendations for detergent usage and dilution ratios.


