
How To Set Up Ferrex Pressure Washer

Harnessing the power of precision and efficiency, we embark on a journey towards achieving the epitome of cleanliness in our surroundings. This article delves into the art of optimizing the functionality of a robust cleaning apparatus, enabling us to maximize our potential in conquering dirt and grime. Allow me to guide you through the seamless process of establishing an exemplary ecosystem, utilizing the remarkable prowess of the Ferrex High-Pressure Cleaning Implement.
Unlocking the Potential:
Embrace the immense capabilities of this cutting-edge cleaning companion by mastering the art of its setup. By understanding the intricate details and nuances, you will become a proficient custodian of your environment. Together, we embark on a transformative expedition to witness the sheer power and effectiveness that lies within the Ferrex High-Pressure Cleaning Implement.
Seamless Preparation:
Prior to letting this powerhouse unleash its might, certain steps need to be diligently followed. Ensuring a smooth setup is imperative in guaranteeing optimal performance. Begin by acquainting yourself with the various components that comprise the apparatus. Familiarize yourself with every contour, every crevice, and every connection point. Ignite the flame of curiosity within, allowing it to guide you through this realm of possibilities.
Meticulous Assembly:
In the realm of efficiency, precision is key. Piece by piece, construct the Ferrex High-Pressure Cleaning Implement, harmoniously merging its components to form an indomitable force against any resistant element. Take caution in following the manufacturer’s instructions, embracing the interplay of mind and hand, ensuring each part finds its rightful place. Rejoice in the symbiotic relationship you forge with this remarkable machine.
Preparing Your Ferrex Power Sprayer: A Step-by-Step Guide
When it comes to getting your Ferrex power sprayer ready for action, a few simple steps can make all the difference. In this guide, I will walk you through the process of preparing your pressure washing machine for use, ensuring that you are equipped with the knowledge and confidence to tackle any cleaning project.
Gather Your Equipment
The first step in setting up your Ferrex power sprayer is to gather all the necessary equipment. This may include the power sprayer unit itself, a water source, an electrical outlet (if applicable), and any attachments or accessories that you plan to use. By having everything in one place, you can save time and ensure a smooth setup process.
Connecting the Components
Once you have all the necessary equipment, it’s time to start connecting the components of your Ferrex power sprayer. Begin by securely attaching the water source, whether it’s a hose or a water container, to the inlet valve of the sprayer unit. Make sure the connection is tight to prevent leaks during operation. If your power sprayer requires electricity, plug it into a nearby electrical outlet using a properly rated extension cord.
Next, if you have any attachments or accessories such as nozzles or brushes, carefully connect them to the appropriate fittings on the sprayer wand or hose. Ensure that these connections are also tight to avoid any issues later on.
Water and Pressure Adjustment
With the components connected, it’s time to focus on the water and pressure settings of your Ferrex power sprayer. Turn on the water source and allow it to flow through the sprayer. Check for any leaks or drips and address them immediately if necessary. Once you are confident that everything is connected properly, you can adjust the pressure settings according to your specific cleaning needs. Follow the instructions provided with your Ferrex power sprayer to set the desired pressure levels.
By following these step-by-step instructions, you can easily set up your Ferrex power sprayer and be ready to tackle any cleaning task that comes your way. Remember to always prioritize safety and read the user manual provided by the manufacturer for detailed instructions and guidelines specific to your model. Happy pressure washing!
Unboxing and Checking the Contents
As I eagerly opened the package of my new high-pressure cleaning device, I was filled with anticipation to discover the contents within. In this section, I will outline the exciting unboxing experience and provide a detailed account of the items that were included in the package.
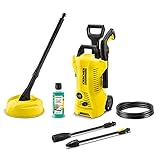
The moment I tore away the packaging, I was greeted with a neatly organized arrangement of essential components. The contents were thoughtfully packed to ensure their safety during transit. Alongside the main pressure washer unit, I discovered an assortment of accessories that promised to enhance my cleaning experience.

| Item | Description |
| High-pressure wand | A sturdy and extendable wand that delivers a powerful stream of water for efficient cleaning. |
| Nozzle attachments | Interchangeable nozzles with different spray patterns, allowing for versatile cleaning options. |
| Hose | A long and flexible hose that connects the pressure washer to a water source. |
| Detergent bottle | A convenient attachment for applying cleaning solutions to tackle stubborn dirt and grime. |
| Instruction manual | A comprehensive guide that provides step-by-step instructions for setting up and using the pressure washer. |
| Additional accessories | An assortment of connectors and adapters to ensure compatibility with various water sources and applications. |
Each item within the package showcased a high level of quality, with durable materials and attention to detail evident in their design. The inclusion of a user-friendly instruction manual instilled confidence in my ability to successfully set up and operate the pressure washer.
Unboxing and examining the contents of the package gave me a clear understanding of the tools at my disposal for efficient and effective cleaning. With the excitement building, I was eager to proceed to the next step and embark on the setup process, ready to unleash the power of this impressive pressure washer.
Familiarizing Yourself with the Components of the Pressure Washer
As I delve into the world of pressure washers, I find it crucial to familiarize myself with the various components that make up this powerful cleaning machine. Understanding these parts not only ensures that I can use the pressure washer effectively, but also allows me to troubleshoot any issues that may arise during operation.
One of the key components of the pressure washer is the pump, which is responsible for creating the high-pressure water flow. It acts as the heart of the machine, providing the necessary power to clean various surfaces effectively. The pump can be powered by either an electric motor or a gas engine, depending on the specific model.
Another vital component is the nozzle, which determines the spray pattern and intensity of the water. Different nozzles produce varying degrees of pressure, allowing me to customize the cleaning process according to the task at hand. It is crucial to choose the appropriate nozzle for different surfaces to achieve optimal results without causing any damage.

The pressure hose serves as a conduit for the water, transporting it from the pump to the nozzle. It must be durable enough to withstand the high pressure and resistant to kinks and abrasions. Additionally, maintaining the proper length and connection of the pressure hose is essential to ensure efficient operation.
In addition to these main components, the pressure washer may also have other auxiliary features such as a detergent tank, wheels for portability, and a handle for ease of maneuverability. Familiarizing myself with these additional elements enhances my overall understanding of the machine’s capabilities and helps me make the most of its functionalities.
| Component | Description |
|---|---|
| Pump | The heart of the pressure washer, responsible for creating high-pressure water flow. |
| Nozzle | Determines the spray pattern and intensity of the water. |
| Pressure Hose | Conveys the water from the pump to the nozzle. |
| Auxiliary Features | Additional elements such as a detergent tank, wheels, and a handle for enhanced functionality and convenience. |
By familiarizing myself with these pressure washer components, I am confident that I can effectively operate the machine and achieve outstanding cleaning results. Moreover, being knowledgeable about these elements allows me to troubleshoot potential issues and maintain the pressure washer properly, ensuring its longevity and optimal performance.
Choosing the Perfect Spot for Your High-Pressure Cleaning Equipment
When it comes to setting up your high-pressure cleaning equipment, selecting the right location is crucial for ensuring optimal performance and safety. In this section, I will guide you through the process of choosing the perfect spot for your pressure washer, considering various factors such as convenience, protection, and accessibility.
Consider Convenience and Accessibility
- Find a location that is easily accessible and convenient for your cleaning tasks. Ideally, it should be close to the areas you frequently use your pressure washer on.
- Ensure there is sufficient space around the pressure washer to move freely and maneuver the equipment comfortably.
- Consider the availability of a power source nearby to avoid long extension cords or the need for additional electrical installations.
Protect Your Pressure Washer from the Elements
- Choose a spot that provides shelter from harsh weather conditions such as rain, snow, or extreme heat. Exposure to such elements can damage the sensitive parts of your pressure washer over time.
- If an indoor area is available, it is highly recommended to set up your pressure washer there. This will not only protect it from the elements but also reduce the noise levels produced during operation.
- If an outdoor location is the only option, consider investing in a weatherproof cover or storing the pressure washer in a shed or garage when not in use.
By considering the convenience, accessibility, and protection of your pressure washer, you are setting yourself up for an efficient and long-lasting cleaning experience. Take the time to evaluate the available options and choose a location that suits your needs best. Remember, a well-located pressure washer will make your cleaning tasks a breeze and extend the lifespan of your equipment.

Assembling the Power Cleaner
When setting up your new power cleaner for the first time, it is important to follow a step-by-step process to ensure its proper assembly and functionality. In this section, I will guide you through the process of assembling your power cleaner, providing clear instructions and tips along the way.
Gather the Necessary Tools and Parts
- Start by preparing all the required tools and parts. Check the contents of the packaging to ensure that you have received all the necessary components for assembly.
- Make sure you have a set of common household tools, such as a screwdriver, pliers, and an adjustable wrench, as they may come in handy during the assembly process.
Follow the Instruction Manual
Consult the instruction manual provided with your power cleaner. It contains detailed instructions specific to your model. Familiarize yourself with the contents of the manual before beginning the assembly process.
When following the instruction manual, pay attention to each step and perform them in the suggested order. This will help ensure a smooth and efficient assembly process.
Attach the Components
Now, it is time to attach the various components of your power cleaner. Assemble the parts carefully, referring to the manual’s illustrations and instructions.
Begin by securing the handle to the main body of the power cleaner. Use the provided screws or fasteners to ensure a secure connection. Make sure to tighten them properly, but be cautious not to overtighten and damage the components.
Next, attach the water hose inlet and outlet connectors to their respective ports on the power cleaner. Ensure that the connections are tight to prevent any leaks during operation.
If your power cleaner has additional accessories, such as a soap dispenser or brush attachment, follow the manufacturer’s instructions to attach them securely.
Double-Check and Test
Once you have assembled all the components, take a moment to double-check each connection and attachment. Tighten any loose screws or connectors, if necessary.
Before using your power cleaner, it is crucial to test its functionality. Connect the power cleaner to a suitable power source, ensuring that all connections are secure. Turn on the power cleaner and check if it operates smoothly and produces the desired pressure.
If you encounter any issues or notice any irregularities during the assembling or testing process, refer back to the instruction manual or contact the manufacturer for assistance.

By following these steps and carefully assembling your power cleaner, you will be ready to tackle your cleaning tasks with confidence and efficiency.
Connecting the Hoses and Attachments
When setting up your pressure washing equipment, one crucial step is connecting the various hoses and attachments. This process ensures that the water flow is properly directed, and the machine functions effectively. Here, I will guide you through the necessary steps to connect your hoses and attachments, making the setup process smooth and hassle-free.
Step 1: Start by locating the water source and ensuring it is turned off. This could be a garden hose or a water tap, depending on your specific setup. Make sure the water source is easily accessible and can provide a sufficient flow rate for your pressure washer.
Step 2: Attach one end of the high-pressure hose tightly to the water outlet on the pressure washer. This connection should be secure to prevent any leaks or water loss during operation. Use a wrench or pliers, if necessary, to ensure a tight fit.
Step 3: Take the other end of the high-pressure hose and connect it securely to the spray gun or wand. This connection is crucial, as it is where the water will be expelled at high pressure. Ensure a tight fit to prevent any water leakage during use.

Step 4: If your pressure washer has additional attachments, such as a soap dispenser or surface cleaner, follow the manufacturer’s instructions to attach them securely. These attachments can enhance your cleaning capabilities and provide more efficient results.
Step 5: Once all the hoses and attachments are connected, turn on the water source and check for any leaks. If you notice any leaks, tighten the connections further or use Teflon tape to seal them. It is essential to have a leak-free setup for optimal performance.
Step 6: Finally, before starting the pressure washer, ensure that all connections are secure and the hoses are free from any kinks or twists. Kinks or obstructions can disrupt the water flow and affect the pressure washer’s performance.
With the hoses and attachments properly connected, you are now ready to start your ferrex pressure washer and tackle your cleaning tasks with confidence. Always refer to the user manual for specific instructions related to your pressure washer model to ensure safe and efficient operation.
Checking the Water Supply and Inlet
One of the essential steps in setting up your pressure washer is ensuring a proper water source and inlet. Before beginning any cleaning tasks, it is crucial to check that your water supply meets the necessary requirements and that the inlet of the pressure washer is connected correctly.
Start by locating a water source that provides adequate pressure and flow rate. It is important to note that the pressure washer’s performance heavily relies on the water supply, so ensuring a sufficient source is essential for optimal results. Check if the water source is clean, free from debris or contaminants, and easily accessible.
After locating the water source, connect one end of a high-pressure hose to the water inlet connection on the pressure washer. Secure the connection tightly to prevent any leaks or loss of pressure during operation. Ensure that the connection is secure and that there are no kinks or twists in the hose that may impede water flow.
Once the high-pressure hose is securely connected, check that the water inlet filter is clean and free from any blockages. Remove the water inlet filter if necessary and rinse it thoroughly to remove any accumulated dirt or debris. A clean filter allows for uninterrupted water flow and prevents damage to the pressure washer’s internal components.
Before proceeding with any cleaning tasks, it is essential to prime the pump to ensure proper water flow and prevent damage to the pressure washer. Follow the manufacturer’s instructions to prime the pump, which typically involves flushing water through the system until air bubbles are expelled and a steady flow is achieved.
By taking the time to check and ensure a proper water source and inlet, you can be confident that your pressure washer will operate efficiently and effectively, delivering optimal cleaning performance.
| Key Points: |
|---|
| – Ensure a water source with sufficient pressure and flow rate |
| – Connect the high-pressure hose securely to the pressure washer’s water inlet |
| – Check and clean the water inlet filter to prevent blockages |
| – Prime the pump according to the manufacturer’s instructions |
Preparing the Machine for Use: Ensuring Proper Functionality
When it comes to getting your pressure washer up and running, it is crucial to follow the necessary steps for priming the machine and testing the spray. This section will guide you through the initial setup process, ensuring that your pressure washer is ready to tackle the cleaning tasks at hand.
Firstly, it is essential to prime the pressure washer before starting any cleaning operations. Priming the machine involves ensuring that water flows smoothly through the system, preparing it for optimal performance. By priming the pressure washer, you will prevent any potential damage to the internal components and guarantee a longer lifespan for your equipment.
To accomplish this, begin by connecting the water supply hose to a suitable water source. Ensure that the hose is tightly secured to both the pressure washer and the water supply faucet. Once connected, be sure to check that the water supply is turned on and that there are no leaks present in the connections.
Next, it’s time to test the spray functionality of your pressure washer. Point the spray gun away from any objects or people and turn on the machine. Squeeze the trigger to activate the spray, allowing water to flow through the system. Observe the spray pattern and make sure it is consistent and strong.
If you notice any irregularities in the spray pattern, such as weak pressure or inconsistent flow, it may be necessary to troubleshoot and make adjustments. Check that all connections are secure and that the water supply is providing sufficient flow. Additionally, inspect the nozzle and wand attachments for any blockages or debris that may impede the spray.
Remember, the proper setup of your pressure washer is crucial to its overall performance. By following these steps and ensuring that the machine is primed and the spray is tested, you can confidently proceed with your cleaning tasks, knowing that your pressure washer is ready to deliver outstanding results.
Adjusting the Water Pressure and Selecting the Appropriate Nozzle
In this section, I will share my experience and tips on how to optimize the water pressure of your Ferrex pressure washer and choose the right nozzle for different cleaning tasks. Adjusting the water pressure is crucial to ensure effective cleaning without causing any damage to the surfaces.
1. Controlling the Water Pressure
One of the key aspects of using a pressure washer is to accurately control the water pressure according to the cleaning requirements. To achieve this, start by twisting the adjustment knob or lever on the pressure washer’s wand. This will allow you to increase or decrease the water pressure output.
For lower pressure requirements, turning the knob or lever counterclockwise will decrease the pressure, while turning it clockwise will increase the pressure.
2. Selecting the Right Nozzle
Using the correct nozzle is equally important for obtaining the desired cleaning results. Different nozzles have varying spray patterns and pressure levels, making them suitable for different cleaning tasks.
Typically, pressure washer nozzles are color-coded for easy identification:
- Red Nozzle (0°): This nozzle provides a concentrated, pinpoint spray and is ideal for removing tough stains or dirt from small areas.
- Yellow Nozzle (15°): The 15-degree nozzle offers a slightly wider spray pattern, making it suitable for general-purpose cleaning tasks such as washing cars or outdoor furniture.
- Green Nozzle (25°): With a wider spray angle, the green nozzle is ideal for cleaning larger surfaces like driveways, decks, or patios.
- White or Black Nozzle (40°): These nozzles provide the widest spray pattern and are perfect for gentle cleaning of delicate surfaces like windows or screens.
Remember to always start with a wider spray pattern and gradually switch to narrower ones if necessary, depending on the cleaning task at hand.
By adjusting the water pressure and selecting the appropriate nozzle, you can optimize the performance of your Ferrex pressure washer and achieve efficient and satisfying cleaning results. Experimenting with different settings and nozzles will help you find the perfect combination for each specific cleaning task.
Proper Maintenance and Storage of Your High-Pressure Cleaning Device
As an owner of a high-pressure cleaning device, it is crucial to understand the importance of proper maintenance and storage. Taking care of your equipment can prolong its lifespan and ensure optimal performance when you need it most. Here are some essential tips for maintaining and storing your high-pressure cleaner effectively:
1. Regular Cleaning: It is important to clean your pressure washer after each use to remove any dirt, debris, or leftover detergent that may have accumulated. Use a mild detergent and a soft sponge or cloth to gently wipe down the exterior of the machine. Pay close attention to the nozzle, hose, and other attachments, making sure they are free from any clogs or blockages.
2. Inspection and Repairs: Regularly inspect your pressure washer for any signs of wear and tear. Check the hoses, fittings, and seals for any leaks or cracks. If you notice any damage, it is important to repair or replace the parts as soon as possible to prevent further issues and maintain the machine’s efficiency.
3. Lubrication: Proper lubrication of your pressure washer is essential for smooth operation. Make sure to follow the manufacturer’s guidelines for lubricating the pump, engine, and other moving parts. Use the recommended lubricants and apply them according to the specified intervals to keep your machine running smoothly.
4. Winterizing: If you live in an area with freezing temperatures, it is crucial to winterize your pressure washer before storing it for the season. Drain all water from the pump, hoses, and spray gun to prevent freezing and potential damage. Consult your user manual or contact the manufacturer for specific instructions on how to winterize your particular model.
5. Proper Storage: Store your pressure washer in a clean, dry, and well-ventilated area. Avoid storing it in extreme temperatures or direct sunlight, as this can damage the components and decrease its lifespan. Use a cover or tarp to protect the machine from dust, moisture, and other elements that can cause corrosion or damage.
- Regularly clean your pressure washer after each use.
- Inspect and repair any signs of wear and tear.
- Properly lubricate the machine to ensure smooth operation.
- Winterize your pressure washer if necessary.
- Store it in a clean, dry, and well-ventilated space.
By following these maintenance and storage tips, you can ensure that your high-pressure cleaning device remains in top condition, maximizing its lifespan and performance. Remember, proper care and maintenance are the keys to long-term success with your pressure washer.
FAQ:
What is a Ferrex pressure washer and why do I need one?
A Ferrex pressure washer is a powerful cleaning tool that uses high-pressure water streams to remove dirt, grime, and stains from various surfaces. It is useful for cleaning patios, driveways, vehicles, and even outdoor furniture. It saves time and effort compared to traditional cleaning methods.
How do I assemble a Ferrex pressure washer?
Assembling a Ferrex pressure washer is quite simple. First, attach the handle to the main body using the provided screws. Then, connect the high-pressure hose to the unit and the spray gun. Finally, connect the water inlet hose to a water source and turn it on. Your pressure washer is now ready to use.
What maintenance tips should I follow for my Ferrex pressure washer?
To maintain your Ferrex pressure washer, you should regularly clean the nozzles and filters to prevent clogging. Additionally, ensure that all connections are secure and free from leaks. After each use, drain any excess water from the machine and store it in a dry place. Regularly inspect the hoses for damage and replace them if necessary.
How do I start the Ferrex pressure washer?
To start your Ferrex pressure washer, follow these steps: 1) Ensure that the water inlet hose is connected to a water source. 2) Turn on the water supply. 3) Connect the spray gun to the high-pressure hose. 4) Squeeze the trigger to release any trapped air. 5) Plug in the pressure washer and turn it on. Your pressure washer is now ready to use.
Can I use a Ferrex pressure washer for indoor cleaning?
No, it is not recommended to use a Ferrex pressure washer for indoor cleaning. The high-pressure water streams can cause damage to delicate surfaces and may lead to water damage if not used correctly. It is best to use the pressure washer outdoors where there is proper drainage and less risk of causing damage to your property.


