
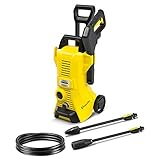
How To Rewind The Hose On A Nilfisk Pressure Washer

Have you ever found yourself struggling to neatly coil up your powerful spraying tube after a vigorous cleaning session? I certainly have! It can be quite frustrating when this essential accessory of your top-notch cleaning equipment gets tangle-prone, causing unnecessary delays and hassle during your cleaning routines. Fortunately, there is a surefire method I have discovered to effortlessly reel in your trusty high-intensity hose, turning this tedious task into a breeze.
Imagine no longer having to wrestle with a spool of gnarled tubing, as you confidently channel the forces of friction and gravity to your advantage. With a few straightforward steps and a mindful approach, you can effortlessly tuck away your indomitable water conduit until its next heroic mission. Let me guide you through this enlightening process, containing the key to mastering the art of smoothly retracting your versatile cleaning companion.
Picture yourself feeling empowered and in control, as the coiling of your flexible water-carrying apparatus becomes a satisfying exercise. No longer will you dread the end of a cleaning session, dreading the time-consuming fight with a rebellious hose, as the secrets I will unveil will equip you with all the knowledge required to elegantly tame the wiry beast. It’s time to put an end to those winding nightmares and embrace the enchanting dance of a perfectly retracted high-pressure tubing.
Tips on Coiling the Pipe of a Nilfisk Power Sprayer
Greetings fellow Nilfisk power sprayer users! In this section, I will share some valuable insights on effectively coiling the pipe of your trusty pressure washer. Properly coiling the pipe not only ensures easy storage and transportation but also helps prevent kinks and damages that can affect the efficiency of your equipment. So, let’s dive in!
1. Embrace the Art of Loosening
Before starting the coiling process, gently release any remaining pressure from the hose. This will allow for a smooth and hassle-free rewinding experience. Make sure to detach the nozzle, wand, or any other attachments from the hose to make the coiling process more manageable.
2. Master the Knot-Free Technique
When coiling the hose, aim for a knot-free result to avoid tangling and waste less time unwinding for future use. Begin by holding one end of the hose securely, usually the nozzle end, and carefully loop the hose in a clockwise direction. Create large, round loops to maintain a consistent and neat coil.
Pro Tip: Using your free hand, slightly lift the hose as you coil it to prevent it from dragging on the ground. This extra effort will help preserve the hose’s integrity and prevent unnecessary wear and tear.
Once you reach the end of the hose, ensure that it lies tightly against the coiled loops, preventing any additional twists or loops. This approach will keep your hose compact and organized, making it easier to carry and store.
Wrapping It Up
Now that you’ve acquired the skills needed to rewind the hose of your Nilfisk power sprayer with finesse, practice this technique regularly to maintain the longevity of your equipment. Remember, a well-coiled hose not only extends the life of your Nilfisk pressure washer but also saves you time and effort in the long run. Happy coiling!
Importance of Properly Coiled Hose
As an owner of a Nilfisk pressure washer, I learned firsthand about the significance of properly coiling the hose. The way you rewind and store the hose can have a considerable impact on its overall lifespan, efficiency, and performance.

When you take the time to carefully rewind the hose, you ensure that it is not twisted or tangled. This prevents kinks and knots, which can restrict water flow and reduce the pressure washer’s overall effectiveness. A smooth and unrestricted hose allows for optimum water flow, resulting in better cleaning results and increased productivity.
In addition to maintaining water flow, correctly coiling the hose also helps protect it from damage. When haphazardly thrown or loosely wrapped, the hose is more prone to being stepped on, crushed, or entangled with other objects. These incidents can lead to punctures, leaks, or even complete hose failure, rendering your pressure washer unusable.
Properly coiling the hose also promotes efficient storage and transportation. By neatly winding the hose, you minimize its size and streamline its overall shape. This makes it easier to store in limited spaces or transport to different locations, especially if you frequently move your pressure washer around for various cleaning tasks.
- Minimizes kinks, knots, and twists, ensuring optimal water flow
- Prevents damage from being stepped on or entangled with objects
- Facilitates efficient storage and transportation
- Enhances the lifespan, efficiency, and performance of the hose
By recognizing the importance of properly rewound hose, you can significantly extend its lifespan and maximize the performance of your Nilfisk pressure washer. So, take the time to coil your hose carefully after each use, and reap the benefits of a reliable and efficient cleaning tool.
Gather the Essential Tools and Materials
When it comes to rewinding the hose on your Nilfisk pressure washer, it is important to have the necessary tools and materials on hand. By gathering these items before starting the process, you can ensure a smooth and efficient hose rewind.

1. Hose Reel
A hose reel is an essential tool for rewinding the hose. It provides a convenient and organized way to store the hose when not in use. Look for a hose reel that is compatible with your Nilfisk pressure washer and can support the length and diameter of your hose.
2. Robust Garden Gloves
Investing in a pair of sturdy garden gloves is vital to protect your hands from any potential splinters, dirt, or sharp edges that may be encountered during the hose rewinding process. Look for gloves that provide a good grip and are comfortable to wear for extended periods.
Additionally, you may also need the following materials:
- Waterproof Marker: Use a waterproof marker to mark any measurements or necessary indicators on the hose reel for future reference.
- Hose Repair Kit: If you notice any damages or leaks on your hose during the rewinding process, having a hose repair kit on hand can help you quickly fix the issue.
- Clean Cloth: Keeping a clean cloth nearby can be handy for wiping down the hose and reel before and after rewinding to prevent dirt and debris from causing any damage.
- Replacement Parts: Depending on the condition of your current hose and reel, you might want to consider having replacement parts available, such as connectors or fittings, in case any are damaged during the rewinding process.
By gathering these essential tools and materials before you start rewinding your Nilfisk pressure washer hose, you can ensure a smooth and uncomplicated process while also being prepared for any unexpected situations.
Preparing the Washer for Hose Retraction
When it comes to smoothly and effortlessly rewinding the hose on your pressure washer, proper preparation is key. By taking a few simple steps beforehand, you can ensure a hassle-free experience and extend the lifespan of your equipment. In this section, I will guide you through the crucial preparation process that will make hose rewinding a breeze.

Gather Your Tools
Before you begin, gather all the necessary tools and materials to make the process more efficient. You will need a pair of gloves to protect your hands, a bucket of clean water, a soft brush or sponge, and a cleaning solution specifically designed for pressure washers. Additionally, have a cloth or towel ready to wipe off any excess water or dirt from the exterior of the hose.
Clean the Hose
To ensure optimal functionality and prevent any potential damage during rewinding, it is essential to clean the hose thoroughly. Start by disconnecting the hose from the pressure washer unit and connecting it to a water source. Gently squeeze the trigger to release any remaining water pressure and drain the excess water from the hose. Then, using the soft brush or sponge, clean the entire length of the hose, removing any dirt, debris, or other contaminants that might have accumulated during use. Rinse the hose with clean water to eliminate any residue, and let it air dry completely before continuing with the rewinding process.
| Tools and Materials | Steps |
|---|---|
| Gloves | 1. Gather all the necessary tools and materials. |
| Bucket of clean water | 2. Disconnect the hose from the pressure washer unit. |
| Soft brush or sponge | 3. Connect the hose to a water source and release any remaining water pressure. |
| Cleaning solution for pressure washers | 4. Clean the entire length of the hose using a soft brush or sponge. |
| Cloth or towel | 5. Rinse the hose with clean water and let it air dry completely. |
By properly preparing your pressure washer and hose for rewinding, you can ensure a smooth and efficient process, prolong the lifespan of your equipment, and maintain optimal performance.
Loosen and disconnect the hose from the power cleaner
When it comes to properly maintaining your power cleaner, it’s essential to know how to loosen and disconnect the hose. This is a crucial step in ensuring that your power cleaner remains in good condition and functions optimally. In this section, I will guide you through the process of disconnecting the hose from the power cleaner, providing you with the necessary steps to carry out this task effectively.
Gather the required tools
Before beginning the disconnection process, it is important to have the necessary tools on hand. You will need a pair of adjustable pliers, a wrench, and a cloth or towel to protect your hands and provide grip during the procedure.

Step-by-step process
| Step | Description |
|---|---|
| 1 | Turn off the power cleaner and unplug it from the power source. Safety is paramount, so always ensure that your power cleaner is not connected to any electricity before starting the disconnection process. |
| 2 | Locate the connection point between the hose and the power cleaner. This is typically found on the side or back of the machine, near the water inlet. |
| 3 | Use the adjustable pliers to loosen the hose connection by turning it counterclockwise. Apply gentle pressure as you grip the connection to avoid damaging the threads. |
| 4 | Once the connection is loosened, continue unscrewing it by hand until it is completely detached. Be cautious as you remove the hose, as residual water may still be inside. |
| 5 | After removing the hose, inspect it for any signs of damage or wear. If necessary, clean the hose using a mild detergent and water solution, ensuring that it is completely dry before reattaching it. |
| 6 | Store the hose in a safe and dry location to prevent any potential damage or exposure to the elements. Consider using a hose reel or a designated storage area to keep it organized and readily accessible for future use. |
By following these simple steps, you can easily loosen and disconnect the hose from your power cleaner. Remember to handle the hose with care and inspect it regularly for any signs of damage. This maintenance task will contribute to the longevity and performance of your power cleaner, allowing you to tackle your cleaning projects effectively and effortlessly.
Untangle and straighten the hose
In this section, I will guide you through the process of untangling and straightening the hose of a Nilfisk pressure washer. Ensuring that your pressure washer’s hose is free of tangles and properly straightened is essential for optimal performance and easy storage.
Step 1: Assess the hose condition
Before attempting to untangle and straighten the hose, it’s important to assess its overall condition. Check for any signs of damage, such as kinks, twists, or wear. If you notice any significant damage, it may be necessary to replace the hose or seek professional assistance.
Step 2: Release any existing pressure
Prior to untangling the hose, relieve any existing pressure by turning off the pressure washer and pressing the trigger gun to release any built-up pressure. This will ensure your safety during the untangling process.
Step 3: Start untangling from the nozzle end
Begin untangling the hose from the nozzle end, gently maneuvering any loops or tangles. It’s important to take your time and be careful not to force any tangled sections as this may cause further damage to the hose.
Step 4: Straighten the hose
Once all tangles have been untangled, focus on straightening the hose. Hold one end of the hose and gently pull it straight, ensuring it doesn’t twist or kink as you go along. Work your way towards the other end of the hose, applying even pressure to maintain its straightened position.

Step 5: Secure the hose for storage
After untangling and straightening the hose, it’s important to secure it properly for storage. Avoid any sharp bends or kinks during this process. Loop the hose into a loose coil and secure it with rubber bands or Velcro straps to keep it neat and ready for future use.
By following these steps, you can effectively untangle and straighten the hose of your Nilfisk pressure washer, ensuring optimal functioning and hassle-free storage.
Safely Store the Hose with Ease
When it comes to maintaining and storing your pressure washer, safely rewinding the hose onto the reel is an essential task. Properly handling the hose ensures its longevity and prevents any potential hazards or accidents. In this section, I will guide you through the steps to safely rewind the hose onto the reel, ensuring a hassle-free experience.
Gather the necessary equipment
Before starting the rewinding process, it is important to gather the necessary equipment. You will need a pair of gloves to protect your hands, as well as a clean cloth to wipe the hose if required. Additionally, it can be helpful to have a friend or family member assist you in holding the hose steady during the rewinding process.

Step-by-step rewinding process
To begin, make sure the pressure washer is turned off and disconnected from the power source. This will help prevent any accidental operation while you are rewinding the hose. Once this precaution is in place, follow these steps:
- Start by loosening any attachments or accessories from the end of the hose. This will make the rewinding process easier and prevent any damage to the hose or reel.
- Gently guide the hose onto the reel, being careful not to twist or kink it. It can be helpful to have a friend hold the hose steady as you wind it onto the reel, ensuring a smooth and even rewinding process.
- As you rewind the hose, periodically check for any kinks or tangles. If you notice any, stop rewinding and carefully untangle the hose to prevent damage.
- Once the hose is fully rewound onto the reel, secure any attachments or accessories back onto the hose if necessary. This will ensure that everything is kept together and ready for future use.
- Finally, wipe down the hose with a clean cloth to remove any dirt or debris. This simple step will help maintain the cleanliness and longevity of the hose.
By following these steps and taking proper care when rewinding the hose onto the reel, you can ensure its safe storage and prolong its lifespan. Remember to always take your time and pay attention to any potential issues or tangles, guaranteeing a smooth and hassle-free rewinding process.
Ensuring Proper Positioning and Alignment
When it comes to operating a pressure washer, ensuring proper positioning and alignment of the hose is essential for efficient and effective cleaning. In this section, I will guide you through some important tips and techniques to help you achieve the correct positioning and alignment for your pressure washer hose.
1. Check for Straightness
Before you start using your pressure washer, it is crucial to ensure that the hose is properly straightened. A kinked or twisted hose can restrict water flow and decrease the efficiency of your cleaning. Take a close look at the entire length of the hose and straighten out any bends or twists before connecting it to the pressure washer.
2. Secure Proper Connection
Once the hose is straightened, make sure it is securely connected to both the pressure washer and the spray gun or nozzle. A loose connection can result in water leaks and decrease the overall pressure of the washer. Double-check all connections and tighten them if necessary, ensuring a tight and secure fit.
3. Position the Hose Appropriately
Consider the layout of the area you will be cleaning and position the hose accordingly. Avoid placing the hose in areas where it could get entangled or stuck, as this can not only impede the cleaning process but also pose a safety hazards. Keep it away from sharp or abrasive objects that could potentially damage the hose.
Additionally, ensure that the hose is positioned in such a way that it allows for free movement while you are cleaning. Keep it away from obstacles or obstructions that may restrict your access or make it difficult to reach certain areas.
4. Maintain Adequate Hose Length
It is important to consider the length of the hose when positioning it for optimal performance. Keep in mind that a hose that is too short may limit your reach, while a hose that is too long may cause unnecessary tangling or tripping hazards. Choose a hose length appropriate for your cleaning needs and make sure it allows sufficient room for movement.
By following these guidelines and ensuring the proper positioning and alignment of your pressure washer hose, you can improve the overall efficiency and effectiveness of your cleaning process. Taking the time to set up and position the hose correctly will ultimately result in better cleaning results and a more enjoyable experience with your Nilfisk pressure washer.
Testing the Rewound Hose: Ensuring Optimal Functionality
As I successfully rewind the hose of my powerful Nilfisk pressure washer, taking the necessary steps to ensure its proper storage and longevity, it is crucial to test the functionality of the hose after rewinding. This section outlines the necessary steps to evaluate the rewound hose so that it performs optimally during future use.
To begin, it is essential to thoroughly inspect the rewound hose for any signs of damage or wear. Carefully examine the entire length of the hose, checking for cuts, cracks, or leaks, which may have occurred during the rewinding process or previous usage. Remember to use synonyms for “inspect” and “examine” to maintain linguistic variety throughout the section.
After the visual inspection, it is important to test the integrity of the rewound hose by conducting a functionality check. To do this, securely connect one end of the hose to the pressure washer and the other end to a water source, ensuring a tight fit to prevent any water leakage. Then, turn on the pressure washer and gradually increase the water pressure to the desired level.
Observe the hose during this test, carefully monitoring it for any signs of leakage, bulging, or abnormal behavior. Test the hose at various pressure levels, simulating the typical usage conditions to ensure its robustness and reliability. Additionally, try different spray patterns and nozzle settings to ascertain that the hose can handle a variety of tasks without any issues.
Another aspect to consider during the functionality test is the flexibility and maneuverability of the rewound hose. As I maneuver the pressure washer across various surfaces and angles, I gauge how well the hose responds to my movements and if it remains flexible and unobstructed. Synonyms for “maneuver” and “flexibility” will add linguistic diversity to the section.
Lastly, after completing the functionality test, carefully dry the hose and store it properly to prevent any potential damage or tangling. By following these steps and regularly testing the rewound hose for functionality, I can maintain its optimal performance and dependability for future pressure washing tasks.
Maintaining the rewound hose for optimal and durable performance
As an avid user of a high-quality pressure washer, I understand the importance of proper maintenance to ensure its long-lasting performance. One crucial aspect of this is ensuring the proper maintenance of the rewound hose, which plays a vital role in the efficient functioning of the pressure washer. In this section, I will share some valuable tips on how to keep your rewound hose in pristine condition, optimizing its performance and durability.
| Tip | Description |
|---|---|
| 1 | Regular inspection and cleaning |
| 2 | Proper storage and protection |
| 3 | Careful handling and prevention of kinks |
| 4 | Using appropriate fittings and connectors |
| 5 | Periodic lubrication and maintenance |
1. Regular inspection and cleaning:
Regularly inspect your rewound hose for any signs of wear, abrasion, or leakage. Check for any loose or damaged fittings, connectors, or couplings. Cleaning the hose after each use is essential to remove debris, dirt, and grime that may lead to clogs or reduced water flow. Use a mild detergent and warm water to clean the hose, then rinse thoroughly and allow it to dry completely before storing.
2. Proper storage and protection:
Store your rewound hose in a dry and cool area away from direct sunlight or extreme temperatures, as these can degrade the hose material over time. Coiling the hose neatly and avoiding any sharp bends or kinks will prevent damage and prolong its lifespan. Consider using a hose reel or hanger for convenient storage and to minimize tangling.
3. Careful handling and prevention of kinks:
Avoid forcefully yanking or dragging the rewound hose, as it can lead to kinks or twists that restrict water flow. When using the pressure washer, keep the hose straight to allow a smooth and unobstructed water flow. If you encounter a kink, carefully straighten it out to prevent any damage to the hose or the pressure washer.
4. Using appropriate fittings and connectors:
Ensure that you use high-quality fittings and connectors that are compatible with your pressure washer and the rewound hose. Using improper or low-quality fittings may result in leaks or reduced performance. Regularly check and tighten the connections to prevent any potential leaks during operation.
5. Periodic lubrication and maintenance:
Apply a thin layer of silicone-based lubricant on the fittings and connectors to minimize friction and enhance their longevity. Additionally, periodically inspect and replace any worn-out o-rings or seals to maintain a secure and leak-free connection.
Following these simple yet effective tips for maintaining your rewound hose will ensure optimal performance and durability, allowing you to make the most out of your Nilfisk pressure washer for years to come.
FAQ:
What is a Nilfisk pressure washer?
A Nilfisk pressure washer is a high-pressure cleaning device commonly used for cleaning outdoor surfaces such as driveways, decks, and cars. It is known for its powerful water flow and versatility in cleaning various types of dirt and grime.
Why would I need to rewind the hose on a Nilfisk pressure washer?
Rewinding the hose on a Nilfisk pressure washer is necessary to keep it organized, prevent tangling, and prolong its lifespan. It also allows for easy storage and transportation, as a neatly coiled hose occupies less space.
How do I rewind the hose on a Nilfisk pressure washer?
To rewind the hose on a Nilfisk pressure washer, start by detaching the spray gun and any attachments from the hose. Then, hold the end of the hose near the fitting and start rotating it in a circular motion while moving towards the pressure washer. Continue coiling the hose in a tight and even manner until it is completely rewound.
Are there any tips for rewinding the hose on a Nilfisk pressure washer?
Yes, there are a few tips to keep in mind when rewinding the hose on a Nilfisk pressure washer. Firstly, make sure to release any leftover water pressure before attempting to rewind the hose. Secondly, avoid sharp bends or kinks that can damage the hose. Lastly, try to keep the hose free from dirt and debris before rewinding to prevent clogging or potential damage to the pressure washer.


