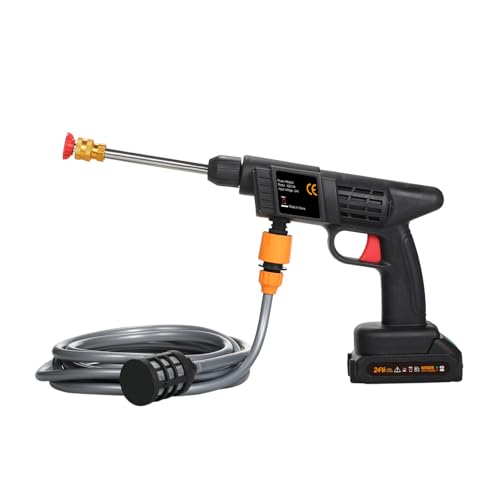
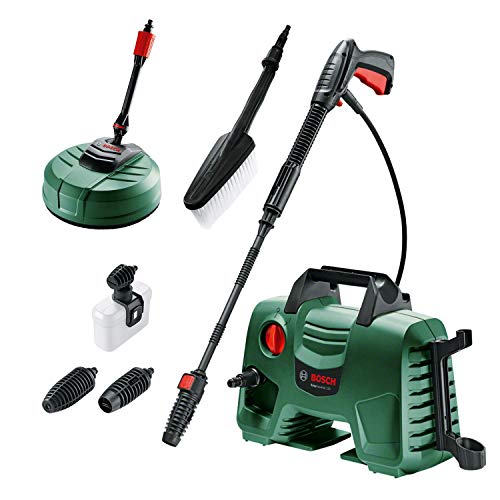
How To Repair Leaking Pressure Washer Hose

Ever encountered a situation where your formidable water sprayer suddenly starts to ooze droplets around the junction? It seems like a small annoyance at first, but if left unattended, it can quickly escalate into a messy situation. Thankfully, there is a straightforward way to resolve this issue effortlessly.
Imagine a scenario where you are in the middle of a demanding cleaning task, and suddenly you notice water slowly seeping out from the interface between the powerful compression device and its flexible conduit. This unexpected leakage can not only hinder the desired cleaning results but can also put unnecessary strain on the equipment, leading to wear and tear.
Fortunately, there is no need to panic or rush to buy a new hose, as this predicament can often be resolved promptly by following a few simple steps. By tackling this problem head-on and investing a little time and effort, you can save yourself from spending extra dollars on a replacement and extend the lifespan of your trusty washer, ensuring it remains a reliable companion in all your cleaning endeavors.
So, let’s dive into the step-by-step process of fixing a troublesome water sprayer hose connection.
Fixing a Dripping Pressure Washer Tube: Simple Solutions
If you encounter a situation where your pressure washer hose is unexpectedly releasing water, don’t fret! I have some useful tips and tricks that can help you address this issue swiftly and effectively. In this section, I will guide you through the easy steps to resolve a dripping issue with your pressure washer tubing without the need for professional assistance.
Identifying the Source of the Leak
Before diving into the repair process, it’s important to locate the origin of the leak. By conducting a thorough inspection, you can pinpoint the exact spot where the water is escaping. This step is crucial as it will determine the most appropriate repair method for your specific situation.
Exploring Temporary Fixes
If you are faced with a minor leakage in your pressure washer hose, temporary fixes can sometimes save the day. These quick solutions can provide a temporary fix until a full repair can be made. By understanding a range of stop-gap measures, such as using electrical tape or hose repair kits, you’ll be well-prepared to handle unexpected leaks on the spot.
Replacing Damaged Sections

In some cases, a leaking pressure washer hose may require a more comprehensive repair. This involves replacing the damaged sections with new hose segments. By meticulously removing the affected area and seamlessly connecting the replacement part, you can ensure the longevity and optimal functionality of your pressure washer.
Preventing Future Leaks
Now that you have successfully repaired your leaking pressure washer hose, it’s essential to take proactive steps to prevent future leaks. By incorporating preventative measures into your maintenance routine, such as regular inspections and proper storage, you can minimize the chances of encountering this issue again in the future.
Remember, taking care of your pressure washer hose is crucial for maintaining efficient cleaning performance. By following these simple steps, you can quickly fix a leaking pressure washer hose and get back to your cleaning tasks with ease. Now go on and tackle that dripping hose like a pro!
Identifying the Leak: Locating the Problem Area
When faced with a leaking pressure washer hose, it is crucial to be able to identify the exact area where the problem is occurring. This knowledge will not only save you time but also ensure that you are able to effectively repair the leak.

Step 1: Visual Inspection
Begin by visually inspecting the hose for any visible signs of damage or wear. Look for any cracks, splits, or bulges along the length of the hose. Pay close attention to the connectors and fittings as well, as they are common areas where leaks can occur.
Note: It is important to wear protective gloves while inspecting the hose to avoid any potential injuries from sharp edges or debris.
Step 2: Feeling for Leaks
After conducting a visual inspection, run your hands along the hose to feel for any signs of moisture or water leaking. Leaks are often accompanied by a noticeable change in texture, such as a damp or wet sensation.
Tip: To make it easier to detect leaks, try applying slight pressure to the hose while feeling for any water seepage.
By following these steps, you will be able to effectively identify the leak and determine the exact location of the problem area on your pressure washer hose. This knowledge will pave the way for successful repairs and ensure that your pressure washer is functioning optimally once again.

Assessing the Damage: Determining the Severity of the Leak
When faced with a hose leak in my pressure washer, understanding the extent of the damage is crucial before proceeding with any repair. By evaluating the severity of the leak, I can determine the appropriate course of action to take, ensuring effective and lasting results.
Visual Inspection
One of the first steps in assessing the damage is to visually inspect the hose for any visible signs of leakage. This includes looking for noticeable cracks, splits, or holes that may be causing the leak. Additionally, I carefully examine the fittings and connections to identify any loose or damaged components that could be contributing to the problem.
Water Flow Evaluation
Another important aspect of assessing the severity of the leak is to evaluate the water flow when the pressure washer is in operation. I observe the rate at which water is leaking from the hose and compare it to the normal flow. This helps me determine if the leak is minor or significant, as well as if it is affecting the performance of the pressure washer.
| Signs of a Minor Leak | Signs of a Severe Leak |
|---|---|
| – Small drips or trickles of water | – Continuous and substantial water leakage |
| – Minimal impact on pressure washer performance | – Decreased pressure and reduced efficiency |
| – Possible temporary solutions in some cases | – Immediate repair or replacement required |
| – Limited potential for further damage | – Potential for water damage or equipment malfunction |
By considering the visual inspection results and the water flow evaluation, I gain a clear understanding of the severity of the leak in my pressure washer hose. This knowledge guides my decision-making process and ensures that I select the most appropriate repair method or replacement option to resolve the issue effectively.
Temporary Quick Fix: Using Duct Tape to Stop the Leakage
When faced with the challenge of a hose that may be experiencing some issues in terms of liquid seepage, it is crucial to have a temporary solution handy before proceeding with any major repairs. In situations where the hose may not be functioning optimally, one effective technique that I have found to be useful is the utilization of duct tape.

Duct tape can provide a quick and reliable solution to prevent any leakage in the hose. By simply applying the tape tightly around the affected area, it creates a temporary seal that can withstand the pressure from the liquid passing through. This step can be particularly helpful in situations where immediate repair is needed, allowing you to continue using the pressure washer without any interruption.
While using duct tape as a temporary fix can be effective, it is important to keep in mind that it is not a long-term solution. Over time, the adhesive properties of the tape may weaken, and the leakage could recur. Therefore, it is crucial to address the underlying issue and seek a permanent solution as soon as possible.
So, if you find yourself dealing with a leaking hose, try utilizing duct tape as a temporary fix. This simple and easily accessible solution can provide you with a quick resolution, allowing you to continue your pressure washing tasks without any disruption. However, always remember to prioritize finding a more permanent repair to ensure the longevity and effectiveness of your pressure washer.
Repairing Small Holes: Patching Up Minor Leaks
When faced with a pressure washer hose that has developed small holes and is leaking, it is essential to address this issue promptly to ensure optimal performance and prevent further damage. In this section, I will guide you through the process of repairing these minor leaks, restoring the hose’s functionality without the need for extensive replacements or professional assistance.
Step 1: Identify the Leaks

- Thoroughly inspect the hose, searching for any small holes or punctures.
- Look for signs of water spraying, dripping, or moisture around the hose.
- Pay close attention to damaged areas, including connections, bends, and bends.
- Make a mental note or mark any areas where leaks are present for easy reference during the repair process.
Step 2: Prepare the Patching Materials
- Gather appropriate patching materials such as strong adhesive tape or waterproof patches.
- Ensure the materials are suitable for use on high-pressure hoses and capable of withstanding water, heat, and pressure.
- Cut the adhesive tape or patches into small square pieces, with dimensions slightly larger than the identified leaks.
Step 3: Clean and Dry the Leaking Areas
- Using a clean cloth or sponge, wipe the leaking areas to remove any dirt, debris, or moisture.
- Allow the hose to dry completely to ensure optimal adhesion of the patching materials.
Step 4: Apply the Patch
- Carefully peel off the backing of the adhesive tape or remove the protective layer from the waterproof patches.
- Position the patch directly over the identified leak, ensuring complete coverage and a secure fit.
- Apply firm pressure to the patch, making sure it adheres well to the hose’s surface.
- If using adhesive tape, wrap it around the hose, overlapping the ends slightly for added strength and durability.
Step 5: Test the Repaired Hose
- Once the patching materials have been securely applied, it is crucial to test the repaired hose before resuming regular use.
- Connect the pressure washer and turn on the water supply to check for any signs of leakage.
- If no water is escaping the patched areas, you have successfully repaired the small holes in the pressure washer hose.
- If any leaks persist, repeat the patching process or consider seeking professional assistance for further repairs.
By following these simple steps and patching up minor leaks in your pressure washer hose, you can restore its functionality and prolong its lifespan without incurring significant costs or relying on professional help. Regularly inspecting and addressing such issues promptly will ensure optimal performance and prevent more significant damage down the line.

Replacing O-Rings: Fixing Leaks at the Couplings
In this section, I’ll share with you a simple and effective solution for addressing leaks at the couplings of your pressure washer hose. When you notice water dripping from the connections where your hose meets the machine or the spray gun, replacing the O-rings is often the key to resolving the issue. O-rings are small rubber rings that create a tight seal, preventing water from leaking out. Over time, these O-rings can become worn out or damaged, leading to leaks. By replacing them, you can quickly and easily fix the problem.
Determining the Size and Type of O-Rings
The first step in replacing the O-rings is determining the correct size and type of O-ring for your pressure washer hose. O-rings come in various sizes and materials, so it’s important to choose the right ones to ensure a proper fit and a reliable seal. To determine the size, measure the diameter of the old O-ring or the groove it fits into. Additionally, take note of the material of the old O-ring to select a replacement with similar properties.
Steps to Replace the O-Rings
Once you have obtained the correct O-rings, you’re ready to replace them and fix those annoying leaks. Here are the steps to follow:
- Turn off the pressure washer and disconnect it from the power source.
- Release any pressure in the hose by squeezing the trigger of the spray gun.
- Using a small flat-head screwdriver or a pick, carefully remove the old O-ring from the coupling. Be gentle to avoid causing any further damage.
- Place the new O-ring in the groove of the coupling, ensuring it sits securely and evenly.
- Apply a small amount of lubricant, such as silicone grease, to the O-ring to facilitate easy installation and prolong its lifespan.
- Gently push the coupling back into place and ensure it is securely fastened.
- Reconnect the pressure washer to the power source and test for any leaks by turning it on and running water through the hose.
With these simple steps, you can easily replace the O-rings and fix leaks at the couplings of your pressure washer hose. This straightforward solution will save you time and money by preventing water wastage and allowing your pressure washer to work efficiently again.
Repairing Large Tears: Reattaching Severed Sections of the Hose
When faced with significant tears in your pressure washer hose, it can seem like a challenging task to restore it to its original functionality. However, with the right techniques and a little patience, it is possible to reattach severed sections of the hose and ensure a leak-free pressure washing experience.

Before you begin the repair process, gather the necessary tools, including a sharp utility knife, hose connectors, hose clamps, and a hose mender. It is also essential to have a clean working space and a clear understanding of the hose’s structure.
- Step 1: Start by carefully examining the tear in the hose. Assess the extent of the damage and ensure that the severed sections are clean and free from debris.
- Step 2: Use a sharp utility knife to cut away any jagged or uneven edges around the torn sections. This will help create a smooth surface for reattachment.
- Step 3: Once the edges are clean and even, take a hose connector that matches the diameter of your pressure washer hose. Insert one end of the connector into the first severed section of the hose and the other end into the second severed section.
- Step 4: Secure the hose connector in place using hose clamps. Ensure that the clamps are tightened properly to prevent any potential leaks.
- Step 5: If the tear is near the ends of the hose, consider using a hose mender instead of a connector. A hose mender is a specialized fitting that can effectively join severed ends of the hose.
- Step 6: After reattaching the severed sections, turn on the pressure washer and test the repaired hose for any leaks. If you detect any leaks, revisit the connections and tighten the clamps or mender accordingly.
Remember, repairing large tears in a pressure washer hose may require some trial and error. It is crucial to take your time, follow the steps carefully, and ensure that all connections are secure before using your pressure washer again. With the proper repair techniques, you can save time and money by fixing your leaking hose instead of replacing it entirely.
Fixing Damaged Connectors: Replacing Faulty Hose Connectors
When it comes to maintaining and repairing your pressure washer, one common issue that can arise is damaged connectors on the hose. These connectors play a vital role in ensuring a secure and leak-free connection between the different components of your pressure washer. However, over time, they can become worn out or damaged due to regular use or accidents.
Identifying the problem
Before replacing any connectors, it is important to first identify the problem. Leakage or water spraying out from the connectors is a clear indication of a faulty connector. Additionally, if you notice any cracks, breaks, or visible damage to the connectors, it is necessary to replace them.
Replacing the connectors
Replacing faulty hose connectors involves a few simple steps. Start by shutting off the pressure washer and disconnecting it from the power source. Release any pressure in the hose by squeezing the trigger on the wand. Next, locate the damaged connectors.
Using a wrench or pliers, carefully loosen and remove the old connectors from the hose. Take note of the type and size of the connectors, as you will need to purchase suitable replacements. Once the old connectors are removed, clean the ends of the hose thoroughly to ensure a proper seal when installing the new connectors.
Apply a small amount of plumber’s tape or sealant to the threads of the new connectors to prevent any future leaks. Carefully attach the new connectors to the hose, ensuring a tight and secure fit. Use the wrench or pliers to tighten the connectors firmly, but be cautious not to overtighten and risk damaging the new connectors.
After replacing the connectors, it is important to test for any leaks. Connect the pressure washer to the power source and turn it on. Inspect the newly installed connectors for any signs of leakage or spraying. If everything looks secure and there are no leaks, you can resume using your pressure washer with confidence.
By promptly replacing damaged connectors on your pressure washer hose, you can ensure a reliable and efficient operation, minimizing the risk of leaks and maximizing the cleaning power of your pressure washer.
Preventive Maintenance: Regular Inspections and Care to Avoid Leaks
As an experienced pressure washer user, I understand the importance of preventive maintenance to ensure the longevity and effectiveness of my equipment. Regular inspections and care are essential to avoid leaks in your pressure washer hose and to maintain optimal performance. By implementing a few simple maintenance practices, you can proactively address potential issues before they become major problems.
1. Visual Inspection
The first step in preventing leaks is to conduct regular visual inspections of your pressure washer hose. Look for signs of wear and tear, such as cracks, bulges, or frayed edges. Pay close attention to the connections and fittings, as these are common areas where leaks can occur. If you notice any damage or potential weak points, it is important to address them promptly to prevent further deterioration.
2. Proper Handling and Storage
In addition to visual inspections, proper handling and storage practices can significantly reduce the risk of hose leaks. Avoid dragging the hose across rough surfaces or sharp edges that can cause cuts or abrasions. When coiling or uncoiling the hose, be gentle to prevent kinks and twists that can lead to weakened areas and eventual leaks. After each use, make sure to store the hose properly, away from sunlight and extreme temperatures, to avoid degradation.
3. Regular Cleaning
Regularly cleaning your pressure washer hose is not only important for maintaining its appearance but also for preventing leaks. Over time, dirt, debris, and chemicals can accumulate inside the hose, potentially causing damage or blockages. Using a hose cleaning attachment or flushing the hose with clean water after each use can help remove any buildup and ensure proper water flow, reducing the risk of leaks.
- Inspect your pressure washer hose visually for signs of wear and tear.
- Handle the hose properly, avoiding dragging it across rough surfaces.
- Store the hose away from sunlight and extreme temperatures.
- Clean the hose regularly to remove dirt, debris, and chemicals.
By incorporating these preventive maintenance practices into your routine, you can minimize the chances of experiencing leaks in your pressure washer hose. Remember, a small investment of time and effort goes a long way in prolonging the life of your equipment and ensuring optimal performance in your cleaning tasks.
Seeking Professional Help: When to Consult a Specialist
Whenever we encounter challenges or difficulties with our pressure washer, it is natural to try and fix them ourselves. However, there are instances when seeking professional help from a pressure washer repair specialist is the wisest course of action.
When faced with a hose that is experiencing leakage, it can be tempting to embark on a DIY repair project. However, it is important to recognize the limitations of our own expertise and acknowledge when professional assistance is necessary.
One situation in which consulting a specialist is essential is when the leakage is persistent or recurring despite our attempts to fix it. This may indicate a deeper underlying issue that requires the knowledge and skills of a professional to properly diagnose and resolve.
Additionally, if the leakage is substantial or poses a safety risk, it is crucial to seek the help of a specialist. A pressure washer hose may carry high-pressure water, chemicals, or other potentially hazardous substances. Attempting to repair a hose without the proper expertise and equipment can lead to accidents or further damage.
Moreover, consulting a professional can save us time and effort in the long run. They have the experience and access to specialized tools that allow them to quickly identify and address the root cause of the leakage. By involving a specialist, we can ensure a more efficient and effective resolution of the problem.
Finally, relying on a pressure washer repair specialist can also provide us with peace of mind. They are familiar with the intricacies of these machines and have the necessary training to handle any repair or maintenance needs. By entrusting the job to a professional, we can rest assured knowing that the issue will be resolved properly and our pressure washer will be in good hands.
In conclusion, while it may be tempting to tackle a leaking pressure washer hose on our own, knowing when to consult a specialist is crucial. By recognizing the limitations of our skills and considering factors such as persistent leakage, safety risks, efficiency, and peace of mind, we can make informed decisions and ensure the long-term functionality of our pressure washer.