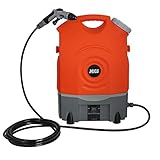
How To Repair Karcher Pressure Washer Pump

Every now and then, we come across situations where our powerful cleaning companion starts showing signs of weakness. The heart of any high-pressure cleaning system is its main engine, also commonly referred to as a pump. This vital component is responsible for generating the immense pressure required to tackle even the toughest cleaning tasks. However, just like any other machine, pumps are prone to wear and tear, resulting in performance issues. Fortunately, understanding the anatomy of the pump and knowing how to diagnose and fix its problems can save you both time and money.
Whether you refer to it as a water blaster or a jet cleaner, you must have experienced the satisfaction of using this impressive device capable of blasting away dirt, grime, and stains. However, when this machine fails to deliver the expected results, frustration begins to build. Before you start considering costly repairs or even purchasing a new device, it’s important to explore the possibility of troubleshooting and repairing the pump on your own.
Repairing a high-pressure cleaning system’s core unit can seem like a daunting task. However, armed with the right knowledge, tools, and determination, it can also be a rewarding experience. Whether you hear strange noises coming from the pump, notice a drop in pressure, or encounter leakage issues, identifying the root cause is the first step towards successful repairs. By taking a closer look at the various components, understanding their functions, and using the appropriate techniques, you can bring your pressure washer pump back to life.
In the following sections, I will guide you through the process of troubleshooting and fixing common problems that arise with high-pressure cleaning system pumps. From inspecting seals and valves to checking for blockages and conducting necessary adjustments, you will learn how to address the most frequent issues that may impede your device’s performance. Remember, by gaining the skills to repair your pump, you not only save yourself from unnecessary expenses but also gain a sense of accomplishment and self-sufficiency.
Identifying the Issue
In this section, I will guide you through the process of identifying the problem with your Karcher pressure washer pump. By recognizing the signs and symptoms, you will be able to determine the underlying issue and take the necessary steps to fix it.
Observing Unusual Behavior
One of the first steps in identifying the issue with your pressure washer pump is observing any unusual behavior during operation. Pay attention to any strange noises, excessive vibrations, or leaks that may occur. These signs can provide valuable clues as to what may be causing the problem.
Performing Visual Inspection
An essential part of identifying the issue is conducting a visual inspection of the pressure washer pump. Look for any visible damage, such as cracks, dents, or wear and tear on the components. Additionally, check the connections and hoses to ensure they are properly secured and in good condition.
Tip: Take note of any specific areas that look damaged or show signs of malfunctioning, as these will help you narrow down the potential causes.
By carefully observing any unusual behavior and performing a thorough visual inspection, you will be able to identify the issue with your Karcher pressure washer pump. This step is crucial in order to understand the root cause and proceed with the appropriate repairs.

Understanding common issues encountered with Karcher pressure cleaner pumps
As an experienced technician who has worked with various pressure washer models, I have come across several common problems that users often encounter with Karcher pressure washer pumps. In this section, I will provide you with insights into these issues and offer some potential solutions for each one. By understanding these problems and their possible remedies, you will be better equipped to maintain and troubleshoot your Karcher pressure washer pump.
1. Lack of Pressure
One of the most prevalent issues is a lack of pressure from the Karcher pressure washer pump. This can occur due to multiple factors such as a clogged nozzle, a faulty unloader valve, or even a worn-out spray wand. To address this problem, it is essential to check and clean the nozzle, inspect the unloader valve for any damage or blockage, and replace the spray wand if necessary.
2. Leaks and Drips
Another frequently encountered issue is the presence of leaks and drips in the Karcher pressure washer pump. Leaks can originate from various sources, including loose fittings, worn-out seals, or damaged O-rings. To tackle this problem, it is crucial to inspect all fittings and connections, tighten any loose parts, replace worn-out seals, and ensure the O-rings are in good condition. Regular maintenance and prompt repairs of leaks can help prevent further damage to the pump.
3. Pump Cycling On and Off
Many Karcher pressure washer users face the problem of the pump cycling on and off repeatedly while in use. This issue is often caused by a malfunctioning pressure switch, a clogged water inlet filter, or inadequate water supply. To resolve this problem, it is recommended to check the pressure switch for any defects or damage, clean or replace the water inlet filter as needed, and ensure a sufficient water supply is reaching the pump.
- Check and clean the nozzle
- Inspect the unloader valve
- Replace the spray wand if necessary
- Inspect all fittings and connections
- Tighten any loose parts
- Replace worn-out seals
- Ensure O-rings are in good condition
- Check the pressure switch
- Clean or replace the water inlet filter
- Ensure sufficient water supply
By addressing these common problems with your Karcher pressure washer pump, you can extend its lifespan and ensure optimal performance. Regular maintenance and timely troubleshooting will help keep your pressure washer in excellent working condition for years to come.

Gathering the Necessary Tools
When it comes to successfully repairing a malfunctioning pump on your pressure washer, having the right tools at your disposal is crucial. In this section, I’ll guide you through the process of gathering all the necessary equipment needed to tackle this task effectively.
1. Wrench
A wrench is an indispensable tool that you’ll need to have on hand. Whether it’s an adjustable wrench or a socket wrench set, make sure it’s capable of tightening and loosening bolts and fittings of various sizes.
2. Screwdriver Set
Having a comprehensive set of screwdrivers is essential for disassembling the pump. It’s best to have a mix of flathead and Phillips-head screwdrivers in different sizes to accommodate different types of screws you may encounter.
3. Safety Goggles
Protecting your eyes is paramount when working with a pressure washer pump. Safety goggles will shield your eyes from any debris, chemicals, or water that may be expelled during the repair process.
4. Rubber Gloves
Handling chemicals and working with moving parts can put your hands at risk. Rubber gloves provide a layer of protection against potential hazards, such as corrosive substances or sharp edges.

5. Clean Cloth or Rag
A clean cloth or rag will come in handy for wiping away dirt, grime, and any spilled liquids. Keeping your work area clean is important not only for your convenience but also to prevent any contaminants from entering the pump during the repair process.
6. Replacement Parts
Depending on the specific issue with your pump, you may need to have certain replacement parts readily available. This could include seals, O-rings, valves, or other components that commonly wear out or become damaged over time. It’s a good idea to identify the parts you may need before starting the repair process.
| Tools | Protection |
|---|---|
| Wrench | Safety Goggles |
| Screwdriver Set | Rubber Gloves |
| Clean Cloth or Rag | N/A |
| Replacement Parts | N/A |
Essential Tools for Fixing a Faulty Karcher Pressure Washer Pump
When it comes to addressing issues with your Karcher pressure washer pump, having the right tools is essential. In this section, I will outline the tools that are necessary for effectively repairing and maintaining your pressure washer pump, ensuring its optimal performance and longevity.
1. Wrench Set
A wrench set is a fundamental tool that every DIY enthusiast should have in their arsenal. It allows you to loosen and tighten various components of the pressure washer pump, such as bolts and nuts, ensuring a secure fit without causing damage.
2. Screwdriver Set
A set of screwdrivers, including both flathead and Phillips-head varieties, is invaluable when dealing with the internal components of the pressure washer pump. These tools enable you to remove and replace screws to access different parts of the pump for inspection and potential repair.

3. Rubber Mallet
For certain stubborn or stuck components of the pressure washer pump, a rubber mallet can be incredibly helpful. It allows you to gently tap or knock on specific areas without causing damage, helping to dislodge and free up any stuck parts for easier maintenance.
4. Pressure Gauge
A pressure gauge is an essential tool for diagnosing pressure-related issues with your Karcher pressure washer pump. It enables you to measure and monitor the pressure levels accurately, ensuring your pump is functioning at the desired capacity and taking corrective measures if needed.
Remember, having these tools at your disposal will allow you to tackle most common problems that arise with your Karcher pressure washer pump. By using them properly, you can effectively repair and maintain your pump, ultimately extending its lifespan and ensuring reliable performance.

Disassembling the Pump
When it comes to troubleshooting and fixing a malfunctioning pressure washer, understanding how to disassemble the pump is an essential skill. In this section, I will share my personal experience and guide you through the steps of disassembling the pump, allowing for a thorough inspection and potential repairs.
To begin the process, it is important to ensure your safety by first disconnecting the power supply and relieving any built-up pressure in the system. Once these precautions have been taken, we can proceed with the disassembly.
The first step involves removing the outer casing or housing of the pump. This can usually be accomplished by removing a few visible screws or fasteners. Care should be taken not to force any parts or damage the housing during this step.
With the housing removed, we gain access to the inner components of the pump. It is crucial to handle these parts with care, as they are often delicate and prone to damage. Using a combination of tools such as wrenches, pliers, and screwdrivers, we can carefully disassemble the pump further, separating different parts for closer examination.
While disassembling the pump, take note of the order in which the components are removed. This will prove helpful when it comes time to reassemble the pump later. Additionally, it is recommended to document or take pictures of the disassembly process, as this can serve as a reference during the reassembly phase.

Once all the necessary parts have been detached, we can thoroughly inspect them for any signs of wear, damage, or clogging. Pay close attention to seals, O-rings, valves, and any other components that may have contributed to the pump’s malfunction. Depending on the identified issues, repairs or replacements may be necessary.
By disassembling the pump, we gain valuable insight into its internal workings and can diagnose potential problems more accurately. Remember to exercise caution throughout the process and take your time to ensure a successful disassembly. In the next section, we will discuss the steps to reassembling the pump and putting it back together.
Step-by-step guide to disassembling the Karcher pressure washer pump
In this section, I will guide you through the process of disassembling the pump of your Karcher pressure washer. By following these step-by-step instructions, you will be able to dismantle the pump efficiently and effectively.
- Remove the external casing: Begin by carefully removing the outer casing of the pressure washer pump. This can usually be done by unscrewing the screws or using a suitable tool to gently pry off the casing.
- Detach the water inlet and outlet hoses: Locate the water inlet and outlet hoses connected to the pump and disconnect them. This can usually be done by loosening the hose clamps or using a wrench to unscrew the fittings.
- Release the pressure: Before proceeding further, it is important to release any pressure that may be trapped in the pump. This can be done by pressing the trigger of the pressure washer gun until all pressure is released.
- Remove the pump head: Carefully detach the pump head from the motor assembly by unscrewing the bolts or nuts that secure it in place. Take caution not to damage any of the internal components as you remove the pump head.
- Disassemble the pump internals: Once the pump head is removed, you can proceed to disassemble the internal components of the pump. This may include removing screws, bolts, or clips that hold various parts together.
- Inspect and clean the components: As you disassemble the pump internals, take the opportunity to inspect each component for any signs of damage or wear. Clean any dirt, debris, or buildup that may have accumulated in the pump.
- Reassemble the pump: After thorough inspection and cleaning, carefully reassemble the pump components in the reverse order of disassembly. Ensure that all parts fit properly and securely.
- Test the pump: Once the pump is reassembled, reconnect the water inlet and outlet hoses and tighten the fittings. Turn on the pressure washer and test the pump to ensure it is functioning properly.
By following these step-by-step instructions, you will be able to disassemble the Karcher pressure washer pump and perform any necessary repairs or maintenance with confidence. Remember to exercise caution and take your time throughout the process to avoid any damage to the pump or personal injury.
Inspecting and Cleaning the Components
In this section, I will guide you through the process of examining and cleansing the various parts of the pressure washer pump. By carefully inspecting each component and ensuring its cleanliness, you can maintain the optimal performance of your equipment and prolong its lifespan.
Firstly, it is essential to inspect the intake valves and seals. These crucial elements regulate the flow of water and prevent leaks. Carefully examine them for any signs of wear, cracks, or damage. If necessary, replace them with suitable alternatives to guarantee efficient operation.
Next, pay close attention to the pistons and cylinders. These components are responsible for generating the water pressure required for effective cleaning. Carefully observe their surfaces to identify any signs of corrosion or debris buildup. Gently clean them with a soft cloth or brush to remove any dirt or grime, ensuring smooth movement and optimal performance.
Furthermore, it is vital to inspect the pump bearings. These small but significant parts support the rotating components of the pump. Check for any excessive wear or noise during operation, as it might indicate a need for replacement. Regular lubrication of the bearings is also necessary to prevent friction and ensure their longevity.
Additionally, examine the pump’s inlet and outlet fittings. These connectors play a vital role in maintaining a secure and stable connection between the pump and other components. Look out for signs of leakage, loose fittings, or blockages. Thoroughly clean them and tighten any loose connections to prevent water loss and optimize pressure output.
Lastly, remember to inspect the pump’s manifold and pressure release valves. The manifold distributes water to different parts of the pump, while the pressure release valves regulate the pressure to prevent overloading. Check for any cracks or damage in the manifold, and ensure that the pressure release valves are functioning correctly. Clean or replace these components as needed to ensure efficient and safe operation.
| Components | Inspection Points | Cleaning Tips |
|---|---|---|
| Intake valves and seals | Wear, cracks, and damage | Replace if necessary |
| Pistons and cylinders | Corrosion and debris buildup | Gently clean with a soft cloth or brush |
| Pump bearings | Wear and noise during operation | Regular lubrication, replace if necessary |
| Inlet and outlet fittings | Leaks, loose fittings, and blockages | Thoroughly clean and tighten connections |
| Manifold and pressure release valves | Cracks and functionality | Clean or replace as needed |
Inspecting and Cleaning the Various Components of a Karcher Power Washer PumpIntroduction
When it comes to properly maintaining a Karcher power washer pump, it is crucial to regularly inspect and clean its different parts. This ensures the pump’s optimal performance and extends its lifespan. In this section, I will guide you through the process of inspecting and cleaning the various components of a Karcher power washer pump.
1. Checking the Inlet Filter
One of the first components to inspect is the inlet filter, which prevents debris from entering the pump. To begin, shut off the power and water supply to the pressure washer. Locate the inlet filter, typically located at the water inlet connection. Remove the filter and inspect it for any signs of dirt, debris, or damage. Clean the filter using a soft brush or rinse it with water to remove any clogs or buildup. Once cleaned, reinstall the filter securely.
2. Examining the High-Pressure Seals
The high-pressure seals are important for maintaining the pump’s pressure and preventing leaks. Carefully examine these seals, located within the pump assembly, for any signs of wear or damage. Look for cracks, breaks, or deformation. If any issues are detected, it is essential to replace the seals following the manufacturer’s instructions. Regular inspection and replacement of these seals can help avoid more significant problems later on.
Continued below…
Replacing Faulty Parts
When it comes to restoring the functionality of your pressure washer, one of the key steps is to replace any faulty parts. This section will guide you through the process of identifying and replacing worn-out or damaged components, ensuring the optimal performance of your equipment.
Identifying the Problematic Parts
Before initiating any repairs, it is essential to identify the specific parts that are causing issues in your pressure washer. This can be done by thoroughly examining the machine and paying close attention to any unusual sounds, leaks, or reduced performance. By pinpointing the problematic parts, you can focus your efforts on replacing those components that are directly responsible for the malfunction.
Obtaining and Replacing Parts
Once you have identified the faulty parts, the next step is to obtain suitable replacements. This can be achieved by reaching out to authorized dealers or contacting the manufacturer directly to ensure you get the correct parts and avoid any substandard alternatives. Whether it’s a faulty valve, worn-out seals, or a damaged hose, replacing these components will require careful disassembly of the pressure washer and meticulous installation of the new parts.
Note: It is crucial to refer to the user manual or seek professional guidance if you are unsure about disassembling or replacing any parts.
During the replacement process, pay close attention to proper alignment, tight connections, and utilizing appropriate tools. It is also advisable to inspect and clean other parts while you have access to the interior of the pressure washer. This will help prevent future issues and ensure the longevity of your equipment.
Remember, the key to successfully replacing faulty parts is accuracy, patience, and meticulousness. By identifying and replacing the problematic components, you can restore your pressure washer’s functionality and enhance its performance.


