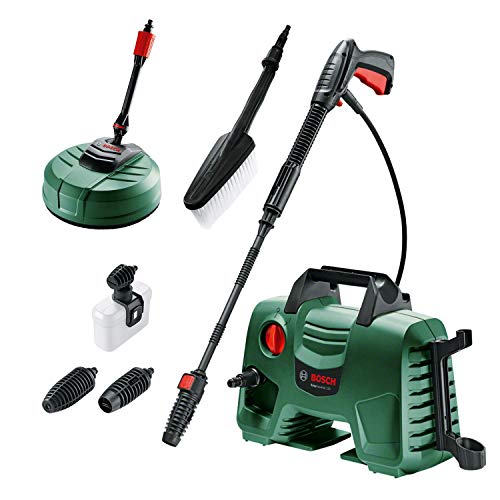
How To Remove Wheel From Karcher Pressure Washer

So, you find yourself facing the need to disassemble the wheel from your Karcher pressure washer, huh? Fret not, for I have just the solution to your predicament. In this comprehensive guide, I will walk you through the step-by-step process of effortlessly removing the wheel from your trusty Karcher high-pressure cleaning equipment.
Picture this – you’ve been diligently cleaning away with your mighty Karcher pressure washer, tackling dirt and grime with ease. But now, for one reason or another, you need to remove the wheel from this powerful machine. Whether it’s for maintenance purposes, replacing a worn-out part, or simply to make storage more convenient, I understand the importance of this task.
This article is designed to empower you with the knowledge and skills necessary to accomplish this seemingly daunting task effortlessly. We will delve into the intricate details of the wheel removal process, covering everything from the necessary tools to the precise techniques to employ for a smooth operation. With my guidance, you’ll soon be able to detach the wheel from your Karcher pressure washer like a seasoned pro.
Intrigued? Let’s dive right in!
Removing the Wheel for Easy Maneuverability
When it comes to enhancing the mobility of your Karcher pressure washer, one important step is to detach the wheel from the unit. In this section, I will guide you through the process of separating the wheel from your washer without the need for any special tools or technical expertise.
To begin, we are going to disengage the wheel by using the detach lever located on the side of the pressure washer. This lever allows you to release the wheel from its locked position, allowing for easy removal. Once the lever is activated, you can proceed to gently pull the wheel away from the unit.
Next, it is crucial to ensure a smooth and hassle-free removal by inspecting the wheel for any obstructions or debris. Clean the wheel thoroughly using a soft cloth or brush to get rid of any dirt, dust, or grime that may have accumulated over time. By doing so, you can maintain the optimal performance of your pressure washer and prevent any potential damage to the wheel or surrounding components.
After the cleaning process, you can now reconnect the wheel to the pressure washer. Ensure that the wheel aligns correctly with the shaft and insert it firmly into place. Apply gentle pressure and listen for a clicking sound, which indicates that the wheel has securely locked back into position. Give it a slight tug to verify that it is firmly attached.
Finally, take a moment to assess the overall condition of the wheel. Look for any signs of wear and tear, such as cracks or excessive wobbling. If you notice any significant damages, it may be necessary to replace the wheel to maintain the efficiency and safety of your Karcher pressure washer.
By removing and reinstalling the wheel properly, you can enjoy improved maneuverability and ease of transportation with your Karcher pressure washer. Take the time to regularly inspect and clean the wheel to prolong its lifespan and ensure optimal performance for years to come.

| Benefits of Removing the Wheel |
|---|
| – Enhanced mobility and maneuverability |
| – Easy transportation and storage |
| – Simple cleaning and maintenance |
| – Prevention of potential damages |
Preparing Your Workspace and Gathering Necessary Tools
In this section, I will guide you through the important steps of setting up your working area and collecting the essential tools for removing a wheel from your Karcher pressure washer. It is crucial to have a properly organized and safe workspace to ensure a smooth process.
1. Clearing the area: Before you begin, make sure to clear the space around your pressure washer. Remove any obstacles or clutter that may hinder your movement or cause accidents.
2. Safety measures: Put on a pair of heavy-duty gloves and safety goggles to protect your hands and eyes from potential hazards during the wheel removal process. Safety should always be a top priority.
3. Gathering the tools: Grab the necessary tools to assist you in removing the wheel. These may include a socket wrench, a breaker bar, a torque wrench, and a jack or a lift to elevate your pressure washer if needed. Make sure these tools are in good condition and suitable for the task at hand.
4. Tool preparation: Check the size and compatibility of the socket wrench and breaker bar with the nuts securing the wheel. Ensure that they fit snugly and are securely attached to the handles for optimal leverage.

5. Additional tools: Depending on the design and construction of your Karcher pressure washer, you may need additional tools such as Allen wrenches, pliers, or screwdrivers to access and disconnect any components blocking the wheel removal.
6. Organization: Lay out all the tools you have gathered in an organized and easily accessible manner. By doing so, you can save time and avoid the frustration of searching for specific tools during the wheel removal process.
7. Workspace cleanliness: Keep your workspace clean and free from dirt, debris, or clutter that could potentially contaminate the tools or impede the task at hand. Regularly clean and inspect your tools to ensure their effectiveness.
Remember: Proper workspace preparation and gathering the necessary tools are crucial for a successful and safe wheel removal process. Taking the time to set up your workspace and gathering the right tools will result in a smoother and more efficient experience, ultimately enhancing both your safety and the overall quality of the task.
Preparing to Safely Disable and Disconnect the Power Supply to the Pressure Washer
Before attempting to perform any maintenance or handling on the pressure washer, it is crucial to ensure that the power supply is turned off and disconnected. This step is essential to prevent any accidents, electrical shocks, or injury from occurring during the removal process. By following the necessary precautions, you can safely proceed with the wheel removal task.

Determining the Power Source
In order to properly turn off and unplug the pressure washer, it is essential to first identify the power source. Locate the power cord or plug connected to the pressure washer, and identify the corresponding power outlet or socket.
Turning off and Unplugging the Pressure Washer
Once you have identified the power source, firmly grasp the power plug and gently pull it out of the power outlet. Make sure you follow the correct procedure to ensure a secure and successful disconnection. Once the power plug is safely disconnected, double-check to confirm that the pressure washer is no longer receiving power by checking its display or any operational lights.
Locating the desired wheel for removal
When it comes to disassembling a Karcher pressure washer, one of the crucial steps is to locate the specific wheel that needs to be removed. To successfully complete this task, it is essential to carefully identify and pinpoint the precise component you intend to detach.
Begin by closely examining the pressure washer’s structure, paying particular attention to the various wheels that contribute to its mobility. Take note of their positions and characteristics, as this will help you determine the targeted wheel accurately.
To facilitate the localization process, utilize distinctive features such as color, size, or unique markings on the wheels. By carefully observing the attributes of each wheel, you can differentiate and identify the specific one you aim to detach.

Furthermore, it is essential to ensure a clear understanding of the pressure washer’s user manual or any related instructions provided by the manufacturer. These resources might contain specific details or diagrams to help you identify the designated wheel effortlessly.
Once you have successfully located the desired wheel, proceed to the appropriate steps for its removal, taking all necessary precautions and following the recommended guidelines to ensure a smooth and efficient disassembly process.
Prepare the Wheel for Removal
In this section, I will guide you through the necessary steps to remove any protective covers or caps from the wheel of your Karcher pressure washer. Ensuring a safe and proper removal process is essential to maintain the functionality of your pressure washer.
Firstly, it is important to carefully inspect the wheel to identify the protective covers or caps. These coverings are typically designed to shield the wheel from dirt, dust, and debris, ensuring optimal performance and longevity. Removing these covers will provide you with better access to the wheel and its components.
Before proceeding, make sure to gather the appropriate tools for the job, such as a screwdriver or a wrench, depending on the type of locking mechanism used for the protective covers. Additionally, it is advisable to wear appropriate personal protective equipment, such as gloves or safety goggles, to avoid any potential injuries.

Once you have prepared the necessary tools and safety equipment, locate the screws or bolts that secure the protective covers in place. Depending on the model of your Karcher pressure washer, these fasteners may be visible on the wheel’s surface or hidden beneath the covers.
Using a screwdriver or wrench, carefully loosen and remove the screws or bolts, taking care not to damage the wheel or its surrounding components. It might be necessary to exert some force or rotate the screwdriver in a counterclockwise motion to fully remove the fasteners.
After successfully removing the screws or bolts, gently lift or pry off the protective covers or caps from the wheel. Take note of their orientation and any specific alignment requirements for reinstallation, as these may vary depending on the design of your Karcher pressure washer.
Now that the protective covers or caps are removed, you can proceed with further maintenance or repair tasks for the wheel. Remember to store the covers or caps in a safe place and keep them clean for future use.
By following these steps and properly removing the protective covers or caps from the wheel, you can ensure a smooth and hassle-free maintenance process for your Karcher pressure washer.

Loosening the fasteners securing the wheel in position
When it comes to freeing the wheel from a Karcher pressure washer, it is essential to begin by loosening the bolts or screws that hold it securely in place. This step is crucial in order to successfully detach the wheel without causing any damage or complications. By properly releasing the fasteners, you can effortlessly remove the wheel, allowing for troubleshooting or maintenance tasks to be performed efficiently.
There are various types of fasteners that may be used to secure the wheel, such as bolts or screws. These fasteners are responsible for keeping the wheel firmly attached to the pressure washer’s frame, ensuring stability and ease of maneuverability. Loosening them requires strategic effort and careful handling to prevent any unintended consequences.
- Identify the fasteners: Start by visually inspecting the wheel and locating the bolts or screws that hold it in place. These fasteners may be positioned at specific intervals around the wheel, usually near the center or along the rim.
- Gather the necessary tools: To effectively loosen the fasteners, you will need the appropriate tools. This may include a wrench, socket set, or screwdriver, depending on the type of fasteners used. Ensure that the selected tools fit properly and securely onto the fasteners.
- Apply force in the correct direction: Carefully position the tool onto the fastener and apply gentle force in the appropriate direction. Typically, you will need to rotate the fastener counter-clockwise to loosen it. Take caution not to apply excessive force or strip the fastener threads.
- Loosen all fasteners evenly: If the wheel is secured by multiple bolts or screws, it is important to loosen them evenly. This will help distribute the pressure and prevent any imbalances that could affect the wheel’s alignment or overall stability.
- Remove the fasteners completely: Once all the bolts or screws have been sufficiently loosened, you can proceed to remove them entirely. Set them aside in a safe place to avoid misplacement or loss.
By following these steps and taking the necessary precautions, you can successfully loosen the bolts or screws holding the wheel in place on your Karcher pressure washer. This will enable you to remove the wheel effectively, allowing for any necessary maintenance or repairs to be carried out smoothly.
Carefully slide the wheel off the axle
In this section, I will guide you on how to safely detach the wheel from the axle of your Karcher pressure washer. It is important to follow the steps precisely to avoid any damage or mishaps during the process.
Start by ensuring that the pressure washer is powered off and disconnected from the power source. This will prevent any accidental activation of the machine while working on removing the wheel.

1. Loosen the wheel nut: Use an appropriate wrench or spanner to loosen the nut that secures the wheel onto the axle. Turn it counterclockwise to loosen it, but do not fully remove it yet.
2. Grease the axle: Apply a small amount of grease to the axle, ensuring smooth movement when removing the wheel. This will protect the axle from rusting and make it easier to slide the wheel off.
3. Slide the wheel off: Carefully grip the wheel on both sides and gently wiggle it back and forth while pulling it towards you. The grease on the axle should help in sliding the wheel off smoothly.
Note: If the wheel is stubborn and difficult to remove, you may need to use some additional force. However, do so cautiously to avoid any damage to the pressure washer or yourself. Seek assistance if needed.
Once the wheel is successfully removed, you can clean it or replace it if necessary. To reattach the wheel, simply follow these steps in reverse order, ensuring the wheel nut is tightened securely.
By carefully sliding the wheel off the axle, you can easily remove and handle the wheel of your Karcher pressure washer. Remember to always prioritize safety and take necessary precautions throughout the process.
Inspecting the Wheel and Axle: Ensuring Optimal Performance
When it comes to maintaining the efficiency and performance of your pressure washer, inspecting and evaluating the condition of the wheel and axle is vital. This step is essential in preventing any potential damage or wear that may affect the overall functionality of your equipment.
Evaluating the Wheel
One of the key aspects to consider is the condition of the wheel. Carefully examine the wheel for any signs of damage or wear such as cracks, chips, or significant deformities. It’s important to note that a damaged wheel can impede the mobility and maneuverability of your pressure washer, making it less effective in reaching certain areas.
TIP: Rotate the wheel while closely observing any abnormalities. If you notice any wobbling, excessive noise, or resistance, it may indicate an issue that requires further attention.
Assessing the Axle
The axle plays a crucial role in supporting the weight and facilitating smooth movement of the pressure washer. Examine the axle for any signs of wear, rust, or bending. A damaged or deteriorated axle can affect the stability and balance of your equipment, potentially causing it to tip or malfunction during operation.
TIP: Gently wiggle the axle to check for any excessive play or looseness. If you notice any abnormal movement or a lack of stability, it is recommended to address the issue promptly to prevent further damage.
Regularly inspecting the wheel and axle of your pressure washer is an essential part of proper maintenance and care. By identifying and addressing any potential damage or wear, you can ensure optimal performance and prolong the lifespan of your equipment.
Reassembling and Testing the Wheeled Assembly
Now that we have completed the process of disassembling the pressure washer and removing the wheel, it is time to put everything back together and ensure that the wheel functions properly. This section will guide you through the reassembly process and provide instructions on how to test the wheel for optimal performance.
Firstly, gather all the necessary components that were removed during the disassembly process. This includes the wheel, axle, washers, and any other relevant parts. Make sure to check for any damages or wear and tear that may require replacement before proceeding.
Next, carefully align the axle with the designated slot on the pressure washer frame. Ensure that the axle is inserted securely, with the wheel facing outward. Use the washers provided to create a snug fit and maintain stability.
Once the axle is in place, tighten the nuts or screws to secure it firmly. Be cautious not to overtighten, as this may cause damage to the frame or other components. It is recommended to use a wrench or pliers to ensure a secure yet appropriate level of tightness.
After reassembling the wheel and axle, it is important to test the functionality of the wheel before using the pressure washer. Gently roll the pressure washer back and forth, observing the movement of the wheel. Pay attention to any unusual noises, resistance, or wobbling that may indicate incorrect assembly or further issues.
If you notice any abnormalities during the testing process, disassemble the wheel and axle once again to identify and address the problem. Double-check all connections, tighten any loose parts, and ensure the wheel is properly aligned with the axle. Repeat the testing process until the wheel moves smoothly without any issues.
| Reassemble and Test the Wheel: Step-by-Step | |
| 1. | Gather all necessary components removed during disassembly. |
| 2. | Align the axle with the designated slot on the pressure washer frame and insert securely. |
| 3. | Use washers to create a snug fit and maintain stability. |
| 4. | Tighten the nuts or screws securely without overtightening. |
| 5. | Test the functionality of the wheel by gently rolling the pressure washer back and forth. |
| 6. | Observe for any unusual noises, resistance, or wobbling. |
| 7. | If abnormalities are detected, disassemble and address the problem. |
| 8. | Repeat the testing process until the wheel moves smoothly without any issues. |
FAQ:
What tools do I need to remove the wheel from my Karcher pressure washer?
To remove the wheel from your Karcher pressure washer, you will need a socket wrench, a pry bar or a screwdriver, and possibly a rubber mallet or a hammer.
Can I remove the wheel from my Karcher pressure washer without any tools?
No, you cannot remove the wheel from your Karcher pressure washer without any tools. You will need a socket wrench, a pry bar or a screwdriver, and possibly a rubber mallet or a hammer to remove the wheel.