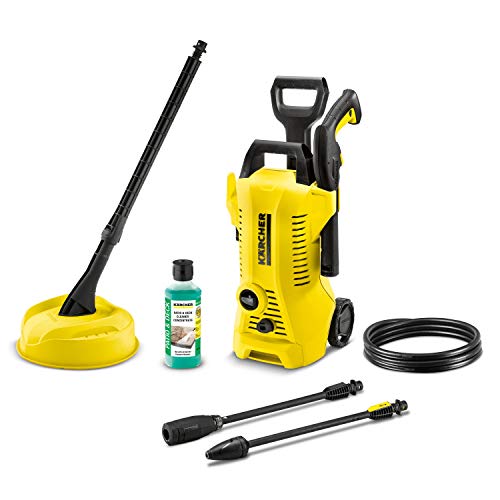
How To Remove The Hose On A Karcher Pressure Washer

Have you ever found yourself eager to take on a new challenge? To delve into the world of home improvement and accomplish feats that seemed impossible before? If you are like me, the answer is a resounding yes. And what better way to embark on this journey than by learning how to skillfully detach and liberate the force that lies within the mighty water pressure, without a doubt a task worthy of admiration.
Picture this: you stand before your trusty apparatus, a majestic machine that has aided you in countless battles against dirt and grime. This treasured companion, robust and powerful, has become an extension of yourself. Its soul, encased within the slender tubing known as the hose, holds the key to your cleaning conquests. Now, envision the moment when you, with unwavering confidence, grasp this vital link and free it from its entanglements.
But wait! Before you embark on this endeavor, it is essential to arm yourself with knowledge, to understand the intricacies that lie within. The hose, dear friend, is not to be underestimated. Its role is pivotal, channeling a torrent of water at your command. It is a conduit of force, a medium for deliverance. Thus, its detachment requires nothing short of expertise, a delicate dance between caution and technique. Fear not, for I shall be your guide through this intricate process, enlightening you on the steps that will soon grant you mastery over your trusted ally.
Removing the Hose: A Step-by-Step Guide
When it comes to maintaining your Karcher pressure washer, one important task is removing the hose. This process allows you to clean and inspect the hose for any possible damages or clogs. In the following guide, I will share my personal experience and provide you with easy-to-follow steps on how to effectively remove the hose from your Karcher pressure washer.
Gather Your Tools
Before starting the hose removal process, it is crucial to gather all the necessary tools. A pair of pliers, a bucket for water drainage, and a towel to clean up any spills are some of the essentials you will need for this task.
Step 1: Relieve Pressure
To ensure your safety, it is vital to relieve the pressure from the pressure washer before attempting to remove the hose. Start by turning off the pressure washer and disconnecting it from any power source. Then, engage the spray gun trigger to discharge any remaining pressure in the hose. This step is crucial to avoid any accidents or injuries during the hose removal process.
By following these steps, you can safely and effectively remove the hose from your Karcher pressure washer. Remember to always prioritize your safety and take your time in completing each step. Regularly inspecting and cleaning your pressure washer’s hose can help prolong its lifespan and ensure optimal performance.
Safety First: Preparing for Hose Detachment
Before proceeding with removing a component from your pressure washer, it is crucial to prioritize safety.
Preparing for the disconnection of a vital part of the equipment requires diligence and careful consideration.
First and foremost, make sure to turn off the power supply to the pressure washer. This ensures that there is no risk of accidental startup or injury during the hose detachment process.

Additionally, it is important to release any built-up pressure within the system before removing the hose. One must carefully follow the manufacturer’s instructions or consult the user manual to safely release the pressure.
Wearing appropriate personal protective equipment (PPE) is a must in this situation. Properly fitting gloves and safety goggles will help safeguard against potential hazards and ensure a secure working environment.
Lastly, taking the time to inspect the area around the pressure washer and hose is paramount. Clear any obstacles or clutter that may hinder the hose removal process or pose a trip hazard.
By following these safety measures, you can confidently proceed with removing the necessary hose on your pressure washer while minimizing the risks of accidents or injuries.
Tools You’ll Need
When it comes to removing the hose from your Karcher pressure washer, it’s important to have the right tools on hand. These essential tools will make the process easier and more efficient, allowing you to complete the task successfully. In this section, I will share the tools that are necessary for this job.

1. Wrench
A wrench is an essential tool that will help you loosen and tighten the connections on the pressure washer. It provides a strong grip, ensuring that you can easily disconnect the hose without any difficulty. Make sure to choose an appropriate size wrench that fits the connections on your pressure washer.
2. Safety Gloves
Protecting your hands is crucial when working with pressure washers. Safety gloves provide insulation and prevent any injuries that may occur during the hose removal process. They offer a secure grip and ensure your hands stay safe from any potential hazards.
By having these tools readily available, you’ll be well-prepared to remove the hose from your Karcher pressure washer. Always remember to prioritize safety and take necessary precautions while handling the equipment.
Step-by-Step Guide: Disconnecting the Tube
Today I will guide you through the process of releasing the tube from the Karcher pressure washer. It’s important to know how to properly remove the tubing in order to ensure the functionality and longevity of your pressure washer.
Step 1: Before starting the disconnection process, it’s essential to switch off the pressure washer and unplug it from the power source. Safety should always come first!

Step 2: Locate the connection point between the hose and the pressure washer. This is usually a tightly attached connection that requires a bit of force to release.
Step 3: Using both hands, firmly grip the hose near the connection point and twist it counterclockwise. This twisting motion will help loosen the connection and make it easier to remove.
Step 4: Once the connection has been loosened, gently pull the hose away from the pressure washer. Be careful not to apply excessive force as this could damage the hose or the pressure washer itself.
Step 5: In some cases, the hose may be equipped with a clip or clamp that secures it to the pressure washer. If this is the case, use a pair of pliers or a similar tool to loosen and remove the clip before disconnecting the hose completely.
Step 6: After successfully disconnecting the hose, inspect it for any signs of damage or wear. If necessary, replace the hose before using the pressure washer again to ensure optimal performance.

Step 7: Congratulations! You have successfully removed the hose from your Karcher pressure washer. Remember to store the hose properly to avoid any kinks or damage that could affect its functionality in the future.
I hope this step-by-step guide has been helpful in assisting you with removing the hose from your pressure washer. Following these instructions will allow you to maintain your pressure washer effectively and ensure its long-term usability.
Troubleshooting: Common Issues and Solutions
When it comes to operating and maintaining a pressure washer, there are times when we encounter certain difficulties that can disrupt its performance. In this section, I will share some common issues that you may encounter with your pressure washer, along with their corresponding solutions.
1. Loss of Water Pressure
One of the most common issues that pressure washer users face is a sudden loss of water pressure. When this happens, it can be frustrating and hinder the effectiveness of your cleaning tasks. There are several possible causes for the loss of water pressure, such as a clogged nozzle, a worn-out pump, or a damaged high-pressure hose.
Solution: To address this issue, start by checking the nozzle for any debris or obstructions. Clean or replace the nozzle if necessary. Next, inspect the pump for any signs of damage or wear. If the pump is damaged, it may need to be repaired or replaced. Finally, examine the high-pressure hose for any leaks or damage. If there are any issues with the hose, it should be repaired or replaced.

2. Unusual Noise or Vibration
Another common issue that may arise is the presence of unusual noise or excessive vibration during the operation of your pressure washer. This can be concerning and may indicate a problem with certain components of the machine.
Solution: To troubleshoot this issue, start by checking the engine oil level. Low oil levels can cause excessive noise and vibration. Ensure that the oil is filled to the recommended level. Additionally, inspect the spray gun for any loose or damaged parts. Tighten or replace any components as needed. If the issue persists, it is advisable to consult a professional for further inspection and repair.
Remember, troubleshooting and addressing these common issues promptly can help ensure the optimal performance and longevity of your pressure washer. Regular maintenance and proper care are essential in preventing and resolving problems that may arise during its operation.
Tips for Proper Hose Maintenance
As someone who frequently uses a pressure washer, I understand the importance of proper hose maintenance. Taking care of your hose can extend its lifespan, ensuring that it continues to perform at its best. In this section, I will share some tips and techniques that I have learned over the years for keeping your pressure washer hose in excellent condition.
| Tip | Description |
|---|---|
| 1. Regular Inspections | Inspect your pressure washer hose regularly for any signs of wear and tear, such as cracks, leaks, or fraying. Identifying these issues early on can prevent further damage and potential accidents. |
| 2. Proper Storage | After each use, ensure that you properly store the hose. This includes coiling it up neatly, avoiding any kinks or tangles. Store the hose in a dry and cool place, away from direct sunlight or extreme temperature fluctuations. |
| 3. Avoid Hose Dragging | Avoid dragging the hose across rough surfaces or sharp edges that can cause abrasions or cuts. Instead, carefully maneuver the hose to minimize any potential damage. |
| 4. Use Adequate Water Pressure | Using excessive water pressure can put unnecessary strain on your hose. Follow the manufacturer’s guidelines and adjust the pressure according to the task at hand to prevent damage to the hose and other components of your pressure washer. |
| 5. Clean the Hose Regularly | Regularly clean your pressure washer hose, both internally and externally, to remove any dirt, debris, or chemical residue. This helps to maintain optimal performance and prevents clogging, blockages, or damage caused by buildup. |
| 6. Replacing Worn Out Parts | If you notice any significant damage or signs of wear that cannot be repaired, it is essential to replace the worn-out parts promptly. This includes any fittings, connectors, or damaged sections of the hose itself. |
By following these tips for proper hose maintenance, you can ensure that your pressure washer hose remains in excellent condition, allowing you to get the most out of your cleaning tasks without any unexpected disruptions.

Cleaning and Storage: Taking Care of the Hose
When it comes to maintaining and prolonging the lifespan of your pressure washer hose, proper cleaning and storage are essential. By following a few simple steps, you can ensure that your hose remains in optimal condition, allowing you to tackle your cleaning tasks effortlessly and effectively.
First and foremost, it is crucial to clean the hose after each use. This will not only remove any dirt or debris that may have accumulated during operation but also prevent the build-up of mold or mildew over time. Begin by disconnecting the hose from the pressure washer and the spray gun, ensuring that any residue pressure is released.
Next, using a mild detergent or soap solution, thoroughly clean the entire length of the hose. This can be done by either manually scrubbing the hose with a soft-bristle brush or by running the soapy solution through the hose using a low-pressure setting on the pressure washer. Pay close attention to any areas that may have come into contact with stubborn stains or grime.
After cleaning, rinse the hose with clean water to remove any soap residue. Gently shake the hose to dislodge any excess water and allow it to air dry completely. It is important to avoid leaving the hose in direct sunlight, as prolonged exposure to UV rays can cause the material to degrade and weaken over time.
Once the hose is dry, it is time to store it properly. Coil the hose loosely, making sure not to twist or kink it, and secure it with hose ties or a storage reel. Avoid hanging the hose directly on metal hooks or sharp objects that may cause damage. It is also advisable to store the hose in a cool, dry location to prevent any moisture or humidity from affecting its condition.

| Key Points: |
|---|
| 1. Clean the hose after each use to remove dirt and prevent mold. |
| 2. Use a mild detergent or soap solution to thoroughly clean the hose. |
| 3. Rinse the hose with clean water to remove any soap residue. |
| 4. Allow the hose to air dry completely and avoid direct sunlight. |
| 5. Coil the hose loosely and secure it with proper ties or a storage reel. |
| 6. Store the hose in a cool, dry location to prevent moisture damage. |
Choosing the Right Replacement Hose
When it comes to replacing the essential component that connects your pressure washer to the water source, it’s important to consider various factors to ensure you choose the optimal replacement hose. As a person who has used a pressure washer extensively, I understand the significance of selecting the right hose for efficient and effective cleaning.
Determining the correct length:
One of the key considerations in choosing a replacement hose is its length. Having a hose that is too short can restrict your movements and make it difficult to reach certain areas. On the other hand, a hose that is too long can become tangled and cumbersome, making the cleaning process inefficient. Therefore, it is important to measure the distance from your pressure washer to the furthest point you need to reach in order to select a hose that provides optimal length without unnecessary excess.
Assessing the hose material:
The material of the hose can greatly impact its durability and flexibility, which are crucial factors for a smooth and hassle-free cleaning experience. There are different materials available, such as rubber and PVC. While rubber hoses tend to be more durable and resistant to kinks, PVC hoses offer better flexibility and are often lighter. Consider your specific needs and the type of cleaning tasks you perform to determine the most suitable material for your replacement hose.
Considering the hose diameter:
The diameter of the hose plays a significant role in determining water flow and pressure. A larger diameter allows for greater water flow, which can be beneficial for heavy-duty cleaning tasks. However, it is important to ensure that the diameter is compatible with your pressure washer, as using a hose with a larger diameter than recommended can lead to reduced pressure. On the other hand, a smaller diameter hose may be suitable for lighter tasks or when you require more precise control over the water flow.
Checking the hose fittings:
Another important aspect to consider when choosing a replacement hose is the compatibility of its fittings with your pressure washer. The fittings should be able to securely attach to both the pressure washer and the spray gun to prevent any leakage or loss of pressure. It is recommended to check the specifications of your pressure washer and ensure that the replacement hose has the appropriate fittings for a proper and secure connection.
Considering additional features:
Lastly, it may be worth considering any additional features that can enhance your cleaning experience. Some hoses come with built-in accessories such as quick-connectors or swivel fittings that provide convenience and flexibility during use. Additionally, hoses with reinforced layers or abrasion-resistant coatings can offer added durability for heavy-duty tasks. Assessing these extra features can help you choose a replacement hose that aligns with your specific cleaning requirements.
By taking into account the length, material, diameter, fittings, and additional features, you can confidently select the right replacement hose for your pressure washer. As someone who understands the importance of maintaining and optimizing a pressure washer, I believe that choosing the correct hose is crucial for achieving satisfactory results and prolonging the lifespan of your equipment.
Connecting a Replacement Pipe to Your Power Sprayer
In this section, I will guide you through the process of connecting a new pipe to your high-pressure washing machine. By following these steps, you will have your power sprayer ready for action in no time!
1. Prepare the New Hose
Before starting the installation, ensure that you have a new hose suitable for your power sprayer. Select a hose of the appropriate length and make sure it is compatible with the fittings on your machine. Inspect the hose for any damages or leaks, as a damaged hose can compromise the efficiency and effectiveness of your power sprayer.
2. Attach the Hose Connector
The first step in connecting the new hose is to attach the hose connector to the end of the hose. This connector is designed to fit securely onto the power sprayer’s nozzle, ensuring a tight seal. Carefully screw the connector onto the hose, making sure it is firmly in place.
| Tip: | To ensure a leak-free connection, you may apply a small amount of plumber’s tape to the threads before attaching the hose connector to the hose. |
|---|
3. Connect the Hose to the Power Sprayer
Once the hose connector is securely attached to the hose, it’s time to connect the other end of the hose to the power sprayer. Locate the inlet port on your power sprayer, which is typically located at the rear or side of the machine. Line up the hose connector with the inlet port and push the two together until you hear a click or feel a secure connection.
Ensure that the hose is correctly aligned with the inlet port to prevent any leaks or loss of pressure. You may need to twist the hose slightly to achieve a proper fit. Once connected, give it a gentle tug to confirm that it is securely attached.
Note: Different power sprayer models may have varying connection mechanisms, so refer to your user manual for specific instructions on attaching the hose.
By following these easy steps, you can successfully connect a new hose to your power sprayer, ensuring a reliable and effective cleaning experience. Now you’re ready to tackle any cleaning task with confidence!
Final Thoughts and Additional Resources
In conclusion, removing the hose from a Karcher pressure washer can be a straightforward task when using the right techniques and tools. Throughout this article, I have provided step-by-step instructions and tips to help you successfully detach the hose without any hassle.
If you encountered any challenges during the hose removal process, do not worry. Remember that practice makes perfect, and with some patience and persistence, you will become more confident in handling this task.
Additionally, it is important to emphasize the significance of regular maintenance for your pressure washer equipment. Taking care of your Karcher pressure washer, including its hoses, will not only prolong its lifespan but also ensure optimal performance every time you use it.
If you are interested in learning more about maintaining your pressure washer or tackling common troubleshooting issues, there are plenty of additional resources available. Online forums and communities dedicated to pressure washers can be valuable sources of information and helpful advice from experienced users.
You may also consider consulting the official Karcher website for comprehensive user manuals, instructional videos, and frequently asked questions. The manufacturer’s resources provide specific details and recommendations tailored to your pressure washer model.
By utilizing the final thoughts and additional resources mentioned in this article, you will be well-equipped to handle the hose removal process effectively and efficiently. Remember to prioritize safety and follow proper procedures to avoid any damage or accidents. With proper maintenance and care, your Karcher pressure washer and its hose will continue to serve you for years to come.