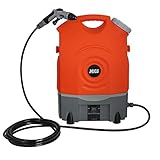
How To Remove Karcher Pressure Washer Pump

Have you ever found yourself in a situation where your state-of-the-art cleaning equipment requires maintenance, but you are unsure of how to proceed? Fear not, as this comprehensive guide will equip you with the knowledge and skills necessary to successfully disassemble and service your trusty cleaning companion.
Today, we will explore the ins and outs of dismantling the heart of your cleaning machine – the powerful pump that drives its performance. Whether you are an experienced outdoor enthusiast or a novice, our user-friendly instructions will make this seemingly daunting task as easy as a walk in the park.
As the proud owner of a well-known high-pressure washer, you understand the significance of its pump in ensuring consistent, robust water flow. Over time, wear and tear can affect the pump’s functionality, resulting in a decline in performance. Rather than lamenting over a loss of power, why not take control of the situation by learning to remove and replace the vital components of your equipment’s pump?
With our step-by-step instructions and expert guidance, you will gain the confidence to disassemble your pressure washer pump. By following our precise instructions accompanied by clear visuals, you will soon be able to identify the essential parts, understand their functions, and successfully remove and replace them without relying on professional help.
So, why wait? Join us on this enlightening journey towards maintaining your pressure washer pump and maximizing the longevity of your beloved cleaning equipment. In just a short time, you will triumph over any repair hurdle and restore your high-pressure washer to its full glory!
Diagnosing Issues with Karcher Pressure Washer Pump: Troubleshooting Guide
As a pressure washer owner, it is important to understand how to identify and solve problems with your Karcher pressure washer pump. By diagnosing the underlying issues, you can effectively find the right solutions and ensure the optimal performance of your equipment.
Signs of Pump Problems
When facing pump-related problems, it is crucial to observe signs that indicate issues with your Karcher pressure washer. Common symptoms may include reduced water flow, inconsistent pressure output, unusual vibrations, leaks, or strange noises coming from the pump. Recognizing these signs will help you pinpoint the source of the problem.
Possible Causes and Solutions
Inadequate Water Supply: Insufficient water supply can lead to pump problems. Ensure that the water source is fully open and free from any blockages. Checking the hose for kinks or leaks will also help in securing proper water flow.
Clogged Nozzle or Spray Tip: A clogged nozzle or spray tip can restrict water flow, causing uneven pressure output. Clean or replace the nozzle to restore the desired performance.
Worn or Damaged Seals: Over time, the seals inside the pump may wear out or become damaged, resulting in leaks. Inspect the seals and replace them if needed to prevent water leakage.

Failed Pressure Regulator: If water pressure is inconsistent, the pressure regulator may be faulty. Check the regulator for any issues and replace it if necessary.
Faulty Unloader Valve: An unloader valve that does not function properly can cause irregular pressure and lead to pump damage. Clean or replace the valve to ensure smooth pressure regulation.
Internal Pump Damage: In some cases, the pump itself may be damaged due to wear and tear or improper use. If other troubleshooting methods fail to resolve the issue, it may be necessary to consult a professional or replace the pump.
By conducting a thorough diagnosis of your Karcher pressure washer pump, you can identify the specific problem and apply the appropriate solution. Regular maintenance and prompt troubleshooting will help prolong the lifespan of your pump and ensure optimal performance for all your pressure washing needs.
Understanding the Basics of Karcher Pressure Washer Pumps
As an experienced user of pressure washers, I have come to appreciate the vital role that the pump plays in the overall performance of the machine. In this section, I will delve into the fundamental aspects of Karcher pressure washer pumps, without explicitly referring to their removal or the specific brand itself. By gaining a better understanding of these essential components, you will be equipped with the knowledge to maintain and troubleshoot your pressure washer effectively.

The Heart of the Power
At the core of every pressure washer lies its pump, which can be likened to the beating heart of the machine. The pump is responsible for generating the immense water pressure that enables the washer to tackle stubborn dirt, grime, and stains. It builds up pressure by drawing in water and pushing it out at high speeds through a series of valves and pistons. Understanding the inner workings of the pump is crucial for anyone seeking to optimize the performance of their pressure washer.
Types of Pressure Washer Pumps
Pressure washer pumps come in different types, each with its unique advantages and characteristics. Two common types are axial cam pumps and triplex plunger pumps. Axial cam pumps are known for their simplicity and affordability, making them a popular choice for casual users. On the other hand, triplex plunger pumps are more robust and efficient, capable of handling heavy-duty cleaning tasks. Understanding the different pump types will help you make an informed decision when selecting or troubleshooting your pressure washer.
Key Components

Pressure washer pumps consist of several vital components that work together to create the necessary pressure. These include valves, pistons, seals, and plungers, among others. Each component plays a specific role in the pump’s operation, ensuring a continuous and powerful flow of water. By familiarizing yourself with these key components, you will have a better understanding of how they contribute to the overall performance and reliability of your pressure washer.
Maintenance and Troubleshooting
Regular maintenance is crucial to keep your pressure washer pump in optimal condition and prolong its lifespan. It is important to inspect and clean the pump regularly, check for any signs of wear or damage, and replace worn-out parts promptly. Additionally, understanding common issues that may arise with pressure washer pumps, such as loss of pressure or leaks, will enable you to troubleshoot and resolve problems effectively. By following proper maintenance practices and having troubleshooting knowledge, you can ensure that your pressure washer pump continues to deliver optimal performance for years to come.
Signs of a Failing Pump on Your Karcher Pressure Washer
As an experienced user of Karcher pressure washers, I have come across various issues that can arise with the pump. Identifying common symptoms of a failing pump is crucial in order to address the problem promptly and prevent further damage.
One telltale sign of a failing pump is a noticeable decrease in water pressure during operation. Instead of the usual strong and consistent flow, you might experience weak and inconsistent sprays. This can greatly hinder the effectiveness of your cleaning tasks and indicate potential pump-related issues.

An unusual noise emanating from the pump can also be a red flag. If you notice strange sounds like rattling, grinding, or banging, it is likely that the internal components of the pump are damaged or worn out. Ignoring these noises can lead to irreversible damage to the pump and necessitate expensive repairs or replacement.
Another symptom to watch out for is water leakage. If you observe any water dripping or spraying from the pump area, it is a clear indication of a problem. Leakage can occur due to worn-out seals, cracked fittings, or loose connections, all of which require immediate attention to prevent further damage and ensure the longevity of your pressure washer.
In some cases, the pump might struggle to build up pressure or fail to maintain a consistent pressure level. This is often manifested by a pulsating or fluctuating spray. If you notice that the pressure fluctuates instead of remaining constant, it is likely due to an issue with the pump. It could be caused by a clogged inlet or outlet valve, a worn-out pressure regulator, or a damaged o-ring.
Lastly, a failing pump can exhibit abnormal vibrations during operation. Excessive vibration can be felt through the handle or observed through unstable movements of the pressure washer. This can be attributed to issues such as misalignment of pump components, damaged bearings, or loose mounting bolts. Paying attention to these vibrations can help you address the problem before it escalates.
| Signs of a Failing Karcher Pressure Washer Pump |
|---|
| Decreased water pressure |
| Unusual noises |
| Water leakage |
| Fluctuating pressure |
| Abnormal vibrations |
Being aware of these common symptoms will help you quickly identify any issues with your Karcher pressure washer pump and take the necessary steps to resolve them. Regular maintenance and inspections can also help prevent pump failures and extend the lifespan of your pressure washer.

Step-by-Step Guide: Detaching the Pressure Washer Pump
In this section, I will walk you through the process of safely removing the crucial component responsible for creating high-pressure water flow in your cleaning machine. By following these step-by-step instructions, you will be able to detach the pump effortlessly, allowing you to perform necessary maintenance or repair tasks.
First, let’s begin by preparing the workspace and ensuring the pressure washer is turned off. It’s important to have a clean and well-lit area to work in, with all necessary tools and equipment readily available.
Next, locate the housing or cover that encases the pump. This can usually be found at the front or side of the pressure washer. Using a screwdriver or wrench, carefully remove any screws or bolts securing the housing in place. Set aside these fasteners in a safe place, as you will need them later to reassemble the pump.
Once the housing is removed, you will have access to the pump itself. Take note of the connections and hoses that are attached to the pump. It may be helpful to take a photo or make a diagram to ensure you can reconnect everything correctly later on.
Now, identify the fittings or clamps that secure the hoses to the pump. Depending on the model, these may require a simple twist, a squeeze, or the use of pliers to loosen and remove. Carefully disconnect the hoses, ensuring not to damage any of the connections or fittings.

With the hoses detached, it’s time to disconnect the power supply. Look for the electrical connections leading from the pump motor. Depending on your pressure washer, these may include wires or plugs. Follow the manufacturer’s instructions to safely disconnect the power source, ensuring your safety throughout the process.
Once the power is disconnected, you can proceed to remove the pump from the pressure washer. Depending on the model, the pump may slide out, requiring a gentle tug or minor loosening of additional fasteners. Pay careful attention to any instructions provided by the manufacturer to avoid accidental damage.
With the pump removed, take a moment to inspect it for any signs of wear, damage, or debris. This is an excellent opportunity to clean or replace any necessary parts, ensuring optimal performance when reassembled.
Finally, when you’re ready to reassemble the pressure washer, reverse the steps taken to remove the pump. Carefully insert the pump back into its housing, reconnect the power supply, and reattach the hoses, ensuring they are securely fastened.
Remember to refer to the manufacturer’s instructions or consult professional advice if you encounter any difficulties during the removal or reassembly process. By following these step-by-step instructions, you can effectively remove and replace the pressure washer pump, maintaining the longevity and efficiency of your cleaning equipment.
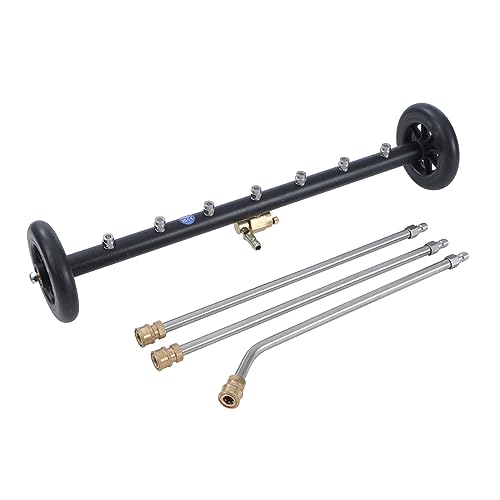
The Essential Tools and Materials for Pump Removal
When it comes to removing the pump from your pressure washer, having the right tools and materials is crucial. In this section, I will guide you through the essential items you’ll need to successfully complete the pump removal process. By being prepared with these tools, you can ensure a smooth and efficient removal without causing any damage to your equipment.
- A wrench or socket set: You’ll need a reliable tool for loosening and removing the nuts and bolts that secure the pump in place. A wrench or socket set with various sizes will come in handy for different components of the pump.
- Screwdrivers: Having both flathead and Phillips head screwdrivers will be useful for removing any screws or fasteners that hold parts of the pump together. Make sure to have a set of screwdrivers with different sizes to accommodate various screw heads.
- Plastic bags or containers: It’s important to keep all the small parts and screws organized during the pump removal process. Using plastic bags or containers and labeling them accordingly will help you keep track of everything and prevent any parts from getting lost.
- Teflon tape or thread sealant: When reinstalling the pump or connecting any pipes or fittings, using Teflon tape or thread sealant can help create a secure and leak-free connection. This will ensure proper functioning of the pressure washer after the pump removal.
- A clean, well-lit workspace: Clearing a suitable area for pump removal is essential. Make sure the space is clean and free from any debris or obstacles. Additionally, having sufficient lighting will make it easier for you to see and work on the pump components.
- Protective gloves and eyewear: Safety should always be a priority when working with machinery. Wearing gloves will protect your hands from any sharp edges or potential injuries, while eyewear will shield your eyes from debris or harmful substances that may be present during the pump removal process.
By gathering these tools and materials before starting the pump removal, you’ll be well-prepared to handle any challenges that may arise. Having everything on hand will make the process smoother and more efficient, allowing you to successfully remove the pump from your pressure washer without any hassle.
Tips for Safely Disconnecting and Removing the Pump
In this section, I will share some important tips and guidelines for safely disconnecting and removing the pump from your pressure washer. It is crucial to follow these steps carefully to avoid any accidents or damage to the equipment.
- Turn off the power: Before proceeding with any disconnection or removal, ensure that the pressure washer is completely turned off and unplugged from the power source. This will prevent any electrical mishaps during the process.
- Release pressure: Next, you need to release the pressure in the pump. Locate the pressure release valve, usually found near the pump’s outlet. Slowly turn the valve counterclockwise until any remaining pressure is released. This step is crucial for your safety.
- Disconnect hoses: Carefully detach any hoses connected to the pump. Start with the high-pressure hose, followed by the detergent hose if applicable. Use an adjustable wrench to loosen any fittings, making sure to support the hoses to avoid strain on the connections.
- Secure loose parts: Some pumps may have additional parts or accessories attached, such as pressure gauges or filters. Safely remove these components and keep them organized and secure to avoid misplacing or losing them during the process.
- Remove mounting bolts: Check the pump’s mounting brackets or bolts that secure it to the pressure washer frame. Use the appropriate tools, such as a socket wrench or screwdriver, to carefully remove these bolts. Ensure that any supporting brackets or straps are also removed if present.
- Support the pump: The pump can be heavy. It is crucial to have a plan and assistance to support the weight of the pump as you disconnect it from the pressure washer. Consider using a sturdy workbench or table at a comfortable height to work on the pump.
- Disconnect pump from the engine: If your pressure washer has a separate engine and pump assembly, there will be a shaft connecting the two. Follow the manufacturer’s instructions to properly disconnect the pump from the engine, ensuring that you don’t damage any gears or mechanisms in the process.
- Store the pump: Once the pump is safely disconnected, clean it thoroughly and inspect for any damage or wear. If necessary, refer to the manufacturer’s guidelines on proper storage to ensure the pump remains in good condition until it is ready for reinstallation.
Remember, it is essential to consult the user manual or reach out to the manufacturer for specific instructions on disconnecting and removing the pump for your particular Karcher pressure washer model. Following these tips will help you safely and effectively remove the pump without causing any harm to yourself or the equipment.
Inspecting and Cleaning the Pump Components
When maintaining your pressure washer, it is essential to pay close attention to the pump components to ensure optimal performance and longevity. In this section, I will guide you through the process of inspecting and cleaning the various parts of your pressure washer pump.
1. Checking the Pump Housing
Begin by examining the outer casing of the pump, also known as the pump housing. Look for any signs of cracks or damage that could affect the pump’s overall functionality. If you notice any issues, it may be necessary to replace the housing to prevent further damage.
Additionally, check for any loose or missing screws or bolts that secure the pump housing. Tightening or replacing these fasteners as needed will help maintain the structural integrity of the pump.
2. Inspecting the Pump Valves
The pump valves are a crucial part of the pressure washer pump system, as they regulate the flow of water. Carefully inspect the valves for any signs of wear or tear, such as cracks, chips, or deformation. If you notice any damage, it is advisable to replace the valves with compatible replacements.
Furthermore, check for any debris or blockages that may be obstructing the valves’ functionality. Use a soft brush or cloth to gently remove any dirt or buildup that could affect their performance.
Note: It is important to handle the valves with care to avoid bending or damaging them during the inspection and cleaning process.
In conclusion, regularly inspecting and cleaning the pump components of your pressure washer ensures that it operates at its best. By checking the pump housing and valves for any damage or blockages, you can prevent potential issues and prolong the lifespan of your pressure washer.
Reassembling the Pressure Washer and Testing the Pump
Now that the disassembly process is complete, it’s time to reassemble the pressure washer and test the pump. This is a crucial step in ensuring that the machine functions properly and is ready for use.
Firstly, gather all the components that were removed during the disassembly process. Take care to arrange them in the correct order and ensure that everything is clean and free from any debris or damage.
Begin by carefully reattaching the pump to the main body of the pressure washer. Use the appropriate screws or bolts and tighten them securely, but not overly tight to avoid damaging any parts. As you work, double-check that all connections and fittings are secure and properly aligned.
Next, reconnect the water inlet and outlet hoses to the pump. Take extra care to ensure that the hoses are tightly fastened, as any leaks can result in loss of pressure and reduced performance.
Once all the components are properly attached, it is important to inspect the pump and surrounding areas for any signs of wear or damage. Check the seals, gaskets, and O-rings to ensure they are in good condition. If any components appear worn or damaged, it is recommended to replace them before moving forward.
Finally, it’s time to test the pump and make sure it is functioning correctly. Start by filling the detergent tank (if applicable) and connecting the pressure washer to a power source. Turn on the machine and allow water to flow through the system, checking for any leaks or abnormal noises.
With the pressure washer running, aim the nozzle at an appropriate target and pull the trigger to activate the spray. Observe the water pressure and ensure that it is consistent and sufficient for your needs. If everything appears to be working properly, you can proceed with using your pressure washer as needed.
Following these steps will help you reassemble your pressure washer and test the pump, ensuring its optimal performance and reliability for future use.
Increasing the Lifespan of Your Karcher Pressure Washer Pump through Regular Maintenance
As a proud owner of a Karcher pressure washer, I understand the importance of keeping the pump in top condition to ensure optimal performance. Regular maintenance is key to extending the lifespan of your pressure washer pump, preventing unexpected breakdowns, and saving on costly repairs. In this section, I’ll share some preventative maintenance tips that will help you keep your Karcher pressure washer pump running smoothly for years to come.
1. Maintain Proper Water Supply
One of the most important factors in preserving the life of your pressure washer pump is ensuring a continuous supply of water. Always check that the water source is clean and free from debris or contaminants that could clog the pump or cause damage. Additionally, ensure that the water supply is sufficient and not restricted, as a lack of water flow can put excessive strain on the pump.
2. Use the Correct Detergent and Cleaning Solutions
Choosing the right detergent or cleaning solution for your specific cleaning tasks is crucial for both effective cleaning and pump maintenance. Using the wrong detergents can result in chemical buildup, corrosion, and damage to the pump. Refer to the manufacturer’s guidelines and recommendations for the compatible detergents and cleaning solutions to ensure optimum performance and longevity of your pressure washer pump.
3. Monitor and Maintain Oil Levels
Regularly checking and maintaining the oil levels in the pump is essential for efficient operation and durability. Insufficient oil can cause excessive friction, leading to overheating and premature wear of pump components. Check your owner’s manual for instructions on how to properly check and top up the oil in your Karcher pressure washer pump.
4. Keep an Eye on Pump Seals and O-rings
Inspecting the pump seals and O-rings regularly is a simple yet vital step in preventative maintenance. Damaged or worn-out seals can lead to leaks, loss of pressure, and potential pump failure. If you notice any signs of wear or deterioration, such as leaks or decreased performance, it’s important to replace the seals or O-rings promptly to prevent further damage to the pump.
5. Clean and Store Properly
After each use, take the time to clean the pressure washer and properly store it. Remove any residues or debris that may have accumulated on the pump or other components. Store the pressure washer in a dry and protected area to prevent rust or damage from environmental factors.
By following these preventative maintenance tips, you can significantly extend the life of your Karcher pressure washer pump, ensuring consistent performance and saving money on potential repairs or replacements. Remember that regular maintenance is an investment that pays off in the long run.
FAQ:
Do I need any special tools to remove a Karcher pressure washer pump?
No, you don’t usually need any special tools to remove a Karcher pressure washer pump. However, you may need a wrench or socket set to remove the screws securing the pump to the pressure washer’s engine or frame. Additionally, depending on the model and configuration of your pressure washer, you may need pliers or adjustable wrenches to disconnect hoses and fittings from the pump. It’s always a good idea to consult the user manual or instructions provided by Karcher for your specific model to ensure you have the right tools and follow the correct procedure.
Can I remove the pump from a Karcher pressure washer myself, or do I need professional help?
You can remove the pump from a Karcher pressure washer yourself in most cases. It is a relatively simple process that can be done with basic tools. However, it is important to exercise caution, follow the appropriate steps, and make sure to disconnect the pressure washer from the power source before attempting any maintenance or repairs. If you are unsure or uncomfortable with removing the pump yourself, it is always recommended to consult a professional or contact Karcher’s customer support for assistance.