How To Remove Garden Hose From Pressure Washer

Picture yourself engulfed in the serenity of your garden, as the vibrant foliage sways gently in the breeze. The fragrance of blooming flowers fills the air, captivating both your senses and your soul. Amidst this tranquil oasis, you find yourself faced with the task of separating the conduit conveying water from the omnipotent device propelling it forward. Fear not, for I am here to guide you through the intricate process of disassembling the garden hose from your formidable pressure washer.
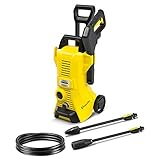
As we embark on this journey of knowledge and understanding, envision holding in your hands a tool that harnesses the power of pressurized water to blast away grime, dirt, and even the most stubborn stains. This indispensable apparatus seamlessly connects to a water implement that ensures the steady flow of liquid, allowing you to conquer the most formidable cleaning tasks with ease. However, the time eventually arrives when the harmonious union of these two forces must be temporarily severed, providing respite for both the machine and its human operator.
With determination and unwavering focus, you shall learn the secrets hidden within the art of detachment. By grasping the methods and techniques outlined here, you will acquire the prowess to effortlessly disentangle the hose from the pressure washer without causing damage or experiencing frustration. Throughout this enlightening journey, prepare to unleash the power within you, as we explore the necessary steps to separate these intertwined entities and restore order to your garden and cleaning routine.
Ensuring Safe Removal of Garden Hose from Power Washer: My Top Tips!
When it comes to disconnecting the hose from your pressure washer, it’s essential to follow a few key steps to ensure a safe and hassle-free experience. In this section, I will share my personal insights and offer valuable advice on how to detach a garden hose from a power washer without any difficulties or risks.
1. Proper Preparation and Inspection
Before attempting to remove the hose, it’s crucial to prepare yourself by wearing protective gloves and eyewear. Safety should always come first! Additionally, it’s advisable to inspect the hose and the pressure washer connections for any signs of wear, leaks, or damages. This preliminary check will help identify potential issues and prevent accidents.
2. Relieving Pressure and Draining Water
Prior to disconnecting the hose, it’s important to turn off the pressure washer and release any built-up pressure. This can be done by engaging the trigger on the spray gun to allow water to flow freely. Once the pressure has been relieved, make sure to drain any remaining water from both the hose and the pressure washer to prevent any dripping or spraying.
Once you have completed these initial steps, you are ready to safely remove the garden hose from the pressure washer. Remember to take your time and handle the hose and connections with care to avoid any potential damage or accidents. Your safety is paramount!
Understanding the Significance of Proper Hose Disconnection
As an experienced pressure washer enthusiast, I cannot stress enough the importance of correctly removing the hose from your equipment. Safely disconnecting the hose not only ensures the longevity of your pressure washer, but it also minimizes the risk of accidents and damage during the disconnection process. In this section, I will explain why properly removing the hose is crucial and provide a step-by-step guide on how to do it effectively.
The Potential Consequences of Improper Hose Removal
Improper hose disconnection can lead to various negative consequences, which can be both costly and dangerous. Firstly, if the hose is forcefully pulled or yanked off, it can damage the pressure washer’s fittings, potentially leading to leaks or even complete failure of the machine. Additionally, incorrect hose removal may result in personal injury, as the sudden release of high-pressure water can cause the hose to whip around uncontrollably. This can cause serious harm to you, bystanders, or nearby objects.
The Step-by-Step Guide to Properly Disconnecting the Hose
Follow these simple steps to ensure the correct removal of the hose from your pressure washer:

| Step | Description |
|---|---|
| 1 | Switch off the pressure washer and unplug it from the power source to avoid any accidental operation. |
| 2 | Relieve the pressure in the hose by pressing the trigger gun or wand until the water flow ceases completely. |
| 3 | Locate the hose connection point on the pressure washer and identify any locking mechanisms or connectors that may be present. |
| 4 | Depending on the type of connector, release it by twisting, pulling, or pressing the locking mechanism. Be gentle and avoid applying excessive force. |
| 5 | Once the connector is released, slowly pull the hose away from the pressure washer, taking care to avoid any sudden movements that may result in unwanted damage or injury. |
| 6 | Inspect the hose and connectors for any signs of damage or wear. If necessary, clean or replace any faulty components before reusing the hose. |
| 7 | Properly store the hose in a designated area to prevent tangling or damage. |
By following these guidelines, you will ensure that your pressure washer remains in top condition and that the hose can be safely and efficiently reconnected when needed. Remember, taking the time to disconnect the hose properly not only extends the lifespan of your equipment but also prioritizes your own safety and the well-being of those around you.
Preparing Your Pressure Washing Equipment for Hose Detachment
When it comes to disassembling your pressure washer, proper preparation is essential to ensure a smooth and efficient process. In this section, I will guide you through the steps of getting your pressure washer ready for hose removal without using any specific terms.
1. Power Down and Disconnect
The first step is to power down your pressure washer and ensure that it is completely disconnected from any power source. This will prevent any accidental start-ups or electric shocks during the disassembly process.
2. Relieve Pressure
Before detaching the hose, it is crucial to relieve any built-up pressure within the system. This can be achieved by triggering the spray gun and allowing water to flow for a few seconds. By doing so, you will minimize the risk of possible injury or damage when removing the hose.
3. Inspect and Clean
Once the pressure has been relieved, take a moment to inspect the hose and its connections for any signs of wear, leaks, or damage. It is important to identify any issues before removing the hose to ensure proper maintenance or replacement.

Additionally, make sure to clean the surrounding areas by removing any dirt, debris, or other contaminants. Keeping the workspace clean will facilitate the disassembly process and prevent any particles from entering the pressure washer.
4. Secure and Stabilize
Before attempting to remove the hose, ensure that the pressure washer is securely stabilized to prevent it from accidentally tipping over or moving during the disassembly process. This can be achieved by placing the pressure washer on a flat and stable surface or using appropriate securing mechanisms.
By following these preparatory steps, you can ensure a safe and efficient hose removal process for your pressure washer without any difficulty. Remember to always prioritize safety and take your time when performing maintenance tasks to avoid any accidents or damage to your equipment.
Shutting Off the Pressure Washer and Releasing Built-up Pressure
In this section, I will guide you on safely shutting off your pressure washer and releasing any built-up pressure in the system. It is important to follow these steps to ensure your safety and to prevent any potential damage to the equipment.
Step 1: Turn Off the Power
The first step in shutting off the pressure washer is to turn off the power supply. This can be done by unplugging the power cord from the electrical outlet or by turning off the power switch, depending on the model of your pressure washer.

Step 2: Release the Pressure
To release any built-up pressure in the system, locate the pressure release valve or the unloader valve. This valve is typically located near the outlet where the hose is connected. It usually has a small lever or knob that can be pulled or turned.
Before proceeding, make sure to wear protective gloves and eyewear. Once you have located the pressure release valve, slowly pull the lever or turn the knob in the direction indicated to release the pressure. You may hear a hissing sound as the pressure is being released.
Continue to hold the lever or knob until you no longer hear any hissing sound, indicating that all the pressure has been released. It is important to hold the valve in the open position until all the pressure has dissipated to prevent any sudden release of pressure when disconnecting the garden hose.
By following these steps, you can safely shut off your pressure washer and release any built-up pressure in the system, allowing you to remove the garden hose without any risk of injury or damage.
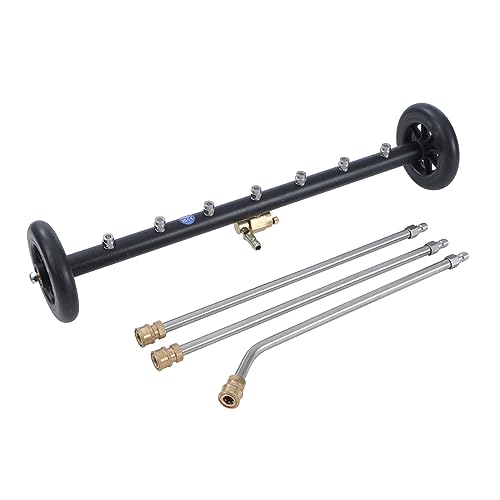
Loosening the Hose Connection with the Correct Tools
In this section, I will guide you through the proper method of loosening the hose connection on your pressure washer using the appropriate tools. By following these steps, you will be able to detach the hose effortlessly and safely, ensuring a hassle-free experience.

Step 1: Prepare the Necessary Tools
Before beginning the process, gather the essential tools required for loosening the hose connection. Some of the recommended tools include pliers, an adjustable wrench, and a cloth for added grip and protection. These tools will assist in providing stability and leverage throughout the process, allowing for an easier disconnect.
Note: It is crucial to use the correct tools to ensure a safe and efficient disconnection. Using improper tools or excessive force may cause damage to the pressure washer or the hose.
Step 2: Identify the Hose Connection
Next, locate the hose connection on your pressure washer. This connection usually consists of a threaded coupling that secures the hose to the pressure washer. Identifying the exact location of the connection will help you focus your efforts and ensure a smoother disconnection process.
Synonym: Determine the hose attachment point on your pressure washer, often marked by a threaded coupling.
Step 3: Hold the Hose Firmly
Having identified the hose connection, firmly grasp the hose near the coupling using a cloth or towel for added grip. This will help prevent the hose from slipping or twisting during the disconnection process, allowing for better control and maneuverability.
Synonym: Maintain a secure hold on the hose, ensuring it remains steady and prevents any accidental movements.
Step 4: Apply the Proper Tools

Using either pliers or an adjustable wrench, carefully grip the threaded coupling of the hose connection. Applying gentle pressure, turn the tool counterclockwise to loosen the connection. Remember to use the appropriate tool size to avoid damaging the coupling or losing grip during the process.
Synonym: Use pliers or an adjustable wrench to exert controlled force in a counterclockwise direction, gradually loosening the hose connection.
Step 5: Disconnect the Hose
Once the hose connection feels adequately loosened, release your grip on the hose and proceed to remove it from the pressure washer. Gently pull the hose away from the connection, ensuring it comes off smoothly without any sudden jerks or tugs.
Synonym: Detach the hose from the pressure washer by slowly pulling it away from the loosened coupling in a steady and controlled manner.

Following these steps will enable you to safely and effectively loosen the hose connection on your pressure washer using the correct tools. Always remember to exercise caution and use the proper equipment in order to maintain the integrity of both the pressure washer and the hose during the disconnection process.
Removing the Hose from the Pressure Washer with Care
When it comes to the task of detaching the hose from your pressure washer, it’s important to handle the process with utmost care. This section will guide you through the proper steps to safely remove the hose from your pressure washer without causing any damage or accidents. Here’s what you need to know.
1. Loosening the Connection
To begin the process, the first step is to loosen the connection between the hose and the pressure washer. This can be done by using a suitable tool or simply using your hand to undo the coupling. Take caution not to apply excessive force, as this can lead to potential damage or injury. Gentle but firm pressure should suffice to loosen the connection.
2. Releasing the Pressure
Before fully detaching the hose, it is crucial to release any residual pressure that may be present in the system. Failure to do so can result in a sudden release of pressurized water, which can be dangerous. To release the pressure, turn off the pressure washer and engage the trigger on the wand to allow any remaining pressure to escape. Wait a few moments to ensure all pressure is released before proceeding.
By following these steps with care and attention, you can successfully remove the hose from your pressure washer without causing any harm. Remember, safety should always be a top priority when working with pressure washers or any other powerful tools.
Inspecting and Cleaning the Hose after Detachment
After successfully separating the hose from the pressure washer, it is crucial to inspect and clean it to ensure optimal performance and longevity. Taking the time to assess the hose’s condition and eliminating any debris or dirt buildup will not only enhance its efficiency but also prevent potential damages in the long run.
1. Visual Inspection
- Thoroughly examine the entire length of the hose for any signs of wear, such as cracks, abrasions, or bulges.
- Inspect the hose connectors for any damage or corrosion.
- Check for any leaks or loose fittings.
2. Cleaning the Hose
To clean the hose effectively, follow these steps:
- Begin by removing any loose dirt or debris from the exterior of the hose.
- For stubborn dirt or grime, use a mild detergent or dish soap solution.
- Gently scrub the hose with a soft-bristle brush or sponge.
- Rinse the hose thoroughly with clean water to remove any soap residue.
- Allow the hose to air dry completely before reattaching it to the pressure washer.
3. Storage and Maintenance
To ensure the durability of your hose, proper storage and regular maintenance are essential. Consider the following tips:
- Avoid exposing the hose to extreme temperatures or direct sunlight when storing it.
- Store the hose in a dry and well-ventilated area to prevent mold or mildew growth.
- Inspect the hose regularly and address any damage or wear promptly.
- When not in use, detach the hose from the pressure washer to relieve any tension or pressure.
- Consider investing in a hose reel or storage solution to keep the hose organized and protected.
By inspecting and cleaning your garden hose after removal, you can ensure its reliability and extend its lifespan. A well-maintained hose will provide optimal performance when reattached to your pressure washer, allowing you to tackle your outdoor cleaning tasks efficiently.
Proper Storage Techniques for Preserving Garden Hoses
As an experienced gardener and pressure washer user, I have learned the importance of properly storing garden hoses to ensure their longevity and future use. When it comes to preserving these essential tools, a few simple steps can go a long way in protecting them from damage and extending their lifespan.
One of the key factors in storing garden hoses is finding a suitable location. It is advisable to store the hose in a cool, dry place away from direct sunlight and extreme temperatures. Prolonged exposure to sunlight can cause the hose material to degrade, making it brittle and prone to cracks and leaks. Similarly, freezing temperatures can cause the water inside the hose to expand, leading to bursting and other forms of damage.
A great way to protect the hose from tangling and kinking is to coil it properly before storage. Start by disconnecting it from the pressure washer or any other equipment it may be attached to. Then, using large loops, neatly coil the hose without any twists or overlapping. This will help maintain its flexibility and prevent any potential damage.
Another important consideration is to avoid applying excessive pressure to the hose during storage. This means avoiding heavy objects or equipment placed on top of it, which can cause deformation and weakening. It is also beneficial to elevate the hose off the ground or floor, using hooks or hangers, to eliminate any potential crushing or bending.
In addition to proper coiling and storage location, it is also advisable to clean and dry the hose before putting it away. Any residual moisture can lead to mold or mildew growth, which can deteriorate the hose over time. Rinse the hose with clean water and ensure it is completely dry before storing it to maintain its quality and prevent any unpleasant surprises when it is next used.
By following these simple storage techniques, you can ensure your garden hose remains in excellent condition for future use. Proper storage not only preserves the hose’s lifespan but also saves you money and the hassle of having to replace it frequently. So, take a few extra minutes to store your garden hose correctly, and you’ll reap the benefits in the long run.
FAQ:
What is the best way to remove a garden hose from a pressure washer?
The best way to remove a garden hose from a pressure washer is to first turn off the water supply and release any remaining pressure in the unit. Then, locate the hose connection on the pressure washer and firmly grasp the hose coupling. Twist it counterclockwise while pulling it away from the pressure washer until it is completely detached. Be careful not to force it or use excessive force, as this may damage the hose or the pressure washer.
Do I need any special tools to remove a garden hose from a pressure washer?
No, you do not need any special tools to remove a garden hose from a pressure washer. The process can be done easily with just your hands. However, if the hose coupling is tightly stuck, you can use a pair of pliers to provide some extra grip and leverage. It is important to use the pliers gently to avoid causing any damage to the hose or the pressure washer.