
How To Put Foam Cannon On Pressure Washer

Imagine transforming your ordinary pressure washer into a formidable tool, capable of delivering an unmatched level of cleaning performance. Picture yourself effortlessly eliminating dirt, grime, and tough stains from any surface, from your vehicles to your outdoor furniture. Now, what if we told you that this dream can become a reality, all thanks to a simple and effective solution?
Introducing the revolutionary technique of incorporating a high-quality foam cannon into your pressure washing routine. Let me guide you through the process of achieving maximum foaminess and superior cleaning results, without the need for excessive effort or expensive equipment.
Prepare to embark on a newfound cleaning journey filled with a wealth of advantages and benefits. By attaching a foam cannon to your pressure washer, you open the door to a world of enhanced foam generation and prolonged dwell time on the surface. The foam acts as a magnet, effectively latching onto and loosening dirt particles, making them easier to remove.
But wait, there’s more! The added tactical advantage of using a foam cannon is the equal distribution of foam, ensuring no spot is left untouched. This uniform application guarantees a comprehensive and thorough cleanse, leaving no trace of dirt behind. Say goodbye to uneven cleaning results and hello to a spotless and gleaming finish!
Attaching a Foam Dispenser to your Power Sprayer: A Step-by-Step Guide
In this section, I will guide you through the process of connecting a foam dispenser to your power sprayer. By following these steps, you will be able to efficiently apply foam to your surfaces without the hassle of manual application.
| Step 1 | Detach the existing nozzle |
| Step 2 | Identify the foam dispenser attachment point |
| Step 3 | Prepare the foam dispenser |
| Step 4 | Connect the foam dispenser to the power sprayer |
| Step 5 | Secure the foam dispenser in place |
| Step 6 | Test the foam dispenser |
Let’s dive into the details of each step to ensure a successful attachment of your foam dispenser.
Step 1: Detach the existing nozzle
Before attaching the foam dispenser, it is important to remove any existing nozzle or attachment from your power sprayer. This will allow for a seamless connection and optimal functionality.
Step 2: Identify the foam dispenser attachment point
Locate the designated area on your power sprayer where the foam dispenser can be connected. This attachment point may be labeled or indicated in the user manual. It is essential to find the correct spot for a secure and effective attachment.

Step 3: Prepare the foam dispenser
Prior to connecting the foam dispenser, ensure that it is filled with the desired foam solution. Follow the manufacturer’s instructions for proper preparation and set-up. This will guarantee an even distribution of foam during usage.
Step 4: Connect the foam dispenser to the power sprayer
Gently insert the foam dispenser attachment into the designated area on your power sprayer. Make sure it fits snugly and securely. Double-check the connection to avoid any potential leaks or dislodgement during operation.
Step 5: Secure the foam dispenser in place

If necessary, use any provided fastening mechanisms or straps to ensure the foam dispenser remains firmly attached to your power sprayer. This will prevent any unwanted movement or detachment during usage, especially when working with a high-pressure setting.
Step 6: Test the foam dispenser
Before starting your foam application, run a test to ensure proper functionality. Activate your power sprayer and observe the foam dispenser for a consistent and controlled release of foam. Adjust the settings or reattach if needed.
By following these simple steps, you can easily attach a foam dispenser to your power sprayer, enhancing the efficiency and effectiveness of your foam application process.
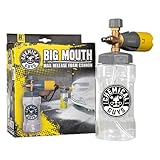
Selecting the Right Foam Cannon for your Pressure Washer
When it comes to enhancing the cleaning power of your pressure washer, finding the right foam cannon is crucial. As someone who has used pressure washers for years, I understand the importance of selecting a foam cannon that fits your specific needs and preferences. In this section, I will guide you through the process of choosing the perfect foam cannon for your pressure washer, providing you with valuable tips and considerations to help you make an informed decision.

1. Determine your Desired Foam Thickness
One of the key factors in selecting a foam cannon is deciding the thickness of foam you want to achieve during your cleaning tasks. Whether you prefer a thick and dense foam for lifting dirt and grime, or a thinner consistency for quicker rinsing, it is essential to consider how your pressure washer performs and your personal cleaning preferences.
2. Assess the Pressure Washer Compatibility
Before purchasing a foam cannon, it is vital to ensure compatibility with your pressure washer. Check the specifications and features of both your pressure washer and the foam cannon you are considering to make sure they are a good match. Look for compatibility in terms of pressure ratings, flow rates, and connection types to ensure seamless integration.
3. Consider Adjustable Foam Settings
An adjustable foam cannon allows you to have more control over the foam thickness and coverage. Look for foam cannons that offer adjustable knobs or settings, allowing you to easily fine-tune the foam output according to your specific cleaning requirements. This flexibility can be especially beneficial when cleaning various surfaces or tackling different levels of dirt and grime.
4. Quality and Durability
Investing in a high-quality foam cannon is essential for long-term performance and durability. Look for foam cannons made from durable materials such as brass or stainless steel, as they are more resistant to corrosion and can withstand the demands of regular use with your pressure washer. Additionally, consider foam cannons with reputable brands or positive customer reviews to ensure you are getting a reliable product.
5. Cost and Value
While considering your budget, it is important to find a foam cannon that offers an excellent balance between cost and value. Evaluate the features and benefits provided by different foam cannons within your price range and compare them to determine the best value for your money. Remember that investing in a quality foam cannon can enhance your cleaning experience and contribute to superior cleaning results.

By following these tips and considering your specific needs, you can confidently select the right foam cannon for your pressure washer. Remember to assess your desired foam thickness, check for compatibility, consider adjustable settings, prioritize quality and durability, and evaluate the cost and value. With the perfect foam cannon in hand, you can elevate the cleaning capabilities of your pressure washer and achieve outstanding results with every use.
Gathering the Essential Tools and Materials
When it comes to setting up a foam cannon on your pressure washer, it’s important to gather all the necessary tools and materials beforehand. By gathering these items, you can ensure a smooth and efficient installation process.
| Tools | Materials |
| Adjustable wrench | Thread seal tape |
| Phillips screwdriver | Soap solution or car wash shampoo |
| Socket set | Water hose |
| Nozzle tips | Foam cannon attachment |
Having an adjustable wrench is crucial for tightening and securing various components of your pressure washer. A Phillips screwdriver will come in handy for any screws that need to be secured. A socket set is useful for removing and attaching different parts of the pressure washer.
In addition to the tools, there are also several materials you will need for the installation process. Thread seal tape is essential for creating a tight, leak-free connection between the foam cannon attachment and the pressure washer. It’s important to have a soap solution or car wash shampoo on hand to mix with water and create the foam for your cleaning needs.
Lastly, a water hose is necessary to connect your pressure washer to a water source. This ensures a steady flow of water during the foam cannon application. Additionally, having extra nozzle tips allows you to adjust the spray pattern of the foam cannon to your desired preference.
By gathering all the necessary tools and materials mentioned above, you will be well-prepared to install and use a foam cannon on your pressure washer effectively. It’s always better to gather everything in advance to avoid any delays or interruptions during the installation process.
Preparing Your Power Wash System for Attachment of Foam Dispensing Nozzle
On the path to achieving optimal cleaning results from your power wash system, there are various accessories and attachments available that can enhance its performance. One such attachment is the foam dispensing nozzle, which is designed to create a thick layer of foam for effective cleaning and removing dirt and debris from surfaces. Before putting the foam cannon on your pressure washer, it is essential to properly prepare your power wash system to ensure seamless compatibility and maximize the benefits of the foam dispensing nozzle.
To prepare your power wash system for attaching the foam dispensing nozzle, it is important to first gather all the necessary tools and components required for the process. This may include an adjustable wrench, a set of pliers, and potentially specific adapters or fittings depending on the design of your pressure washer and foam cannon. These tools will enable you to securely and correctly connect the foam dispensing nozzle to your power wash system.
Before attempting to install the foam dispensing nozzle, it is crucial to turn off and unplug the pressure washer from its power source. This precautionary step ensures your safety during the setup process. Additionally, it is advisable to relieve any pressure in the system by triggering the gun trigger to release any remaining water or air. This step prevents any potential mishaps during attachment.
Next, carefully unscrew the existing nozzle or lance from the end of your pressure washer wand. The specific method may vary depending on the model of your pressure washer, but generally, using an adjustable wrench or pliers should suffice. Once the original nozzle or lance is removed, inspect the threads at the end of the wand for any debris or damage that may hinder a proper seal with the foam dispensing nozzle.

| Steps to Prepare Your Pressure Washer for Foam Cannon Attachment: |
|---|
| 1. Gather all necessary tools and components. |
| 2. Turn off and unplug the pressure washer. |
| 3. Release pressure in the system by triggering the gun trigger. |
| 4. Unscrew the existing nozzle or lance from the end of the wand. |
| 5. Inspect the threads for debris or damage. |
Once the threads are clean and undamaged, proceed to attach the foam dispensing nozzle to the end of the pressure washer wand. Ensure that the foam cannon is securely tightened, but be cautious not to overtighten, as this might cause damage to the threads or the foam dispensing nozzle itself.
With the foam dispensing nozzle successfully attached, you are now ready to use your pressure washer with a foam cannon for effective and convenient cleaning. Always refer to the manufacturer’s instructions for guidance on how to properly operate the foam cannon and adjust the foam concentration based on your specific cleaning requirements.
By following these preparatory steps, you can ensure a smooth and successful integration of the foam dispensing nozzle onto your pressure washer, allowing you to achieve superior cleaning results and effortlessly tackle various cleaning tasks.
Connecting the Foam Cannon to your Pressure Washer
When it comes to enhancing the foam-generating abilities of your pressure washer, connecting a foam cannon is a game-changer. In this section, I will guide you through the process of connecting the foam cannon to your pressure washer, step by step.
Gather the necessary equipment
Before you begin connecting the foam cannon, make sure you have all the required equipment at hand. This includes a foam cannon, a pressure washer, a foam cannon connector, a compatible hose, and an adjustable wrench.

Step-by-step instructions
- 1. Start by turning off your pressure washer and disconnecting it from the power source to ensure safety.
- 2. Locate the soap inlet on your pressure washer. It is typically marked by a symbol or labeled “soap”.
- 3. Unscrew the soap inlet cap using the adjustable wrench, taking care not to damage the threads.
- 4. Attach the foam cannon connector to the soap inlet, securing it tightly with the adjustable wrench.
- 5. Screw the foam cannon onto the foam cannon connector, ensuring it is firmly attached.
- 6. Connect the compatible hose to the foam cannon and tighten it securely.
- 7. Turn on the water supply to your pressure washer, ensuring a steady flow of water.
- 8. Adjust the foam cannon’s settings according to your desired foam thickness and spray pattern.
Once you have successfully connected the foam cannon to your pressure washer, you are ready to experience the wonders of dense and luxurious foam during your pressure washing tasks. Remember to always follow the manufacturer’s instructions and guidelines for optimal performance and safety.
Adjusting the Foam Generation Settings to Achieve Optimal Results
In this section, I will delve into the various settings available on your foam cannon to help you achieve the ideal foam generation for your specific needs. By adjusting these settings, you can optimize the foam coverage, thickness, and longevity, enhancing the overall effectiveness of your pressure washer and foam cannon combination.
Firstly, it is crucial to note that foam cannon settings may vary depending on the brand and model you are using. However, the basic principles I will outline here can be applied universally to most foam cannons.
| Setting | Description |
|---|---|
| Dilution Ratio | The dilution ratio determines the concentration of the foam solution. Adjusting this setting allows you to control the thickness and coverage of the foam generated. A higher ratio will result in thicker foam, while a lower ratio will create a lighter, more spreadable foam. |
| Water Flow | The water flow setting controls the amount of water mixed with the foam solution. By regulating the water flow, you can influence the density and foaminess of the generated foam. Increasing the water flow will produce a foam with larger bubbles, while decreasing it will result in a denser, more compact foam. |
| Spray Pattern | The spray pattern setting determines the shape and direction of the foam spray. This setting can be adjusted to achieve a wider or narrower spray, enabling you to cover a larger surface area or focus on specific spots. Experimenting with different spray patterns can help you optimize foam distribution and ensure even coverage. |
| Air Intake | The air intake setting controls the amount of air mixed with the foam solution. Increasing the air intake will enhance the foam’s thickness and fluffiness, while reducing it will create a denser foam with less air pockets. This setting is particularly useful when you want to generate a luscious, clinging foam that adheres well to the surface. |
Remember, achieving optimal foam generation requires some trial and error. Start with the default settings recommended by the foam cannon manufacturer, then make gradual adjustments based on your desired foam characteristics. Keep in mind that external factors such as temperature and humidity can also affect foam production, so it’s always a good idea to adapt your settings accordingly.
By understanding and fine-tuning these foam cannon settings, you will be able to unleash the full potential of your pressure washer and enjoy a satisfying foam generation experience.
Applying Foam to the Surface with the Foam Cannon
When it comes to effectively cleaning surfaces, using a foam cannon can be a game-changer. The foam cannon provides an efficient and thorough way to apply foam to various surfaces, ensuring maximum coverage and optimal cleaning results. In this section, I will share my experience and insights on how to properly use the foam cannon to apply foam to surfaces.
| Step 1: Preparation |
| Before using the foam cannon, it’s important to prepare the necessary materials and equipment. Make sure you have a compatible pressure washer and a foam cannon attachment. Additionally, ensure that you have a suitable foam soap or detergent that is specifically designed for use with foam cannons. Proper preparation will ensure a smooth and effective foam application process. |
| Step 2: Setting up the Foam Cannon |
| Next, it’s time to set up the foam cannon. Attach the foam cannon to the pressure washer using the provided connectors. Make sure the connections are secure to avoid any leaks during operation. Adjust the foam cannon’s settings, such as the foam thickness or spray pattern, according to your preference and the requirements of the surface you are cleaning. This customization will ensure optimal foam coverage and cleaning efficiency. |
| Step 3: Dilute the Foam Soap |
| Now, it’s time to prepare the foam soap solution. Dilute the foam soap according to the manufacturer’s instructions, using a suitable container or mixing device. It’s essential to follow the recommended dilution ratio to achieve the desired foam thickness and cleaning performance. Once the foam soap solution is ready, pour it into the foam cannon’s reservoir, ensuring not to overfill it. |
| Step 4: Applying Foam to the Surface |
| With everything set up and prepared, it’s time to apply foam to the surface using the foam cannon. Hold the foam cannon at a suitable distance from the surface, typically around 2 to 3 feet, and start spraying. Move the foam cannon in a controlled and systematic manner, covering the entire surface with a thick layer of foam. Ensure that the foam reaches all crevices and hard-to-reach areas for thorough cleaning. |
| Step 5: Allow Foam to Dwell |
| After applying the foam, it’s crucial to allow it to dwell on the surface for a recommended period. This dwell time will enable the foam to loosen dirt, grime, and contaminants, enhancing the cleaning effectiveness. Refer to the foam soap manufacturer’s instructions for the appropriate dwell time, as it may vary depending on the product and the surface being cleaned. Patience during this step will ensure optimal cleaning results. |
Using a foam cannon to apply foam to surfaces is a fantastic way to achieve thorough and efficient cleaning. By following the steps outlined in this section, you can ensure that you make the most out of your foam cannon and achieve exceptional cleaning results every time.
Cleaning and Maintaining Your Foam Cannon for Optimal Performance
When it comes to keeping your foam cannon in good shape and ensuring its longevity, proper cleaning and storage are crucial. Taking care of your foam cannon will not only ensure that it continues to perform at its best but also help you avoid any unwanted clogs or malfunctions down the line. In this section, I will share some tips and techniques for cleaning and storing your foam cannon effectively.
1. Thoroughly Rinse the Foam Cannon After Each Use
To maintain the performance and functionality of your foam cannon, it is essential to rinse it thoroughly after each use. Start by detaching the foam cannon from your pressure washer and removing any excess foam or detergent residue. Rinse the foam cannon with clean water, ensuring all the nozzles and internal components are free from any debris or build-up.
2. Use a Gentle Cleaning Solution
For a deeper clean, you can use a gentle cleaning solution to remove stubborn stains or residue from the foam cannon. Mix warm water with a mild soap or detergent and soak the foam cannon in the solution for a few minutes. Gently scrub the foam cannon with a soft brush or sponge to remove any remaining dirt or grime, paying extra attention to the nozzle and other hard-to-reach areas. Rinse thoroughly with clean water afterwards.
3. Inspect and Clean the Foam Cannon Nozzle Regularly
The nozzle of the foam cannon is a critical component that requires special attention. Regularly inspect the nozzle for any signs of clogs or blockages. If you notice any obstructions, use a pin or needle to remove the debris carefully. Be sure to clean the nozzle thoroughly to maintain the foam cannon’s optimal performance.
4. Properly Store Your Foam Cannon
When it comes to storing your foam cannon, it is important to keep it in a safe and clean environment. Make sure the foam cannon is completely dry before storing to prevent any moisture-induced damage. Store it in a cool, dry place, away from direct sunlight or extreme temperatures. Additionally, consider using a protective cover or bag to shield your foam cannon from dust and dirt.
By following these cleaning and maintenance practices, you can extend the lifespan of your foam cannon and enjoy its optimal performance for many years to come. Remember, a clean and well-maintained foam cannon will help you achieve the desired foam thickness and coverage, making your car washing or cleaning tasks more efficient and effective.


