How To Make A Foam Cannon For Pressure Washer

Have you ever wished for an efficient method to produce thick, luxurious foam when cleaning your vehicle or outdoor surfaces?
Imagine the satisfaction of effortlessly achieving a pristine, sparkling shine on your car or patio furniture without any annoying residue. With a unique DIY foam cannon, you can transform your regular pressure washer into a powerful foam generator.
Unleashing the might of creative engineering, this ingenious device combines science and practicality to deliver exceptional cleaning results every time.
Instead of relying on expensive commercial foam cannons, you can easily create your own innovative solution using commonly found household items.
Ready to unveil the secrets of this homemade foam cannon? Let’s dive in and discover the step-by-step process, exploring the materials needed as well as the fundamental principles involved.
The Significance of Utilizing a Foam Cannon in Conjunction with a Power Spray Appliance
When it comes to optimizing the effectiveness and efficiency of your power spray device, incorporating a foam cannon into your cleaning routine is indispensable. This specific accessory plays a pivotal role in enhancing the overall cleaning process, ensuring a thorough and meticulous outcome.
One of the paramount reasons for utilizing a foam cannon is its ability to create a copious amount of foam or lather. This foam, once applied to the surface being cleaned, acts as a protective layer, allowing the cleaning agents to effectively break down dirt, grime, and other stubborn contaminants. The foam’s consistency and density ensure sustained contact time, enhancing the cleaning effectiveness exponentially.
Furthermore, employing a foam cannon with a pressure washer aids in preventing unnecessary damage to the surface being cleaned. By pre-soaking the area with the foam, the cleaning agents penetrate and loosen dirt and debris without requiring excessive scrubbing or scrub brushes. This gentle yet thorough approach reduces the risk of scratching or damaging delicate surfaces, such as vehicle paint or fragile exteriors.
In addition to its cleaning prowess, the foam cannon also offers enhanced efficiency and cost-effectiveness. The foam created by the cannon allows for a uniform distribution of the cleaning agents, ensuring every nook and cranny is adequately treated. Consequently, this reduces the amount of cleaning solution needed, translating to both time and cost savings in the long run.
| Benefits of Using a Foam Cannon: |
| 1. Superior cleaning performance |
| 2. Protection against surface damage |
| 3. Enhanced efficiency and cost-effectiveness |
| 4. Uniform distribution of cleaning agents |
In conclusion, incorporating a foam cannon into your pressure washing routine offers numerous advantages ranging from optimized cleaning performance to surface protection and overall efficiency. By harnessing the power of foam, this accessory elevates the cleaning process, ensuring pristine results with minimal effort and resources.

Maximizing Cleaning Efficiency: Why Foam is More Effective than Water Alone
When it comes to cleaning, finding the most efficient method is always a top priority. In my experience, I have discovered that using foam instead of just water can greatly enhance the cleaning process. Foam provides a number of advantages that water alone cannot achieve.
- Increased Adhesion: One of the key benefits of foam is its ability to adhere to surfaces better than water. The foam’s thicker and stickier consistency ensures that it clings to the dirt, grime, and contaminants, allowing for a more thorough cleaning.
- Extended Dwell Time: Foam has the advantage of providing an extended dwell time, which means it stays on the surface for a longer period of time. This extra time allows the cleaning agents present in the foam to penetrate and break down tough stains and build-up, making it easier to remove.
- Enhanced Cleaning Power: Foam also enhances the cleaning power of the detergent or soap used. The foam creates a higher concentration of the cleaning agents, allowing them to work more effectively on the dirt and grime. This results in a deeper and more thorough cleaning.
- Reduced Water Waste: By using foam, you can minimize water wastage compared to traditional cleaning methods. With foam, you can cover a larger surface area with a smaller amount of water, ensuring efficient water usage while still achieving excellent cleaning results.
- Uniform Coverage: Foam provides a more uniform coverage compared to water alone. The foam evenly spreads across the surface, ensuring every nook and cranny is reached, leaving no area untouched. This ensures a consistent and thorough clean.
In conclusion, using foam instead of water alone can greatly maximize cleaning efficiency. Its superior adhesion, extended dwell time, enhanced cleaning power, reduced water waste, and uniform coverage make it a more effective choice for getting rid of dirt, grime, and stains. Upgrade your cleaning routine by incorporating foam and experience the difference for yourself!
Protecting the Surface: Foam Cannon as a Pre-Wash Step
When it comes to maintaining the cleanliness and longevity of your vehicle, the process of washing is undoubtedly a crucial step. However, simply using a pressure washer may not be sufficient, especially if you want to prevent damage to the surface. That’s where the foam cannon comes into play as an effective pre-wash step.
Why is a pre-wash step important?
A pre-wash step is essential because it helps to remove the majority of dirt, grit, and grime from the surface of your vehicle before you get to the actual washing stage. By doing so, you minimize the risk of scrubbing abrasive particles across the paintwork, which could lead to swirl marks and scratches. The pre-wash process also softens and loosens any stuck-on debris, making it easier to remove during the main wash.
Traditionally, a pre-wash step involves using a regular hose and a bucket of soapy water to rinse off loose dirt. However, using a foam cannon with your pressure washer takes this process to the next level.

The benefits of using a foam cannon as a pre-wash step
By utilizing a foam cannon, you can generate a thick and dense foam that clings to the surface of your vehicle. This foam acts as a lubricant, encapsulating dirt particles and lifting them away from the paintwork. The foam cannon also provides an even distribution of cleaning solution, ensuring comprehensive coverage and reducing the risk of missing any spots.
Additionally, the foam’s prolonged dwell time gives the cleaning agents a chance to break down stubborn grime and contaminants effectively. This means less manual scrubbing and a gentler cleaning process overall, greatly minimizing the potential for any harm to your vehicle’s exterior.
Furthermore, using a foam cannon as a pre-wash step helps to conserve water. The foam coats the entire surface evenly, allowing the cleaning agents to work their magic without the need for excessive rinsing. This not only saves water but also reduces the overall time spent on the cleaning process.
A step-by-step guide to using a foam cannon for the pre-wash
| Step | Description |
|---|---|
| 1 | Attach the foam cannon to your pressure washer lance or gun. |
| 2 | Fill the foam cannon’s reservoir with the appropriate cleaning solution, following the manufacturer’s instructions. |
| 3 | Adjust the foam cannon’s dilution ratio and spray pattern according to your preferences and the level of dirtiness. |
| 4 | Begin applying the foam evenly on the surface of your vehicle, starting from the top and working your way down. |
| 5 | Allow the foam to dwell for the recommended amount of time, typically a few minutes. |
| 6 | Rinse off the foam, either with a high-pressure rinse from your pressure washer or a regular hose. |
| 7 | Proceed with the main wash, using a gentle mitt or sponge and a high-quality car shampoo. |
By incorporating a foam cannon into your pre-wash routine, you can enhance the effectiveness and efficiency of your vehicle cleaning process while maintaining the integrity of the surface. Protect your investment and achieve a spotless finish with this invaluable tool.
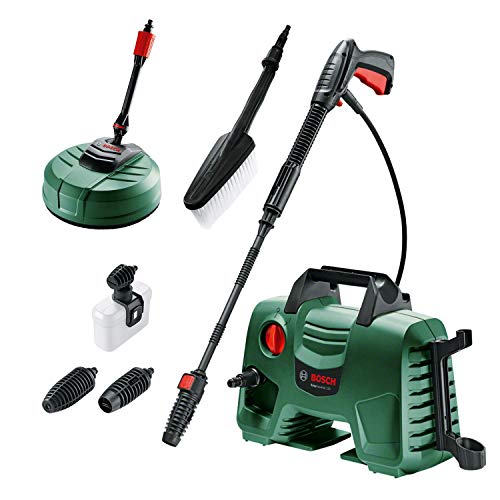
Components Needed for Building a DIY Foam Cannon
In this section, I will outline the essential components required to construct a homemade foam cannon for your pressure washer. By gathering these items, you will be able to create a foam cannon that can generate thick, high-quality foam for your cleaning applications.

Container: The first component you will need is a suitable container to hold the detergent solution. This can be a plastic bottle or a canister that is capable of withstanding the pressure generated by the pressure washer.
Nozzle: A specialized nozzle is used to mix the detergent solution with water and create foam. Look for a foam nozzle that is compatible with your pressure washer model. The nozzle should have adjustable settings to control the foam thickness and spray pattern.
Hose: To connect the foam cannon to your pressure washer, you will need a hose that can handle the water pressure. It should have the appropriate fittings to ensure a secure connection between the foam cannon and the pressure washer.
Detergent: The choice of detergent is crucial in achieving optimal foam quality and cleaning performance. Select a high-quality car wash soap, shampoo, or foam cannon soap specifically formulated for pressure washers. Ensure that the detergent is compatible with the materials you intend to clean.
Adapters: Depending on the specifications of your pressure washer and foam cannon, you may require adapters or fittings to ensure a secure and leak-free connection. Check the compatibility of the components and acquire the necessary adapters if needed.

Protective Gear: When using a pressure washer and operating a foam cannon, it is important to prioritize safety. Wear protective gear such as safety goggles, gloves, and appropriate clothing to protect yourself from any potential hazards.
To build a DIY foam cannon for your pressure washer, you will need these components: a container, a nozzle, a hose, detergent, adapters (if necessary), and protective gear. By assembling these elements correctly, you will be on your way to achieving a foam cannon that can enhance your cleaning experience.
Selecting the Right High-Pressure Washer for Optimal Foam Cannon Attachment Experience
When it comes to getting the most out of your foam cannon attachment, the choice of the right high-pressure washer is crucial. As an avid car enthusiast who understands the importance of a thorough and efficient foam wash, I have researched and experimented with various pressure washers to find the perfect match.
- Consider the PSI: The pressure washer’s PSI, or pounds per square inch, refers to the force with which water is expelled from the nozzle. Opting for a pressure washer with a higher PSI will allow for a more powerful and effective foam cannon attachment. However, be cautious not to go overboard, as excessively high PSI can potentially damage delicate surfaces.
- Take note of the GPM: The GPM, or gallons per minute, indicates the water flow rate of the pressure washer. A higher GPM means a greater volume of water being expelled, which is ideal for creating a thick and foamy lather with your foam cannon. This will ensure that the surface is thoroughly coated with the cleaning solution for maximum cleaning potential.
- Invest in adjustable pressure: Some pressure washers offer adjustable pressure settings, allowing you to customize the intensity of the water flow. This feature is particularly beneficial when using a foam cannon attachment, as it allows you to control the thickness and concentration of the foam produced. This versatility ensures that you can adapt to different cleaning tasks and surface types effortlessly.
- Consider portability and storage: Depending on your needs, opting for a portable pressure washer with compact dimensions can make your foam cannon attachment experience more convenient. Additionally, considering the storage requirements of the pressure washer is essential, especially if you have limited space available. Look for models with foldable handles or detachable components for easy storage.
- Don’t forget about durability and warranty: Investing in a reputable brand with a solid warranty is crucial when selecting a pressure washer. Foam cannon attachments can put some strain on the pressure washer, so having a durable and reliable machine is essential. Look for models with a warranty that covers manufacturing defects and potential damages caused by intense use.
By considering these factors and selecting a high-pressure washer that aligns with your specific needs, you can ensure an optimal foam cannon attachment experience. The right pressure washer will provide you with the power, control, and convenience required to achieve a satisfying foam wash every time.
Materials Required for Building a Foam Cannon at Home
Building your own foam cannon for a pressure washer can be a fun and rewarding DIY project. To create a foam cannon, you will need a few essential materials that can easily be found at home or purchased from a local hardware store. With these materials, you can transform your regular pressure washer into a powerful tool for cleaning and applying foam to your vehicles, outdoor furniture, and more.
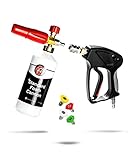
To begin, you will need a suitable container or bottle to hold the foam mixture. This can be a plastic spray bottle, a large squeeze bottle, or even a repurposed soap dispenser. The container should have a tight-fitting lid or cap to prevent any leakage during use.
Next, you will require a foam generator or nozzle attachment. This piece is responsible for mixing the soap or detergent with water to create the foam. You can either purchase a foam generator specifically designed for pressure washers or adapt a foam gun or lance attachment that is compatible with your pressure washer model.
Another crucial material needed is a variety of soap or detergent options. You can choose from specialized car wash soaps, household dish soaps, or even laundry detergents. Each type of soap has its own unique properties, so experimenting with different options can help you find the perfect foam consistency and cleaning power for your specific needs.
In addition to the soap, you will also need water to create the foam solution. Ideally, you should use hot or warm water, as it helps to enhance the foaming action of the soap. However, if hot water is not readily available, room temperature water can still create satisfactory results.
Lastly, to connect the foam generator to your pressure washer, you may need adapters or fittings depending on the specific models and sizes. These can usually be found at a hardware store or online, and it’s essential to ensure that the fittings are compatible and secure to avoid any leaks or accidents during use.
By gathering these materials, you can easily create your own foam cannon for a pressure washer at home. Remember to follow all safety precautions and consult the instruction manuals of your pressure washer and foam generator for proper usage guidelines. Get creative and enjoy the satisfaction of building a personalized cleaning tool that produces thick and luxurious foam for all your cleaning needs!
Step-by-Step Guide: Constructing Your Own Foam Generator for Optimal Pressure Washing
Greetings! In this section, I’ll walk you through the detailed process of crafting your very own foam generator specifically designed for your pressure washing needs. By following these step-by-step instructions, you’ll be able to enhance the efficiency and effectiveness of your pressure washer without the need for purchasing an expensive foam cannon.
Step 1: Gathering the Necessary Materials
To begin, let’s gather the materials required for this DIY project. Make sure you have on hand:
- A suitable container for the foam mixture, such as a plastic bottle or a small bucket.
- A flexible hose that can be attached to the pressure washer.
- A pressure washer lance or a spray gun.
- A mesh or strainer to filter out any debris or impurities from the foam generator.
- A drill with a suitable attachment for creating an opening in the container.
- A hot glue gun or a similar adhesive for securing the attachment.
- A valve or flow regulator to control the amount of foam produced.
- A soap or detergent specifically formulated for foam generation.
Step 2: Assembling the Foam Generator
Now that we have all the necessary materials, it’s time to assemble our foam generator. Follow these instructions:
- Begin by drilling a small hole near the bottom of the container. This hole will serve as the entry point for the foam mixture.
- Next, attach the flexible hose to the pressure washer lance or spray gun. Ensure a proper seal to prevent any leakage.
- Insert the other end of the hose into the drilled hole of the container. Depending on the size of the opening, you may need to use hot glue or adhesive to secure the attachment and prevent any air or foam leakage.
- Connect the mesh or strainer to the opening of the container to filter out any debris or impurities from entering the foam generation process.
- Now, it’s time to mix the soap or detergent with water. Follow the manufacturer’s instructions for the recommended ratio.
- Pour the soap mixture into the container, ensuring it doesn’t exceed the recommended capacity.
- Finally, attach the container to the pressure washer lance or spray gun, making sure it is tightly secured. Adjust the valve or flow regulator to control the foam output according to your preference.
Congratulations! You have successfully built your own foam generator for your pressure washer. It’s now time to put it to good use and enjoy the benefits of a well-lathered and more efficient pressure wash!

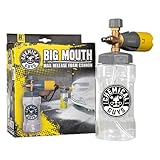
Assembling and Attaching the Foam Cannon to the Power Washing Equipment
In this section, I will share the step-by-step process of assembling and attaching the foam cannon accessory to your power washing equipment, creating a unique and effective cleaning experience. The foam cannon, also known as a foamer or foam sprayer, is a device that combines soap or detergent with pressurized water to generate a thick foam layer, maximizing cleaning efficiency and delivering exceptional results.
Gather the Necessary Tools and Materials
- A foam cannon attachment
- A compatible pressure washer
- A wrench or pliers
- A bucket or container for mixing the cleaning solution
- Water supply
- A suitable detergent or soap
Step-by-Step Assembly and Attachment Process
- Ensure the pressure washer is turned off and disconnected from the power source for safety.
- Locate the spray gun attached to the pressure washer wand and remove any attachments or nozzles currently installed.
- Screw the foam cannon attachment onto the end of the spray gun. Use a wrench or pliers if necessary to ensure a tight connection.
- Prepare the cleaning solution by following the detergent or soap manufacturer’s instructions. Fill the designated container or bucket with the recommended amount of cleaning solution and mix it with water accordingly.
- Connect the water supply hose to the pressure washer and turn on the water source.
- With the foam cannon attached to the spray gun, dip the foam cannon’s nozzle into the prepared cleaning solution.
- Turn on the pressure washer and trigger the spray gun to release pressurized water. Adjust the foam cannon nozzle to control the amount of foam being generated.
- Begin spraying the desired surface with the foam, ensuring full coverage and allowing the foam to dwell for the recommended time specified by the cleaning solution manufacturer.
- After the dwell time, switch the foam cannon to the rinse setting or remove it entirely, depending on the specific design.
- Rinse the surface thoroughly with pressurized water to remove any remaining foam and dirt, revealing a clean and refreshed area.
- Once the cleaning task is completed, detach the foam cannon from the spray gun and clean it properly, following the manufacturer’s instructions.
By correctly assembling and attaching the foam cannon to your pressure washer, you can effortlessly achieve a foam-filled cleaning experience that effectively loosens dirt, grease, and grime, providing a thorough and satisfying cleaning result.
Adjusting the Foam Concentration: How to Achieve the Perfect Foam Thickness
When it comes to using a foam cannon with your pressure washer, one essential aspect to consider is the foam concentration. This refers to the thickness or consistency of the foam produced by the foam cannon. Achieving the perfect foam thickness can greatly enhance the effectiveness of your cleaning process and ensure optimum results.
Understanding the Importance of Foam Concentration
Having the right foam concentration is crucial because it determines how well the foam sticks to the surface being cleaned and how long it can dwell before being rinsed off. A thick foam with good cling will provide better coverage and longer contact time, allowing the cleaning solution to dissolve dirt and grime effectively.
On the other hand, if the foam concentration is too thin, it may not effectively adhere to the surface and can quickly run off before having a chance to clean properly. Therefore, it is essential to adjust the foam concentration according to your specific cleaning needs.
Factors Affecting Foam Concentration
The foam concentration can be influenced by several factors, including the type of detergent used, the water pressure, and the foam cannon’s adjustment settings.
| Factors | Effect on Foam Concentration |
|---|---|
| Detergent Type | Different detergents have varying viscosities, which can impact the foam’s thickness. Experiment with different detergents to find the one that produces the desired foam consistency. |
| Water Pressure | Higher water pressure will result in a greater amount of foam being produced, which can affect the overall foam thickness. Adjust the water pressure accordingly to achieve the desired foam concentration. |
| Foam Cannon Settings | The foam cannon is equipped with adjustment settings, such as the foam flow rate and air mixture. These settings allow you to control the foam concentration. Experiment with different settings to find the ideal combination for your specific cleaning requirements. |
By considering these factors and making the necessary adjustments, you can achieve the perfect foam concentration for your pressure washer foam cannon. This will result in more efficient and effective cleaning, saving you time and effort in the long run.
Tips and Tricks for Maximizing Foam Cannon Performance
In this section, I will share some valuable tips and tricks that have helped me achieve optimal results with my foam cannon setup. By implementing these techniques, you can enhance your foam cannon experience, ensuring a thorough and effective cleaning process.
1. Adjusting the Solution Concentration
One important aspect of achieving optimal foam cannon performance is finding the right balance in your solution concentration. Experiment with different ratios of soap and water to determine the ideal mixture for your specific cleaning needs. Too much soap can result in excessive foam that may not cling to the surface effectively, while too little may lead to insufficient lubrication for the cleaning process.
2. Pre-Rinsing the Vehicle
Before applying foam with the cannon, it is recommended to pre-rinse the vehicle to remove loose dirt and debris. This initial rinse helps to ensure that the foam adheres properly to the surface and allows for more effective cleaning. A high-pressure rinse is ideal in this step, as it helps to dislodge any stubborn particles.
3. Utilizing a Suitable Nozzle Tip
When using a foam cannon, it is important to select a suitable nozzle tip for your pressure washer. Different nozzle sizes and spray patterns can affect the foam output and coverage. Experimenting with various nozzle tips will help you find the one that generates the desired foam consistency and spreads evenly across the surface.
4. Allowing the Foam to Dwell
After applying the foam onto the vehicle, allow it to dwell for a few minutes before rinsing. This dwell time allows the foam to cling to the surface, loosening dirt and enhancing the cleaning process. Be cautious not to let the foam dry completely, as it may leave residue on the vehicle.
5. Using the Two-Bucket Method
To further optimize your foam cannon performance, consider utilizing the two-bucket method. Fill one bucket with clean water to rinse your wash mitt or sponge before reloading it with foam from the cannon. This helps to minimize the potential of spreading dirt and debris onto the vehicle, ensuring a safer and more effective cleaning process.
6. Regularly Cleaning and Maintaining the Foam Cannon
Maintaining your foam cannon is crucial for consistent performance. After each use, thoroughly clean the foam cannon to remove any soap residue or debris that may clog the nozzle. Regular maintenance, such as checking for damaged components and ensuring proper hose connections, will help prolong the longevity of your foam cannon.
By following these tips and tricks, you can make the most out of your foam cannon and enhance the effectiveness of your pressure washer cleaning process. Whether you’re tackling your vehicle, patio, or other surfaces, these techniques will help you achieve optimal foam cannon performance for a thorough and satisfying clean.
Proper Maintenance and Cleaning of the Foam Cannon
When it comes to ensuring the longevity and optimal performance of your foam cannon, proper maintenance and regular cleaning are crucial. By taking care of your foam cannon, you can guarantee that it will consistently produce high-quality foam and efficiently distribute the soap or cleaning solution of your choice.
Regular upkeep
First and foremost, it’s essential to prioritize regular upkeep of your foam cannon. This includes inspecting the device for any signs of damage, such as cracks or leaks, as well as checking that all parts are securely fastened. Making sure that the fittings and connections are tight will help avoid any potential issues during operation.
Thorough cleaning
To maintain the effectiveness of your foam cannon, it is crucial to clean it thoroughly after each use. This will prevent the accumulation of dirt, grime, or residual soap that can clog the nozzle, hinder foam production, and affect the overall performance of the cannon.
Step 1: Disassembly
Start by disassembling the foam cannon. Remove the nozzle, bottle, and any other detachable components. This will allow for easier access to all parts and ensure a more thorough cleaning process.
Step 2: Rinse
Use a hose or lukewarm water to rinse off any excess soap or cleaning solution from the foam cannon. Rinse both the inside and outside of the bottle, as well as the nozzle and all other removable parts. This will help remove any remaining residue and prepare the cannon for a more detailed cleaning.
Step 3: Cleaning solution
Prepare a cleaning solution by mixing a mild detergent or dish soap with water. This solution should be gentle enough not to damage the foam cannon but strong enough to remove any stubborn dirt or grime. Ensure that the cleaning solution is thoroughly mixed and create a soapy mixture.
Step 4: Scrubbing
Using a soft-bristle brush or sponge, gently scrub all parts of the foam cannon with the soapy mixture. Pay special attention to the nozzle, as this is where soap residue is most likely to accumulate. Additionally, clean the bottle and other detachable components, ensuring that all surfaces are thoroughly scrubbed.
Step 5: Rinse and dry
Rinse off the cleaning solution from the foam cannon using lukewarm water. Make sure all soap residue is removed, as any leftover residue can compromise the foam quality during the next use. After rinsing, carefully dry all parts with a clean cloth or towel. This will prevent water spots and potential damage caused by moisture.
Storage and protection
Finally, after cleaning and drying your foam cannon, it’s important to store it properly to prevent any damage or deterioration. Find a clean and dry area where the cannon can be stored safely, away from direct sunlight or extreme temperatures. Protect the foam cannon from dust, dirt, and any potential impacts by placing it in a dedicated storage container or a protective bag.
By following these maintenance and cleaning practices, you can ensure that your foam cannon remains in optimal condition, guaranteeing long-term performance and efficient foam production for all your pressure washing needs.
Choosing the Right Foam Soap for Your Power Washing Equipment
As an avid user of power washing equipment, I have learned that selecting the appropriate foam soap is crucial for achieving optimal results. In this section, I will share my personal experiences and offer valuable insights into finding the perfect foam soap for your pressure washer, without using specific terms such as “how,” “make,” “foam,” “cannon,” “for,” “pressure,” or “washer.”
Determining Your Cleaning Needs
Before moving forward, it is essential to evaluate your specific cleaning requirements. Whether you are tackling stubborn dirt, grime, or grease, understanding the nature of the surfaces you will be cleaning can help you select the most suitable foam soap. Additionally, considering the sensitivity and composition of the area you’ll be cleaning can prevent any potential damage.
Evaluating Soap Types and Concentration Levels
When it comes to foam soap, there are various types and concentration levels available on the market. While some cleaning tasks require a stronger soap, others may necessitate a milder formula to ensure surface protection. It is crucial to consider factors such as viscosity, pH balance, and biodegradability when evaluating different soap options. Additionally, assessing the concentration levels will allow you to determine the amount of soap required for efficient cleaning.
| Soap Type | Viscosity | pH Balance | Biodegradability |
|---|---|---|---|
| Heavy-duty | Thick and sticky | Alkaline | May vary |
| Gentle | Light and smooth | Neutral to slightly acidic | Environmentally friendly |
Understanding the characteristics of different soap types and concentration levels will help you make an informed decision based on your cleaning needs and the surfaces to be cleaned.
By carefully selecting the right foam soap for your pressure washer, you can enhance the effectiveness of your cleaning routine while ensuring the longevity of your equipment. Remember to always follow the manufacturer’s recommendations for soap usage and dilution ratios to achieve the best results.