How To Instal Snowfoam Bottle Onto Rac Pressure Washer

Greetings fellow enthusiasts! Today, I would like to share with you my personal experience and expertise on effortlessly connecting the foam dispenser contraption to a powerful sprayer. This ingenious device, which enables you to achieve frothy, luxurious foam, is a game-changer in the world of automotive detailing.
Imagine indulging your vehicle with a gentle, yet thorough cleansing experience that leaves it gleaming like a jewel. With the use of this foam dispenser, you can effortlessly coat your cherished ride with a rich layer of soapy suds, ensuring a deep and effective cleaning process. No longer will you have to rely on mundane and outdated methods of achieving a pristinely washed vehicle.
The process of successfully attaching the foam dispenser to a powerful sprayer might seem overwhelming at first, but worry not! By following a few simple steps, you will become a master of this seemingly complex art in no time. Allow me to guide you through each intricate detail, providing valuable tips and tricks along the way.
Understanding the Significance of Snowfoam in Car Cleaning
In this section, I will share my insights on the importance of using snowfoam in the process of cleaning automobiles. Snowfoam plays a crucial role in ensuring a thorough and effective cleaning, enhancing the overall appearance and longevity of your vehicle.
The Benefits of Snowfoam
1. Exceptional Cleaning Power: Snowfoam is specifically formulated to remove dirt, grime, and other contaminants that accumulate on the surface of your car. Its powerful foam traps and encapsulates particles, allowing for an effortless and efficient cleaning process.
2. Safe for Vehicle Paint: Unlike traditional cleaning methods that involve rubbing and scrubbing, snowfoam gently cleans the surface of your car without causing any damage or scratches. This ensures the preservation of your vehicle’s paint and glossy finish.
Applying Snowfoam
When applying snowfoam to your car, it is important to follow these steps for optimal results:
- Preparation: Prepare a mixture of snowfoam solution and water according to the manufacturer’s instructions.
- Pre-Rinse: Use a pressure washer or hose to pre-rinse the vehicle, removing any loose dirt and debris.
- Apply Snowfoam: Using a snowfoam lance, evenly distribute the foam over the entire surface of the car, ensuring thorough coverage.
- Dwell Time: Allow the snowfoam to dwell on the surface for a few minutes, allowing it to work its magic and loosen stubborn grime.
- Rinse: Finally, rinse off the foam using a pressure washer or hose, revealing a clean and refreshed vehicle.
By understanding the importance of snowfoam in car cleaning and following the proper application techniques, you can achieve outstanding results and maintain the pristine appearance of your car.
Choosing the Right Foam Cannon
When it comes to enhancing your car washing routine, a high-quality foam cannon can make a world of difference. However, with so many options available in the market, it’s important to choose the right snowfoam bottle for your specific needs. In this section, I will share some valuable insights on selecting the perfect foam cannon that will help you achieve the best results.

Evaluating the Foam Cannon Capacity
One of the key factors to consider when choosing a foam cannon is its capacity. The capacity of the snowfoam bottle determines the amount of foam it can generate for a single car wash. Opting for a larger capacity can be beneficial if you have multiple vehicles or if you prefer a more intensive foam application. On the other hand, a smaller capacity may be suitable if you primarily wash a single vehicle or prefer a lighter foam coverage.
Examining Foam Compatibility and Dilution Ratios
Another essential aspect to look into is the foam cannon’s compatibility with different types of car wash soaps and detergents. Some foam cannons work best with specific brands, while others have a broader compatibility range. Additionally, it’s crucial to consider the dilution ratios recommended by the manufacturer. Dilution ratios determine the foam thickness and can vary depending on the snowfoam bottle. It’s important to choose a foam cannon that offers the versatility to achieve the desired foam consistency.
Remember: The foam cannon you choose ultimately comes down to personal preference and specific requirements. By considering the capacity, foam compatibility, and dilution ratios, you can make an informed decision that will bring you optimal results and satisfaction during your car washing routine.
Tips for Selecting a Compatible Bottle for Your Rac Pressure Washer
When it comes to using a Rac pressure washer, finding the right bottle for your needs is an important aspect to consider. The bottle you choose will determine the efficiency and effectiveness of your snowfoam application. In this section, I will share some valuable tips on how to select a compatible bottle for your Rac pressure washer.
- Consider the size: The size of the bottle plays a crucial role in determining the amount of snowfoam solution you can accommodate. You should consider the size of your pressure washer and the amount of foam you intend to use. Opt for a bottle that is large enough to hold sufficient snowfoam solution but is also lightweight and easily manageable.
- Check the compatibility: It is essential to select a bottle that is compatible with your Rac pressure washer. Different pressure washer models may have different nozzle and connection types, so it is important to ensure that your chosen bottle can securely and seamlessly attach to your pressure washer. Checking for compatibility will help avoid any leaks or inefficient foam generation.
- Assess the durability: The durability of the bottle is another crucial factor to consider. The bottle should be made of high-quality materials that can withstand the pressure and force of the pressure washer. A sturdy and durable bottle will ensure that you can use it for a prolonged period without the risk of it breaking or getting damaged.
- Evaluate the design: The design of the bottle can greatly impact its usability. Look for a bottle with a comfortable grip and an ergonomic design that allows for easy handling and maneuvering. Additionally, a bottle with clear markings for measurement and level indications will help you accurately measure and mix your snowfoam solution.
- Consider additional features: Some bottles come with additional features that can enhance your snowfoam application experience. For example, some bottles have adjustable foam regulators or built-in filters to prevent clogging. Assessing these additional features can help you choose a bottle that best suits your specific needs and preferences.
By considering these tips, you can select a compatible bottle for your Rac pressure washer that will ensure optimum snowfoam application and enhance your overall cleaning experience.

Preparing the Equipment
Before starting the installation process, it is essential to ensure that the pressure washer is properly prepared. This involves checking and assembling all the necessary components, as well as inspecting the machine for any potential damage.
Firstly, make sure to gather all the required tools and materials for the installation process. This may include a wrench or pliers for tightening connections, as well as the snowfoam bottle and its corresponding attachment parts.
Next, carefully examine the pressure washer to ensure it is in good working condition. Check for any leaks, loose fittings, or damaged hoses. If any issues are detected, it is important to address them before proceeding with the installation.
Once the pressure washer has been inspected and deemed suitable for use, it is time to prepare the necessary attachments. This typically involves connecting the appropriate fittings and adapters required to secure the snowfoam bottle onto the pressure washer’s lance or wand.
| Tools and Materials | Pressure Washer Inspection | Preparing Attachments |
|---|---|---|
| – Wrench or pliers – Snowfoam bottle – Attachment parts | – Check for leaks – Inspect fittings and hoses | – Connect fittings and adapters |
By properly preparing the pressure washer and its attachments, you can ensure a smooth and successful installation of the snowfoam bottle. This will help optimize your pressure washer’s performance and achieve effective foam application during cleaning tasks.

Setting Up Your Pressure Washer for Snowfoam Attachment
In this section, I will guide you through the process of preparing your pressure washer for the installation of a snowfoam attachment. By following these steps, you will be able to easily attach the snowfoam bottle onto your Rac pressure washer and enjoy the benefits of foam cleaning.
- Ensure that your Rac pressure washer is turned off and disconnected from its power source.
- Inspect the nozzle and fittings of your pressure washer to ensure they are clean and free from any debris or blockages. It is important to have a clear and unobstructed pathway for the snowfoam mixture to flow through.
- Locate the attachment point on your pressure washer where the snowfoam bottle will be connected. This is typically found at the end of the lance or wand. It may have a threaded connection or a quick-release mechanism.
- If your pressure washer has a threaded connection, screw the snowfoam bottle onto the attachment point in a clockwise direction. Ensure that it is tightened securely to prevent any leaks during operation.
- If your pressure washer has a quick-release mechanism, align the snowfoam bottle with the attachment point and push it firmly until you hear a click, indicating that it is securely attached.
- Once the snowfoam bottle is attached, connect the lance or wand of your pressure washer to the spray gun and secure it in place.
- Now, it’s time to prepare the snowfoam mixture. Follow the instructions provided with your snowfoam product to mix the appropriate amount of foam concentrate with water. Use a bucket or container to mix the solution thoroughly.
- After the snowfoam mixture is ready, connect the foam lance to the snowfoam bottle by attaching it to the lance or wand of your pressure washer.
- With everything properly set up, turn on your Rac pressure washer and test the snowfoam attachment by squeezing the spray gun trigger. You should see a thick and foamy layer being dispensed onto the desired surface.
- Adjust the flow rate of the snowfoam mixture using the controls on your pressure washer to achieve the desired level of foam thickness.
By following these simple steps, you can easily set up your Rac pressure washer for the snowfoam attachment, allowing you to efficiently and effectively clean various surfaces with a layer of foam. Enjoy the benefits of snowfoaming and keep your belongings looking pristine!
Detaching the Existing Attachment
When it comes to modifying and upgrading your pressure washer equipment, one essential step is detaching the existing attachment. In this section, I will guide you through the process of removing the current attachment from your pressure washer, allowing you to prepare for the installation of the Snowfoam bottle onto the RAC pressure washer.
Step 1: Safety First
Before starting any work, it is crucial to prioritize safety. Take the necessary precautions by wearing protective gloves and safety goggles. Ensure that the pressure washer is turned off and unplugged from the power source to avoid any accidents or injury.
Step 2: Identify the Existing Attachment
Begin by identifying the current attachment on your pressure washer that needs to be removed. This can be the foam cannon, cleaning lance, or any other accessory that is currently connected to the pressure washer’s wand or lance.

Note: It is important to familiarize yourself with the specific terminology used by the manufacturer of your pressure washer to refer to the attachment you are detaching. Make sure you understand the proper names for the components involved.
Once you have identified the attachment to be detached, take a moment to examine how it is connected to the pressure washer. Look for any locking mechanisms, fasteners, or release buttons that may be securing the attachment in place.
Step 3: Disconnecting the Existing Attachment
Based on the connection method you identified in the previous step, proceed to detach the existing attachment. This could involve unscrewing, sliding, or releasing any locking mechanisms. Follow the manufacturer’s instructions, if available, to ensure a proper and safe removal process.
When disconnecting the attachment, use gentle and controlled force to avoid any unnecessary damage to the attachment or pressure washer. If you encounter any resistance or difficulty during this process, double-check for any additional securing mechanisms that may need to be released.
Remember: Each pressure washer model may have slightly different attachment mechanisms, so it is crucial to refer to your pressure washer’s user manual if you encounter any confusion or if the detachment process is not straightforward.

Once the existing attachment is successfully detached, set it aside in a safe place or store it according to the manufacturer’s recommendations.
Now that you have successfully detached the existing attachment from your pressure washer, you can proceed to the next step of installing the Snowfoam bottle onto the RAC pressure washer.
Removing the Nozzle or Lance from the Pressure Washer
In this section, I will explain the process of detaching the nozzle or lance from your pressure washer. This step is necessary when you need to replace the nozzle or lance, or when you want to clean and maintain them.
To begin, ensure that the pressure washer is turned off and disconnected from the power source. Safety should always be the first priority when working with any machinery.
Next, locate the nozzle or lance attachment point on the pressure washer. This is usually a threaded connection or a quick-connect fitting, depending on the model of your pressure washer.

If you have a threaded connection, you will need to twist the nozzle or lance counterclockwise to loosen it. This may require some force, so be sure to grip it firmly. Once loose, continue to unscrew it until it is completely detached from the pressure washer.
For quick-connect fittings, there is usually a release mechanism that needs to be engaged before you can remove the nozzle or lance. This may involve pushing or sliding a mechanism to release the connection. Once released, simply pull the nozzle or lance away from the pressure washer.
After removing the nozzle or lance, it is a good idea to inspect it for any damage or wear. If necessary, clean the attachment point on the pressure washer to ensure a secure connection when reattaching the nozzle or lance.
When you are ready to reattach the nozzle or lance, simply reverse the steps above. For threaded connections, align the threads and twist clockwise until it is securely tightened. For quick-connect fittings, line up the connection points and push or slide them together until they click into place.
Remember to always consult the user manual for your specific pressure washer model for any additional instructions or precautions.

Disclaimer: This guide provides general instructions on removing the nozzle or lance from a pressure washer. Always follow the manufacturer’s guidelines and use caution when working with equipment to prevent accidents or damage.
Installing the Foam Dispenser Attachment
Welcome to this step-by-step guide on installing the foam dispenser attachment onto your pressure washer. In this section, I will walk you through the installation process, providing detailed instructions and tips for a successful setup.
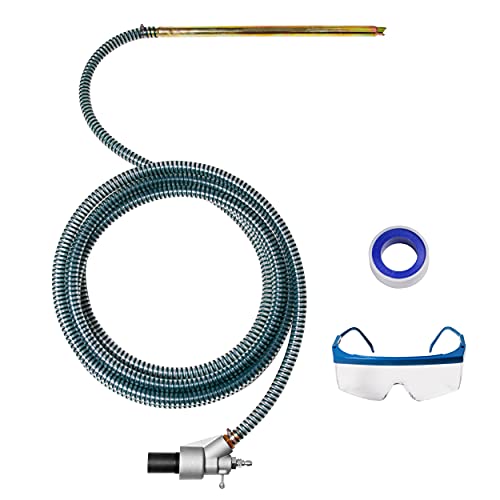
Step 1: Gather the required tools:
- A foam dispenser attachment
- A compatible coupling
- An adjustable wrench
- Teflon tape
Step 2: Turn off your pressure washer:
Before proceeding with the installation, it is important to ensure that your pressure washer is turned off and disconnected from its power source. This will reduce the risk of any accidents or injuries during the installation process.
Step 3: Locate the soap inlet:
Identify the soap inlet on your pressure washer. This is typically located near the water inlet. Take note of its size and shape as it will determine the type of coupling you need for the foam dispenser attachment.
Step 4: Prepare the coupling:
If the foam dispenser attachment did not come with a coupling that matches your pressure washer’s soap inlet, you will need to use Teflon tape to create a secure connection. Wrap the Teflon tape around the threading of the coupling to ensure a tight fit once installed.
Step 5: Attach the foam dispenser:
Screw the coupling onto the soap inlet of your pressure washer. Make sure to tighten it securely using an adjustable wrench. The coupling should be snugly fitted, preventing any leaks during operation.
Step 6: Test for leaks:
Turn on your pressure washer and check for any leaks around the foam dispenser attachment. If you notice any leaks, try tightening the coupling further or adding more Teflon tape to create a better seal.
Step 7: Adjust the foam concentration:
Depending on your desired level of foaminess, you can adjust the foam concentration by manipulating the dial or nozzle on the foam dispenser attachment. Test different settings to achieve the desired foam thickness for your cleaning tasks.
Step 8: Begin foaming:
Once you have completed the installation and adjusted the foam concentration, you are ready to start using your pressure washer with the new foam dispenser attachment. Apply the foam to the desired surface and let it dwell for the recommended amount of time before rinsing it off.
Congratulations! You have successfully installed the foam dispenser attachment onto your pressure washer. Enjoy the benefits of enhanced cleaning efficiency and foam coverage for your next cleaning projects.
Attaching the Foam Applicator onto a High-Pressure Cleaner: Step-by-Step Guide
When it comes to washing my car, I know how important it is to achieve a thorough, yet gentle, clean. That’s why I decided to invest in a snowfoam bottle, which can be easily attached to my Rac pressure washer. In this step-by-step guide, I will walk you through the process of attaching the foam applicator to your high-pressure cleaner, ensuring a foam-rich cleaning experience without any hassle.
Gather the Required Materials
Before we begin, let’s make sure you have all the necessary materials for this installation. You will need:
| 1. Screwdriver | – | To help remove any existing attachments on your pressure washer. |
| 2. Foam applicator | – | Make sure it is compatible with your Rac pressure washer. |
| 3. Attachments | – | Check if your pressure washer requires any additional adapters or fittings to connect the foam bottle properly. |
Installing the Foam Applicator
Now that we have everything we need, it’s time to start attaching the foam applicator to your Rac pressure washer. Follow these simple steps:
- Begin by turning off your pressure washer and disconnecting it from any power sources.
- Locate the spray gun or lance on your pressure washer. This is where the foam applicator will be attached.
- Using a screwdriver, remove any existing attachments from the spray gun or lance.
- Take the foam applicator and check if it has a compatible fitting for your pressure washer. If not, use any required adapters or fittings as instructed by the manufacturer.
- Attach the foam applicator to the spray gun or lance, ensuring a secure and tight connection.
- Once attached, double-check all connections to ensure they are properly sealed and there are no leaks.
Now that you have successfully attached the foam applicator to your Rac pressure washer, you are ready to enjoy the foam-rich cleaning experience it offers. Remember to always follow the manufacturer’s instructions for using the foam applicator, as well as any safety precautions mentioned.
Adjusting the Foam Thickness
In this section, I will discuss the process of adjusting the thickness of the foam produced by the snowfoam bottle attached to your RAC pressure washer. Achieving the desired thickness of foam is essential for effective cleaning and achieving the best results. Let’s explore some techniques and tips for adjusting the foam thickness.
1. Regulating Water Flow
One of the key factors that influence the thickness of the foam is the water flow. By adjusting the water flow rate, you can control the concentration of the foam. Increasing the water flow will result in thinner foam, while decreasing the water flow will produce thicker foam. Experiment with different water flow settings to find the desired foam thickness for your specific cleaning needs.
2. Adjusting Dilution Ratio
The dilution ratio of the snowfoam solution also plays a significant role in determining the foam thickness. The dilution ratio refers to the ratio of snowfoam solution to water. A higher concentration of snowfoam solution will produce thicker foam, while a lower concentration will result in thinner foam. Follow the instructions provided by the snowfoam manufacturer for the recommended dilution ratio and adjust it accordingly to achieve the desired foam thickness.
3. Using Foam Thickness Adjusters
Some snowfoam bottles come with foam thickness adjusters that allow you to fine-tune the foam thickness. These adjusters are typically located on the bottle’s nozzle or gun and provide an additional level of control over the foam production. Experiment with different settings on the adjuster to find the optimal foam thickness for your cleaning tasks.
- Start with the adjuster in the middle position and test the foam thickness.
- If the foam is too thin, gradually increase the adjuster’s setting to thicken the foam.
- If the foam is too thick, gradually decrease the adjuster’s setting to make the foam thinner.
Remember, achieving the perfect foam thickness may require some trial and error. Take your time to make adjustments and find the ideal foam consistency that suits your cleaning needs. Properly adjusting the foam thickness will enhance the cleaning process and help you achieve professional-level results with your RAC pressure washer and snowfoam bottle.
Tips for Achieving the Desired Foam Concentration
When it comes to achieving the perfect foam concentration with your pressure washer and snowfoam bottle, there are a few tips that can help you get the results you desire. In this section, I will share some insights and strategies that have worked well for me in creating a thick and luxurious foam for optimal cleaning.
1. Dilution Ratio:
One of the key factors in achieving the desired foam concentration is getting the right dilution ratio for your snowfoam solution. Experiment with different ratios to find the ideal balance between the foam thickness and cleaning power. It’s important to note that the dilution ratio may vary depending on the brand and type of snowfoam concentrate you are using.
2. Water Pressure:
The water pressure from your pressure washer plays a significant role in creating foam. Adjust the pressure to a level that allows the snowfoam solution to be evenly distributed and create a thick foam. Be mindful not to use excessive pressure as it can reduce the foam thickness.
Moreover, it’s beneficial to use a pressure washer with an adjustable lance or nozzle, as this will allow you to control the spray pattern and foam density more effectively.
Remember: Balanced water pressure is the key to achieving the desired foam concentration.
By following these tips and making adjustments to the dilution ratio and water pressure, you can create a dense, clingy foam that provides excellent coverage and helps loosen dirt and grime on the surface. As with any new technique, it may take some trial and error to find the perfect combination for your specific pressure washer and snowfoam bottle setup. So, don’t be afraid to experiment and make necessary adjustments to achieve the desired results.
Now that you have a better understanding of how to achieve the desired foam concentration, let’s move on to the next section and explore some best practices for properly applying the foam onto the surface you are cleaning.
FAQ:
What is a snowfoam bottle?
A snowfoam bottle is an attachment that can be added to a pressure washer for a more efficient and effective way of applying snow foam to your vehicle during the cleaning process. It allows for better coverage and deeper cleaning.
How do I install a snowfoam bottle onto my Rac pressure washer?
Installing a snowfoam bottle onto a Rac pressure washer is a simple process. First, ensure that your pressure washer is turned off and disconnected from the power source. Next, remove the detergent bottle from the pressure washer and attach the snowfoam bottle in its place. Make sure it is securely attached. Once the snowfoam bottle is in place, connect the pressure washer to the power source and turn it on. You are now ready to use your pressure washer with the snowfoam bottle for a thorough cleaning.
What are the benefits of using a snowfoam bottle with a pressure washer?
Using a snowfoam bottle with a pressure washer has several benefits. Firstly, it provides a more efficient and effective way of applying snow foam to your vehicle, ensuring better coverage and deeper cleaning. The foam produced by the snowfoam bottle clings to the surface of the vehicle, allowing the cleaning agents to penetrate dirt and grime for a more thorough clean. Additionally, using a snowfoam bottle can help to reduce the amount of water and detergent needed compared to traditional washing methods, making it more economical and environmentally friendly.