
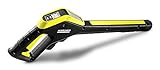
How To Fix Leaking Pressure Washer Gun

Greetings, fellow DIY enthusiasts! Today, I am excited to share with you my knowledge and experience in solving the vexing problem of a water gun that seems to be suffering from a rather troublesome leakage issue. As many of us embark on various outdoor cleaning tasks, the last thing we want is a malfunctioning tool disrupting our progress. Fear not, for I am here to offer you some invaluable tips and tricks to address this predicament.
Leakage, a bothersome concern that can hamper one’s efficiency and significantly reduce the overall effectiveness of our beloved high-pressure water guns. It is essential to assert that this article explores the cunning methods to thwart such leaks, rather than delving into the intricacies of the water gun mechanics. By applying these simple yet effective techniques, you will be able to enhance your cleaning endeavors and restore the impeccable performance of your trusty tool.
Now, dear reader, let us put aside the frustrations and embark on our quest to conquer the leaky adversaries that have plagued us for far too long. Brace yourself for a series of valuable insights, ingenious troubleshooting methods, and practical advice, as we delve into the world of fixing a high-pressure water gun that simply cannot contain its exuberance any longer. Together, we will embark on a journey to witness the transformation of a faulty tool into an efficient cleaning companion.
Identifying the Source of the Leakage
In this section, I will guide you through the process of determining the origin of the leak in your pressure washer gun. To effectively resolve the issue, it is crucial to accurately identify where the leakage is coming from. I will provide you with step-by-step instructions to help you pinpoint the source without using technical jargon or specific terms.
To begin with, carefully inspect the gun for any visible signs of leakage. Look for water drips, wet spots, or puddles around the gun’s handle, nozzle, or trigger. By visually examining these areas, you may be able to detect the initial signs of the leak. If you can’t see any obvious signs, move on to the next step.
The next step involves a systematic approach by testing different sections of the gun to identify the source of the leak. Start by examining the barrel attachment, which connects the gun to the pressure washer hose. Inspect the barrel for any loose connections, cracks, or damaged seals. Often, a faulty barrel attachment can result in leakage at this junction.
If the barrel attachment appears to be intact, proceed to the nozzle assembly. Carefully detach the nozzle from the gun and inspect it for any obstructions, clogs, or damaged components. A blocked or damaged nozzle can lead to abnormal pressure and consequently cause leakage.
Finally, examine the trigger mechanism. This is the part of the gun that controls the flow of water. Look for any signs of wear, damaged seals, or loose fittings. A faulty trigger mechanism can cause water to leak out, compromising its functionality.
By following this methodical approach and attentively examining the different sections of the gun, you will be able to pinpoint the source of the leakage. Identifying the specific area of concern is a crucial first step towards resolving the issue and restoring the functionality of your pressure washer gun.
Cleaning and Lubricating the Nozzle
When it comes to keeping your pressure washer gun in top shape, one important step is to regularly clean and lubricate the nozzle. This ensures that the gun operates smoothly and efficiently, and prevents any potential leaks or malfunctions.

To begin cleaning the nozzle, I usually start by removing it from the gun. This can be done by unscrewing it carefully using a wrench or pliers. Once it’s separated, I gently tap it against a hard surface to dislodge any built-up dirt or debris. Then, I use a small brush or toothbrush to scrub the inside and outside of the nozzle, making sure to remove any stubborn grime.
After cleaning the nozzle, it’s crucial to lubricate it properly. I usually apply a small amount of lubricant, such as silicone spray or a specialized gun lubricant, to the threads and o-rings of the nozzle. This helps create a tight seal and prevents any potential leaks. It’s important to use the right lubricant for your specific pressure washer gun, so be sure to consult the manufacturer’s guidelines or do some research beforehand.
Once the nozzle is cleaned and lubricated, I carefully reattach it to the gun, making sure not to overtighten it. It’s important to ensure that the nozzle is securely fastened but not overly tightened, as this can cause damage to the gun or lead to leaks. Finally, I test the gun to make sure that it’s working properly and that there are no more leaks.
By regularly cleaning and lubricating the nozzle of your pressure washer gun, you can extend its lifespan and ensure optimal performance. Remember to follow the manufacturer’s guidelines and use the appropriate cleaning and lubricating products for your specific gun. Taking these simple maintenance steps will help keep your pressure washer gun in good condition and prevent any frustrating leaks in the future.
Replacing the O-Rings
One important step in repairing a leaking pressure washer gun involves replacing the O-rings. These small, circular rubber seals help create a watertight seal between different parts of the gun, preventing leaks and ensuring proper functionality.

Identifying the Problem
To determine if the O-rings need to be replaced, inspect the gun for any visible signs of damage or wear. This can include cracks, tears, or flattened areas on the O-rings. Additionally, if you notice water leaking from the gun while it is in use, it is highly likely that the O-rings are the culprit.
Replacing the O-Rings
To replace the O-rings, start by gathering the necessary tools: a set of replacement O-rings, a small screwdriver or pick, and some lubricant. Begin by gently prying the old O-rings out of their grooves using the screwdriver or pick. Be cautious not to damage the gun’s components or scratch any surfaces. Once the old O-rings are removed, lubricate the new O-rings with a small amount of lubricant to aid in installation. Carefully insert the new O-rings into their designated grooves, ensuring they are fully seated and evenly positioned.
After the O-rings are replaced, reassemble the pressure washer gun and test it to see if the leaking issue has been resolved. If the leaking continues, it may be necessary to further inspect and troubleshoot other components of the gun.
Remember to exercise caution when working with pressure washer guns and consult the manufacturer’s instructions or seek professional assistance if needed.
Repairing or Replacing the Trigger Assembly
When facing issues with the functionality of your pressure washer gun, one possible culprit could be a faulty trigger assembly. In this section, I will guide you on how to repair or replace the trigger assembly to ensure that your pressure washer gun functions smoothly and effectively.

Identifying the Problem
Before proceeding with any repairs or replacements, it is vital to identify the specific issue with the trigger assembly. Common problems may include a stuck trigger, leaks from the handle, or difficulty in pulling the trigger. By assessing the symptoms, you can determine whether a repair or a complete replacement is necessary.
Repairing the Trigger Assembly
If the issue seems minor or repairable, you can attempt to fix the trigger assembly instead of replacing it entirely. Start by disassembling the gun carefully, ensuring that all parts are organized and the proper safety precautions are taken. Inspect the trigger mechanism for any signs of damage, such as worn-out seals or broken components. Replace any faulty parts and reassemble the gun, following the manufacturer’s instructions.
- Step 1: Disassemble the gun
- Step 2: Inspect the trigger mechanism
- Step 3: Replace any damaged parts
- Step 4: Reassemble the gun
Replacing the Trigger Assembly
In cases where the trigger assembly is severely damaged or beyond repair, replacing it becomes the best option. Begin by sourcing a compatible trigger assembly from a reliable supplier or the manufacturer of your pressure washer. Once you have the replacement part, follow these steps to install it properly:
- Step 1: Turn off and disconnect the pressure washer
- Step 2: Remove the old trigger assembly
- Step 3: Install the new trigger assembly
- Step 4: Test the functionality of the new assembly
By following these steps, you will be able to address issues related to the trigger assembly effectively. Remember to prioritize safety throughout the process and consult the user manual or seek professional assistance if unsure about any step. With a properly functioning trigger assembly, your pressure washer gun will be back in action, allowing you to tackle your cleaning tasks effortlessly.
Checking and Tightening Connections
When faced with a pressure washer gun that is leaking, there is a crucial step that needs to be taken before attempting any repairs. This step involves checking and tightening all connections related to the gun. By carefully inspecting these connections, you can identify any loose or damaged parts that may be causing the leakage.
Start by examining the various fittings, couplings, and connectors that make up the pressure washer gun assembly. Inspect each connection point for signs of wear or corrosion. Look for any visible cracks, breaks, or deformities in the components. Be sure to check not only the larger connections but also the smaller ones, such as o-rings and seals, which are often overlooked but can play a significant role in preventing leaks.
Once you have visually inspected the connections, it is time to start tightening them. Use a wrench or pliers, depending on the type of connection, to securely tighten any loose fittings or couplings. Pay close attention to the torque required for each connection, as over-tightening can lead to damages and leaks. Remember to use a gentle hand when tightening fragile components to avoid unnecessary stress.
If you come across any damaged or worn-out parts during this process, it is advisable to replace them with new ones. This will ensure a proper and leak-free connection. Be sure to select replacement parts that are compatible with your specific pressure washer gun model.
After you have checked and tightened all the connections, it is essential to test the pressure washer gun for leaks. In this step, turn on the pressure washer and observe the gun closely. If you notice any signs of leakage, double-check the connections you worked on, as there may still be some underlying issues that need to be addressed. If the leaks persist, it may be necessary to consult a professional or seek further troubleshooting advice.
- Inspect all connections visually for wear or damage
- Tighten loose fittings and couplings with the appropriate tools
- Replace any damaged or worn-out parts
- Test the pressure washer gun for leaks after completing the repairs
Seeking Professional Assistance
When faced with a complex issue such as a malfunctioning pressure washer gun, it is often beneficial to seek the expertise of professionals in the field. By enlisting professional help, one can ensure that the problem is accurately diagnosed and effectively resolved, minimizing any potential risks or further damage.

Professional assistance offers several advantages when it comes to addressing leakage in pressure washer guns. Firstly, professionals have extensive knowledge and experience in dealing with a wide range of pressure washer issues. They possess the expertise needed to identify the underlying cause of the leakage, which may not always be obvious to an untrained eye.
Additionally, seeking professional help can save valuable time and effort. By entrusting the repair or maintenance of a pressure washer gun to experts, one can avoid the struggle of attempting to fix the issue independently. Professionals have access to specialized tools and equipment that can streamline the troubleshooting process and ensure a prompt resolution.
Another crucial aspect of seeking professional assistance is the assurance of quality service and reliable solutions. Reputable professionals in the industry understand the importance of delivering results that adhere to the highest standards. They possess the necessary skills and resources to carry out repairs or provide recommendations that will effectively address the leaking problem, ensuring long-lasting performance of the pressure washer gun.
In conclusion, when facing a leaking pressure washer gun, considering professional assistance is a wise choice. Their expertise, time-saving benefits, and commitment to quality make them a reliable solution to address the issue effectively. Whether it be diagnosing the problem accurately or providing necessary repairs, seeking professional help can provide peace of mind and ensure optimal performance of the pressure washer gun.
FAQ:
Why is my pressure washer gun leaking?
There are several reasons why your pressure washer gun may be leaking. One common reason is a worn-out or damaged O-ring. Another possibility is a cracked or damaged hose. Additionally, the trigger or spray wand may have a faulty seal, causing leaks. It is important to identify the exact source of the leak before attempting to fix it.

How can I fix a leaking O-ring in my pressure washer gun?
To fix a leaking O-ring in your pressure washer gun, you will need to disassemble the gun and locate the O-ring. Carefully remove the old O-ring and replace it with a new one of the same size and material. Make sure to lubricate the new O-ring before reassembling the gun. This should solve the leaking issue and ensure a proper seal.
What should I do if my pressure washer gun is leaking from the spray wand?
If your pressure washer gun is leaking from the spray wand, the issue may be with the seal inside the wand. Try tightening the connections between the wand and the gun, as loose fittings can cause leaks. If this doesn’t solve the problem, you may need to replace the seal inside the wand. Consult the manufacturer’s instructions or contact customer support for guidance on obtaining a new seal and how to install it correctly.


