How To Fix Impeller Leak In Karcher Pressure Washer

Greetings, fellow pressure washer enthusiasts! Today, I am thrilled to delve into the fascinating realm of troubleshooting and maintenance of our beloved cleaning machines. If you are experiencing water leakage around the impeller area of your Karcher pressure washer, fear not! In this comprehensive guide, I will offer you valuable insights and practical steps to fix this issue and restore your pressure washer to its former glory.
Imagine the satisfaction of effortlessly blasting away dirt, grime, and stains with your trusty pressure washer, only to be frustrated by a frustrating water leak impeding your progress. This type of leak can hamper the overall performance of your cleaning equipment, making it essential to address the problem promptly. Fear not, for I am here to assist you in diagnosing and rectifying the pesky impeller seal leakage issue.
Now, let us embark on this thrilling journey of deciphering the inner workings of your pressure washer and discovering the remarkable techniques to conquer this challenge. Prepare to enlighten yourself with step-by-step instructions, expert tips, and ingenious hacks to fix the impeller seal leak on your Karcher pressure washer. Be prepared to unleash your inner handyman and witness the gratifying results of your newfound knowledge.
Identifying a Possible Impeller Seepage Issue in my Karcher High-Pressure Washer
Have you ever noticed a slight drop in performance from your Karcher high-pressure washer? Perhaps you have observed a subtle reduction in water pressure or an occasional drippage from the unit? These signs could potentially be indicative of an impeller leak, a common issue that can affect the functionality of your pressure washer. In this section, I will guide you through the process of identifying potential signs of an impeller seepage problem in your Karcher pressure washer without using any of the specific terms.
Observation and Water Flow Patterns
One way to determine if your Karcher pressure washer may be experiencing an impeller leak is by closely observing the water flow patterns during operation. Take note of any irregular or inconsistent water patterns, such as sudden changes in water pressure or water spurts that are not part of the usual spray pattern. These variations may indicate a potential issue with the internal components, including the impeller.
Listening for Unusual Noises
Another clue to detect a possible impeller seepage problem is by paying attention to any abnormal noises emitted by the pressure washer during operation. Listen for any unusual sounds, such as clicking, grinding, or rattling noises that are not typically heard during normal usage. These noises may signify that the impeller is not functioning optimally and may require further inspection.
Remember, identifying signs of an impeller leak in your Karcher pressure washer is the first step in addressing the issue. By closely observing water flow patterns and listening for irregular noises, you can proactively identify potential problems and take appropriate action to ensure the efficient and effective operation of your pressure washer.
Understanding the Role of the Impeller in a Pressure Washer
In this section, I will guide you through a comprehensive understanding of the impeller’s crucial role in the efficient functioning of a pressure washer. The impeller, also known as the pump or rotor, plays a vital role in creating the required water flow and pressure necessary for effective cleaning.
1. Generating Water Flow
The impeller operates by using centrifugal force to draw water into the pressure washer. As the impeller rotates, it pulls water from the inlet and expels it through the pump, creating a steady flow. This constant flow is essential for delivering the desired pressure for efficient cleaning.

2. Creating Water Pressure
Additionally, the impeller has the important task of pressurizing the water flow. By spinning at high speeds, the impeller forces the water molecules together, creating a high-pressure environment. This pressure enables the pressure washer to effectively remove dirt, grime, and stains.
- The impeller uses various sizes and shapes to control the pressure produced.
- Some impellers may have multiple blades or vanes to increase the pressure and flow rate.
- The impeller’s design can significantly impact the overall performance of the pressure washer.
Understanding the impeller’s role in a pressure washer’s operation is vital for troubleshooting and maintaining the machine’s efficiency. By comprehending how the impeller generates water flow and creates pressure, you can make informed decisions when it comes to maintenance and repairs.
Signs of an Impeller Leak:
When your pressure washer is not functioning optimally, there might be an issue with the impeller. The impeller plays a crucial role in the water circulation within the pressure washer. If there is a leak in the impeller, it can result in reduced water pressure or complete loss of water flow. In this section, I will discuss the common signs that indicate an impeller leak, allowing you to identify and resolve the problem effectively.
1. Dripping or pooling water:
One of the telltale signs of an impeller leak is the presence of dripping or pooling water near the pressure washer. You may notice water accumulating around the impeller housing or underneath the washer. Keep an eye out for these signs as they indicate that the impeller seal may be compromised, resulting in water leakage.
2. Unusual noise:
An impeller leak can also manifest as unusual noises emitted by the pressure washer during operation. You might hear grinding, squeaking, or rattling sounds coming from the machine. These noises could be indicative of a faulty impeller or a worn-out impeller shaft seal. Therefore, if you notice any unusual sounds while using your pressure washer, it is essential to examine the impeller for potential leaks.

If you notice any of these signs, it is crucial to address the impeller leak promptly. Ignoring the issue can lead to further damage to your pressure washer or even render it unusable. In the next sections, I will guide you through the steps to rectify an impeller leak in your pressure washer and restore its optimal performance.
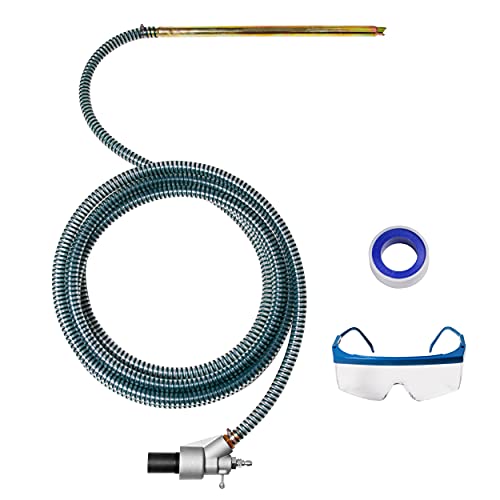
Tools and Materials Needed for Repairing the Leakage
In this section, I will share with you the essential tools and materials that you will need to fix the leakage problem in your pressure washer’s impeller. Having the right equipment is crucial to ensure a successful and lasting repair.
1. Screwdrivers
- Phillips screwdriver
- Flat-head screwdriver
Having a set of screwdrivers with different sizes and types is essential for accessing and removing various parts in your pressure washer. These versatile tools will come in handy during the repair process.
2. Pliers
- Needle-nose pliers
- Adjustable pliers
Pliers are useful for gripping, bending, and holding different components firmly. The needle-nose pliers help in reaching tight spaces, while adjustable pliers provide a strong grip to handle larger parts.
3. Wrenches
- Adjustable wrench
- Socket wrench set
Wrenches are crucial for loosening and tightening nuts, bolts, and other fasteners. An adjustable wrench is versatile and can be used for various sizes. A socket wrench set will come in handy for specific sizes and guarantees a secure fit.

4. Cleaning Solution
- Non-abrasive degreaser
- Mild soap
A cleaning solution is necessary for removing any dirt, grime, or debris from the impeller and its surrounding parts. A non-abrasive degreaser or mild soap will help ensure a thorough cleaning without damaging the components.
5. Replacement Parts
- New impeller
- Gasket or O-ring
If the leakage is due to a damaged or worn impeller, you will need to replace it. It is always recommended to have a new impeller on hand before starting the repair. Additionally, check if the gasket or O-ring needs replacement as well.
6. Lubricant
- Silicone-based lubricant
A silicone-based lubricant is necessary for ensuring smooth movement and reducing friction between different parts after the repair. Apply the lubricant as directed to keep the impeller and its surrounding components functioning properly.
By gathering these tools and materials in advance, you will be well-prepared to tackle the impeller leakage issue in your pressure washer. Remember to refer to the manufacturer’s instructions or consult a professional if necessary to ensure a safe and effective repair.
Step-by-Step Guide: Repairing an Impeller Leak in Your Karcher Pressure Washer
As an avid user of pressure washers, I have encountered my fair share of issues over the years. One common problem that often arises is an impeller leak in the pressure washer. This can be a frustrating issue to deal with, as it can cause a loss of pressure and affect the overall performance of the machine. However, with the right steps and a little bit of know-how, you can easily repair an impeller leak in your Karcher pressure washer.

Step 1: Identify the source of the leak
Before you can begin the repair process, it is important to locate the exact source of the impeller leak. This can typically be found near the impeller housing or the water inlet section of the pressure washer. Look for any signs of water dripping or pooling in these areas.
Step 2: Remove the impeller housing
Once you have identified the source of the leak, you will need to remove the impeller housing to access the impeller and the surrounding components. This may require a set of tools, such as wrenches or screwdrivers, depending on the specific model of your Karcher pressure washer.
Step 3: Inspect the impeller and surrounding components

With the impeller housing removed, carefully inspect the impeller and the surrounding components for any signs of damage or wear. Look for cracks, breaks, or excessive wear that may be causing the leak. If any components are damaged, they will likely need to be replaced.
Step 4: Clean and lubricate the impeller
Before reassembling the impeller housing, take the time to thoroughly clean the impeller and the surrounding area. Remove any debris or buildup that may be causing the leak. Once clean, apply a small amount of lubricant to the impeller to ensure smooth operation.
Step 5: Reassemble the impeller housing
Once the impeller and surrounding components are clean and lubricated, carefully reassemble the impeller housing. Ensure that all parts are properly aligned and tightened, following the manufacturer’s instructions if available.

Step 6: Test the pressure washer
With the impeller housing reassembled, it is time to test the pressure washer for any remaining leaks. Connect the water source and turn on the pressure washer, checking for any signs of dripping or pooling water. If the leak persists, repeat the previous steps to ensure proper repair.
Note: If you are unsure about any step in the process or encounter any difficulties, it is always best to consult the manufacturer’s instructions or seek professional assistance.
By following these step-by-step instructions, you can successfully repair an impeller leak in your Karcher pressure washer. With a little bit of effort and attention to detail, you can have your pressure washer back in top working condition and ready for your next cleaning task.
Step 1: Disconnect the Power and Water Supply
In this section, I will guide you on the first step to take when fixing a leak in the impeller of your Karcher pressure washer. It is essential to disconnect the power and water supply before starting any repair work. This is to ensure your safety and prevent any further damage to the pressure washer.

Firstly, locate the power switch on the pressure washer and turn it off. This will disconnect the power supply and minimize the risk of electric shock during the repair process. Next, you need to turn off the water supply to the pressure washer. Locate the water inlet valve, usually located at the rear or side of the machine, and turn it to the “OFF” position. This will prevent water from flowing into the pressure washer while you are working on it.
Once you have disconnected both the power and water supply, it is important to double-check that they are indeed shut off. This will ensure your safety and prevent any unexpected accidents. You can do this by testing the power switch to make sure the pressure washer does not turn on and checking the water inlet valve to ensure there is no water coming through.
Disconnecting the power and water supply is a crucial first step that should be followed before attempting any repair work on your Karcher pressure washer. By taking this precautionary measure, you can work on fixing the impeller leak safely and efficiently.
Step 2: Locate and Remove the Impeller Housing
When it comes to troubleshooting an issue with your pressure washer, one of the key steps is identifying the problem area. In this step, I will guide you on how to locate and remove the housing that encompasses the impeller mechanism causing the leak.
1. Preparation: Before beginning, ensure that the pressure washer is turned off and disconnected from the power source. This is crucial for your safety as well as preventing any further damage to the machine.
2. Accessing the impeller housing: The impeller housing can typically be found near the water inlet area of the pressure washer. It is often secured by screws or bolts, which might require a screwdriver or wrench for removal. Carefully inspect the housing to identify any signs of leakage or damage.
3. Removing the impeller housing: Once you have located the impeller housing, begin by carefully unscrewing the screws or bolts that are securing it in place. Take note of the position of each screw as you will need to reassemble the housing correctly later on. Make sure to exert even pressure to avoid stripping the screws.
4. Disconnecting any attached components: In some cases, the impeller housing might be attached to other components, such as hoses or connectors. Take the time to disconnect these components by carefully unscrewing or unclipping them. Remember to handle these attachments with care to prevent any damage.
5. Inspecting the impeller housing: Once the housing is removed, carefully inspect it for any signs of damage or wear, such as cracks or worn-out seals. These issues can often be the cause of the impeller leak. If you identify any damage, it is recommended to replace the housing with a new one to ensure proper functioning.
6. Cleaning and reassembly: Before reassembling the impeller housing, it is important to clean it thoroughly to remove any debris or buildup that might have contributed to the leak. Use a soft brush or cloth and mild cleaning solution to gently scrub the housing. Once cleaned, carefully reattach any components that were disconnected and secure the housing back in place using the screws or bolts previously removed.
Note: It is always a good idea to refer to the user manual or contact the manufacturer for specific instructions related to your Karcher pressure washer model.
Step 3: Inspect the Impeller for Any Damage
In this step, I would like to emphasize the importance of inspecting the impeller of your pressure washer for any signs of damage or wear and tear. The impeller is a crucial component responsible for creating the necessary water pressure for effective cleaning. It’s essential to ensure that it is in optimal condition to avoid any further issues or potential leaks.
During this inspection, pay close attention to the impeller blades to see if there are any visible cracks, chips, or breaks. These damages can significantly affect the performance of your pressure washer and potentially lead to leaks or uneven water pressure. If any such damage is spotted, it is crucial to address it promptly to prevent further complications.
Additionally, it is recommended to check if there are any signs of corrosion or buildup on the impeller. Corrosion can weaken the impeller’s structure and hinder its ability to generate the necessary water pressure. Buildup, such as debris or dirt, can also impede the impeller’s movement and affect its efficiency. Therefore, a thorough inspection of the impeller’s surface is necessary to identify and address any such issues.
Furthermore, it is important to check if the impeller is securely fastened in its housing. Loose or improperly installed impellers can result in abnormal vibrations and contribute to leaks or performance issues. Ensure that all fasteners are properly tightened.
In conclusion, inspecting the impeller for any damage, corrosion, buildup, or loose fasteners is an essential part of maintaining your pressure washer’s performance and preventing leaks. Taking the time to carefully examine and address these aspects can significantly prolong the lifespan of your pressure washer and enhance its efficiency.
Step 4: Replace the Damaged Impeller or Repair the Leak
In this step, I will guide you through the process of either replacing the damaged impeller or repairing the leak in your pressure washer. It is essential to address these issues promptly to ensure the efficient functioning of your equipment and prevent further damage.
Firstly, assess the extent of the damage to determine whether a replacement impeller is necessary or if a repair is sufficient. If the impeller is severely damaged or worn out, it is recommended to replace it with a new one. However, if the impeller has minor damage or a small leak is detected, a repair may be a viable option.
- If you decide to replace the impeller, refer to your pressure washer’s manual or the manufacturer’s instructions for specific guidance on acquiring the correct replacement part.
- Make sure to follow safety precautions, such as disconnecting the power supply and wearing protective gear, before proceeding with the replacement process.
- Carefully remove the old impeller by unscrewing or detaching the necessary components. Take note of the original configuration to ensure the correct installation of the new impeller.
- Install the new impeller in the appropriate position, following the reverse steps of the removal process. Secure all components tightly to prevent any future leaks or damage.
- Once the impeller replacement is complete, test the pressure washer to ensure proper functionality.
If you choose to repair the leak instead, there are various methods you can try depending on the type and location of the leak.
- For small leaks in the impeller or pump housing, you can use epoxy or sealant specifically designed for water-related repairs. Apply the chosen sealant to the affected area, following the product instructions carefully. Allow sufficient time for the sealant to cure before testing the pressure washer.
- In cases where the leak is caused by a damaged seal or gasket, you may need to replace the faulty component. Identify the specific seal or gasket causing the leak and refer to your pressure washer’s manual or the manufacturer’s instructions for information on obtaining the correct replacement part. Replace the damaged seal or gasket, ensuring a proper fit.
- If the leak is originating from a connection point or hose, inspect the area for any signs of damage or wear. Tighten any loose connections or replace the damaged hose with a new one if necessary.
- Once the repair is made, check the pressure washer for any remaining leaks and test its performance to verify that the issue has been resolved.
Remember to always prioritize safety when working on your pressure washer and consult professional assistance if needed. By following these steps, you can effectively address impeller leaks and restore your pressure washer to optimal functionality.
Step 5: Reassemble and Check for Leaks
After successfully addressing the impeller leak issue in your Karcher pressure washer, the next step is to reassemble the various components and carefully test for any remaining leaks. Reassembling the pressure washer correctly is crucial to ensure its proper functioning and to prevent any future leaks or malfunctions.
1. Reattach the Disassembled Parts
Begin by carefully reattaching all the parts that were previously disassembled. Make sure to follow the instructions provided in the user manual or any specific guidelines relevant to your Karcher pressure washer model. Ensure that all connections are secure and properly tightened, using the appropriate tools if necessary.
2. Perform a Leak Check
Once the pressure washer is reassembled, it is important to perform a thorough leak check before operating it. This step will help identify any potential areas where leaks might still be present. Follow these steps to conduct a proper leak check:
| Steps | Actions |
|---|---|
| Step 1 | Inspect all connections, including hoses, fittings, and seals for any signs of leakage. Pay close attention to areas that were previously affected by the impeller leak. |
| Step 2 | Turn on the pressure washer and allow it to build up pressure. Observe the areas inspected in the previous step for any indications of leaks, such as water dripping or spraying from fittings or hoses. |
| Step 3 | If any leaks are detected, immediately turn off the pressure washer and address the issue. Check the connections or fittings that are causing the leak and ensure they are tight and properly sealed. If necessary, replace damaged or worn-out components. |
| Step 4 | Repeat the leak check process until no further leaks are observed. This ensures that the pressure washer is in optimal working condition and ready for use. |
By reassembling the pressure washer correctly and conducting a thorough leak check, you can be confident that your Karcher pressure washer is working efficiently and without any leaks. This step is crucial in ensuring the longevity and effectiveness of your pressure washer during future usage.
FAQ:
What are the common signs of impeller leak in a Karcher pressure washer?
The common signs of impeller leak in a Karcher pressure washer include loss of pressure or reduced water flow, water leaking from the pump or motor area, and unusual noises coming from the machine while in use.
How can I determine if the impeller in my Karcher pressure washer is leaking?
You can determine if the impeller in your Karcher pressure washer is leaking by inspecting the pump and motor area for any signs of water leakage, checking for reduced pressure or water flow, and listening for unusual noises while the machine is running.