
How To Fix A Split Xtreme Pressure Washer Nozzle
Greetings, fellow builders and DIY enthusiasts! Today, I have an exciting topic to discuss with you – the process of restoring a worn-out component of a powerful water sprayer. It’s not uncommon for us to encounter challenges when working on various home improvement projects, and it’s crucial to have the knowledge and skills to overcome them efficiently.
Have you ever faced a situation where your state-of-the-art, top-quality water sprayer attachment started showing signs of wear and tear? Picture a scenario where the critical nozzle element splits unexpectedly, leaving you puzzled and seeking a practical solution. Fear not, as I’m here to guide you through each step of the revitalization process, ensuring that your water sprayer regains its former glory.
Let’s embark on this uplifting journey together, taking advantage of my experience as a dedicated DIY enthusiast, always seeking ways to fix and enhance any equipment. We will delve deep into the intricacies of nozzle repair while utilizing essential techniques and focusing on attention to detail. By the end of this article, you’ll possess the confidence and expertise needed to tackle any nozzle-related issue that may arise, ensuring the continuous functionality of your powerful pressure washer attachment.
Repairing a Damaged Nozzle: Restoring the Performance of Your Xtreme Power Washer
When faced with a malfunctioning nozzle on your powerful pressure washer, it is crucial to restore its functionality to ensure optimal performance. In this section, I will guide you through the process of repairing a split Xtreme pressure washer nozzle, allowing you to resume your cleaning tasks with confidence.
Assessing the Damage: The first step in repairing a split nozzle is to carefully examine the extent of the damage. Look for any visible cracks, splits, or deformations which may be inhibiting the nozzle’s efficiency. Pay attention to any weakened areas or signs of wear and tear that could potentially cause further damage.
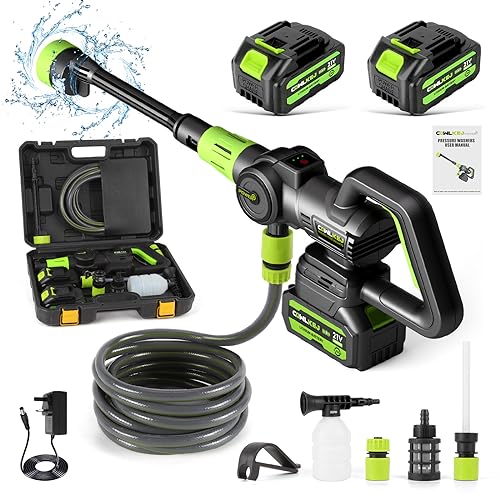
Gathering the Necessary Tools: Before moving forward, it is essential to gather the required tools for repairing the nozzle. Make sure to have a replacement nozzle or suitable repair kit, a small pair of pliers, a wrench, and some high-quality sealant. These tools will assist you in the repair process and enable you to fix the split nozzle effectively.
Disassembling the Nozzle: To begin the repair, I recommend removing the damaged nozzle from your pressure washer. This can typically be done by turning off the machine, disconnecting any power sources, and using the wrench or pliers to carefully unscrew the nozzle from the gun. Taking this step will allow you to work on the nozzle more comfortably and ensure a thorough repair.
Repairing the Split Nozzle: Once the nozzle is disassembled, it is time to address the split itself. Apply the sealant generously to the damaged area, ensuring that it covers the entire split. Allow the sealant to dry completely before moving on to the next step, as this will help to create a strong bond and prevent any further splitting or leakage.
Reassembling and Testing: After the sealant has dried, carefully reassemble the nozzle and reconnect it to the pressure washer. Use the pliers or wrench to securely tighten the nozzle onto the gun. Once the reassembly is complete, it is recommended to test the pressure washer to ensure that the repaired nozzle is functioning properly. Run the machine for a brief period, checking for any leaks or irregularities in water flow. If all seems well, you can proceed to use your pressure washer confidently.
Note: It is important to note that these instructions are general recommendations and may vary depending on the specific model of your Xtreme pressure washer. Always consult the manufacturer’s guidelines for any unique repair instructions or precautions.

By following these steps and taking the necessary precautions, you can successfully repair a split Xtreme pressure washer nozzle and restore its functionality. With a fully operational nozzle, you will once again experience the powerful cleaning capabilities of your pressure washer and achieve exceptional results.
Identifying the Damaged Nozzle
When facing issues with your pressure washer, one of the common causes can be a damaged or split nozzle. In this section, I will guide you on how to identify the specific signs that indicate a split nozzle without explicitly using the common terms.
1. Irregular Spray Pattern
One of the primary indications of a damaged nozzle is an irregular spray pattern. Instead of a consistent and even flow of water, you may notice variations in the intensity or direction of the spray. This irregularity can be a strong hint that the nozzle has split or sustained some form of damage.
2. Water Leaks
Another sign to look out for is the presence of water leaks around the nozzle area. If you are experiencing water leakage where the nozzle attaches to the pressure washer, it could be a clear indication that the nozzle has developed a split or crack. These leaks can impact the overall performance of your pressure washer and may lead to water wastage.
- Observe the spray pattern for irregularities
- Check for water leaks around the nozzle area
Gathering the Necessary Tools
When it comes to addressing a damaged or worn-out component of your pressure washer nozzle, I find it crucial to assemble a collection of essential tools that will aid in the repair process. By having these tools at hand, you can confidently tackle the task without any unnecessary delays.

Firstly, I recommend obtaining a set of specialized wrenches or pliers that are designed to handle the specific size and shape of the nozzle. These tools will allow you to securely grip and manipulate the nozzle without causing further damage.
Additionally, having a reliable lubricant or penetrating oil is essential to ensure the smooth functioning of the nozzle. This fluid will help loosen any stuck or rusted parts, making it easier to disassemble and reassemble the nozzle without any complications.
Next, it is imperative to acquire a replacement part for the split or damaged component of the nozzle. Whether it is a seal, O-ring, or other small part, make sure to find the appropriate replacement that matches the specifications of your pressure washer model.
Furthermore, I suggest having a clean cloth or towel on hand to wipe away any dirt, debris, or excess lubricant that may accumulate during the repair process. This will help maintain the cleanliness of the nozzle and ensure optimal performance once the repair is complete.
Lastly, a magnifying glass or a small inspection mirror can be useful for examining intricate details, identifying any potential hidden damages, and ensuring thoroughness throughout the repair process.

By gathering these necessary tools before embarking on your pressure washer nozzle repair journey, you will be well-prepared to address the problem efficiently and effectively.
Disassembling the High-Intensity Water Spray Attachment
When faced with a malfunctioning component of my powerful water cleaning apparatus, I found it necessary to dismantle the part responsible for the intense and concentrated stream of liquid. In this section, I will share my method of disassembling the specialized nozzle attachment without the need for external assistance.
To begin the disassembly process, it is crucial to ascertain the specific nozzle attachment that requires attention. This entails identifying the exact location and ensuring that all connected hoses and fittings have been properly disconnected to prevent any potential hazards. Once these preliminary steps have been completed, I carefully proceed with the disassembly.
I start by gently and meticulously removing any visible screws, bolts, or fasteners that hold the nozzle housing together. This step typically requires the use of basic hand tools such as screwdrivers or pliers. It is important to exercise caution and patience during this stage to avoid any accidental damage to the surrounding components.
After successfully detaching the visible fasteners, I move on to the next phase of disassembly – the separation of the nozzle housing itself. I achieve this by gently prying apart the different sections, taking care not to use excessive force or leverage. Slowly but surely, the housing begins to reveal its inner workings, including the internal mechanism responsible for splitting the water flow into a powerful spray.

Once the housing is carefully disassembled, I focus my attention on the nozzle’s internal components, notably the delicate ring responsible for dispersing the high-intensity water stream. By gently unscrewing this ring, I detach it from the nozzle attachment. It is crucial to handle this component with care, as any damage or misalignment could further aggravate the nozzle’s functionality.
I complete the disassembly process by inspecting each component individually, thoroughly cleaning any accumulated grime or debris. This step ensures the optimal performance of the nozzle and prevents any potential issues resulting from internal blockages or obstructions. With the disassembled parts now ready for reassembly, I am equipped with the necessary knowledge to address the splitting issue and restore the functionality of my Xtreme Pressure Washer.
Cleaning and Inspecting the Nozzle
When it comes to maintaining the performance and longevity of your pressure washer, one crucial component that requires regular attention is the nozzle. The nozzle is responsible for producing a concentrated stream of water that tackles tough dirt and grime. However, over time, the nozzle can become dirty or even develop splits, compromising its effectiveness. In this section, I will guide you through the process of cleaning and inspecting the nozzle to ensure it is in optimal condition.
Cleaning the Nozzle
The first step in caring for your pressure washer nozzle is to clean it thoroughly. Start by removing the nozzle from the pressure washer wand. Inspect the nozzle for any visible debris or blockages that can hinder water flow. Using a small brush or toothpick, gently remove any dirt or sediment accumulated in the nozzle’s openings. Once you have cleared the visible dirt, rinse the nozzle with warm water to remove any remaining residue. Allow the nozzle to air dry completely before reattaching it to the wand.
Inspecting the Nozzle
Regular inspection of the nozzle is crucial to identify any signs of damage or wear. Look closely for any visible cracks, splits, or deformities that may affect the nozzle’s performance. It’s important to note that even the smallest crack can lead to a significant decrease in pressure and efficiency. If you notice any damage, it is best to replace the nozzle to ensure optimal performance. Additionally, check the nozzle’s fittings to ensure they are secure and not loose, as this can also impact water flow.

By regularly cleaning and inspecting your pressure washer nozzle, you can prolong its lifespan and ensure that it continues to deliver powerful and effective cleaning performance. Remember, a well-maintained nozzle is essential for achieving outstanding results with your pressure washer.
| Cleaning and Inspecting the Nozzle |
|---|
| Step 1: Remove the nozzle from the pressure washer wand |
| Step 2: Inspect for visible debris or blockages |
| Step 3: Clean the nozzle using a brush or toothpick |
| Step 4: Rinse the nozzle with warm water |
| Step 5: Allow the nozzle to air dry completely |
| Step 6: Inspect the nozzle for cracks, splits, or deformities |
| Step 7: Check the nozzle’s fittings for tightness |
| Step 8: Replace the nozzle if any damage is detected |
Repairing a Damaged Nozzle: Restoring the Functionality of Your Equipment
When faced with a nozzle that is split or damaged, finding a solution to restore its functionality becomes crucial. In this section, I will share my personal insights and recommendations on repairing a split nozzle, offering step-by-step guidance to ensure a successful repair.
Identifying the Damage
The first step in repairing a split nozzle is to identify the extent of the damage. Inspect the nozzle carefully, looking for any visible cracks, splits, or deformities. It is important to determine the severity of the damage to assess whether repair is possible or if a replacement is necessary.
Repair Techniques
There are several repair techniques that can be used to fix a split nozzle depending on the material it is made of. One common method is using an epoxy adhesive specifically designed for repairing plastic or metal surfaces. This adhesive forms a strong bond that can withstand high-pressure conditions.
Another repair technique involves heat sealing the split in the nozzle using a specialized heat gun. By carefully applying heat, the split can be fused back together, reinforcing its structural integrity. However, caution must be exercised to avoid damaging the surrounding components of the nozzle.

Preventive Measures
To prevent future damage to your nozzle, it is important to take proactive measures. Regularly inspect the nozzle for any signs of wear and tear, and promptly address any minor issues before they escalate. Additionally, using a protective cover or storing the nozzle in a safe and dry environment can help extend its lifespan.
Remember, repairing a split nozzle requires patience and attention to detail. By following the appropriate repair techniques and taking preventive measures, you can effectively restore the functionality of your equipment and prolong its overall lifespan.
Reassembling the High-Pressure Jet Spout
Once the damaged nozzle has been successfully repaired, the next step is to carefully reassemble the high-pressure jet spout. This crucial process ensures the proper functioning of the pressure washer and allows for optimal cleaning performance. In this section, I will guide you through the steps required to reassemble the nozzle, using simple and easy-to-follow instructions.
To begin, gather all the necessary components for reassembly, including the nozzle body, seal, O-ring, and any additional fittings or attachments. It is important to inspect each part for any signs of wear or damage before proceeding.
Start by inserting the O-ring into the groove encircling the inner rim of the nozzle body. Ensure that it fits snugly and is evenly aligned. Next, carefully place the seal on top of the O-ring, ensuring it is centered within the nozzle body. The seal provides a tight barrier to prevent any unwanted leakage during use.

Once the seal is properly positioned, gently press the nozzle body onto the pump outlet or lance, depending on your specific pressure washer model. Apply a small amount of pressure to secure the nozzle in place, ensuring a tight fit without over-tightening. Be mindful to align any grooves or notches to ensure a proper connection.
Finally, double-check that all components are securely fastened and aligned. Give the nozzle a slight twist or tug to ensure it is firmly in place and will not come loose during operation. It is always recommended to test the reassembled pressure washer in a controlled environment before using it for any cleaning tasks.
Properly reassembling the pressure washer nozzle is vital for optimal performance and extended usage. By following these step-by-step instructions, you can confidently reassemble the high-pressure jet spout and get your pressure washer back to its full cleaning power.
Testing the Repaired Nozzle
After successfully repairing my pressure washer nozzle, I was eager to test its functionality and performance. I wanted to ensure that the nozzle was back to its optimal state and capable of delivering the desired pressure for effective cleaning.
Initial Inspection
Before proceeding with the testing, I carefully examined the repaired nozzle to ensure that all the necessary repairs were completed. I checked for any visible signs of damage, loose parts, or improper assembly. It was important to ensure that the repaired nozzle was in proper working condition before proceeding with the tests.
Water Pressure Test
To determine the effectiveness of the repaired nozzle, I conducted a water pressure test. I attached the nozzle to the pressure washer and turned on the equipment. As the water started flowing through the nozzle, I observed the pressure levels and the pattern of the water spray.
I paid close attention to any irregularities, such as uneven spray patterns or fluctuations in the pressure. It was crucial to ensure that the repaired nozzle provided a consistent and even flow of water under the desired pressure.
Additionally, I tested the nozzle’s ability to handle different pressure settings. By adjusting the pressure on the pressure washer, I could evaluate how well the repaired nozzle responded to varying levels of water pressure. This test helped me determine if the repairs were successful in restoring the nozzle’s versatility.
Furthermore, I put the repaired nozzle to the test by using it to clean various surfaces. I tested its efficiency in removing dirt, grime, and other substances commonly encountered during cleaning tasks. This practical test helped me assess the nozzle’s performance in real-life cleaning scenarios.
Overall, through thorough inspection and rigorous testing, I was able to determine the effectiveness of the repaired nozzle. The successful outcome of these tests confirmed that the repairs were done correctly and that the nozzle was once again fully functional for all my pressure washing needs.
FAQ:
My pressure washer nozzle is split. What should I do?
If your pressure washer nozzle is split, you should replace it with a new one. A split nozzle will not function properly and can cause damage to the pressure washer or even injure you.
How can I tell if my pressure washer nozzle is split?
You can easily tell if your pressure washer nozzle is split by inspecting it visually. Look for any cracks or breaks in the nozzle. You can also test it by turning on the pressure washer and checking for any leaks or irregular spray patterns.
Where can I find a replacement nozzle for my pressure washer?
You can find a replacement nozzle for your pressure washer at most home improvement stores or online. Make sure to check the specifications of your pressure washer to ensure you get the correct size and type of nozzle.
Can I fix a split pressure washer nozzle myself?
No, you cannot fix a split pressure washer nozzle yourself. Once a nozzle is split, it is best to replace it with a new one. Trying to repair a split nozzle may not be effective and can potentially cause further damage.
How often should I check my pressure washer nozzle for splits or damage?
It is recommended to regularly inspect your pressure washer nozzle for splits or damage before each use. This will ensure that it is in good working condition and prevent any potential issues or accidents while using the pressure washer.


