How To Fill A Karcher Pressure Washer Without A Bucket

As an avid user of my reliable pressure washing device, I have encountered my fair share of challenges when it comes to filling up the reservoir. Often, I have found myself searching for alternatives to the traditional bucket method, wishing for a simpler and more efficient way to get the job done.
After extensive research and experimentation, I stumbled upon a game-changing technique that revolutionized the way I refill my top-of-the-line power cleaner. By thinking outside the box, I discovered innovative alternatives to the conventional bucket, allowing me to save time and effort while ensuring optimal performance.
Envision a seamless process that eliminates the need for buckets entirely. Imagine a hassle-free approach that makes the entire refilling experience effortless and frustration-free. With my newfound method, you can say goodbye to the inconvenience of lugging around heavy buckets and dealing with messy spills.
Whether you’re a seasoned pressure washer enthusiast or just starting to explore the world of outdoor cleaning, this article will guide you step by step on how to fill your powerful cleaning tool without relying on a bucket. Prepare to uncover insider tips and tricks that will revolutionize your pressure cleaning routine and make your life easier than ever before.
Filling a Karcher Power Washer Efficiently
When it comes to refilling a Karcher pressure washer without relying on a traditional bucket, there are alternative methods that can streamline the process and save time. In this section, I will share my personal approach to effortlessly filling the pressure washer, focusing on maximizing efficiency and eliminating the need for a bucket.
To start, I recommend utilizing a container that can hold a sufficient amount of water for your cleaning tasks. This could be a large jug, water canister, or any other suitable receptacle. By selecting a container of adequate capacity, you can minimize the number of trips needed to refill the pressure washer, ensuring uninterrupted cleaning sessions.
In addition, it is beneficial to establish a designated filling station for your pressure washer. This could be an outdoor tap, a hose with access to clean water, or any other water source that meets the specifications of your Karcher power washer. Creating a dedicated filling area allows for easy access and avoids the hassle of searching for water each time you need to refill.
Once you have identified the ideal container and filling station, it is essential to establish a secure connection between the two. This can typically be achieved by using a hose or tube that is compatible with both the container and the filling station. Ensuring a tight connection will prevent any leaks or spillage during the filling process, maximizing efficiency and reducing wastage.
Furthermore, it can be advantageous to incorporate a flow control mechanism into the system. This could be a valve or nozzle that allows easy regulation of the water flow from the container to the pressure washer. By having control over the flow, you can adjust it to the desired level, facilitating more precise cleaning and preventing any potential water wastage.

In conclusion, filling a Karcher pressure washer without relying on a traditional bucket can be accomplished by implementing a few practical steps. By selecting an appropriate container, establishing a designated filling station, ensuring a secure connection, and incorporating a flow control mechanism, you can streamline the refilling process, optimize efficiency, and enhance your overall pressure washing experience.
Using a Water Source with Adequate Pressure
When it comes to powering your pressure washer, choosing a water source with sufficient pressure is key. In this section, I will share my tips and insights on selecting the right water source to ensure optimal performance and efficiency for your pressure washer.
Understanding Water Pressure
Before we dive into how to find a water source with adequate pressure, it’s important to understand the concept of water pressure. In simple terms, water pressure refers to the force at which water flows through a pipe or hose. This force is measured in pounds per square inch (PSI) and plays a crucial role in the effectiveness of your pressure washer.
Choosing the Right Water Source
Now that you have a basic understanding of water pressure, let’s discuss how to choose a water source with sufficient pressure for your pressure washer. One option is to connect your pressure washer directly to a household water supply. However, it’s important to ensure that the water pressure from your home’s plumbing system meets the minimum requirements of your pressure washer manufacturer.
Another option is to utilize an external water source, such as a rain barrel or a water storage tank. These alternative sources can provide sufficient pressure, particularly if they are elevated or have an integrated pump system. Just make sure to check the specific requirements of your pressure washer model and adjust the incoming water pressure accordingly.

Using a Pressure Regulator Valve
In cases where the water pressure from your source is too high for your pressure washer, it’s essential to use a pressure regulator valve. This device helps you control and regulate the incoming water pressure, preventing any damage to your pressure washer’s components and ensuring safe and efficient operation.
In conclusion, selecting a water source with adequate pressure is crucial for the effective use of your pressure washer. By understanding water pressure and choosing the right water source, you can maximize the performance and longevity of your pressure washer while achieving optimal cleaning results.
| Benefits | Considerations |
|---|---|
| Optimal performance | Check pressure requirements |
| Efficient operation | Use alternative water sources |
| Protects pressure washer | Utilize a pressure regulator valve |
Connecting a Hose to the Pressure Washer
When it comes to setting up your pressure washer for use, one of the key steps is connecting a hose to the machine. This ensures a steady flow of water to effectively clean the surfaces you intend to tackle. In this section, I will guide you through the process of securely attaching a hose to your pressure washer, allowing you to get started with your cleaning tasks quickly and efficiently.
1. Gather the necessary tools and materials
Before you begin, gather the tools and materials you will need, ensuring a smooth and hassle-free installation process. You will need a hose specifically designed for use with pressure washers, as well as a set of adjustable pliers. Additionally, it is important to have a clean working area free of any dirt or debris that could potentially clog the hose or affect its performance.
2. Inspect the fittings
Prior to connecting the hose, it is crucial to inspect the fittings on both the pressure washer and the hose itself. Look for any signs of damage or wear, such as cracks or leaks. If you notice any issues, it is recommended to replace the defective parts to prevent any potential accidents or malfunctions during operation.

3. Attach the hose to the pressure washer
Begin by ensuring that the pressure washer is turned off and the power cord is unplugged. Locate the water inlet on the pressure washer, which is typically labeled or indicated by an icon. Take your hose and align the quick-connect fitting with the water inlet, making sure it is securely seated. Once aligned, push the fitting into the inlet until you hear a click, indicating that it is in place.
4. Secure the connection
After attaching the hose to the pressure washer, it is important to secure the connection to prevent any accidental disconnections during operation. Use the adjustable pliers to tighten the connection, ensuring a snug fit without overtightening. This will provide a secure and leak-free connection, allowing for efficient cleaning without any interruptions.
5. Test the connection
Once the hose is securely attached to the pressure washer, it is crucial to test the connection before proceeding with your cleaning tasks. Turn on the water supply and briefly run the pressure washer to check for any leaks or loose fittings. If everything appears to be in order, you are now ready to use your pressure washer confidently and effectively.
- Gather the necessary tools and materials
- Inspect the fittings
- Attach the hose to the pressure washer
- Secure the connection
- Test the connection
Turning on the Water Source and Activating the Power of the Machine
In this section, I will guide you through the process of starting up your pressure washer by first ensuring a proper water source and then activating the power to unleash its cleaning prowess.
Before we begin, it’s essential to locate a suitable water source for your pressure washer. Look for a faucet or outdoor water spigot nearby. This water source will supply the machine with the necessary water pressure to generate the powerful spray.

Once you’ve identified the water source, make sure to check the availability of water and its flow rate. Ensure that the water is free from any blockages or obstructions that can impact the performance of your pressure washer.
Next, connect one end of the garden hose to the water supply and tighten it securely. Ensure that the connection is leak-free by performing a quick inspection. It’s crucial to have a reliable and leak-free connection to maintain constant water flow during operation.
Now, take the other end of the garden hose and connect it to the water inlet on the pressure washer. Again, ensure a tight and secure connection to prevent any water leakage.
Before moving forward, double-check that all connections are secure, and there are no visible leaks. This step is vital to prevent any accidents or interruptions during the operation.
Now that the water source is established, it’s time to activate the power of your pressure washer. Locate the power switch or button, usually located near the handle or control panel.

With caution, flip the power switch, and you should hear the machine come to life. Allow the pressure washer a few moments to build up pressure and stabilize its operating state.
If your pressure washer has additional settings or features, such as adjustable pressure levels or detergent injection, consult the user manual for specific instructions on how to utilize them effectively.
Congratulations! You have successfully turned on the water source and activated the power of your pressure washer. You are now ready to tackle your cleaning tasks with efficiency and ease.
Bleeding Air from the System
In this section, I will share effective techniques to eliminate air from the system of your pressure washer. Removing air bubbles is essential for ensuring optimal performance and preventing any potential damage to the equipment. Follow the steps below to properly bleed air from your pressure washer system.
Step 1: Checking for Air Leaks
Before starting the bleeding process, it is important to inspect the system for any air leaks. Inspect all connections, hoses, and fittings to ensure they are securely tightened and free from any cracks or damages. Leaks can introduce air into the system and affect the pressure washer’s performance. If you discover any leaks, tighten or replace the faulty components accordingly.

Step 2: Priming the Pump
To initiate the bleeding process, the pump of the pressure washer needs to be primed. This can be achieved by connecting the water supply, turning on the intake valve, and allowing water to flow freely through the system. Priming the pump helps to push out any trapped air and enables a smooth flow of water throughout the pressure washer.
A helpful technique during the priming process is to gently tap or shake the hoses and fittings to dislodge any air pockets. This encourages the air to rise towards the highest point in the system, making it easier to eliminate during the next step.
Step 3: Bleeding Air through the Nozzle
Once the pump is primed, it is time to bleed the air through the nozzle. Point the nozzle in a safe direction, away from yourself and others, and activate the pressure washer. Allow the water to flow continuously for a few minutes to ensure that all the air has been expelled from the system. You may notice sporadic bursts of air followed by a consistent stream of water, indicating the successful removal of air bubbles.
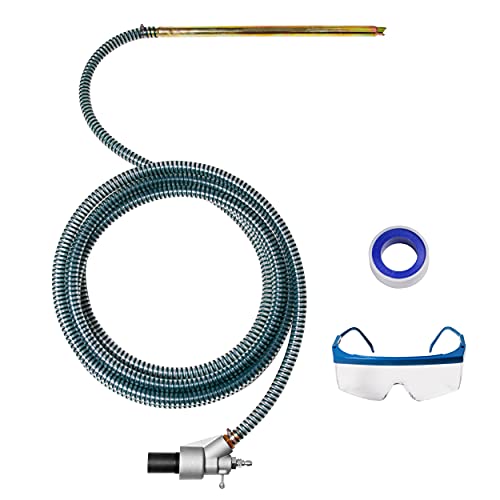
During this process, it is important to keep a firm grip on the pressure washer to ensure stability and prevent any accidents. Additionally, always wear appropriate protective gear, such as safety goggles, to safeguard yourself against any potential debris or splashes.
Remember to bleed the air from your pressure washer system whenever you notice a decrease in performance or if it has been idle for an extended period. Regularly eliminating air ensures that your pressure washer operates efficiently, providing consistent and powerful cleaning results.

| Key Points to Remember: |
|---|
| – Inspect for air leaks before bleeding the system |
| – Prime the pump to dislodge trapped air |
| – Activate the pressure washer and point the nozzle away before bleeding air |
| – Maintain a firm grip on the pressure washer and wear protective gear |
| – Regularly bleed air from the system to ensure optimal performance |
Ensuring Proper Water Flow
When it comes to effectively operating a pressure washer, it is essential to ensure that the water flow is adequate. By checking for proper water flow, you can optimize the performance of your pressure washer and achieve the best possible results. In this section, I will outline a few simple steps that you can take to ensure that the water flow meets the necessary requirements.
1. Assess the water source
First and foremost, it is important to assess the water source before connecting it to your pressure washer. Make sure that the water supply is free from any obstructions or contaminants that may affect the flow. Additionally, check for the presence of any leaks or damage in the water supply system that could potentially hinder the proper flow of water.
2. Check the water inlet filter
An integral part of ensuring proper water flow is checking the condition of the water inlet filter. This small screen is responsible for filtering out debris and impurities from the water, preventing them from entering the pressure washer and causing blockages. Inspect and clean the filter regularly to maintain optimal water flow.
Remember, a strong and steady water flow is crucial for the efficient operation of your pressure washer. By following these steps and regularly inspecting the water system, you can ensure that the water flow remains unobstructed and the performance of your pressure washer is maximized.
Properly Disconnecting the Hose
When it comes to using my pressure washer efficiently, one crucial step is properly disconnecting the hose. Disconnecting the hose is the process of detaching it from the pressure washer’s water inlet. This essential step ensures the hose is disconnected in a safe and effective manner, preventing any damage or leaks.
First and foremost, it is important to make sure the pressure washer is turned off and unplugged before starting the disconnection process. This ensures your safety and avoids any potential accidents. Once you’ve done that, you can visually inspect the hose to ensure there are no kinks or damages that may impede its proper function.
- Step 1: Locate the water inlet on the pressure washer. This is usually marked with an arrow or the word “Inlet”. It is typically located near the bottom or the back of the pressure washer.
- Step 2: Once you have located the water inlet, grip the collar or the locking mechanism firmly and push it towards the hose connector. This action will release the pressure and allow the hose to detach from the pressure washer.
- Step 3: Slowly and steadily pull the hose away from the water inlet, making sure to keep your grip firm and steady. Be cautious not to pull too hard, as this may cause the hose to snap back towards you or damage the connector.
- Step 4: Once the hose is disconnected from the water inlet, inspect it for any signs of damage, such as cracks, holes, or leaks. If you notice any, it is essential to address these issues before using the pressure washer again.
- Step 5: To keep the hose tidy and prevent any tripping hazards, coil it neatly and secure it with a hose reel or a twist tie. This helps maintain the hose’s longevity and ensures its proper function for future use.
By following these simple steps, you can safely and effectively disconnect the hose from your pressure washer. Properly disconnecting the hose not only prevents any potential damage to the equipment but also ensures that it is ready for your next cleaning tasks. Remember, always prioritize safety and take the necessary precautions when handling machinery.
FAQ:
Can I fill a Karcher pressure washer without using a bucket?
Yes, you can fill a Karcher pressure washer without using a bucket. There are alternative methods you can use to fill the pressure washer, such as connecting it directly to a water source using a garden hose.
What do I need to fill a Karcher pressure washer without a bucket?
To fill a Karcher pressure washer without a bucket, you will need a garden hose, a water source with sufficient water pressure, and the necessary connectors/adapters to attach the hose to both the water source and the pressure washer.
How do I connect a garden hose to a Karcher pressure washer?
To connect a garden hose to a Karcher pressure washer, first, ensure that both the pressure washer and the hose are turned off. Then, locate the water inlet on the pressure washer and attach one end of the garden hose to it, making sure it is securely connected. Finally, attach the other end of the hose to a water source with adequate pressure.
Can I use any type of garden hose to fill a Karcher pressure washer?
While you can use most standard garden hoses to fill a Karcher pressure washer, it is recommended to use a high-quality, reinforced hose specifically designed for pressure washers. These hoses are more durable and better equipped to handle the high water pressure required by pressure washers.
Are there any precautions I should take when filling a Karcher pressure washer without a bucket?
Yes, there are a few precautions to keep in mind. First, make sure the water source you are connecting the pressure washer to has sufficient water pressure to avoid damaging the unit. Additionally, double-check that all hose connections are secure to prevent any leaks during operation. Finally, always follow the manufacturer’s instructions and safety guidelines when using and operating your Karcher pressure washer.