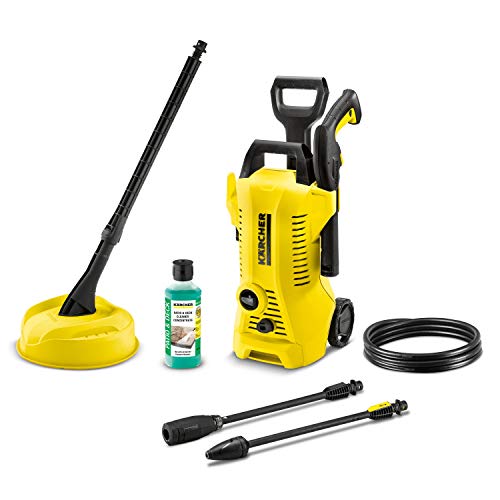
How To Drain Fuel From A Pressure Washer

Have you ever found yourself in the situation where you need to empty the fuel tank of your powerful water spraying machine but are unsure of the safest and most efficient way to do so? Fear not, as I am here to guide you through the process of removing the combustible liquid from your high-pressure washer.
One important thing to keep in mind is that you should always exercise caution when handling flammable substances, such as gasoline, within a confined space. Incorrect fuel removal procedures can not only result in damage to your pressure washer but also pose a serious safety risk. Therefore, it is crucial to follow the appropriate steps to ensure a smooth and incident-free fuel draining process.
Before we delve into the specifics of separating the fuel from your pressure cleaner, it is worth emphasizing the importance of taking certain precautions. Remember: safety should always be your top priority. So, let’s equip ourselves with the necessary knowledge and tools needed to tackle this task with confidence and ease.
The Significance of Properly Emptying the Fuel Reservoir
When it comes to dealing with the fuel reservoir of your pressure washer, it is of utmost importance to handle the emptying process correctly. Carelessly neglecting this crucial step can lead to unforeseen consequences and potentially damage your equipment. As an experienced user, I can guarantee that understanding the significance of proper fuel drainage is essential for the long-term functionality and performance of your pressure washer.
Preserving Optimal Performance: Emptying the fuel from your pressure washer ensures that any remnants or impurities are eliminated, preventing potential clogs and blockages. By removing these substances, you can maintain the optimal performance of your equipment, ensuring it operates smoothly and effectively during every use.
Preventing Corrosion: Over time, fuel can deteriorate and lead to the corrosion of essential components within your pressure washer. Draining the fuel reservoir not only removes any aged or degraded fuel, but also prevents the buildup of rust and other corrosive substances, extending the lifespan of your equipment.
Protecting the Engine: Fuel that is left stagnant in the reservoir can potentially damage the engine of your pressure washer. It can cause sediment accumulation, resulting in blocked fuel lines or a clogged carburetor. Properly draining the fuel not only prevents these issues, but also safeguards the engine, ultimately saving you from costly repairs.
Enhancing Safety Measures: An important aspect often overlooked is the safety factor associated with fuel drainage. Fuel can be highly flammable, and any residue left behind poses a potential fire hazard. By executing the proper steps to empty the fuel reservoir, you minimize the risk of accidental ignition and ensure a safer working environment.
In conclusion, properly draining the fuel from your pressure washer is not only key to maintaining its optimal performance and extending its lifespan, but also to protecting your own safety. By taking the necessary precautions to eliminate fuel remnants, you can enjoy the full benefits of your pressure washer while minimizing the potential risks and complications that may arise.
Essential Tools for Removing Fuel
In this section, I will discuss the necessary tools needed to complete the fuel removal process without mentioning specific terms. As I share my personal experience, I aim to provide you with insights on the tools that can effectively assist you in achieving your goal.

First and foremost, you will require a container to store the fuel that you will be draining. This receptacle should possess the ability to safely contain the liquid without any leakage. Additionally, it should have an appropriate size to hold the volume of fuel you plan to remove.
An efficient pump or siphon is another tool that proves beneficial when dealing with transferring fuel. A pump or siphon that can function effortlessly without the need for electricity or any external power source is preferred. This tool will make the fuel removal process easier and more convenient for you.
A suitable hose and nozzle combination are indispensable for the effective draining of fuel. The hose must be of a proper length and diameter to ensure a smooth flow of fuel from the pressure washer. Furthermore, the nozzle should have the capacity to control and regulate the fuel flow effectively.
When dealing with potentially hazardous substances such as fuel, it is vital to prioritize safety. Therefore, the inclusion of personal protective equipment (PPE) is essential. PPE such as gloves and safety goggles are imperative in order to protect yourself from accidental spills or exposure to harmful fumes.
Lastly, having a bucket or any type of container for waste disposal is necessary to properly handle any fuel that may have spilled during the draining process. This aids in maintaining a clean and organized workspace while facilitating the proper disposal of any excess fuel.

| Essential Tools for Fuel Removal: |
|---|
| Container for fuel storage |
| Efficient pump or siphon |
| Suitable hose and nozzle combination |
| Personal protective equipment (PPE) |
| Bucket or container for waste disposal |
Step-by-step guide: Safely removing excess fuel from your high-pressure cleaning machine
In this section, I will guide you through the process of effectively and safely removing any excess fuel from your powerful cleaning device. By following these simple steps, you will be able to ensure the proper maintenance and longevity of your pressure washer without the need for professional assistance.
- Secure the necessary tools: Before proceeding, gather all the required tools for this fuel removal process. This includes a clean and dry container, a funnel, gloves, and safety goggles.
- Prepare your workspace: Find a well-ventilated area, preferably outdoors, to carry out this task. Make sure you have enough space to work comfortably around your pressure washer.
- Turn off the ignition: Switch off the ignition of your cleaning machine to prevent any accidental starts during the fuel draining process. Safety first!
- Locate the fuel tank: Identify the fuel tank on your pressure washer. This can usually be found near the engine compartment or on the side of the cleaning machine. Take a moment to familiarize yourself with its location.
- Position the container: Place the clean and dry container below the fuel tank to catch the excess fuel. This will prevent any spilling or leakage.
- Remove the fuel cap: Unscrew the fuel cap or lid from the fuel tank, ensuring a smooth and steady motion. Store the cap in a safe place where it won’t get misplaced.
- Drain the fuel: Carefully tilt your pressure washer towards the container, allowing gravity to assist in draining the fuel from the tank. Be gentle to avoid any sudden movements that could lead to spills.
- Dispose of the fuel: Once the fuel has been drained completely, transfer it to an appropriate container for disposal. Remember to adhere to local regulations and guidelines when it comes to disposing of hazardous materials.
- Clean the fuel tank: Use a clean cloth or paper towel to wipe any residual fuel inside the tank. Make sure it is completely dry before proceeding with refueling or storing your pressure washer.
- Secure the fuel cap: Screw the fuel cap back onto the tank firmly, ensuring it is tightly sealed. This will prevent any potential fuel leakage or evaporation.
By following these step-by-step instructions, you can effectively drain excess fuel from your pressure washer, promoting its optimal performance and extending its lifespan. Remember to always prioritize safety and proper disposal procedures when dealing with fuel and chemicals.
Precautions to consider before initiating the process of fuel evacuation
Before commencing the fuel evacuation process, it is imperative to emphasize the significance of taking adequate precautions. Ensuring safety measures are in place will help prevent any mishaps or potential hazards throughout the process.
1. Disconnect any power sources: Before starting the fuel evacuation, ensure that the pressure washer is not connected to any power sources or electrical outlets. This step will minimize the risk of electric shocks or accidents.
2. Wear appropriate protective gear: To safeguard yourself from any fuel splashes or potential fumes, it is essential to wear protective gear such as gloves, safety goggles, and an apron.

3. Find a well-ventilated area: Choose an outdoor or well-ventilated area for the fuel draining process. Adequate ventilation will help dissipate any fumes and minimize the risk of inhaling hazardous gases.
4. Use a fire-resistant container: When draining the fuel, it is crucial to utilize a fire-resistant container specifically designed for storing flammable liquids. This precaution will minimize the risk of fire accidents.
5. Keep a fire extinguisher nearby: As an additional safety measure, have a fire extinguisher readily available near the fuel draining area. In case of any unforeseen fire incidents, it can be used to suppress or extinguish the flames.
6. Avoid smoking or open flames: To mitigate the risk of ignition, it is crucial to refrain from smoking or having any open flames near the fuel draining process. Even the smallest spark can lead to a hazardous fire situation.
7. Follow manufacturer’s instructions: Prior to initiating the fuel evacuation process, carefully review the pressure washer’s manual or manufacturer’s instructions. Adhering to their guidelines will ensure a safe and effective fuel draining process.

8. Dispose of fuel properly: Once the fuel has been successfully drained, ensure proper disposal. Follow local regulations and guidelines for the safe disposal or recycling of the fuel and the container.
Remember, taking the necessary precautions is crucial for a safe and incident-free fuel draining process.
Removing the Fuel Tank and Locating the Fuel Drain Valve: A Step-by-Step Guide
When it comes to maintaining a power cleaning device like a pressure washer, it’s important to familiarize yourself with the components and their functions. One crucial aspect is understanding how to effectively remove the fuel tank and locate the fuel drain valve. In this section, I will walk you through the process, sharing practical tips and step-by-step instructions.
- Begin by ensuring that the pressure washer is turned off and the engine is completely cool to avoid any potential accidents.
- Gently remove any detachable parts or covers that may be obstructing your access to the fuel tank. This could include panels, caps, or protective plates.
- Next, identify the fuel tank, which is typically located near the engine and is responsible for storing the fuel needed to power your pressure washer.
- Once you have located the fuel tank, carefully disconnect any fuel lines attached to it. These lines are responsible for transporting fuel from the tank to the engine.
- Now, it’s time to remove the fuel tank itself. This may require unscrewing bolts or using a specific tool, depending on the pressure washer model you have. Make sure to keep track of any hardware you remove for easy reassembly later.
- After successfully detaching the fuel tank, inspect the tank for any signs of damage or wear. This is a good opportunity to address any issues or perform regular maintenance.
- While examining the fuel tank, locate the fuel drain valve. The fuel drain valve is a small, often lever-operated mechanism that allows you to empty the tank of any remaining fuel.
- Once you have located the fuel drain valve, carefully open it. Remember to aim the valve into an appropriate container to catch the drained fuel.
- Allow the fuel to completely drain from the tank. This may take a few minutes depending on the size of the fuel tank.
- Once the tank is empty, securely close the fuel drain valve to prevent any leaks or spills.
Congratulations! You have successfully removed the fuel tank and located the fuel drain valve. By following these steps, you can safely drain the fuel from your pressure washer and proceed with any necessary maintenance or repairs.
Removing all the fuel from the tank effectively and securely
When it comes to emptying the fuel tank of your pressure washer, ensuring that every last drop is safely removed is essential. By taking the necessary precautions and following the correct procedure, you can effectively drain the tank without any potential risks or hazards.

First and foremost, it is crucial to prioritize safety throughout the entire fuel drainage process. This involves wearing appropriate protective gear, such as gloves and safety glasses, to prevent any fuel from coming into contact with your skin or eyes. Additionally, remember to conduct the procedure in a well-ventilated area to avoid inhaling any potentially harmful fumes.
To commence the fuel drainage process, start by locating the fuel shut-off valve. This valve effectively cuts off the fuel supply to the engine, preventing any fuel from entering the system during the drainage. Once located, turn the valve in a clockwise direction to shut it off completely. This step will prevent any additional fuel from entering the tank and ensure a thorough drainage.
After shutting off the fuel supply, it is advisable to start the pressure washer’s engine and let it run for a few minutes. This action will consume the remaining fuel in the system, allowing for a more complete drainage. Remember to pay close attention to any warning lights or indicators on the pressure washer’s control panel to ensure that the engine is running smoothly and without any issues.
Once the engine has consumed all the remaining fuel, it is time to prepare a suitable container for collecting the fuel being drained. This container should be clean, leak-proof, and able to hold the entire capacity of the pressure washer’s fuel tank. Position the container directly underneath the fuel tank, ensuring that it is stable and secure.
Next, locate the fuel drain valve or plug, typically located at the base or side of the fuel tank. Open this valve or remove the plug carefully, allowing the fuel to flow into the prepared container. Exercise caution to prevent any spills or leakage during this step, ensuring the fuel is directed solely into the container and avoiding any contact with the surrounding environment.

Once you have successfully drained all the fuel from the tank, securely close the fuel drain valve or replace the plug. Ensure it is tightly sealed to prevent any fuel leakage or potential accidents. Take a moment to inspect the surrounding area and wipe away any spills or drips with a cloth or absorbent material.
Remember, proper disposal of the collected fuel is crucial for environmental safety. Consult local regulations and guidelines to determine the appropriate method of disposal for your area. Always dispose of fuel in a responsible and eco-friendly manner to minimize any negative impacts on the environment.
By following these steps carefully, you can successfully drain the fuel tank of your pressure washer completely and safely. It is essential to prioritize safety throughout the entire process and take the necessary precautions to prevent any accidents or mishaps. Regular maintenance and keeping the fuel tank empty during storage periods will help prolong the life and performance of your pressure washer.
Proper disposal of the emptied fuel
As part of maintaining the environmental responsibility, it is crucial to ensure the correct disposal of the fuel that has been drained from a pressure washer. By disposing of the fuel properly, we can prevent potential harm to our surroundings and protect the ecosystem. In this section, I will guide you through the steps for the appropriate disposal of the emptied fuel from your pressure washer.
1. Safety precautions
Before proceeding with the disposal process, it is essential to take necessary safety precautions. This includes wearing protective gloves and safety goggles to prevent any contact with the fuel, as it can be harmful to your skin and eyes. Additionally, make sure you are working in a well-ventilated area to avoid inhaling any fumes. Safety should always be prioritized when dealing with potentially hazardous substances.

2. Local regulations and guidelines
It is important to familiarize yourself with the local regulations and guidelines regarding the disposal of fuel. Different regions may have specific rules regarding the proper disposal methods, and it is crucial to adhere to these guidelines to ensure compliance with the law. You can check with your local environmental agency or waste management department for specific instructions on fuel disposal in your area.
3. Empty fuel into approved containers
To properly dispose of the drained fuel, you will need to transfer it from your pressure washer into approved containers. Ensure that the containers are specifically designed for the storage and transport of hazardous liquids, such as gasoline. It is recommended to use containers that are made of materials like metal or high-density polyethylene (HDPE) to minimize the risk of leaks or spills. Make sure the containers are securely sealed to prevent any accidental leaks during transportation.
4. Take the fuel to an authorized disposal facility
Once you have safely transferred the drained fuel into suitable containers, you will need to take it to an authorized disposal facility. These facilities are equipped to handle and dispose of hazardous materials in an environmentally friendly manner. Do not attempt to dispose of the fuel in regular household waste or pour it down the drain, as this can lead to contamination of water sources and harm the environment. Instead, check with your local waste management department for information on hazardous waste disposal facilities near you.
By following these steps and ensuring the proper disposal of the emptied fuel, you are playing an active role in protecting the environment and promoting a sustainable future. Remember to always prioritize safety and adhere to the regulations set forth by your local authorities. Together, we can make a difference in preserving our planet for future generations.
Reinstalling the fuel tank and testing the power cleaner
After successfully emptying the fuel reservoir and addressing any maintenance or repair needs, it’s time to reinstall the fuel tank and evaluate the performance of your high-pressure washing machine. This section will guide you through the step-by-step process of reconnecting the fuel tank, conducting a thorough inspection, and testing the pressure washer’s effectiveness.
Firstly, ensure that the fuel tank is clean and free of any debris or residue. Carefully position the tank back into place, ensuring that all connections fit securely. Double-check that the fuel tank is properly aligned with the pressure washer’s body, as any misalignment can cause fuel leakage or affect the machine’s overall performance.
Once the fuel tank is securely in position, reconnect any fuel lines or hoses that were temporarily detached during the maintenance process. Ensure that all connections are tightened, as loose fittings can lead to fuel leakage and compromise the efficacy of your pressure washer.
Next, take a moment to inspect the pressure washer for any signs of damage or wear. Check hoses, nozzles, and fittings for any cracks or leaks. Replace any damaged components before proceeding further to avoid potential hazards or performance issues.
Now, it’s time to test the pressure washer and confirm that it functions properly. Start by adding a sufficient amount of fuel into the tank, ensuring that it complies with the manufacturer’s recommendations. Carefully turn the machine on and allow it to run for a few minutes, paying close attention to any unusual noises or vibrations.
While the pressure washer runs, examine the water output and check if the spray patterns are consistent and powerful. Adjust the nozzle settings if necessary to achieve the desired pressure levels. Conduct a small test wash on a suitable surface to test the unit’s cleaning ability and verify that it meets your expectations.
After completing the testing phase, turn off the pressure washer and disconnect it from any power sources. Allow the machine to cool down before proceeding with any further adjustments or storage. It’s important to maintain your pressure washer regularly to ensure its continued effectiveness and longevity.
| Step | Description |
|---|---|
| 1 | Clean the fuel tank and ensure it is debris-free |
| 2 | Position the fuel tank securely in place |
| 3 | Reconnect any fuel lines or hoses |
| 4 | Inspect the pressure washer for damage or wear |
| 5 | Add fuel to the tank and power on the machine |
| 6 | Test the water output and spray patterns |
| 7 | Adjust nozzle settings if necessary |
| 8 | Conduct a small test wash on a suitable surface |
| 9 | Turn off the pressure washer and disconnect it from power |
| 10 | Allow the machine to cool down before further actions |