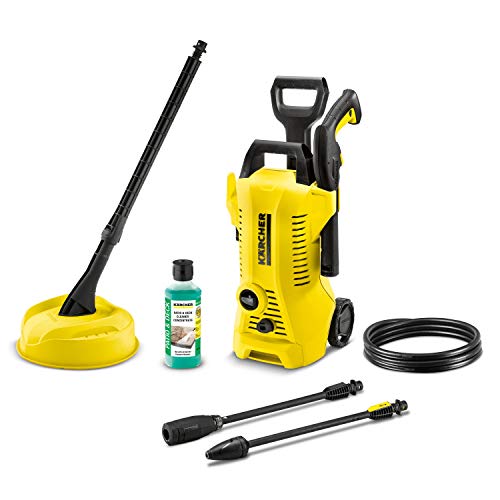
How To Dismantle A Karcher K4 Pressure Washer

Greetings, fellow DIY enthusiasts! Today, I am excited to share with you my personal experience and knowledge regarding the disassembling and repair of a commonly used household device. In this guide, I will discuss the intricacies of dismantling and restoring a powerful machine, which happens to be one of the most widely recognized brands in the cleaning industry.
Throughout my journey, I was faced with numerous challenges, but my determination to understand the inner workings of this remarkable appliance led me to develop an in-depth understanding of the disassembly process. In their quest for cleanliness, many individuals have grown reliant on this reliable companion, which can effortlessly banish dirt and grime from surfaces of varying materials.
Together, we will embark on a comprehensive exploration of the steps necessary to successfully take apart and fix this exceptional piece of technology. By following my guidance, you too will gain the confidence and expertise needed to dismantle and diagnose potential issues within this impressive apparatus.
Preparing for the Dismantling Process
Before starting the dismantling process of a K4 pressure washer, it is important to ensure you have the necessary tools and a clear understanding of the steps involved. This section aims to guide you through the preliminary preparations required for a successful dismantling process.
Gathering the Tools
To begin with, gather all the tools you will need for the dismantling process. It is essential to have a set of screwdrivers, pliers, adjustable wrenches, and a socket set. Additionally, having a cloth or towel to wipe away any dirt or debris will be handy during the process. Organize the tools in a convenient location nearby to have them readily available as you progress with the dismantling.
Taking Safety Precautions
Safety should be your utmost priority during any dismantling process. Before starting, make sure to turn off the pressure washer and unplug it from the power source. Wearing protective gloves and safety glasses is highly recommended to prevent any potential injuries. By taking these simple precautions, you create a safe environment that allows you to focus on the dismantling process without any unnecessary risks.
Note: It is advisable to consult the user manual or refer to online resources specific to your K4 pressure washer model for any model-specific guidelines or precautions.
With the necessary tools gathered and safety precautions in place, you are now ready to proceed with the dismantling process of your K4 pressure washer. The following sections will provide detailed instructions on how to carefully dismantle each component, ensuring a thorough and effective process.
Ensuring Safety Measures Before You Start
When beginning the process of dismantling a K4 pressure washer, it is essential to prioritize safety. Before diving into the task at hand, it is crucial to take precautions to protect yourself and avoid any potential accidents or injuries.
1. Safety Equipment: Before starting the dismantling process, ensure that you have the necessary safety equipment readily available. This may include protective goggles, gloves, and a face mask. Wearing these items will reduce the risk of any harmful substances or debris from coming into contact with your eyes, hands, or respiratory system.

2. Power Off: Always remember to disconnect the power supply and unplug the pressure washer from any electrical outlets before you begin working on it. This will prevent any accidental electric shocks or electrocutions while handling the equipment.
3. Cool-Down Period: Allow the pressure washer to cool down completely before starting the dismantling process. This is important as the components may be hot, and trying to dismantle them when they are still heated can lead to burns or other injuries.
4. Pressure Release: Before attempting any dismantling, it is crucial to release the pressure in the pressure washer. This can be done by either squeezing the trigger of the spray gun until all the pressure is released or by following the manufacturer’s instructions for pressure relief.
5. Work Area: Create a clean and organized work area free from any clutter or obstacles. This will ensure that you have ample space to work and minimize the risk of any accidents occurring due to tripping or knocking things over.
6. Familiarize Yourself: Before undertaking the dismantling process, take the time to familiarize yourself with the operating manual and instructions provided by the manufacturer. Understanding how the pressure washer works and its various parts will help you navigate the dismantling process more efficiently.

By following these safety measures and taking the necessary precautions, you can ensure a safe and successful dismantling process for your K4 pressure washer.
Step-by-Step Guide to Disassembling the High-Pressure Cleaner
As an experienced technician in the field of maintenance and repair, I have compiled a detailed step-by-step guide on how to disassemble a high-pressure cleaner. By carefully following these instructions, you will be able to dismantle the device effectively, ensuring smooth disassembly without damaging any components. So, let’s begin the disassembling process.
| Step | Description |
|---|---|
| Step 1 | Start by disconnecting the power supply and all attachments from the high-pressure cleaner to ensure safety during the disassembly process. |
| Step 2 | Next, locate and remove the fastening screws or clips that hold the outer casing of the cleaner in place. Use the appropriate tools, such as a screwdriver or pliers, to loosen and remove them. |
| Step 3 | Gently lift off the outer casing, revealing the internal components of the high-pressure cleaner. |
| Step 4 | Take note of the different parts and their locations within the device. This will help in reassembling the cleaner correctly later on. |
| Step 5 | Identify the motor and pump assembly. Carefully disconnect any wiring or cables connected to these components. |
| Step 6 | Now, it’s time to remove the motor and pump assembly. Depending on the model, this may require unscrewing additional fasteners or loosening specific parts. Be cautious and refer to the manufacturer’s manual if needed. |
| Step 7 | Continue by disassembling other smaller components, such as valves, connectors, and hoses, using appropriate tools to detach them carefully. |
| Step 8 | Ensure that you keep track of all the removed parts and any associated screws, bolts, or washers. Organize them in a labeled container or use a systematic approach to prevent confusion during reassembly. |
| Step 9 | Inspect the disassembled components for any signs of damage or wear. If necessary, clean them thoroughly using appropriate cleaning agents and tools to ensure optimal performance upon reassembly. |
| Step 10 | With all the components disassembled, the high-pressure cleaner is now ready for maintenance, repair, or any necessary part replacements. Remember to refer to the manufacturer’s manual for guidance, especially when working with intricate parts. |
By following these step-by-step instructions and exercising caution during the disassembly process, you will have successfully taken apart your high-pressure cleaner. Now, you can effectively carry out the required maintenance tasks or address any specific issues with ease!
Removing the Pump and Motor Assembly
In this section, I will guide you on the necessary steps to detach the essential components of your K4 pressure washer, namely the pump and motor assembly. By following these instructions carefully, you will be able to disassemble the device efficiently and effectively.
To start, locate the designated screws securing the pump and motor assembly to the main body of the pressure washer. These screws may be situated in different areas depending on the specific model, so make sure to examine the device thoroughly. Once identified, use a suitable screwdriver, preferably with a strong grip, to remove the screws.

Once the screws are loosened, gently lift the pump and motor assembly from the main body. Be cautious as you handle the assembly, ensuring a steady grip and minimizing any unnecessary movements that may cause damage. Pay attention to any attached wires or cables, as they need to be disconnected before fully detaching the assembly.
To disconnect the wires and cables, use a small pair of pliers or appropriate tools to carefully remove the connectors. Take note of their positions and locations as you remove them to ensure proper reassembly later. It is helpful to document or label these connections if necessary.
Once all the wires and cables are detached, set them aside safely. Now, you can fully remove the pump and motor assembly from the pressure washer. Take a moment to inspect the assembly for any signs of damage or wear that may indicate the need for repairs or replacements.
Remember to handle the pump and motor assembly with care and store it in a secure and clean location. Keeping the components in a safe environment will maintain their condition and ensure future reassembly is carried out smoothly.
By successfully removing the pump and motor assembly, you have completed an essential step towards dismantling your K4 pressure washer and gaining access to other internal components for further maintenance or repair.

Remember to consult the manufacturer’s manual or seek professional assistance for any concerns or specific instructions related to your model of K4 pressure washer.
Dismantling the Spray Gun, Hose, and Nozzle
In this section, I will guide you through the process of disassembling the essential components of your K4 pressure washer. We will look at how to take apart the spray gun, hose, and nozzle to ensure a thorough cleaning and maintenance.
Removing the Spray Gun
To begin, let’s focus on the spray gun. First, locate the trigger lock, which is typically positioned near the handle. Gently press the trigger lock and hold it in place. This will prevent any accidental spraying during the dismantling process.
Next, find the connection point where the spray gun attaches to the hose. Rotate the spray gun counterclockwise to unscrew it from the hose connection. Slowly pull the spray gun away from the hose, being mindful of any residual water or debris that may be present.
Once the spray gun is separated from the hose, set it aside for further inspection and cleaning. It is essential to check for any clogs or blockages in the trigger, as well as any damaged or worn-out parts that may need replacement.

Taking apart the Hose and Nozzle
Now let’s move on to the hose and nozzle components. Start by disconnecting the hose from the pressure washer unit. Locate the threaded connection where the hose attaches and rotate it counterclockwise to loosen it. Gently pull the hose away from the unit to detach it completely.
Inspect the hose for any signs of damage or wear, such as cracks or leaks. If needed, replace the hose with a suitable replacement to ensure optimal performance.
To dismantle the nozzle, locate the connection point where it attaches to the end of the hose. Depending on the model, you may need to unscrew the nozzle or use a quick-release mechanism to detach it. Carefully remove the nozzle from the hose, taking note of any clogs or debris that may be obstructing the flow.
Once all the components are disassembled, you can proceed with cleaning and maintenance tasks specific to each part. This will help prolong the lifespan of your K4 pressure washer and ensure its continued efficiency.
Taking Apart the Water Inlet and Outlet Components
When it comes to disassembling the water inlet and outlet components of a K4 pressure washer, there are a few key steps to keep in mind. In this section, I will guide you through the process of dismantling these important parts, allowing you to access and clean them effectively.

To begin, start by identifying the water inlet and outlet components on your pressure washer. These are typically located near the base of the machine and are responsible for allowing water to enter and exit the appliance. It is important to handle these parts with care, as they can be fragile and prone to damage if mishandled.
- First, ensure that the pressure washer is turned off and disconnected from the power source. This will prevent any potential accidents or injuries while working on the water inlet and outlet components.
- Next, using a suitable screwdriver or wrench, gently remove any screws or fittings that are securing the water inlet and outlet components in place. Take your time to avoid stripping or damaging the fasteners.
- Once the fasteners are removed, carefully detach the water inlet and outlet components from the pressure washer body. Pay attention to any gaskets or O-rings that may be present and ensure they remain intact during the process.
- With the components removed, inspect them for any signs of wear, debris, or blockages. These parts can accumulate dirt and sediment over time, which can affect the performance of your pressure washer.
- Using a soft brush or cloth, gently clean the water inlet and outlet components, ensuring that all surfaces are free from dirt and buildup. Be cautious not to use abrasive materials that may cause damage.
- If you notice any damaged or worn-out parts during the cleaning process, it is advisable to replace them with suitable replacements. This will ensure optimal functioning and prolong the lifespan of your pressure washer.
- Once the components are cleaned and any necessary replacements are made, carefully reattach them to the pressure washer body. Secure them in place using the previously removed fasteners, ensuring a tight and secure fit.
By following these steps, you will be able to successfully dismantle and clean the water inlet and outlet components of your K4 pressure washer. This maintenance routine is essential for maintaining the efficiency and longevity of your appliance, allowing it to perform at its best for years to come.
Cleaning and Maintaining the Disassembled Parts
When it comes to cleaning and maintaining the various components of a disassembled pressure washer, there are several important steps to follow to ensure optimal performance and longevity of the machine. By properly cleaning and maintaining the parts, you can extend the lifespan of your pressure washer and avoid costly repairs or replacements.
To start, it is essential to clean each part thoroughly using a mild detergent and warm water. This will help remove any built-up dirt, debris, or residue that may have accumulated over time. Be sure to pay special attention to hard-to-reach areas and crevices to ensure a thorough cleaning.
- Next, carefully inspect each disassembled part for any signs of damage or wear. Look for cracks, breaks, or worn-out seals that may require repair or replacement. It is crucial to address these issues promptly to prevent further damage and ensure the safe operation of your pressure washer.
- Additionally, consider lubricating certain components, such as seals or o-rings, to maintain their functionality and prevent potential leaks. Be sure to use an appropriate lubricant recommended by the manufacturer to avoid any adverse effects.
- When reassembling the pressure washer, take extra care to ensure that all parts fit together securely and correctly. This will help prevent any potential leaks or malfunctions once the machine is put back into operation.
- Lastly, after reassembly, it is essential to test the pressure washer to confirm that it is functioning properly. Run a few tests to check for any irregularities or issues before using it for any cleaning tasks.
By following these steps and maintaining a regular cleaning and maintenance routine for your pressure washer, you can maximize its performance and ensure its longevity. Remember to consult the manufacturer’s manual or seek professional advice if you encounter any difficulties during the cleaning or maintenance process.

Assembling the Pressure Washer After Cleaning and Maintenance
After completing the cleaning and maintenance process of the pressure washer, it is important to carefully assemble the machine to ensure it functions properly and efficiently. In this section, I will guide you through the steps of reassembling the pressure washer, highlighting the key points to pay attention to.
1. Start by gathering all the cleaned and maintained parts of the pressure washer. This may include the spray gun, lance, nozzle attachments, hoses, and other components. Ensure that each part is fully dry before proceeding with the assembly.
- Attach the spray gun to the end of the lance securely. Make sure it is tight but avoid overtightening to prevent damage.
- Connect the appropriate nozzle attachment to the end of the lance. Different nozzles provide various spray patterns, so choose the one suitable for your cleaning needs.
- Inspect the hoses for any signs of damage or wear. Replace them if necessary. Attach the hoses to their designated connectors on the pressure washer unit.
- Double-check all the connections for tightness and proper alignment. Any loose connections can affect the performance of the pressure washer.
2. Once all the parts are securely connected, it is important to check the oil and fuel levels, if applicable, in the pressure washer. Refer to the user manual for the specific instructions on how to check and refill the oil and fuel.
- If the pressure washer is electric, ensure that it is properly plugged into a compatible power source.
- If the pressure washer is gas-powered, make sure to fill the fuel tank with the recommended type of fuel.
3. Now that all the connections and fluid levels are in order, it’s time to prime the pressure washer before starting it. Follow the instructions in the user manual to perform the priming process correctly.
4. After completing the priming process, the pressure washer is ready to be used. Test it by spraying a small amount of water to ensure proper functionality. Adjust the nozzle settings as needed to achieve the desired pressure and spray pattern.
Throughout the assembly process, it is essential to refer to the user manual provided by the manufacturer for specific instructions and safety guidelines. Proper assembly and maintenance will help prolong the lifespan of your pressure washer and ensure optimal performance for future cleaning tasks.