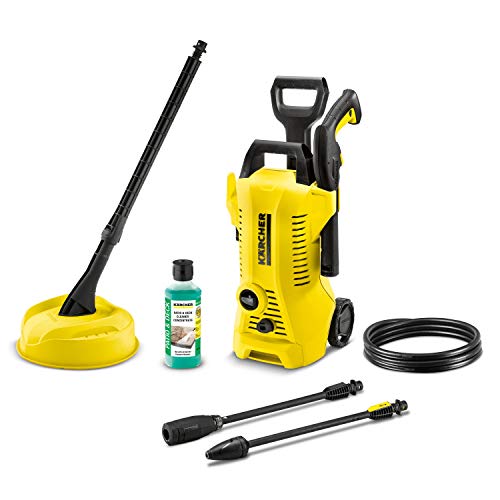
How To Disassemble Karcher Pressure Washer
Greetings fellow enthusiasts of cleanliness and DIY projects! Today, I am excited to share my knowledge and experience on the fine art of dismantling a renowned and highly efficient high-pressure cleaning device. With no hints as to the specific brand or function, I will guide you through the intricate process of uncovering the inner workings of a mechanical marvel that helps us rid our surroundings of grime and dirt.
Imagine a powerful apparatus that harnesses the force of water to rejuvenate and restore the sparkle of various surfaces. By disassembling this ingenious machinery, we can explore its hidden labyrinth of components, unearth the secrets of its engineering, and gain a deeper appreciation for the craftsmanship that powers our cleaning endeavors. By the end of this tutorial, you will be able to confidently disassemble and reassemble your very own cleaning companion.
Prepare to embark on a journey that will require patience, precision, and an unyielding desire to explore the heart of mechanical brilliance. Throughout this guide, I will employ my expertise and illustrate the intricate steps involved in deconstructing this mystical device, providing tips and insights to ensure a smooth and successful disassembling process. Remember, safety first and foremost, so don’t forget to wear appropriate protective gear, such as gloves and safety goggles.
Disassembling a Karcher Pressure Washer: Step-by-Step Guide
In this section, I will guide you through the process of taking apart a Karcher pressure washer. By following these step-by-step instructions, you will be able to dismantle your pressure washer safely and efficiently.
Gathering the Necessary Tools
Before starting the disassembly process, it is essential to gather all the required tools. These tools may include a screwdriver set, pliers, adjustable wrench, and gloves for your safety.
Opening the Main Casing
The first step in disassembling the Karcher pressure washer is to open the main casing. This can usually be done by removing the screws or clips that hold it in place. Carefully pry open the casing using a suitable tool, making sure not to damage any components.
Once the casing is open, you will have access to the internal components of the pressure washer.
Removing the Pump Assembly
The next step is to remove the pump assembly from the pressure washer. Start by disconnecting any hoses or pipes connected to the pump. Use an adjustable wrench or pliers to loosen and remove any fittings or bolts securing the pump in place.
Once all the connections and fasteners are removed, carefully lift the pump assembly out of the pressure washer.
Disassembling the Pump
With the pump assembly removed, it is time to disassemble the pump itself. This step may vary depending on the specific model of your Karcher pressure washer. Refer to the user manual or manufacturer’s guidelines for detailed instructions on dismantling the pump.

Typically, you will need to remove any remaining fittings, screws, or clips to take the pump apart. Pay close attention to the order in which the components are removed to ensure proper reassembly later.
Once the pump is disassembled, you can clean and inspect its individual parts for any signs of damage or wear.
Additional Disassembly Steps
In addition to the pump assembly, there may be other components that need to be disassembled, such as the motor or pressure control system. Follow the specific instructions provided by the manufacturer to dismantle these components correctly.
Remember to take note of each step and keep track of the removed parts. This will make reassembly much easier once you have completed the necessary repairs or maintenance.
By following these steps, you can confidently disassemble your Karcher pressure washer and gain a better understanding of its internal workings. Remember to proceed with caution and refer to the user manual if needed.

Tools and Equipment Needed
When it comes to disassembling a Karcher pressure washer, having the right tools and equipment is essential to ensure a smooth and successful process. In this section, I will provide you with a comprehensive list of the tools and equipment you will need to disassemble your pressure washer effectively.
1. Screwdriver Set
A screwdriver set is a must-have tool for any disassembly task. Make sure to have a set that includes both flathead and Phillips head screwdrivers to handle different types of screws that may be present in your Karcher pressure washer. These screwdrivers will allow you to remove screws and disassemble various components with ease.
2. Allen Wrench Set
An Allen wrench set, also known as a hex key set, is essential for disassembling any pressure washer. These wrenches come in different sizes and will be needed to remove bolts or screws with hexagonal-shaped heads. Having a complete set will ensure that you have the right size available for any disassembly task.
In addition to these tools, it may also be helpful to have a pair of pliers, a socket wrench set, and a rubber mallet on hand. These additional tools can assist in loosening stubborn or tight-fitting components, allowing for a smoother disassembly process.
Remember to always wear protective gear, such as safety glasses and gloves, when disassembling your pressure washer to ensure your safety. Additionally, it is recommended to refer to the manufacturer’s manual for specific instructions and recommendations for disassembling your Karcher pressure washer.

Preparing for Dismantling: Getting Ready for the Breakdown
When it comes to the process of disassembling a Karcher pressure washer, proper preparation is key. Before tackling the task of dismantling the machine, it is important to take certain steps to ensure a smooth and successful breakdown. In this section, I will outline the necessary measures to take before beginning the disassembly process.
Gathering the essential tools:
Before starting the disassembly, it is crucial to gather all the necessary tools needed for the task at hand. This will prevent any unnecessary interruptions or delays during the process. Some of the tools that may be required include screwdrivers, wrenches, pliers, and possibly a hammer. Ensuring that you have all the required tools within reach will make the disassembly process more efficient.
Turning off the power:
For safety purposes, it is essential to disconnect the power supply to the pressure washer before beginning the disassembly. This can be done by unplugging the machine from the electrical outlet or switching off the power from the circuit breaker, depending on the model. This step will prevent any potential electrical accidents and protect both yourself and the equipment.

Evaluating safety hazards:
Prior to starting the disassembly, it is important to assess any safety hazards that may be present. This includes identifying any sharp edges, hot surfaces, or potential leakages in the machine’s internal components. Being aware of these hazards will help in taking necessary precautions such as wearing protective gloves, using insulated tools, or exercising caution when handling specific parts of the pressure washer.
Taking pictures and notes:
Before starting the disassembly process, it is advisable to document the current state of the pressure washer by taking pictures and notes. This will serve as a reference for reassembling the machine later on. Additionally, it can be helpful to jot down any important steps or observations while disassembling the pressure washer, aiding in the reassembly process and troubleshooting any potential issues.
Organizing and labeling parts:

As you begin the disassembly, it is crucial to keep all the loose parts organized and labeled properly. This will prevent confusion and make the reassembly process much easier. Using small containers, bags, or labels to categorize and store components will ensure that no parts are misplaced or forgotten.
By following these preparatory steps, you will be well-equipped to embark on the disassembly process of your Karcher pressure washer. Taking the time to gather the necessary tools, ensuring safety precautions, and documenting the process will make the breakdown and subsequent reassembly a smooth and successful endeavor.
Removing the Housing of a High-Pressure Cleaning Device
As an experienced technician who has worked with various pressure washers, I have encountered the need to disassemble the housing of these powerful cleaning devices on numerous occasions. Removing the outer casing is an essential step in accessing and repairing the internal components of the pressure washer. In this section, I will guide you through the process of safely removing the housing of your high-pressure cleaning device.
Preparing for the Housing Removal
Before diving into the disassembly process, it is crucial to ensure that the pressure washer is powered off and disconnected from any electrical sources. This precautionary measure will prevent any accidents or harm that may occur during the disassembly process.
Additionally, make sure you have the necessary tools readily available, such as a screwdriver or wrench, to complete the task efficiently. Having these tools at hand will save you time and frustration, ensuring a smooth disassembly process.

Step-by-Step Housing Removal Guide
1. Locating and Removing Screws: Begin by locating the screws that secure the housing in place. These screws are typically positioned on the front and sides of the pressure washer. Use the appropriate tool, such as a screwdriver or wrench, to carefully remove these screws. Keep them in a safe place to avoid misplacement.
2. Unlocking Latches: In some pressure washer models, latches may be used instead of screws to secure the housing. If this is the case with your device, gently release the latches by carefully prying them open with a suitable tool. Be cautious not to apply excessive force to prevent any damage to the latches or housing.
3. Disconnecting Electrical Connections: Once the screws or latches are removed, you may find electrical connections attached to the housing. It is essential to disconnect these connections by carefully unplugging them to avoid any potential damage. Take note of their positions or take a picture for future reference.
4. Removing the Housing: With the screws, latches, and electrical connections detached, you can now remove the housing from the pressure washer. Gently lift the housing off, ensuring not to force or damage any other components in the process. Some models may require slight maneuvering or sliding to release the housing entirely.
Note: Depending on the specific make and model of your pressure washer, the steps outlined above may slightly vary. It is always recommended to consult the user manual or manufacturer’s instructions provided with your device for accurate disassembly instructions.

By following these step-by-step instructions, you will be able to successfully remove the housing of your high-pressure cleaning device. Remember to handle the disassembly process with care and attention to prevent any accidental damage. Now, you can proceed with accessing and repairing the internal components of your pressure washer.
Disassembling the Pump Assembly
In this section, I will guide you through the process of disassembling the pump assembly of your Karcher pressure washer. Taking apart the pump assembly is an essential step when performing maintenance or troubleshooting issues with your pressure washer.
Gathering the Necessary Tools
Before beginning the disassembly process, it is important to have the right tools readily available. Some of the tools you may need include a wrench set, screwdrivers (both Phillips and flathead), pliers, and possibly a rubber mallet or hammer. Having these tools prepared will ensure a smooth disassembly process.
Step-by-Step Disassembly Instructions
| Step 1 | Turn off the pressure washer and disconnect it from the power source to ensure safety. |
| Step 2 | Remove the housing cover by unscrewing the screws or bolts holding it in place. You may need to use a screwdriver or a wrench for this step. |
| Step 3 | Locate the pump assembly, which is typically positioned near the center of the pressure washer. |
| Step 4 | Identify the connections and hoses attached to the pump assembly. Carefully disconnect them by loosening any clamps or fittings using the appropriate tools. |
| Step 5 | Once the connections and hoses are detached, remove any screws or bolts securing the pump assembly to the frame. Be sure to keep track of these fasteners for reassembly. |
| Step 6 | Gently lift the pump assembly away from the frame, being cautious not to damage any delicate components. |
| Step 7 | If needed, further disassemble the pump assembly by removing any additional parts or components as required for your specific maintenance or troubleshooting task. |
By following these step-by-step instructions, you will be able to successfully disassemble the pump assembly of your Karcher pressure washer. Remember to proceed with caution and take note of the specific connections and fasteners during disassembly to ensure a smooth reassembly process later on.
Cleaning and Replacing Parts
When it comes to maintaining and ensuring the longevity of your high-pressure cleaning device, proper cleaning and timely replacement of parts play a crucial role. In this section, I will guide you through the essential steps to clean your pressure washer effectively and replace any damaged or worn-out components to keep it running smoothly.
Cleaning Your Pressure Washer
To maintain the optimal performance of your pressure washer, regular cleaning is necessary. Start by disconnecting the power supply and making sure that the machine is completely turned off. Using a damp cloth or sponge, wipe down the exterior surfaces of the pressure washer to remove any dirt, dust, or debris. Be sure to pay attention to the nozzle, trigger gun, and hoses.
Clean the nozzle by removing it from the gun or lance and rinsing it thoroughly with clean water. Inspect the nozzle for any clogs or blockages and use a fine needle or wire to remove any debris. It is essential to clean the nozzle regularly to ensure a consistent and powerful spray pattern.
Next, inspect the hoses and connections for any signs of wear or damage. Check for any leaks or cracks in the hoses and tighten any loose connections. It is recommended to replace any damaged hoses or fittings to prevent water leakage and maintain proper functioning of your pressure washer.
Additionally, check the filter and clear any debris or buildup that may restrict water flow. Clogged filters can affect the performance of your pressure washer, so clean or replace them regularly. Consult the user manual for specific instructions on accessing and cleaning the filter.
Replacing Parts
Over time, certain parts of your pressure washer may wear out or become damaged, affecting its performance. It is important to replace these parts promptly to ensure the efficient operation of your machine.
Common parts that may require replacement include the pump, hose, trigger gun, nozzles, and O-rings. Consult the user manual or contact the manufacturer for guidance on identifying and purchasing the correct replacement parts for your specific pressure washer model.
| Part | Signs of Wear or Damage |
|---|---|
| Pump | Low pressure, unusual noises, leaks |
| Hose | Cracks, leaks, excessive wear |
| Trigger Gun | Difficulty in triggering, leaks |
| Nozzles | Clogs, reduced spray pressure |
| O-rings | Leaking connections, reduced performance |
Replacing these parts may vary in complexity and may require specific tools or professional assistance. If you are unsure or uncomfortable with the process, it is recommended to consult a qualified technician or the manufacturer’s support team.
By regularly cleaning your pressure washer and promptly replacing any worn-out parts, you can ensure its longevity and maintain its optimal performance. Remember to always refer to the user manual or seek professional guidance when dealing with specific maintenance or replacement tasks.
Reassembling the Power Cleaner
In this section, I will guide you through the process of putting together the power cleaner using clear and concise instructions. By following these steps, you will be able to reassemble the device and restore its functionality.
Gathering the Components
Before reassembling the power cleaner, it is important to ensure that you have all the necessary components readily available. Check that you have collected all the parts mentioned in the disassembly process, including screws, O-rings, and any other accessories.
Step-by-Step Reassembly Instructions
Now, let’s commence the reassembly process. Follow these step-by-step instructions to successfully put the power cleaner back together:
| Step | Description |
|---|---|
| 1 | Start by attaching the motor housing to the main body of the cleaner. Ensure a secure fit by aligning the corresponding slots and holes. |
| 2 | Proceed to place the nozzle and trigger assembly onto the main body. Connect any necessary tubes or hoses as per their designated connections. |
| 3 | Securely fasten the handle to the main body using the provided screws. Make sure the handle is firm and stable. |
| 4 | Install the detergent compartment onto the main body, ensuring proper alignment and attachment. |
| 5 | Attach the spray wand to the nozzle assembly, making sure it is tightly secured. |
| 6 | Finally, check all the connections and fastenings to ensure everything is properly assembled and tightened. Verify that all parts are correctly aligned and in their designated positions. |
By following these steps, you will have successfully reassembled your power cleaner, and it will be ready for use. Remember to double-check all connections and components before operating the device to ensure safety and optimal performance.
Tips and Safety Precautions
When it comes to the task of dismantling a Karcher pressure washer, there are a few important tips and safety precautions that should be kept in mind. In this section, I will share my personal insights and recommendations to ensure a smooth and hazard-free disassembling process.
- Before starting the disassembly procedure, it is crucial to read and understand the manufacturer’s instructions and guidelines. Following these instructions will help prevent any damage to the pressure washer and ensure your safety.
- Always make sure to wear appropriate protective gear, such as safety goggles, gloves, and a dust mask, to safeguard yourself from any potential hazards that may arise during the disassembly process.
- Before proceeding with any disassembly steps, ensure that the pressure washer is completely turned off and disconnected from its power source. It is also recommended to release any remaining pressure in the system by squeezing the trigger on the spray wand.
- Take your time and work in a well-lit and organized area. This will minimize the chances of misplacing or losing any small parts during the disassembly process.
- When removing screws or bolts, it is helpful to use a suitable screwdriver or wrench that fits properly. Applying excessive force or using an incorrect tool may result in stripped threads or damaged components.
- Take note of the specific order and location of each part as you disassemble the pressure washer. Photographs or labeled diagrams can be helpful references when reassembling the unit later on.
- Avoid placing excessive pressure or force on delicate components such as seals, gaskets, or connectors. These parts can easily get damaged and may require replacement if mishandled.
- Keep track of any screws, bolts, or other fasteners that you remove and store them in a safe place. Consider using small bins or magnetic trays to organize these parts, ensuring they won’t get lost or mixed up.
- If you encounter any difficulties during the disassembly process or are unsure about a certain step, it is highly recommended to consult a professional or refer to the manufacturer’s customer support for further assistance.
By following these tips and safety precautions, you can ensure a successful and safe disassembly of your Karcher pressure washer. Remember, it’s always better to take your time and proceed with caution rather than rushing and risking potential damages or injuries.
FAQ:
What tools do I need to disassemble a Karcher pressure washer?
To disassemble a Karcher pressure washer, you will need a set of screwdrivers (Phillips and flathead), adjustable wrenches, pliers, a socket wrench set, and possibly a rubber mallet. These tools will allow you to remove screws, nuts, and bolts, as well as disconnect any electrical connections.
Is it necessary to disassemble a Karcher pressure washer for regular maintenance?
Disassembling a Karcher pressure washer for regular maintenance is not always necessary. Most maintenance tasks, such as cleaning the nozzle, changing the oil, and inspecting hoses and fittings, can be done without fully disassembling the machine. However, for more complex repairs or troubleshooting issues, it may be necessary to disassemble certain components to access and fix the problem.
How long does it take to disassemble a Karcher pressure washer?
The time required to disassemble a Karcher pressure washer can vary depending on the model and the purpose of disassembly. For simple maintenance tasks, such as cleaning the nozzle or changing the oil, it may take around 15-30 minutes. However, for more extensive repairs or troubleshooting, it can take several hours or even longer, especially if you are unfamiliar with the machine or the specific issue you are trying to resolve.