
How To Det Up A Karcher Pressure Washer
When it comes to efficiently tackling outdoor cleaning tasks, having a reliable power cleaner is indispensable. These innovative devices, known for their exceptional performance in removing dirt and grime, are ideal for a variety of applications. In this guide, I will walk you through the step-by-step process of setting up a top-notch power cleaner to ensure optimal functionality and long-lasting results.
First and foremost, it is vital to emphasize the significance of choosing the right power cleaner model that perfectly fits your specific cleaning needs. Whether you’re looking to spruce up your patio, driveway, or even your car, the proper selection is crucial. By considering factors such as the water pressure, flow rate, and versatility of attachments, you can ensure that your chosen power cleaner will deliver outstanding results.
Once you have acquired your power cleaner, it’s time to dive into the setup process. The initial step involves familiarizing yourself with the essential components and their functions. From the high-pressure hose to the spray gun and the nozzle, each part plays a crucial role in effectively harnessing the power of water to dislodge tough dirt and stains. Taking the time to understand these elements will not only make the setup process smoother but also enhance your overall experience with the power cleaner.
From there, it’s crucial to address the issue of water supply. Whether you’re using tap water or drawing from a natural water source, it is essential to ensure a consistent flow. This can be achieved by connecting the power cleaner to a reliable water source and making any necessary adjustments to optimize water pressure. By paying attention to this step, you will guarantee that your power cleaner operates at its maximum potential, resulting in spotless surfaces that will leave everyone impressed.
Preparing Your Equipment for Use
When it comes to getting your pressure washing equipment set up and ready to use, there are a few key steps you’ll need to follow. In this section, I will guide you through the process of preparing your equipment, without specifically mentioning the brand, type, or purpose of the machine.
To begin, ensure that you have all the necessary tools and accessories on hand. This may include things like hoses, nozzles, and cleaning detergents. Once you’ve gathered everything you need, it’s time to familiarize yourself with the different parts of your equipment.
Next, carefully examine the hoses for any damages or leaks. If you notice any issues, it’s important to address and repair them before using the pressure washer. Additionally, check the nozzle and make sure it is clean and free from any clogs or debris.
Now, it’s time to connect the various components of your pressure washer. Start by attaching the hose to the machine, ensuring a tight and secure connection. Then, connect the other end of the hose to the water source, making sure it is properly fitted.
Once the hoses are connected, it’s important to turn on the water source and let it run through the system for a few minutes. This will help to remove any air pockets and ensure a steady flow of water during operation.
| Steps to set up your pressure washer: |
|---|
| 1. Gather all necessary tools and accessories. |
| 2. Inspect and address any damages or leaks in the hoses. |
| 3. Clean the nozzle to avoid clogs or debris. |
| 4. Connect the hose securely to the machine and water source. |
| 5. Run water through the system to remove air pockets. |
By following these steps and taking the time to properly set up your pressure washer, you can ensure its optimal performance and longevity. With everything in place and ready to go, you’ll be well-equipped to tackle your cleaning tasks with ease and efficiency.
Understanding the Fundamentals
When it comes to setting up a pressure washer, it is essential to have a solid understanding of the basics. In this section, I will explain the key concepts and components that will help you get started with your Karcher pressure washer.
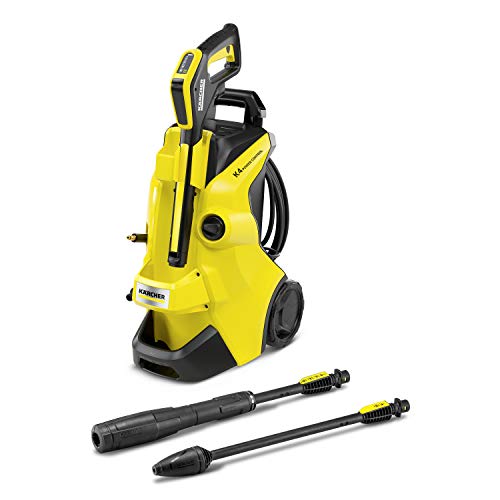
Pressure Washer Components
- Water Inlet: The water inlet is where you connect the hose to the pressure washer. It serves as the entry point for the water supply.
- Pump: The pump is responsible for pressurizing the water. It draws water from the inlet and creates high-pressure jets that propel dirt and grime away.
- Spray Gun: The spray gun is held by the operator and allows you to control the application of the pressurized water.
- Nozzle: The nozzle is attached to the spray gun and determines the shape and intensity of the water spray pattern.
- Detergent Tank: Some pressure washers have a detergent tank that allows you to apply cleaning solutions in addition to water.
Setting Up the Pressure Washer
Now that we understand the key components, let’s move on to setting up the pressure washer. Begin by finding a suitable location for your pressure washer near a water source. Ensure that the water supply has adequate pressure and flow rate to meet the requirements of your pressure washer.
Next, securely attach the hose to the water inlet of the pressure washer. Make sure it is tightly connected to prevent any leaks.
If your pressure washer has a detergent tank, fill it with the appropriate cleaning solution. This step is optional, but it can be beneficial for removing stubborn dirt and stains.
Now, turn on the water supply and allow the pressure washer to fill with water. Once the water flow is established, you can switch on the pressure washer.

With the pressure washer turned on, pick up the spray gun and point it in a safe direction. Squeeze the trigger to release the pressurized water. Take note of the different nozzle attachments and experiment with them to find the spray pattern that works best for your cleaning needs.
Remember to follow all safety precautions and guidelines provided by the manufacturer while operating the pressure washer.
By understanding these basics and following the proper steps, you will be well on your way to effectively setting up and using your Karcher pressure washer.
Preparing Your High-Pressure Cleaning Machine
Before using your powerful cleaning equipment, it is crucial to ensure that it is properly prepared for operation. In this section, I will guide you through the necessary steps to get your pressure washer ready for optimal performance.
Gathering the Required Tools and Materials
- First, let’s gather all the tools and materials we will need for the setup process. You will need a water source, preferably a faucet with sufficient water flow, a garden hose, and electrical power supply for electric models.
- Additionally, have a wrench or adjustable pliers handy to securely connect the fittings, and ensure that you have a suitable detergent specifically designed for pressure washers, if desired.
Inspecting and Assembling the Pressure Washer
- Start by carefully inspecting all parts of the pressure washer, including the hose, nozzle, and wand, for any signs of damage or wear. Replace or repair any defective components before proceeding.
- If your pressure washer has multiple sections, such as a motor unit and a water tank, follow the manufacturer’s instructions to assemble them correctly. Ensure that all connections are tight and secure.
Connecting the Water Supply
- Next, connect the garden hose to the inlet valve of the pressure washer. Use the wrench or pliers to tighten the connection, ensuring that it is leak-free and secure.
- If your pressure washer has a built-in water filter, check and clean it if necessary. This will help prevent debris from entering the system and causing damage.
Setting Up the Nozzle and Wand
- Now, it’s time to attach the appropriate nozzle and wand to the pressure washer. Select the nozzle suitable for your cleaning task and securely attach it to the end of the wand.
- Ensure that the nozzle is tightly connected, as any loose fittings can result in water leakage and decreased performance.
Final Checks and Safety Precautions
- Before powering on the pressure washer, double-check all connections to ensure they are appropriately assembled and tightened.
- Ensure that the electrical cord, if applicable, and the high-pressure hose are positioned and routed safely, away from any potential hazards.
By following these steps, you are now ready to move on to the next phase of setting up your Karcher pressure washer and achieving excellent cleaning results!

Connecting the Water Source
When setting up a Karcher pressure washer, one of the crucial steps is connecting the water source. This part of the process ensures that there is a steady supply of water to the pressure washer, allowing it to function efficiently and effectively.
Firstly, it is important to locate a suitable water source near the area where you plan to use the pressure washer. This can be a faucet, hose bib, or any other water outlet that can provide a consistent flow of water. Ensure that the water source has adequate pressure to meet the requirements of the pressure washer.
Next, attach the garden hose to the water source. Make sure to tighten the connection securely to prevent any leaks or water loss during operation. It is recommended to use a high-quality hose that is long enough to reach the desired cleaning area without any difficulty.
After attaching the garden hose, inspect it for any damages or blockages. Clear any debris or clogs that may affect the water flow. It is crucial to have a clean and unrestricted water supply to ensure optimal performance of the pressure washer.
Once the garden hose is properly connected and inspected, it is time to connect the other end of the hose to the pressure washer. Look for the water inlet on the pressure washer unit and attach the hose using the provided connector. Ensure a tight connection to prevent any leaks or water wastage.

Before turning on the water source, it is recommended to bleed any air from the hose to avoid airlocks, which can disrupt the water flow. Simply turn on the water source briefly and allow water to flow freely through the hose until all air is expelled. Once this is done, turn off the water source.
With the water source properly connected, inspected, and bled of any air, you are now ready to move on to the next step of setting up your Karcher pressure washer. This crucial stage ensures a reliable water supply, allowing the pressure washer to deliver the desired cleaning performance.
Attaching the Spray Gun and Nozzle
When setting up a pressure washer, one of the crucial steps is attaching the spray gun and nozzle. This section will guide you through the process of connecting these essential components, ensuring proper functionality and maximum efficiency.
Step 1: Preparing the Spray Gun
Before attaching the spray gun, it’s essential to ensure that it is clean and free from any debris or obstructions. Wipe the gun with a soft cloth to remove any dirt or dust particles that could affect its performance. It is also important to check that the trigger mechanism is functioning correctly, ensuring smooth operation during use.
Step 2: Connecting the Spray Gun
Locate the nozzle connector at the end of the pressure washer hose. It is usually a threaded connection that matches the threading on the spray gun. Take the spray gun and screw it tightly onto the nozzle connector, ensuring a secure and leak-free connection. Avoid over-tightening, as it may damage the threads or the spray gun itself.

Step 3: Selecting the Nozzle
Choosing the right nozzle for your specific cleaning needs is vital for achieving optimum results. Karcher pressure washers usually come with a variety of nozzles that offer different spray patterns, including narrow, medium, and wide-angle options. Consider the surface you will be cleaning and the level of dirt or grime before selecting the appropriate nozzle.
Step 4: Attaching the Nozzle
With the spray gun connected to the pressure washer hose, it’s time to attach the chosen nozzle. Align the nozzle with the end of the spray gun and push it firmly into place. You will hear a click or feel a slight resistance when the nozzle is securely attached. Give it a gentle tug to ensure it is locked in position.
Now that the spray gun and nozzle are securely attached, you are ready to start using your Karcher pressure washer. Remember to always follow the manufacturer’s instructions and take necessary safety precautions while operating the equipment.
Adjusting the Pressure Settings
When it comes to optimizing the performance of your pressure washer, one of the most important aspects to consider is adjusting the pressure settings. By customizing the pressure, you can achieve the ideal level of power for your specific cleaning needs, whether you’re tackling stubborn dirt or delicate surfaces.
1. Understanding the Pressure Control
The pressure control feature on your Karcher pressure washer allows you to adjust the force at which the water is expelled from the nozzle. This control is essential for achieving the desired cleaning results and preventing any potential damage to the surface being cleaned.
2. Fine-Tuning the Pressure
To fine-tune the pressure settings, start by identifying the range of pressure options available on your Karcher pressure washer. Refer to the user manual or the manufacturer’s website for specific details on the pressure settings applicable to your model.
Once you have identified the available pressure options, it’s important to consider the nature of the surface you’ll be cleaning. For tougher dirt and stains, you may need to increase the pressure. On the other hand, more delicate surfaces will require a lower pressure to prevent any damage.
When adjusting the pressure, make small incremental changes and test the impact on a small area to ensure optimal results. This way, you can fine-tune the pressure without risking any damage to the surface.
Remember, finding the perfect pressure setting may require some trial and error. But with patience and experimentation, you’ll be able to adjust the pressure settings on your Karcher pressure washer to effectively tackle any cleaning task.
Starting and Using the High-Pressure Cleaner
Greetings! In this section, I will guide you through the process of starting and effectively using your high-pressure cleaner. Accurate understanding of these steps will maximize the efficiency of your cleaning tasks and ensure optimal performance.

1. Assemble and Prepare
Before starting, ensure that all required components are properly assembled. Check the water inlet connections, high-pressure hose, and spray gun for any damage or leaks. It’s also crucial to verify the presence of an adequate water supply and that the water inlet filter is clean and unobstructed.
2. Connect and Prime
Connect the high-pressure hose to the unit and the spray gun, making sure to securely fasten the connections. Turn on the water supply and release any trapped air by squeezing the trigger on the spray gun until the water flows steadily. Once the water is pumped through the system without interruptions, you are ready to proceed.
3. Adjust Settings
Depending on the nature of your cleaning task, adjustments may be required. Familiarize yourself with the different nozzles or attachments available for your high-pressure cleaner. Select the appropriate nozzle or adjust the spray pattern based on the desired intensity and surface area to be cleaned.
4. Start the Cleaner
Now it’s time to start the high-pressure cleaner. Locate the on/off switch or button and activate the unit. Allow the motor to warm up for a few moments before engaging the trigger to initiate the pressurized water flow. Remember to handle the spray gun securely and maintain a balanced stance during operation.
5. Cleaning Techniques
When using the high-pressure cleaner, maintain a consistent distance from the surface to be cleaned, typically around 12 inches (30 centimeters). Move the spray gun in a controlled and sweeping motion, ensuring that the pressurized water covers the desired area evenly. Take breaks as needed to avoid excessive strain or fatigue.
- Avoid directing the water stream towards delicate materials or electrical components to prevent damage.
- For stubborn stains, you may need to use a rotating brush or a detergent solution compatible with your high-pressure cleaner.
- Adjust the pressure setting if necessary, keeping in mind the surface’s sensitivity and material.
Remember, it’s crucial to follow the manufacturer’s instructions provided in the user manual for any specific recommendations or precautions.
With these steps and techniques in mind, you are well-equipped to start and effectively use your high-pressure cleaner. Enjoy the benefits of a thoroughly cleaned environment with the power and performance of your trusty cleaning tool!


