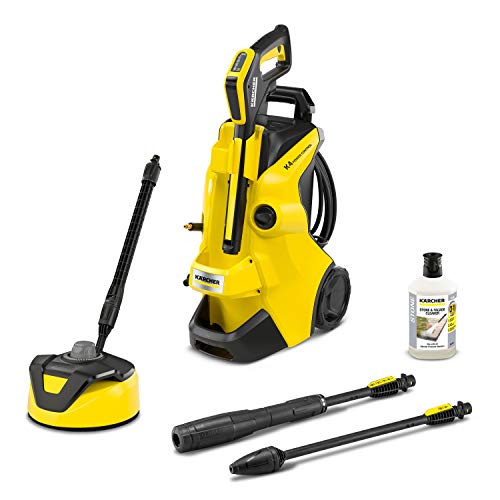
How To Descale Karcher Pressure Washer Filter

As a seasoned user of pressure washers, I understand the importance of regular maintenance to ensure their longevity and peak performance. One crucial aspect often overlooked is descaling the filter. Scaling can accumulate over time, hindering the efficiency of your Karcher pressure washer and reducing its cleaning power.
Keeping your pressure washer filter clean and free from scale deposits is of utmost importance. When scale builds up, it restricts water flow, resulting in decreased pressure and ultimately affecting the washer’s ability to remove dirt and grime effectively. By taking the time to descale your filter regularly, you can maintain the machine’s optimal performance and increase its lifespan.
Effective descaling techniques are essential to preserve the efficiency of your Karcher pressure washer filter. From simple household vinegar solutions to commercial descaling products, there are various methods available. The choice depends on the severity of scaling and personal preference. Regardless of the method, a thorough descaling routine will ensure that your pressure washer operates at maximum potential.
Caring for Your Pressure Washer Filter
When it comes to keeping your pressure washer running smoothly, one important maintenance task you should never overlook is descaling the filter. Regular descaling not only helps to maintain the efficiency and performance of your pressure washer, but it also prolongs its lifespan. In this guide, I will walk you through the steps to descale your pressure washer filter effectively.
Why Descaling is Important
Descaling your pressure washer filter is crucial for keeping your machine in optimal condition. Over time, mineral deposits and debris can accumulate on the filter, restricting water flow and diminishing the effectiveness of the pressure washer. Descaling removes these deposits, allowing for unrestricted water flow and ensuring that your pressure washer operates at its peak performance.
The Descaling Process
1. Start by turning off the pressure washer and unplugging it from the power source to ensure your safety.
2. Locate the filter housing on your pressure washer. It is usually situated near the water inlet.
3. Carefully remove the filter from the housing. Depending on the model, you may need to unscrew or unclip it.
4. Rinse the filter under a stream of water to remove any loose debris.
5. Fill a container with a descaling solution, such as vinegar or a specialized descaling agent, following the manufacturer’s instructions.
6. Submerge the filter in the descaling solution and let it soak for the recommended amount of time. This will help dissolve any stubborn mineral deposits on the filter.
7. After the designated time, remove the filter from the solution and rinse it thoroughly under running water.
8. Inspect the filter to ensure all deposits have been removed. If necessary, repeat the soaking and rinsing process.
9. Once the filter is clean, allow it to air dry completely before reinserting it into the filter housing.
10. Finally, reassemble the filter housing and securely attach it back to the pressure washer.
By following these simple steps on a regular basis, you can effectively descale your pressure washer filter, ensuring optimal performance and longevity of your machine.
Understanding the Significance of Descaling
Descaling plays a crucial role in maintaining optimal performance and prolonging the lifespan of your pressure washing equipment. Scaling is a common issue that occurs when minerals and impurities in the water supply accumulate over time, forming a layer of deposits on the internal components.
These deposits can lead to a range of problems, including reduced water flow, decreased pressure, and clogged filters. By understanding the importance of descaling, you can effectively prevent these issues and ensure that your pressure washer operates at its best.
Regular descaling not only helps in maintaining consistent water flow and pressure but also extends the life of your pressure washer. Removing scale buildup from internal components such as the pump and spray nozzles prevents corrosion and allows them to function smoothly. This results in improved efficiency, better cleaning performance, and ultimately, cost savings.
Furthermore, descaling also promotes safety by preventing the buildup of harmful bacteria and contaminants. These unwanted substances can accumulate in the scaling deposits and pose health risks to users if not properly addressed. By regularly descaling your pressure washer, you can ensure a clean and hygienic washing experience.

There are various descaling methods available, including the use of descaling solutions or simply using vinegar or lemon juice as a natural alternative. Regardless of the method chosen, it is essential to follow the manufacturer’s guidelines and recommendations to ensure a thorough and effective descaling process.
- Regular descaling maintains optimal performance and prolongs the lifespan of your pressure washer.
- Descaling prevents reduced water flow, decreased pressure, and clogged filters.
- Removing scale buildup prevents corrosion and improves efficiency and cleaning performance.
- By descaling, you prevent the buildup of harmful bacteria and contaminants.
- Follow manufacturer’s guidelines for effective and thorough descaling.
Gathering the Necessary Tools and Materials
When it comes to descaling the filter of your Karcher pressure washer, it’s important to gather all the necessary tools and materials beforehand. Having everything you need at hand will make the process smoother and more efficient. In this section, I will guide you through the key items you’ll need to effectively descale your pressure washer filter.
1. Protective Gear
Prior to starting the descaling process, it’s important to prioritize your safety. Therefore, it is advisable to wear protective gear to safeguard yourself from any potential hazards. This can include safety goggles, gloves, and protective clothing.
2. Cleaning Solution
The next key element you’ll need is a suitable cleaning solution for descaling. There are various options available in the market, such as descaling solutions specifically designed for pressure washers or alternative homemade solutions. It’s important to choose a solution that is compatible with your specific needs and requirements.
3. Clean Water
The importance of clean water cannot be overstated in the descaling process. Ensure that you have access to a sufficient amount of clean water to carry out the descaling effectively. This can be from a water source or using a water hose connected to a tap.
4. Brushes or Scrubbing Tools
To physically remove any buildup or debris from the filter, you will need brushes or scrubbing tools. These can include a soft-bristled brush, toothbrush, or sponge. The choice of tool will depend on the type and extent of the buildup on the filter.
5. Container or Basin
You will need a container or basin to soak the filter in the cleaning solution. Make sure the container is of suitable size to accommodate the filter and allows for thorough soaking.
6. Towels or Rags
Towels or rags will come in handy to dry the filter and surrounding areas after descaling. Ensure that you have enough absorbent materials to effectively dry the components and prevent any moisture-related issues.
| Essential Tools and Materials: |
|---|
| Protective gear (safety goggles, gloves, clothing) |
| Cleaning solution (descaling solution or homemade alternative) |
| Clean water source (water hose or tap) |
| Brushes or scrubbing tools (soft-bristled brush, toothbrush, sponge) |
| Container or basin for soaking |
| Towels or rags for drying |
Removing and Cleaning the Filtration System
When maintaining your pressure washing equipment, it is important to regularly clean and remove the filtration system. This crucial component helps prevent debris and contaminants from clogging the machine and causing damage to its internal mechanism. In this section, I will guide you through the process of safely removing the filtration system from your pressure washer, ensuring its longevity and optimal performance.
Start by locating the filtration system, which can often be found near the water inlet on the pressure washer. Carefully check the user manual or consult the manufacturer’s instructions to determine the exact location. Once identified, prepare a clean and well-lit workspace where you can comfortably perform the filter removal process.

- Gently turn off the pressure washer and unplug it from the power source to ensure your safety during the procedure.
- Inspect the filtration system for any signs of wear, damage, or excessive accumulation of debris. If the filter appears severely clogged or damaged, it may be necessary to replace it entirely.
- Using a suitable screwdriver or the specified tool recommended by the manufacturer, carefully unscrew the fasteners securing the filtration system in place. Be cautious not to apply excessive force to prevent breaking any delicate components.
- Gently pull out the filter assembly from the pressure washer, taking care not to damage any surrounding parts.
- Once removed, visually inspect the filter for any signs of residue, dirt, or foreign objects. If necessary, gently brush off loose debris with a soft-bristled brush or rinse it under running water.
- For a more thorough cleaning, prepare a mild detergent solution and soak the filter for a few minutes. Then, delicately scrub it with a brush to remove any stubborn residue.
- Rinse the filter thoroughly under clean running water to ensure all the detergent is removed.
- Allow the filter to air dry completely before reinstalling it back into the pressure washer. This will prevent any potential moisture-related issues and ensure optimal performance.
- Finally, carefully align the filter with the designated slot in the pressure washer and secure it in place using the previously removed fasteners. Ensure they are tightened sufficiently but not over-tightened to avoid damaging the filter.
By regularly removing and cleaning the filtration system of your pressure washer, you can maintain its efficiency, extend its lifespan, and ensure consistent high-performance results. Remember to consult the manufacturer’s guidelines and recommendations for specific cleaning procedures and intervals to keep your pressure washer running smoothly for years to come.
Preparing the Solution to Remove Scale from Your Pressure Washer Filter
In this section, I will guide you through the process of preparing a solution to effectively remove scale buildup from your pressure washer filter. As a pressure washer owner, it is important to regularly descale and maintain your equipment to ensure optimal performance and longevity.
Gather the Necessary Ingredients
- White vinegar: Vinegar is a natural and effective descaling agent that helps break down scale deposits.
- Clean water: You will need clean water to dilute the vinegar solution and rinse the filter after descaling.
Mixing the Descaling Solution
To prepare the descaling solution, follow these steps:
- Dilute the white vinegar with an equal amount of clean water. For example, if you use 1 cup of vinegar, mix it with 1 cup of water.
- Stir the mixture well to ensure the vinegar and water are thoroughly combined.
By diluting the vinegar, you create a solution that is safe to use on your pressure washer filter without causing any damage.
Soaking the Filter in the Solution
When it comes to effectively removing built-up sediments and debris from your pressure washer filter, one highly effective method is to soak it in a specially formulated cleaning solution. By immersing the filter in this solution, you allow the powerful cleaning agents to penetrate deep into its fibers, breaking down any stubborn deposits and restoring its optimal filtering capabilities.

Before beginning the soaking process, it is essential to ensure that the filter is fully submerged in the solution. This ensures a thorough and comprehensive cleaning, as the solution can reach all areas of the filter. Make sure to use a container that is large enough to accommodate the filter without any crumpling or folding, as this can impede the cleaning process and result in ineffective descaling.
During the soaking period, it is important to let the cleaning solution work its magic. By giving it enough time to interact with the filter, you allow it to dissolve and break down any limescale, mineral deposits, or other contaminants that may be present. This soaking process should typically last for a recommended amount of time, which can vary depending on the specific cleaning solution used. It is crucial to follow the manufacturer’s instructions for the best results.
After the recommended soaking time has elapsed, it is necessary to thoroughly rinse the filter. This step is crucial as it removes any residual cleaning solution from the filter and ensures that no harmful chemicals remain. Thoroughly rinse the filter under a gentle stream of water until the water runs clear, indicating that all cleaning solution has been removed.
Once the filter has been rinsed, it is essential to allow it to fully dry before reinstalling it in your pressure washer. Placing the filter in a clean, dry area with good airflow will facilitate faster drying. Avoid exposing the filter to direct sunlight, as this can cause degradation and reduce its lifespan. Depending on the ambient conditions, the drying process may take some time, so it is important to be patient and ensure the filter is completely dry before reassembly.
By following these steps and soaking your pressure washer filter in a suitable cleaning solution, you can effectively remove scale, debris, and other contaminants, ensuring uninterrupted performance and extending the lifespan of both your filter and your pressure washer.

Scrubbing and Rinsing the Filter
In this section, I will share my experience with cleaning and refreshing the filter of my Karcher pressure washer. Maintaining a clean and efficient filter is essential for optimal performance, so I have developed a simple yet effective method to scrub and rinse the filter using accessible materials.
To start the process, gather the necessary materials such as a soft-bristle brush, a bucket of warm water, and a mild detergent. First, remove the filter from its housing, taking care not to damage any delicate parts.
Once the filter is removed, gently scrub the surface of the filter using the soft-bristle brush. This will help to dislodge any accumulated debris, such as dirt, leaves, or grime. Be thorough but cautious not to scrub too vigorously, as this may cause damage to the filter.
After scrubbing, it is time to rinse the filter. Fill a bucket with warm water and add a small amount of mild detergent. Place the filter in the bucket and agitate it gently to ensure that all parts are thoroughly rinsed. This step will help remove any remaining dirt or residue from the filter.
Once rinsed, carefully lift the filter out of the bucket, allowing excess water to drain off. Inspect the filter for any remaining debris or clogs. If necessary, repeat the scrubbing and rinsing process until the filter is visibly clean and free from obstructions.
Finally, before reinstalling the filter, make sure it is completely dry. You can either air dry it by placing it in a well-ventilated area for a few hours or use a clean, lint-free cloth to gently pat it dry. Once dry, reinsert the filter into its housing, ensuring it is correctly positioned and securely fastened.
Reinstalling and Testing the Filter
After successfully cleaning the filter of your Karcher pressure washer, the next step is to reinstall it properly and test its functionality. Ensuring the correct reinstallation and testing of the filter is crucial for the optimal performance of your pressure washer and to prevent any potential damage to the machine.
1. Reinstallation Process
To begin the reinstallation process, carefully place the cleaned filter back into its designated slot. Make sure to align it correctly and ensure a firm fit. This will prevent any air or water leakage during operation. Check for any signs of wear or damage on the filter itself, and if necessary, replace it with a new one.
Next, reattach any clips or fasteners that secure the filter in its place. Double-check that they are securely fastened to prevent any movement or dislodgement during use. A properly installed filter will provide effective filtration and ensure the longevity of your pressure washer.
2. Testing the Filter
Once the filter is securely reinstalled, it’s important to test its effectiveness. Start by running a test cycle with your pressure washer, following the manufacturer’s instructions. Pay close attention to any changes in water pressure or unusual sounds during operation.
Observe the pressure washer for any signs of clogging or reduced flow, which may indicate a faulty or improperly installed filter. If you notice any issues, immediately turn off the machine and recheck the filter installation. It’s also a good idea to inspect the surrounding areas for any water leakage or unusual vibrations.
If the pressure washer operates smoothly and maintains consistent water pressure, it indicates that the filter is functioning correctly. Congratulations! You have successfully reinstalled and tested the filter of your Karcher pressure washer, ensuring its optimal performance for future use.
Maintenance Tips to Prevent Future Scaling
As a pressure washer owner, I understand the importance of regular maintenance to keep my equipment running smoothly and prevent future issues. In this section, I will share some valuable tips on how to maintain your pressure washer properly to avoid scaling problems in the future.
1. Regularly Clean and Inspect All Parts: One of the key steps in preventing scaling is to clean and inspect all parts of your pressure washer regularly. This includes the nozzle, wand, hoses, and fittings. By removing any debris or buildup on these parts, you can prevent it from accumulating and causing scaling issues in the future.
2. Use Appropriate Cleaning Solutions: When using your pressure washer, it is essential to use the appropriate cleaning solutions for the specific task at hand. Using the wrong chemicals may not only be ineffective but can also contribute to scaling. Therefore, always read the manufacturer’s instructions and use recommended cleaning solutions to prevent future scaling problems.
3. Flush the System after Every Use: After each use, it is crucial to flush out your pressure washer system properly. By doing so, you can remove any leftover cleaning solution or minerals that may have built up during operation. Flushing the system will help prevent scaling and maintain the efficiency of your pressure washer.
4. Check Water Quality: The quality of water you use in your pressure washer can significantly impact its performance and lifespan. Hard water, which contains high levels of minerals, is more likely to cause scaling issues. Consider using a water softener or filtering system to reduce the mineral content before using it in your pressure washer.
5. Store Properly: When you’re not using your pressure washer, it is essential to store it properly. Make sure to drain any remaining water from the system and store it in a clean and dry place. Proper storage will prevent the growth of bacteria or mold, which can contribute to scaling problems when you use it next time.
6. Schedule Professional Maintenance: While regular maintenance tasks can go a long way in preventing scaling, it is also wise to schedule professional maintenance periodically. A trained technician can inspect your pressure washer thoroughly, identify potential issues, and provide any necessary repairs or replacements. This proactive approach can save you from future scaling problems.
In conclusion, taking proactive steps to maintain your pressure washer properly is crucial to prevent scaling issues in the future. By regularly cleaning and inspecting all parts, using appropriate cleaning solutions, flushing the system, checking water quality, storing properly, and scheduling professional maintenance, you can ensure the longevity and efficient performance of your pressure washer.