How To Connect Karcher Telescopic Lance To Pressure Washer

When it comes to enhancing the performance and reach of your pressure washing experience, there is one vital element you simply cannot overlook – the seamless connection between your extendable arm and your high-powered water sprayer. In this comprehensive guide, I am here to equip you with the knowledge and know-how to effortlessly attach your extendable wand to your hydro jet, ensuring optimal efficiency and effectiveness in all your cleaning endeavors.
Embarking on the journey of connecting these two essential components may seem daunting at first, but fear not! With the right instructions and a little patience, you will soon be wielding the power of a professional pressure washer like a seasoned expert. So, tighten your grip and prepare to discover the secrets of successfully joining your flexible lance and robust water dispenser into a true force to be reckoned with.
Step into the world of compatibility
Before diving into the intricacies of connecting your extendable wand to your hydro jet, it is crucial to acknowledge the significance of compatibility. Just as harmony and cohesion are vital in any successful partnership, ensuring that your expandable lance and pressure washer are a match made in cleaning heaven will set the stage for a remarkable cleaning experience. Consider the dimensions, fittings, and specifications of both components to guarantee a seamless connection that will withstand the test of time.
Stay tuned for step-by-step instructions on connecting your extendable wand to your hydro jet, as well as valuable tips for avoiding potential pitfalls and ensuring a leak-free connection that will maximize your pressure washing prowess.
Connecting the Adjustable Extension Arm to the Power Cleaner
In this section, I will guide you through the process of attaching the versatile extension arm to your high-pressure cleaning device. By following these step-by-step instructions, you will be able to seamlessly connect the adjustable add-on to your pressure washer, enhancing its reach and versatility without any difficulty.
Step 1: Preparing the Extension Arm
Before proceeding with the attachment process, it is important to ensure that the extension arm is in a safe and stable condition. Inspect it for any damages or signs of wear and tear. Additionally, check if all the relevant components are present and intact. This includes the latch, locking mechanism, and any adjustment knobs or levers.
Step 2: Positioning the Power Cleaner
Next, place your pressure washer in a well-ventilated and open area, preferably on a flat and stable surface. Ensure that it is turned off and disconnected from any power sources before proceeding further. This will prevent any accidental operation or electrical hazards during the attachment process.
Step 3: Aligning and Attaching
Now comes the critical part – aligning and attaching the extension arm to the pressure washer. Carefully hold the extension arm near the lance connection point of the power cleaner. Align the attachment mechanism with the corresponding connection on the pressure washer. While firmly holding the extension arm and the power cleaner, gently push or slide the extension arm into place until you feel it securely lock into position.
Note: It is essential to double-check that the extension arm is firmly attached to the power cleaner to prevent any accidental detachment during use.

With these simple steps, you are now ready to connect the adjustable extension arm to your pressure washer. This seamless integration will significantly enhance your cleaning experience, allowing you to effortlessly reach high or distant areas without straining yourself. Enjoy the added convenience and efficiency that this combination brings to your cleaning tasks!
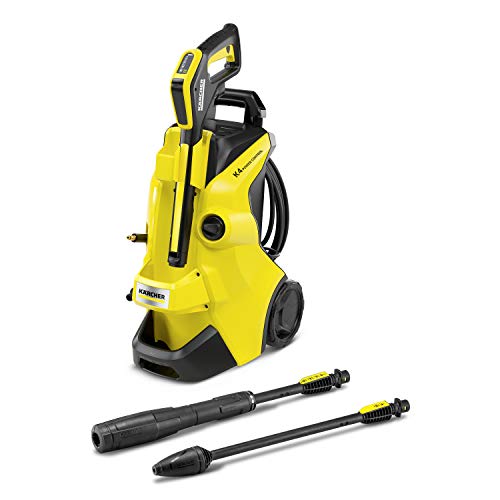
Choosing the Right Telescopic Lance for Your Karcher Pressure Washer
When it comes to enhancing the performance of your Karcher pressure washer, selecting the appropriate telescopic lance is crucial. A telescopic lance is an extended attachment that allows you to reach inaccessible areas with ease, ensuring thorough cleaning and efficient results. In this section, I will guide you through the process of choosing the ideal telescopic lance for your Karcher pressure washer.
Consider Your Cleaning Needs
Before making a decision, it is essential to assess your specific cleaning requirements. Different telescopic lances offer varying features and functionalities, making it necessary to consider factors such as the type of surfaces you’ll be cleaning, the level of dirt or grime buildup, and the areas that are difficult to reach. By understanding your cleaning needs, you can narrow down the options and find a telescopic lance that best suits your requirements.
Evaluate the Lance Material and Length
The material and length of the telescopic lance play a crucial role in its performance and durability. Typically, telescopic lances are constructed using lightweight and sturdy materials like aluminum or fiberglass. These materials ensure the lance is strong enough to withstand high-pressure water flow while remaining easy to handle. Additionally, consider the length of the telescopic lance based on the height and reach required for your cleaning tasks. A longer lance will allow you to clean elevated or distant areas effortlessly.
By considering your cleaning needs and evaluating the lance material and length, you can make an informed decision when choosing the right telescopic lance for your Karcher pressure washer. Remember, investing in a high-quality telescopic lance will enhance the effectiveness of your pressure washer and make your cleaning tasks more efficient and convenient.

Gathering the Essential Tools and Equipment
When it comes to assembling and connecting your Karcher telescopic lance to the pressure washer, having the right tools and equipment is crucial. This section will guide you through the necessary items you will need to ensure a successful connection.
1. Wrench or Adjustable Spanner
One of the most important tools you will need is a wrench or an adjustable spanner. This will be used to securely fasten the different components of the telescopic lance to the pressure washer. Make sure to choose a wrench or spanner that fits the specific nuts and bolts of your equipment.
2. Teflon Tape or Sealant
In order to prevent any leakage or water damage, it is recommended to use Teflon tape or sealant. This can be applied to the threaded connections of the telescopic lance and the pressure washer to create a watertight seal. Ensure that the tape is wrapped tightly around the threads to achieve a snug fit.
| Tools and Equipment | Usage |
|---|---|
| Wrench or Adjustable Spanner | To securely fasten components |
| Teflon Tape or Sealant | To prevent leakage and ensure a watertight seal |
By gathering these essential tools and equipment, you are setting yourself up for a successful and hassle-free connection process. Remember to keep them close at hand before starting the assembly to ensure a smooth experience.
Prepping Your Pressure Washer for the Connection Process
When preparing your pressure washer for the connection process, it is important to ensure that all necessary steps are followed to guarantee a successful and efficient setup. By taking the time to properly prepare your pressure washer, you can avoid any potential issues or complications during the connection process.

- Inspect the pressure washer: Before beginning, carefully examine your pressure washer to check for any signs of damage or wear. Look for any loose connections or leaks that may need to be addressed before proceeding.
- Gather the necessary tools: Make sure you have all the required tools and accessories needed for connecting the telescopic lance to your pressure washer. This may include wrenches, screws, or adapters.
- Ensure proper power supply: Confirm that your pressure washer is securely connected to a power source and that it has adequate power supply. This will ensure optimal performance during the connection process.
- Disconnect and clean attachments: If there are any attachments or accessories already connected to your pressure washer, carefully detach and clean them to ensure a clean and clutter-free setup for the telescopic lance.
- Follow manufacturer instructions: Consult the instruction manual provided by the manufacturer of your pressure washer. It will contain detailed guidelines on how to connect the telescopic lance properly.
- Prepare the telescopic lance: Examine the telescopic lance to ensure it is clean and free from any debris. If necessary, wipe it down before proceeding with the connection process.
- Secure the telescopic lance: Follow the manufacturer’s instructions to securely attach the telescopic lance to your pressure washer. Make sure all connections are tightened properly to prevent any leaks during operation.
- Test the connection: After the telescopic lance is attached, turn on your pressure washer to test the connection. Check for any leaks or abnormal functioning and make necessary adjustments if required.
- Maintain and store properly: Once the connection process is complete, it is important to properly maintain and store your pressure washer and telescopic lance. Clean them regularly and store them in a dry and safe location to prolong their lifespan.
By following these steps, you can effectively prepare your pressure washer for the connection process, ensuring a smooth and efficient setup for your Karcher telescopic lance. Remember to always refer to the manufacturer’s instructions for specific guidance on your pressure washer model.
Attaching the Lance Extension to your Karcher Pressure Washer
When it comes to enhancing the reach and flexibility of your Karcher pressure washer, attaching a lance extension can make a significant difference. In this section, I will guide you through the process of connecting the lance extension to your pressure washer, allowing you to effectively clean those hard-to-reach areas without any hassle.
Before we begin, it is important to prepare the necessary tools and materials for the attachment process. You will need a compatible lance extension that is designed to fit your Karcher pressure washer model. Additionally, ensure that you have the required connectors or adapters that may be necessary for a secure and proper connection.
Firstly, make sure that your pressure washer is turned off and disconnected from any power sources. Safety should always be a top priority. Once you have ensured this, locate the lance inlet on the pressure washer. It is typically located near the handle or trigger of the pressure washer.
Next, take your lance extension and check for any markings or indicators that denote the correct orientation. Align these markings with the lance inlet on the pressure washer. Gently insert the lance extension into the inlet, ensuring a snug fit. You may need to push or twist the extension slightly to fully secure it in place.

Once the lance extension is securely attached, give it a gentle tug to test its stability. It should not come loose or detach easily. If it feels loose, recheck the connection and make any necessary adjustments to ensure a secure fit.
Finally, once you are satisfied with the attachment, you can proceed to connect any additional accessories or nozzles to the lance extension as required. This will provide you with further customization options depending on the cleaning task at hand.
With the lance extension successfully connected to your Karcher pressure washer, you are now ready to reach greater heights and clean those distant corners without strain. Remember to always follow the manufacturer’s instructions and guidelines to ensure safe and efficient usage of your pressure washer and its attachments.
Securing the Connection for Added Stability and Safety
When it comes to setting up the connection between the different parts of your pressure washing equipment, ensuring stability and safety is of utmost importance. In this section, I will walk you through the steps to secure the connection between the telescopic lance and the pressure washer, providing you with peace of mind during your cleaning tasks.
- Step 1: Inspect the telescopic lance and the pressure washer before starting the connection process.
- Step 2: Identify the compatible attachment points on both the telescopic lance and the pressure washer.
- Step 3: Carefully align the attachment points, ensuring a proper fit.
- Step 4: Use the provided locking mechanism, such as a securing screw or latch, to secure the connection.
- Step 5: Gently test the stability of the connection by applying slight pressure or movement.
- Step 6: If the connection feels loose or unstable, revisit step 3 and make necessary adjustments.
- Step 7: Once you are satisfied with the stability, proceed with connecting any additional accessories or attachments.
By following these steps and taking the time to properly secure the connection, you can ensure added stability and safety while using your pressure washer with the telescopic lance. This will allow you to confidently tackle your cleaning tasks and achieve optimal results without any concerns about the connection coming loose during operation.

Testing the Connection and Ensuring Proper Functionality
When it comes to setting up and using your new pressure washer with the telescopic lance attachment, it is important to test the connection and ensure everything is functioning properly. This section will guide you through the necessary steps to guarantee a successful and efficient cleaning experience.
Step 1: Securely Attach the Telescopic Lance
The first step in testing the connection is to securely attach the telescopic lance to your pressure washer. This can be done by carefully aligning the lance with the nozzle on the pressure washer and twisting it clockwise until it locks into place. Make sure the connection is tight and secure to avoid any leaks or unwanted movements during operation.
Step 2: Inspect for Leaks or Damage
After attaching the telescopic lance, carefully inspect the connection for any signs of leaks or damage. This can include checking for water dripping or spraying from the connection point, as well as examining the lance for any cracks or broken parts. It is essential to address any issues before proceeding to ensure optimal functionality and safety.
Note: In case of leaks, try tightening the connection or replacing any damaged parts as recommended by the manufacturer.
Step 3: Perform a Test Run
With the telescopic lance securely attached and without any visible leaks or damage, it is time to perform a test run to ensure proper functionality. Start by turning on the pressure washer and allowing it to build up the necessary pressure.

| Action | Observation | Remarks |
|---|---|---|
| Activate the lance trigger | Check for smooth water flow | If the flow is uneven or weak, inspect the nozzle and lance for any clogs or blockages. |
| Adjust the telescopic lance length | Ensure easy extension and retraction | If the extension mechanism is not functioning properly, consult the user manual or contact customer support. |
| Test different spray patterns | Observe the spray intensity and coverage | Confirm that the lance provides the desired pressure and spray patterns according to your cleaning needs. |
| Turn off the pressure washer | Check for any leaks or abnormal behavior | If there are any issues, address them before using the telescopic lance for actual cleaning tasks. |
By following these steps and carefully evaluating the connection and functionality, you can be confident in the proper installation of your Karcher telescopic lance and pressure washer setup. This ensures a successful and efficient cleaning experience while maintaining the longevity of your equipment.
Adjusting the Height and Angle of the Extendable Shaft
In this section, I will guide you on adjusting the height and angle of the extendable shaft for your pressure washer.
When using your pressure washer, it is essential to have the right height and angle for the telescopic lance to ensure efficient and effective cleaning. With the telescopic lance’s adjustable feature, you can easily customize it to fit your specific needs and reach challenging areas without straining yourself.
Adjusting the height: To start, locate the height adjustment mechanism, usually located near the base of the telescopic lance. This mechanism allows you to extend or retract the lance to your desired height. Firmly hold the handle of the lance and loosen the height adjustment mechanism. Gently pull or push the lance to adjust its length. Once you have achieved the desired height, tighten the height adjustment mechanism to secure it in place. Remember to keep the lance at a comfortable height that allows you to maintain control and balance during operation.
Adjusting the angle: The angle adjustment of the telescopic lance is just as crucial as the height adjustment. It allows you to direct the water spray precisely where you need it. Look for the angle adjustment mechanism, usually located near the handle or at the joint where the lance connects to the pressure washer. Loosen the angle adjustment mechanism to enable movement. Gradually tilt the telescopic lance to the desired angle, considering the surface you are cleaning. Once you have found the optimal angle, tighten the angle adjustment mechanism to secure it.

It’s important to mention that the height and angle adjustments may vary depending on the specific model of the pressure washer and telescopic lance you are using. Therefore, always refer to the manufacturer’s instructions for precise guidance on adjusting your particular equipment.
By properly adjusting the height and angle of your telescopic lance, you will achieve more efficient cleaning and reduce the risk of injury or strain during operation. Take the time to find the optimal settings for each cleaning task, and make sure to secure the adjustments before starting the pressure washer.
Troubleshooting Common Issues with the Connection
When it comes to connecting the telescopic lance to the pressure washer, there can be certain issues that may arise. In this section, I will discuss some common problems that you might encounter and provide troubleshooting tips to help you resolve them.
1. Difficulty in securing the connection
If you are having trouble securely attaching the telescopic lance to the pressure washer, there could be a few reasons for this. Firstly, ensure that both the lance and the pressure washer fittings are clean and free from any dirt or debris. Any particles on the surfaces can prevent a tight seal. Also, check that you are aligning the lance correctly with the fittings. Sometimes, a slight turn or adjustment can make all the difference in achieving a secure connection.
2. Leaks or water spray from the connection
If you notice leaks or water spray coming from the connection between the telescopic lance and the pressure washer, it is essential to address this issue promptly. One possible reason for this problem could be a damaged or worn-out O-ring. Inspect the O-ring and if you notice any cracks or signs of wear, it is best to replace it with a new one. Another cause for leaks could be an improper assembly or a loose connection. Double-check that the lance and pressure washer fittings are securely fastened to prevent any water leakage.
- Make sure that the O-ring is properly seated and lubricated before attaching the telescopic lance.
- Tighten the fittings gently using your hands to avoid over-tightening, which can cause damage.
- If the issue persists, consult the user manual or contact the manufacturer for further assistance.
3. Limited range or reduced water pressure
In some cases, you may experience a limited range or reduced water pressure when using the telescopic lance with the pressure washer. One possible reason for this could be a clogged or blocked nozzle. Over time, debris or mineral deposits can accumulate in the nozzle, restricting the water flow. Carefully remove the nozzle and clean it thoroughly with water and a small brush. If the issue persists, consider replacing the nozzle to ensure optimal performance.
- Regularly clean and maintain your telescopic lance and pressure washer to prevent issues from arising.
- Inspect all connections and fittings for any signs of damage or wear.
- Refer to the user manual for specific instructions on troubleshooting and maintenance.
- Reach out to the manufacturer’s customer support if you require additional assistance.
By being aware of these common issues and following the troubleshooting tips provided, you can ensure a secure and efficient connection between your telescopic lance and pressure washer for optimal performance and cleaning results.
Maintenance and Cleaning Tips for your Karcher Telescopic Lance and Pressure Washer
As an owner of a Karcher Telescopic Lance and Pressure Washer, I understand the importance of regular maintenance and cleaning to ensure optimal performance and longevity of these powerful tools. In this section, I will share some valuable tips and techniques to help you keep your equipment in top shape without compromising their efficiency and effectiveness.
1. Regular Inspection and Lubrication
To begin, it is essential to regularly inspect your Karcher Telescopic Lance and Pressure Washer for any signs of wear or damage. Check the components, such as the nozzle, trigger gun, and telescopic lance, for any cracks, leaks, or loose connections. Additionally, lubricate the moving parts, such as the telescopic mechanism and trigger mechanism, using a suitable lubricant to ensure smooth operation.
2. Cleaning the Telescopic Lance
Proper cleaning of the telescopic lance is crucial to maintain its telescoping functionality and performance. After each use, rinse off any dirt, debris, or detergent residue from the lance using clean water. Pay special attention to the telescopic sections, ensuring all dirt and grime are removed. A soft brush can be used for stubborn dirt. Be careful not to use excessive force that may damage the lance.
Additionally, inspect the O-rings and seals of the telescopic lance regularly. If you notice any signs of wear or damage, such as cracks or dryness, they should be replaced promptly. This will prevent leaks and ensure proper sealing during operation.
3. Maintaining the Pressure Washer
When it comes to maintaining your pressure washer, regular cleaning is essential to prevent clogs and prolong its lifespan. Start by emptying any remaining water and cleaning agents from the detergent tank. Then, flush the system by connecting the pressure washer to a water source and letting clean water run through it for a few minutes.
Next, inspect and clean the nozzle, spray lance, and filter for any obstructions. Utilize a soft brush or toothpick to remove any debris or mineral deposits that may have accumulated. Ensure the O-rings on the connections are in good condition and properly lubricated to prevent leaks.
Lastly, it is crucial to store your pressure washer in a clean and dry environment, away from extreme temperatures and direct sunlight. This will prevent damage and corrosion, ensuring its reliable performance for years to come.
| Tips for Maintenance and Cleaning |
|---|
| Regular Inspection and Lubrication |
| Cleaning the Telescopic Lance |
| Maintaining the Pressure Washer |