
How To Change Pressure Washer Tip

Are you looking to upgrade your cleaning routine and achieve remarkable results? Look no further! In this article, I will unveil a simple yet effective technique that will revolutionize the way you tackle your cleaning tasks.
Picture this: you have a powerful tool at your disposal, designed to effortlessly remove dirt and grime from various surfaces. However, have you ever wondered if there’s a way to optimize its performance and adapt it to different cleaning requirements? Well, the answer lies within a small yet essential component – the nozzle.
The nozzle, often referred to as the heart of a pressure washer, is the key to unlocking its full potential. By adjusting the nozzle, you can control the intensity of the water stream and adapt it to specific cleaning tasks. Whether you need a gentle touch to clean delicate surfaces or a strong, forceful spray for stubborn dirt, the nozzle is your trusty companion.
Now, you might be wondering, how can one change the nozzle? Fear not – this process is simpler than you think! By following a few easy steps, you will have the confidence to switch between nozzle types effortlessly, allowing you to accomplish a wider range of cleaning tasks with ease. So, without further ado, let’s dive into the world of nozzle replacement and explore the endless possibilities it provides!
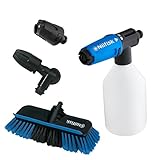
Changing the Nozzle Attachment on the Power Sprayer
When it comes to adjusting the flow of water from your power sprayer, there is a simple and effective solution that will allow you to customize and optimize your cleaning experience. By interchanging the nozzle attachment, you can control the intensity and the coverage of the water pressure, ensuring that it is suitable for the specific task at hand.
One important aspect of maintaining a power sprayer is learning how to switch out the nozzle attachment. This process involves detaching the current tip and replacing it with a different one that suits your needs. Adhering to the correct method will ensure a safe and efficient procedure.
Step 1: Begin by turning off the power sprayer and disconnecting it from the power source. Safety should always be a priority when working with any type of machinery.
Step 2: Identify the current nozzle attachment and understand its features. Each nozzle has a specific spray pattern and angle, allowing for different functions such as concentrated jet streams or wide coverage sprays.
Step 3: Firmly grip the base of the nozzle attachment and twist it counterclockwise to loosen it from the power sprayer wand. Be cautious not to apply excessive force which could damage the equipment.
Step 4: Once the current nozzle attachment is detached, select the new one that best suits your requirements. Ensure that it is compatible with your power sprayer model and the task you wish to accomplish.

Step 5: Align the base of the new nozzle attachment with the end of the power sprayer wand. Begin twisting it clockwise until it is securely tightened. Ensure that it is tightened enough to prevent any water leakage during operation.
Step 6: Once the new nozzle attachment is properly installed, reconnect the power sprayer to the power source and turn it on to test the new setting. Adjust the distance and angle of the sprayer wand to achieve the desired cleaning effect.
Changing the nozzle attachment on your power sprayer can greatly enhance its versatility and effectiveness. By understanding the process and following the correct steps, you can easily adapt your equipment to various cleaning tasks and achieve optimal results.
Understanding the Significance of Selecting the Appropriate Attachment for Optimal Pressure Cleaning
When it comes to effectively cleaning different surfaces using a pressure washer, the choice of nozzle attachment plays a vital role in achieving satisfactory results. The right pressure washer tip can significantly enhance the cleaning performance, making it essential to understand the importance of choosing the appropriate attachment for each specific cleaning task.
Why Does the Selection of Pressure Washer Tip Matter?
Selecting the right pressure washer tip is crucial as it directly impacts the water flow and the pressure at which it is delivered. Different surfaces and projects require varying levels of pressure for optimum cleaning. Using the wrong tip can result in either insufficient force to remove dirt and grime or excessive pressure that may damage delicate surfaces.

A Guide to Choosing the Right Pressure Washer Tip
To ensure effective cleaning while preserving the integrity of the surface being cleaned, it is important to understand the various pressure washer tip options and their corresponding applications. The following table provides a brief overview of the most common pressure washer tips and their recommended uses:
| Pressure Washer Tip | Recommended Use |
|---|---|
| 0-Degree Tip | Ideal for removing tough stains and grime from small, concentrated areas. Use with caution as it delivers a highly concentrated stream of water that can cause damage. |
| 15-Degree Tip | Suitable for heavy-duty cleaning tasks such as removing paint or stubborn dirt from surfaces like concrete or metal. |
| 25-Degree Tip | Provides a balanced level of pressure for general-purpose cleaning on surfaces like decks, patios, or siding. |
| 40-Degree Tip | Gentle and wide-spread spray pattern that is ideal for delicate surfaces like cars, windows, or screens. |
By selecting the appropriate pressure washer tip based on the task at hand, you can ensure effective cleaning while minimizing the risk of damage to the surface. Always refer to the manufacturer’s recommendations and guidelines for optimum performance and safety.
In conclusion, understanding the significance of choosing the right pressure washer tip is essential for achieving desired cleaning outcomes and preserving the integrity of the surfaces being cleaned. By selecting the appropriate attachment, you can optimize the pressure and water flow, ensuring efficient and effective cleaning results.
A Step-by-Step Guide to Ensuring a smooth transition when swapping the nozzle of your powerful water sprayer
Step 1: Preparation and Safety Measures
Before embarking on the journey of swapping your pressure washer’s nozzle, it is crucial to prioritize safety. Begin by donning protective eyewear and gloves to shield yourself from potential harm. Additionally, ensure that the water sprayer is turned off and disconnected from any power sources to eliminate any risk of accidental activation during the process. Safety first!
Step 2: Identifying the Nozzle Type
Understanding the various functions and capabilities of different nozzle types is essential. Each nozzle shape and size corresponds to a specific spray pattern and pressure strength. Take a moment to familiarize yourself with the interchangeable nozzles available for your pressure washer, ranging from pinpoint streams to wide-angle sprays. Once you have identified the specific nozzle you wish to use, you’re ready to proceed.

Step 3: Unscrewing the Current Nozzle
Now that we are ready to disengage the current nozzle, it’s time to remove it carefully. Hold onto the wand firmly and locate the nozzle attachment at the end. Using a counterclockwise motion, begin unscrewing the current nozzle to detach it from the wand. Exercise patience and ensure not to force it, as this may cause damage to the threads.
Step 4: Attaching the New Nozzle
With the previous nozzle removed, it is time to bring in the new one! Take your chosen nozzle and align it with the exposed threads on the wand’s end. Apply gentle pressure and rotate it clockwise, tightening the nozzle until it is snugly attached. Ensure not to overtighten or cross-thread the nozzle to prevent any difficulties for future changes.
Step 5: Test and Adjust
Now that you have successfully replaced the nozzle on your pressure washer, it’s essential to test the sprayer before commencing any cleaning tasks. Connect the water supply and verify that the nozzle is securely in place. Slowly turn on the water flow and carefully inspect the spray pattern. If necessary, adjust the nozzle’s position slightly to achieve the desired spray pattern and pressure. Congratulations, you’re now ready to conquer any cleaning challenge!
Remember, the process of changing the pressure washer nozzle is simple and straightforward if you follow these step-by-step instructions. By prioritizing safety, understanding nozzle types, and exercising caution when removing or attaching nozzles, you will ensure a smooth transition and optimal performance from your pressure washer. I hope this guide has been informative and helpful. Happy cleaning!
Exploring Various Types of Nozzles for Power Cleaning and Their Applications
When it comes to effective power cleaning, utilizing the appropriate nozzle for your pressure washer can make a significant difference in achieving the desired results. In this section, I will discuss the different types of nozzles available for power cleaning and explore their various uses.

| Nozzle Type | Description | Common Applications |
|---|---|---|
| Fan Nozzle | A nozzle with a wide dispersion pattern, producing a fan-shaped spray. | Perfect for cleaning large surface areas, such as driveways, decks, and siding. |
| Rotating Nozzle | A nozzle that spins for an intense and concentrated cleaning power. | Ideal for removing tough stains or grime from concrete, brick, or heavily soiled surfaces. |
| Turbo Nozzle | A specialized nozzle that combines the power of the fan and rotating nozzles. | Great for tackling stubborn dirt, mold, or mildew in hard-to-reach areas. |
| Soap Nozzle | A nozzle designed for applying detergent or soap mixture. | Used for pre-treating surfaces or applying cleaning solutions to achieve a more thorough clean. |
| Adjustable Nozzle | A versatile nozzle with an adjustable spray pattern and intensity. | Allows for flexibility in cleaning various surfaces and adjusting water pressure according to the task at hand. |
By understanding the different types of pressure washer nozzles available and their respective applications, you can optimize your cleaning process and achieve superior results. Whether you need to power clean your patio, remove stubborn stains, or apply soap for thorough cleaning, choosing the right nozzle will ensure efficiency and effectiveness.
Tips for Prolonging the Lifespan of Your Pressure Washer Nozzles
As an experienced pressure washer user, I have learned that taking care of the nozzles is essential for maintaining the efficiency and effectiveness of the machine. In this section, I will share some tips and techniques that I use to extend the lifespan of my pressure washer nozzles.
1. Regularly Inspect and Clean Nozzles
One of the simplest yet crucial tips is to regularly inspect and clean the nozzles. Over time, dirt, debris, and mineral deposits can build up inside the nozzle, leading to reduced water flow and pressure. By inspecting the nozzles before each use and cleaning them as needed, you can prevent clogs and ensure optimal performance.
2. Use the Correct Nozzle Size and Angle
Using the correct nozzle size and angle is important for both cleaning efficiency and nozzle longevity. Using an improper nozzle size can put excessive strain on the nozzle and may lead to premature wear and tear. Additionally, using the incorrect angle can result in unnecessary pressure on the nozzle, causing it to wear out quicker. Always refer to the manufacturer’s instructions to determine the appropriate nozzle size and angle for your specific cleaning task.
3. Avoid Excessive Pressure and Overworking
Excessive pressure and overworking the pressure washer can significantly reduce the lifespan of the nozzles. It is important to strike a balance between the desired cleaning power and the nozzle’s capacity. Avoid using excessive pressure that may cause damage to the nozzle or other components of the machine. Additionally, take breaks during extended use to prevent overheating and to allow the nozzle to rest.

4. Handle Nozzles with Care
Proper handling of the nozzles is essential to prevent damage and increase their lifespan. Avoid dropping or mishandling the nozzles, as this can lead to cracks or breakage. Store the nozzles in a safe place when not in use to protect them from potential damage. Additionally, be cautious when attaching and detaching the nozzles to avoid any accidental damage.
5. Replace Worn-out Nozzles
Nozzles have a finite lifespan, and eventually, they will wear out. It is important to regularly monitor the condition of the nozzles and replace them when necessary. Signs of wear and tear include reduced water flow, decreased cleaning efficiency, or visible damage. By promptly replacing worn-out nozzles, you can ensure optimal performance and prevent further damage to your pressure washer.
By following these tips, you can significantly extend the lifespan of your pressure washer nozzles, saving you time and money in the long run. Proper maintenance and care of the nozzles are key to maximizing the performance and longevity of your pressure washer.
Common Mistakes to Avoid When Swapping Your Pressure Washer Nozzle
In this section, I’ll share my personal experiences and common mistakes to watch out for when swapping out the nozzle on your pressure washer. Changing the nozzle may seem like a simple task, but making these errors can lead to poor performance, damage to your equipment, or even personal injury.
1. Skipping Safety Precautions: Neglecting safety measures is one of the most common mistakes people make when changing their pressure washer nozzle. Remember to always wear safety goggles, gloves, and appropriate attire to protect yourself from potential injuries. Additionally, make sure to remove any sources of power and properly secure the trigger gun to prevent accidental activation.
2. Not Checking Compatibility: Each pressure washer has specific requirements for nozzle compatibility. Before replacing the nozzle, ensure that the new one matches the specifications provided by the manufacturer. Using an incompatible nozzle may result in reduced performance or even damage to your pressure washer.
3. Forgetting to Clear the System: Prior to changing the nozzle, it is essential to relieve pressure and clear the system of any residual water. Failing to do so can lead to water sprays or unpredictable pressure releases, posing a risk to both you and your equipment. Always turn off the pressure washer and release any pressure in the system before proceeding.
4. Incorrect Installation: Improper attachment of the new nozzle can lead to leaks, loss of pressure, or damage to the pressure washer. Ensure that the nozzle is securely tightened and properly aligned with the lance or wand. Take care to avoid over-tightening as it may cause damage to the threads. If necessary, refer to the manufacturer’s instructions for correct installation techniques.
5. Not Testing the New Nozzle: After installing the new nozzle, it is crucial to test it before starting any cleaning tasks. Gradually increase the pressure and observe the nozzle’s performance. Look for any irregularities such as unusual sounds, vibrations, or leaks. Testing the new nozzle ensures proper functionality and allows for immediate troubleshooting if any issues arise.
| Mistake | Consequence | Solution |
|---|---|---|
| Skipping Safety Precautions | Injury or accidents | Always wear safety goggles, gloves, and secure the trigger gun |
| Not Checking Compatibility | Poor performance or equipment damage | Ensure the new nozzle matches manufacturer specifications |
| Forgetting to Clear the System | Potential water sprays or unpredictable pressure releases | Turn off the pressure washer and release any pressure before changing the nozzle |
| Incorrect Installation | Leaks, pressure loss, or damage | Securely tighten and align the new nozzle following the manufacturer’s instructions |
| Not Testing the New Nozzle | Unidentified issues or malfunctions | Test the new nozzle’s performance before starting any cleaning tasks |
Determining the Right Time to Replace Your Nozzle Attachment
When it comes to maintaining and maximizing the efficiency of a high-pressure cleaning system, it is crucial to pay attention to the condition of the nozzle attachment. As a user, I have found that determining the appropriate time for a replacement requires careful observation and consideration. Here, I will share my personal experience and insights on how to recognize signs that indicate when it is time to switch to a new nozzle.

1. Performance Indicator
Underperformance: Over time, the nozzle attachment may start exhibiting signs of declining performance. If you notice a decrease in the pressure or flow of water, it could be an indication that the nozzle has worn out. Additionally, if the water spray pattern becomes inconsistent or irregular, it is a clear sign that the tip may need to be replaced.
Inefficient Cleaning: One of the main purposes of a pressure washer is to ensure efficient and effective cleaning. If you notice that the nozzle is struggling to remove dirt, grime, or stains that it used to effortlessly eliminate, it is a strong indication that a replacement is necessary. Cleaning tasks should be completed with ease and without any residual debris left behind.
2. Physical Condition
Wear and Tear: As the nozzle attachment is constantly exposed to high-pressure water and abrasive substances, it is vital to inspect its physical condition regularly. Look for any signs of wear and tear, such as cracks, chips, or deformities in the material. These visible damages can compromise the overall performance and efficiency of the nozzle, making it an ideal time to consider replacing it.
Corrosion: If your pressure washer is used in areas with corrosive substances or chemicals, it is important to pay attention to any signs of corrosion on the nozzle tip. Corrosion can lead to a decreased lifespan and efficiency of the attachment. If you notice discoloration, rust, or pitting, it is a clear indication that it is time to invest in a new nozzle.
In conclusion, being observant and attentive to the performance indicators and physical condition of your pressure washer’s nozzle attachment is crucial in determining when it is time for a replacement. By recognizing these signs, you can ensure that your cleaning tasks are carried out efficiently and effectively, maintaining the optimal functionality of your pressure washing system.
The Importance of Regular Maintenance for Your Pressure Washer Tips
When it comes to keeping your pressure washer operating at optimal performance, regular maintenance is key. By taking the time to properly maintain and care for your pressure washer tips, you can extend their lifespan, improve cleaning efficiency, and ensure maximum safety during operation. In this section, I will discuss the importance of regular maintenance for your pressure washer tips and provide helpful tips for keeping them in excellent condition.
1. Enhancing Performance
Regular maintenance allows you to optimize the performance of your pressure washer tips. Over time, dirt, debris, and mineral deposits can accumulate on the tip, causing a decrease in the overall pressure and effectiveness of your cleaning. By regularly inspecting and cleaning your tips, you can remove any blockages or build-up, resulting in better cleaning performance.
2. Extending Lifespan
By incorporating regular maintenance into your pressure washer tip care routine, you can significantly extend their lifespan. When tips are neglected and not properly maintained, they can become worn, damaged, or clogged, reducing their effectiveness and requiring replacement sooner. However, by regularly cleaning and inspecting your tips, you can identify any issues early on and address them before they worsen, effectively prolonging their lifespan.
| Benefits of Regular Maintenance for Pressure Washer Tips: |
|---|
| Improved cleaning efficiency |
| Extended tip lifespan |
| Minimized risk of accidents |
| Cost savings on tip replacements |
| Consistent and reliable performance |
Regular maintenance not only enhances the overall cleaning performance and lifespan of your pressure washer tips but also minimizes the risk of accidents. Proper maintenance ensures that the tips are in good working condition, reducing the chances of tip malfunctions or failures during operation. Additionally, by taking care of your tips, you can avoid costly tip replacements and maintain consistent, reliable performance.
In conclusion, regular maintenance is essential for keeping your pressure washer tips in optimal condition. By incorporating routine cleaning, inspection, and care into your maintenance routine, you can enhance performance, extend the lifespan of your tips, and ensure safe and efficient cleaning operations.
Troubleshooting Tips for Common Problems with Pressure Washer Tips
As someone who regularly uses a pressure washer, I understand the frustration that comes with experiencing issues related to the tips. There are times when the spray pattern may not be as expected or the nozzle might be clogged. In this section, I will share some troubleshooting tips to help you resolve common problems encountered with pressure washer tips.
1. Inconsistent Spray Patterns
If you notice that the spray pattern from your pressure washer tip is uneven or inconsistent, there could be a few possible causes. One potential reason is that the tip may not be securely attached to the wand or it might be worn out. In such cases, try removing and reattaching the tip properly. Additionally, inspect the tip for any signs of damage or clogging that could be interfering with the spray pattern. If the tip is damaged, replace it with a new one.
2. Clogged Nozzle
A clogged nozzle is a common issue that can affect the performance of a pressure washer. If you observe that the water flow is restricted or there is a decrease in pressure, it is likely that the nozzle is clogged. Start by disconnecting the wand from the pressure washer and removing the nozzle. Check for any debris or mineral deposits that could be obstructing the flow. To clear the clog, you can use a thin needle or a nozzle cleaning tool. Once the nozzle is clean, reattach it to the wand and test the pressure washer again.
3. Leaking or Dripping Tips
If you notice that the tip is leaking or dripping water even when the pressure washer is not in use, it could be a sign of a worn-out or damaged seal. Inspect the tip and the connection point between the tip and the wand to identify any signs of wear or damage. If necessary, replace the tip or the seals to fix the leakage issue. It’s important to ensure that the tip is properly tightened to prevent any further leaks.
- Check the attachment of the tip
- Inspect for signs of damage or clogging
- Clean a clogged nozzle
- Replace worn-out or damaged seals
- Tighten the tip properly to prevent leaks
By following these troubleshooting tips, you can address common issues related to pressure washer tips and ensure optimal performance of your pressure washer.
Expert Advice: Tips to Maximize the Performance of Your Power Washing Accessories
Greetings, fellow pressure washing enthusiasts! Today, I wanted to share some valuable insights to help you optimize the performance of your power washing accessories. These tips, born out of my experience and expertise, will ensure that you get the most out of your equipment and achieve exceptional cleaning results.
1. Choose the Perfect Nozzle: By selecting the ideal nozzle for your pressure washer, you can significantly enhance its performance. Don’t underestimate the importance of this simple yet crucial component. Experiment with different nozzle sizes and spray angles to find the perfect combination for your specific cleaning task.
Pro tip: A narrow spray angle concentrates the water stream, offering more power, while a wider spray angle covers a larger area.
2. Maintain Optimal Nozzle Distance: Maintaining the right nozzle-to-surface distance is key to optimizing your cleaning efforts. Getting too close may damage surfaces, while being too far may result in inefficient cleaning. As a general rule of thumb, keep the nozzle approximately 12-18 inches away from the surface being cleaned, and adjust as needed based on the material’s sensitivity and degree of dirtiness.
I prefer to start at a safe distance and gradually move closer if necessary, ensuring a thorough clean without causing any harm.
3. Regularly Inspect and Clean: As with any tool, proper maintenance is vital for long-term performance. Regularly inspect and clean your pressure washer accessories, especially the nozzles, for any clogs or debris that may affect the water flow. A clear and unobstructed nozzle ensures optimal water pressure and, consequently, superior cleaning results.
I make it a point to inspect my accessories before and after each use, cleaning them thoroughly and ensuring they are in perfect working condition.
4. Adjust Pressure Settings: Don’t underestimate the power of adjusting pressure settings to suit your specific cleaning needs. Sometimes, a reduced pressure setting can be more effective in removing dirt and grime without damaging the surface. Experiment with different pressure levels to find the sweet spot that combines powerful cleaning with gentle treatment.
I always start with a lower pressure setting and gradually increase it if required, allowing me to find the perfect balance between power and protection.
5. Practice Proper Technique: Lastly, don’t forget that technique plays a crucial role in maximizing the performance of your pressure washer accessories. Optimal cleaning results are achieved by maintaining a consistent and steady motion, directing the water stream evenly across the surface. Take your time, avoid rushing, and let the machine do the work for you.
Remember, a smooth and controlled motion guarantees a thorough clean and prevents patchy results.
By implementing these expert tips, you can unlock the true potential of your power washing accessories and achieve outstanding cleaning performance. Happy power washing!


