
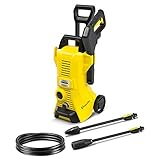
How To Change Hose On Greenworks Pressure Washer

Are you struggling to find the perfect solution for replacing the crucial component of your advanced cleaning device? Look no further! In this step-by-step guide, I will share my personal experience and provide you with expert advice on how to efficiently and effectively change the tubing on your cutting-edge high-pressure cleaner.
Get ready, as I unveil the secrets to a hassle-free hose replacement process that will leave your cleaning tasks a breeze!
Embark on this journey with me as I walk you through the necessary steps to replace the essential tube on your powerful cleaning companion. From identifying the correct tube size to a foolproof method for detachment, I have got you covered.
With the help of this insightful guide, you will gain the confidence and knowledge needed to conquer the task at hand. Discover the key tools required for a seamless hose replacement and learn how to navigate any potential obstacles that may arise during the process.
Bid farewell to your cleaning woes and welcome a renewed sense of control and efficiency with your high-pressure cleaner.
Unlock the potential of your reliable cleaning companion by mastering the art of tube replacement. Say goodbye to costly repair bills and hello to a smooth and cost-effective cleaning experience. Embrace the joy of tackling even the toughest cleaning tasks effortlessly, all thanks to your newfound expertise!
Replacing the Tube on Your Greenworks Power Cleaner: A Step-by-Step Guide
Hello there! If you’re reading this, chances are you’re looking to replace the tube on your trusty Greenworks power cleaner. Well, you’ve come to the right place! In this guide, I’ll walk you through the process of replacing the tube on your power cleaner so that you can continue to clean with ease.
Before we dive into the steps, it’s important to understand why replacing the tube is necessary. Over time, the tube on your power cleaner can become worn out or damaged, resulting in leaks or reduced performance. But don’t worry, with a few simple steps, you’ll have a brand new tube installed in no time.
| Step 1: | First, locate the tube on your power cleaner. It is usually connected to the spray gun and the pump assembly. Carefully disconnect the tube from both ends using an appropriate tool. |
| Step 2: | Next, measure the length of the old tube to ensure that you get the correct replacement size. This will ensure a proper fit and optimal performance. |
| Step 3: | Once you have the new tube, start by attaching it to the spray gun and secure it tightly. Make sure there are no kinks or twists in the tube that could impede water flow. |
| Step 4: | Now, connect the other end of the tube to the pump assembly. Again, ensure a tight and secure connection. |
| Step 5: | Before you start using your power cleaner again, check for any leaks by turning on the machine and inspecting the connections. If you notice any leaks, tighten the connections or consider replacing any faulty parts. |
That’s it! By following these simple steps, you have successfully replaced the tube on your Greenworks power cleaner. Now you can continue to enjoy hassle-free cleaning sessions with your trusty machine. Remember, proper maintenance and regular tube replacements are key to maintaining the optimal performance of your power cleaner. Happy cleaning!
Understanding the Significance of Regular Maintenance for Your Pressure Washer’s Hose
When it comes to ensuring the optimal performance and longevity of your pressure washer, one vital aspect that often gets overlooked is regular maintenance of its hose. The hose of your pressure washer plays a crucial role in delivering water at a high pressure, enabling efficient cleaning of various surfaces. It is essential to comprehend the importance of prioritizing regular maintenance for your hose, as it can significantly impact the overall performance of your pressure washer system.

Enhancing Durability and Longevity
By consistently maintaining and inspecting your pressure washer’s hose, you can extend its lifespan and prevent potential issues that may arise due to neglect. Regular maintenance helps identify any signs of wear and tear, such as cracks, leaks, or weak spots, allowing you to address them promptly before they escalate into more significant problems. This proactive approach can save you from experiencing unexpected hose failures during critical cleaning tasks, ensuring uninterrupted operation and optimal performance of your pressure washer system.
Ensuring Optimal Performance
A well-maintained hose is vital for achieving optimal performance from your pressure washer. Over time, debris, dirt, and other contaminants can accumulate inside the hose, affecting the water flow and pressure. Regular cleaning and inspection of the hose help prevent clogs, blockages, or reduced water flow, enabling your pressure washer to deliver consistent and powerful cleaning performance. Additionally, maintaining the hose connections and fittings ensures a secure and tight seal, preventing any water leakage and optimizing the overall efficiency of your pressure washer.
In conclusion, regular maintenance of your pressure washer’s hose is of utmost importance in enhancing its durability, longevity, and performance. By dedicating time to inspecting, cleaning, and addressing any potential issues, you can ensure a smooth and efficient cleaning experience while also avoiding costly repairs or replacements in the future. Remember, a well-maintained hose is an essential component of a reliable and effective pressure washer system.
Assessing the Condition of Your Pressure Washer’s Hose
When it comes to maintaining and using your pressure washer effectively, one crucial component to consider is the hose. The condition of your pressure washer hose can greatly impact its performance and your overall cleaning experience. In this section, I will guide you through the process of assessing the condition of your Greenworks pressure washer hose.
Before I delve into the specific steps, it’s important to highlight the significance of regularly inspecting and evaluating the condition of your pressure washer hose. Over time, the hose may experience wear and tear, which can lead to leaks, cracks, or even a complete failure. By assessing its condition, you can identify any potential issues and take appropriate action to ensure the optimal functioning of your pressure washer.

| Step | Description |
|---|---|
| 1 | Start by visually inspecting the entire length of the hose, looking for any visible signs of damage or degradation. |
| 2 | Check for any bulges, kinks, or twists in the hose, as these can restrict water flow and lead to decreased performance. |
| 3 | Feel the hose to detect any soft or weak spots, as they can indicate potential weaknesses and vulnerability to leaks. |
| 4 | Inspect the hose ends for any signs of wear or damage, such as fraying or loosening connections. |
| 5 | Test the hose’s flexibility by gently bending it at various points to ensure it retains its shape and doesn’t exhibit excessive rigidity or brittleness. |
By following these steps, you can accurately assess the condition of your pressure washer hose and determine if any maintenance or replacement is necessary. Remember, a well-maintained hose is crucial for optimal performance and ensuring a hassle-free cleaning process.
Gathering the Necessary Tools and Materials for the Replacement
In this section, I will guide you through the process of gathering all the essential tools and materials needed to replace the hose on your Greenworks pressure washer. Having the right equipment is crucial to ensure a smooth and successful replacement without any unexpected interruptions.
1. Tools
To begin, let’s go over the various tools you will need for this task:
- A wrench or pliers
- A screwdriver (Phillips or flathead, depending on your pressure washer model)
- A utility knife or scissors
- A pair of safety gloves
- A bucket or container to catch any excess water
2. Materials
Next, let’s take a look at the materials you should have on hand:
- A replacement hose suitable for your Greenworks pressure washer model
- New hose clamps
- Teflon tape or sealant
- A cleaning solution (optional, for cleaning the pressure washer before the replacement)
Make sure to double-check the compatibility of the replacement hose with your specific Greenworks pressure washer model to avoid any complications during the installation process.

By gathering all the necessary tools and materials listed above, you will be well-prepared to proceed with replacing the hose on your Greenworks pressure washer. Ensuring you have everything you need before getting started will save you time and frustration along the way.
Preparing Your Power Cleaning Device for Tube Replacement
In this section, I will guide you through the steps to follow in order to prepare your high-pressure washing machine for the replacement of its connecting tube. By carrying out these simple preparations, you will ensure a smooth and successful hose replacement process in the future.
The first step is to turn off the power to the washing machine and unplug it from the electrical outlet. This will prevent any accidental starts during the preparation process, ensuring your safety.
Next, you will need to release the pressure from the machine. This can be done by engaging the trigger on the spray gun and allowing any remaining water or air pressure to be expelled. Be cautious while doing this step, as it may cause the water to spray out forcefully. Keeping a safe distance and aiming the gun away from yourself and any nearby objects is essential.
After releasing the pressure, it is advisable to inspect the existing hose for any signs of damage or wear. Look for cracks, leaks, or weakened areas that may indicate that the hose needs to be replaced. If any issues are detected, it is best to replace the hose before it causes further damage to the machine or affects its performance.

To ensure proper installation of the new hose, it is beneficial to clean the connection points on the machine and the spray gun. Use a dry cloth or a gentle cleaning solution to remove any dirt, debris, or residue that may hinder the secure attachment of the new hose.
Lastly, before proceeding with the actual hose replacement, it is a good idea to check the user manual or consult the manufacturer’s instructions for any specific guidelines or recommendations. Different pressure washer models may have slightly different approaches to hose replacement, and following the manufacturer’s guidelines will ensure a correct and efficient process.
| Preparation Steps: |
| 1. Turn off the power and unplug the washing machine. |
| 2. Release the pressure from the machine, using the spray gun. |
| 3. Inspect the existing hose for any damage. |
| 4. Clean the connection points on the machine and spray gun. |
| 5. Refer to the user manual or manufacturer’s instructions for guidelines. |
Disassembly of the Existing Tube from Your Greenworks Power Cleansing Device
When it comes to maintaining and repairing your Greenworks power washing device, it is crucial to be familiar with the steps involved in removing the old tube. In this section, I will guide you through the process of disassembling the existing hose to ensure a smooth and effortless replacement.
Step 1: Preparation
Before starting the disassembly, it’s essential to set up a safe and well-lit work area. Make sure you have all the necessary tools at hand, including gloves and eye protection to ensure personal safety.
Step 2: Relieving Pressure
Prior to removing the old tube, release any pressure that might be trapped inside to prevent any accidental spraying. Follow the manufacturer’s instructions on how to depressurize the power washer properly.
Step 3: Locating the Hose
Identify the hose you wish to remove from your Greenworks power washer. Ensure you have a clear understanding of its location and connection points before proceeding.
Step 4: Disconnecting the Hose

Using an appropriate tool, carefully loosen and detach the hose from the connection points. Take your time to avoid damaging any surrounding parts or components.
Step 5: Inspecting for Leaks or Damage
Once you have successfully disconnected the old hose, examine it for any leaks, cracks, or other signs of wear and tear. This inspection will help you determine if a replacement is necessary, and it’s also an opportune time to check for any potential issues with the connections or seals.
Step 6: Proper Disposal
Dispose of the old hose responsibly, following local guidelines for the proper disposal of used materials. This way, you can contribute to a cleaner environment and prevent any potential harm.

With the existing hose successfully removed from your Greenworks power washer, you are now ready to proceed with the installation of the new hose. Keep in mind that following these steps carefully will not only ensure a smooth transition but also contribute to the longevity and performance of your pressure washer.
Choosing the Right Replacement Hose for Your Pressure Washer
When it comes to finding a suitable replacement for your pressure washer hose, there are a few important factors to consider. As an experienced pressure washer user, I understand the significance of selecting the right hose for optimal performance and longevity.
1. Compatibility
One of the most crucial aspects to take into account when choosing a replacement hose is compatibility with your pressure washer model. Different pressure washers may require specific hose fittings or connectors. Therefore, it is essential to consult your pressure washer’s user manual or contact the manufacturer to ensure compatibility.
2. Hose Material
The type of material used in the hose construction greatly affects its durability and flexibility. Common materials for pressure washer hoses include rubber, PVC, and polyurethane. Rubber hoses offer excellent durability and can withstand high-pressure applications, making them suitable for heavy-duty use. PVC hoses are more affordable and lightweight but may not be as durable. Polyurethane hoses are flexible and resistant to kinks and abrasions, making them a good choice for maneuverability.
3. Hose Length and Diameter
Consider the length and diameter of the replacement hose to ensure it meets your specific needs. Longer hoses provide more reach and allow you to clean larger areas without having to move the pressure washer frequently. However, longer hoses may reduce the water pressure. The diameter of the hose also affects water pressure. Thicker hoses typically allow for higher pressure and flow rates, while thinner hoses are more suitable for lower pressure applications or smaller projects.
4. Maximum Pressure and Temperature Ratings
Every pressure washer has its limits in terms of maximum pressure and temperature it can handle. It is crucial to choose a replacement hose that can withstand the maximum pressure and temperature output of your pressure washer. Exceeding these limits can cause hose failure or even damage to your pressure washer.
5. Safety Considerations
Always prioritize safety when selecting a replacement hose for your pressure washer. Look for hoses that are reinforced with steel or textile braids for added strength and durability. Additionally, consider hoses with smooth covers that are resistant to abrasions, as they minimize the risk of snagging or rupture during use.
By considering these factors and doing thorough research, you can choose the right replacement hose that is compatible with your pressure washer model, provides optimal performance, and ensures safety during operation.
Installing the New Hose on Your Greenworks Pressure Washer
In this section, I will guide you through the process of installing a new hose on your pressure washer from Greenworks. It’s an important step to ensure the proper functioning of your equipment and maintain its efficiency. By following these instructions, you will be able to seamlessly replace the old hose with a new one, allowing you to continue using your pressure washer without any interruptions.
Gather Required Tools
The first step in installing the new hose is to gather all the necessary tools. To complete this task, you will need a wrench, pliers, and a replacement hose specifically designed for your Greenworks pressure washer. It is crucial to ensure that the new hose is compatible with your pressure washer model to avoid any complications later on.
Step-by-Step Installation Process
Now that you have all the required tools ready, let me guide you through the step-by-step installation process.
1. Begin by turning off your pressure washer and disconnecting it from the power source to ensure your safety during the installation process.
2. Locate the connection points of the old hose. Using your wrench or pliers, carefully loosen and remove the hose fittings from these connection points. Take your time and be gentle to avoid damaging any components.
3. Once the old hose fittings are removed, inspect them for any signs of wear or damage. If there are any issues, it is advisable to replace the fittings as well to ensure a secure and leak-free connection.
4. Take the new replacement hose and attach the fittings to the corresponding connection points on your pressure washer. Make sure to tighten them securely using your wrench or pliers. Ensure that the fittings are aligned correctly to avoid any leaks.
5. After securing the fittings, double-check the connections for any potential leaks. Turn on the pressure washer briefly to test if everything is properly installed. If you notice any leaks or abnormalities, recheck the fittings and make any necessary adjustments.
6. Once you are confident that the new hose is securely and correctly installed, reconnect your pressure washer to the power source and ensure it is ready for use.
By following these steps, you have successfully installed a new hose on your Greenworks pressure washer, allowing you to continue using your machine effectively. Remember to refer to the manufacturer’s manual for any specific instructions or precautions regarding your pressure washer model.
Testing the Functionality of the New Hose
When it comes to evaluating the performance of a newly installed hose on my pressure washer, I always conduct a thorough testing process. This allows me to ensure that the hose is functioning optimally and will provide me with the desired cleaning power. In this section, I will share my personal approach to testing the functionality of the hose, providing valuable insights on how to assess its quality and performance.
Checking for Leakage
One of the first things I test is whether the new hose is prone to leakage. To do this, I secure the hose tightly to the pressure washer and turn on the water flow. I carefully examine all connections, joints, and fittings for any signs of water leakage. By checking for leaks, I can ensure that the hose is properly connected and that there are no loose or faulty parts that could compromise its functionality.
Evaluating Water Pressure
Next, I evaluate the water pressure provided by the new hose. I connect the hose to the pressure washer and turn it on, observing the strength of the water stream. I pay attention to the force and consistency of the water flow, ensuring it matches my expectations and requirements. If the pressure seems inadequate or there are irregularities in the water flow, I may need to further investigate the hose or the pressure washer itself to identify the root cause of the issue.
During the evaluation process, I also assess the hose’s ability to handle high-pressure situations. I gradually increase the water pressure, observing how the hose reacts and whether it remains sturdy and durable. It’s important to ensure that the hose can withstand the pressure needed for efficient cleaning without any signs of wear, tear, or potential bursting.
Note: Proper handling of the hose, such as avoiding kinks or sharp bends, is essential to maintain its longevity and functionality.
By following these testing methods, I am able to confidently determine the functionality of the newly installed hose on my pressure washer. This allows me to ensure that the hose is reliable, durable, and capable of delivering the necessary cleaning power for various tasks. Remember to always prioritize safety and regularly inspect your hose to prolong its lifespan and maintain optimal performance.
Maintaining and Enhancing the Longevity of Your Greenworks Pressure Washer Tube
As an avid user of the Greenworks pressure washer, I understand the importance of properly caring for and preserving the lifespan of its hose. By taking proactive measures to maintain and extend the durability of your pressure washer hose, you can ensure optimal performance and avoid unnecessary expenses associated with replacements.
Regularly inspecting the hose for any signs of wear and tear is an essential aspect of its maintenance. Small cracks, leaks, or weak spots can lead to reduced water pressure and may cause potential damage to the washer, so it’s crucial to address these issues promptly. Additionally, avoiding excessive twisting or bending of the hose during use can prevent unnecessary strain and increase its overall longevity.
Proper storage and cleaning are also vital in preserving the life of your Greenworks pressure washer hose. After each use, make sure to drain any remaining water and expel excess air from the hose to prevent freezing or damage. Storing the hose in a cool and dry place, away from direct sunlight or extreme temperatures, helps prevent deterioration and prolongs its lifespan.
Incorporating a regular cleaning routine for your pressure washer hose can further enhance its longevity. Removing any debris, dirt, or residue that may accumulate on the hose surface ensures optimal performance and prevents clogging. Using mild detergents and a soft brush or cloth, gently clean the hose to maintain its functionality and prevent any potential damage from abrasive cleaning agents.
Furthermore, investing in additional protective accessories, such as hose reels or covers, can provide an extra layer of defense against potential damage. These accessories can shield the hose from harsh weather conditions, UV rays, and accidental bumps or abrasions, thereby extending its overall lifespan.
By implementing these proactive measures and making hose maintenance a priority, you can extend the lifespan of your Greenworks pressure washer hose and enjoy optimal performance for years to come. Proper care, regular inspections, and appropriate storage and cleaning practices will ensure that your pressure washer hose maintains its functionality and helps you tackle your outdoor cleaning tasks effectively.
FAQ:
What is the purpose of changing the hose on a Greenworks pressure washer?
Changing the hose on a Greenworks pressure washer is necessary when the current hose becomes damaged or no longer functions properly. It allows the machine to spray water with high pressure, making it essential for effective cleaning.
What are the steps to change the hose on a Greenworks pressure washer?
To change the hose on a Greenworks pressure washer, first, make sure the machine is turned off and the water supply is disconnected. Then, unscrew the old hose from the trigger handle and the pump. Next, attach the new hose by screwing it onto the trigger handle and the pump tightly. Finally, turn on the water supply and the machine to check if the new hose is working properly.


