How To Build An Electric Pressure Washer
Are you tired of spending countless hours scrubbing and cleaning stubborn dirt and grime? Imagine having a highly efficient and effective cleaning device at your fingertips, ready to tackle even the toughest cleaning tasks. In this comprehensive guide, I will walk you through the process of assembling your very own high-performance pressure washer that harnesses the power of electricity to deliver outstanding cleaning results.
Revolutionize your cleaning routine with the art of crafting your own electric pressure washer. Say goodbye to traditional, time-consuming methods and say hello to a faster, more efficient, and environmentally friendly alternative. By repurposing common household materials and incorporating state-of-the-art technology, you’ll soon have a fully functional cleaning powerhouse that will make you wonder how you ever managed without it.
Embark on this DIY adventure and unleash your creativity by customizing your electric pressure washer to match your exact needs. Whether you require a compact and portable device for everyday cleaning tasks or a heavy-duty machine to tackle large-scale projects, I will guide you through each step, providing easy-to-follow instructions and helpful tips along the way.
Choosing the Right Components
In this section, I will discuss the importance of selecting the appropriate components for building an efficient and reliable electric pressure washer. Finding the right components is key to ensuring that your pressure washer operates effectively and meets your specific needs.
1. Motor
- When choosing a motor for your electric pressure washer, it is essential to consider its power output, reliability, and durability.
- Look for a motor that can provide sufficient power to generate high water pressure, allowing for effective cleaning.
- Consider motors with a proven track record of reliability to ensure long-term performance.
2. Pump
- The pump is a crucial component responsible for generating water pressure in your electric pressure washer.
- Opt for a pump that offers high pressure output to facilitate effective cleaning.
- Consider the pump’s overall quality, durability, and ease of maintenance to ensure it can withstand regular use.
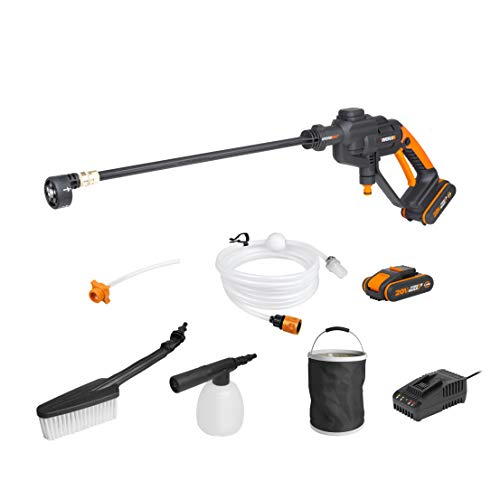
3. Nozzles and Accessories
- Choosing the right nozzles and accessories can greatly impact the efficiency and versatility of your electric pressure washer.
- Invest in a variety of nozzles with different spray patterns to tackle various cleaning tasks.
- Consider accessories such as extension wands, surface cleaners, and soap applicators to enhance the functionality of your pressure washer.
By carefully selecting the right components, you can create an electric pressure washer that is powerful, durable, and tailored to meet your specific cleaning needs. The right combination of motor, pump, and accessories will ensure efficient cleaning performance and make your pressure washer a valuable tool for a range of tasks.
Gathering the Essential Equipment
Assembling the necessary tools is a crucial step in embarking on the journey of creating your very own dynamic cleansing machine. In this section, I will guide you through the process of procuring the fundamental equipment required for constructing an efficient and eco-friendly pressure washing apparatus.
1. Essential Power Components
The first step towards building an electric pressure washer involves acquiring the essential power components. These components include an electric motor, a power supply unit, and electrical wiring. The electric motor serves as the powerhouse of the machine, generating the necessary force to propel water at high pressure. The power supply unit connects to the electrical source and ensures a stable and reliable power input. Lastly, the electrical wiring connects the motor and the power supply unit, facilitating the flow of electricity to the motor.
2. Water Delivery System
Another vital element in the construction of an electric pressure washer is the water delivery system. This system comprises a water pump, piping, and a water source connector. The water pump plays a crucial role in pressurizing the water, allowing it to flow through the piping at the desired intensity. The piping conveys the water from the source to the pump and then through the nozzle. Lastly, the water source connector enables the attachment of the pressure washer to a water supply, ensuring a continuous flow of water during operation.
With the gathering of these essential tools, you are one step closer to creating your very own electric pressure washer. In the upcoming sections, we will delve deeper into the assembly process, providing you with comprehensive instructions on constructing a functional and efficient machine.
Assembling the Washer Frame
Now that we have gathered all the necessary components for our DIY pressure washer, it is time to start assembling the frame. This crucial step will lay the foundation for the entire machine and ensure its stability and functionality.

To begin with, I carefully examined the instructions provided with the pressure washer kit. These instructions provided a detailed overview of the frame assembly process, including step-by-step diagrams and guidelines. Following these instructions, I started by identifying and sorting all the necessary parts.
Next, I laid out the main frame components on a clean and flat surface, making sure to have enough space for maneuvering. I found it helpful to refer to the instruction manual throughout the process to ensure accurate placement and alignment of each piece.
Using the provided hardware, I started connecting the frame pieces together. This involved inserting screws, bolts, and washers into the pre-drilled holes and tightening them securely. It was crucial to pay attention to the sequence specified in the instructions to achieve a sturdy and well-structured frame.
As I progressed with assembly, I periodically double-checked the alignment and stability of the frame. This ensured that any adjustments or corrections could be made promptly, preventing any potential issues down the line.
Once all the main components were securely fastened, I moved on to attaching additional support brackets and handles. These added elements provided extra stability and ease of use during operation. Following the instructions, I carefully positioned and attached these components, ensuring they were firmly fixed onto the frame.

Finally, after making all the necessary adjustments and ensuring the frame was solid and stable, I stepped back to admire my work. The properly assembled washer frame laid the groundwork for the remaining steps of building our electric pressure washer, bringing us one step closer to a fully functional cleaning machine.
Installing the Motor for Power Generation
In this section, I will guide you through the process of installing the motor for power generation in your unique pressure washing setup. The motor plays a vital role in converting electrical energy into mechanical energy, providing the necessary power to operate the pressure washer efficiently.
1. Motor Selection:
Before proceeding with the installation, it is essential to select the appropriate motor for your electric pressure washer. Consider factors such as power rating, voltage compatibility, and motor type to ensure optimal performance. You can consult the manufacturer’s guide or seek expert advice to make an informed decision.
2. Tools and Equipment:
Gather the necessary tools and equipment for a seamless installation process. These may include wrenches, pliers, screwdrivers, electrical tape, wire strippers, and safety gear such as gloves and goggles. Ensuring you have all the required items beforehand will save time and prevent any interruptions during the installation.
3. Installing the Motor:
Follow these steps to install the electric motor effectively:

- Locate a suitable mounting position for the motor on the pressure washer frame. Ensure it is secure and can withstand the motor’s weight and vibrations during operation.
- Use appropriate fasteners, such as bolts or screws, to securely attach the motor to the frame. Double-check for stability and make any adjustments if necessary.
- Next, connect the motor to the power source. Carefully strip the ends of the power wires and connect them to the corresponding terminals on the motor. Use electrical tape to insulate the connections and prevent any potential short circuits.
- Ensure all electrical connections are secure and tightly fastened to avoid any electrical hazards. Check for any loose wires or exposed connections, and address them immediately if found.
- Once the motor is installed and connected, give it a test run to ensure it is functioning correctly. Check for any unusual noises or vibrations and rectify any issues before proceeding with using the pressure washer.
By following these steps, you can successfully install the electric motor for power generation in your DIY electric pressure washer setup. Remember to prioritize safety measures and seek professional assistance if you encounter any difficulties during the installation process.
Connecting the Water Pump
Step 1: Choosing the Right Water Pump
The first step in connecting the water pump is selecting the appropriate one for your DIY pressure washer. Consider the flow rate and pressure requirements for your cleaning tasks, and choose a pump that meets those specifications. It’s important to ensure compatibility between the pump and the power source you are using as well.
Step 2: Assembling the Components
Once you have the suitable water pump, gather all the necessary components that came with it. This may include fittings, connectors, and hoses. Carefully read the manufacturer’s instructions to identify each part and its purpose, ensuring you have a clear understanding before proceeding.
| Component | Description |
|---|---|
| Pump Inlet | This is where the water supply will enter the pump. |
| Pump Outlet | This is where the high-pressure water will exit the pump. |
| Pressure Relief Valve | A safety feature that releases pressure when it reaches a certain level to prevent damage to the pump. |
| Hose Fittings | These connectors attach the hoses to the pump inlet and outlet. |
Step 3: Connecting the Pump
Start by connecting the water supply to the pump inlet using a suitable hose and fitting. Ensure the connection is tight and secure to prevent leaks. Then, connect the pump outlet to the high-pressure hose using the appropriate connector. Again, make sure the connection is tight.
Remember to consult the instruction manual for any specific instructions or recommendations from the manufacturer. Take your time during this step to ensure everything is properly connected and sealed, as any loose or faulty connections can affect the performance and safety of your electric pressure washer.

By following these steps, you will successfully connect the water pump for your homemade high-pressure water cleaner. With this crucial component in place, you are one step closer to having a fully operational electric pressure washer to tackle your cleaning tasks.
Wiring the Electrical System
In this section, I will guide you through the process of setting up the electrical system for your custom pressure washing unit. The electrical system is a crucial component that enables the operation of your pressure washer, providing power to the motor and controlling various functions.
Gathering the necessary components
- Power cord with plug
- Electric motor
- On/off switch
- Pressure switch
- Relay
- Terminal blocks or connectors
- Wire connectors
- Wire strippers
- Wire nuts
- Electrical tape
Step-by-step wiring process
- Start by unplugging the power cord from any power source.
- Using wire strippers, remove about half an inch of insulation from the end of each wire.
- Connect the black wire from the power cord to the black wire of the electric motor using a wire connector or a terminal block.
- Connect the white wire from the power cord to the white wire of the electric motor in the same manner as the previous step.
- Attach the green wire, which is the ground wire, from the power cord to the ground terminal of the electric motor.
- Install the on/off switch, pressure switch, and relay according to their respective manufacturer’s instructions.
- Connect the necessary wires from the on/off switch, pressure switch, and relay to their appropriate terminals on the electric motor.
- Ensure all connections are secure and use wire nuts to cover any exposed wires.
- Use electrical tape to wrap around the wire nuts and secure them in place.
With the electrical system properly wired, you are one step closer to having a fully functional electric pressure washer. It’s essential to double-check all connections and ensure everything is properly insulated to ensure safe and reliable operation. Once the electrical system is in place, you can move on to the next stage of assembling your custom pressure washer.
Enhancing Safety: Important Features for Your DIY Pressure Washing Project
In this section, I will discuss the various safety features that you should consider incorporating into your DIY pressure washing project. It is crucial to prioritize safety to protect yourself and others while operating the equipment. By implementing these features, you can minimize the risk of accidents and ensure a secure working environment.
1. Safety goggles: Eye protection is essential when working with pressurized water. Safety goggles shield your eyes from any potential debris, chemicals, or water splashes that may occur during the pressure washing process.
- Choose goggles that provide a snug fit and cover your entire eye area.
- Ensure they are impact-resistant and have appropriate ventilation to prevent fogging.
- Regularly inspect and replace them if any damage is detected.
2. Non-slip surface: To prevent falls and injuries, it is crucial to have a stable surface during pressure washing operations. Installing a non-slip mat or covering on the ground helps maintain balance and prevents accidents.
- Place a non-slip mat or anti-slip covering on the work area for improved traction.
- Ensure the surface is clean and free from any loose debris or obstacles.
- Regularly clean and inspect the non-slip surface for any wear and tear.
3. Ground Fault Circuit Interrupter (GFCI): A GFCI is a safety feature that protects against electrical shock. It automatically cuts off the power when it detects a ground fault, preventing potential electrocution hazards.
- Install a GFCI outlet or adapter to the power source of your pressure washer.
- Regularly test the GFCI to ensure it is functioning correctly.
- Avoid using extension cords and connect the pressure washer directly to the GFCI outlet.
4. Trigger lock: A trigger lock feature helps prevent accidental discharge of the pressurized water. It secures the trigger in place, allowing you to work comfortably without the need to continuously hold it down.
- Ensure the pressure washer you choose has a reliable trigger lock mechanism.
- Familiarize yourself with how to engage and disengage the trigger lock.
- Use the trigger lock only when you are confident in the stability of the equipment.
5. Child safety lock: If there are children around, incorporating a child safety lock is crucial to avoid any accidental injuries. It restricts unauthorized access to the pressure washer, preventing children from unknowingly operating it.
- Choose a pressure washer model with a child safety lock feature.
- Keep the pressure washer in a locked or secured location when not in use.
- Educate children about the dangers of pressure washers and the importance of staying away from them.
By implementing these safety features and taking necessary precautions, you can enjoy the benefits of a clean and well-maintained space without compromising on safety. Always prioritize safety first when working with power tools or equipment, and operate the pressure washer responsibly.

Testing and Fine-Tuning the High-Pressure Cleaning Device
When it comes to creating a functional high-pressure cleaning device, thorough testing and fine-tuning are essential to ensure optimal performance. In this section, I will delve into the various steps I took to test and fine-tune my newly built high-pressure cleaning device.
I began by conducting initial tests to assess the overall functionality of the device. This involved checking the power source and making sure all the electrical connections were properly connected. I also inspected the water inlet and outlet to ensure smooth water flow without any leaks or blockages. Additionally, I tested the pressure regulator to make sure I could adjust the pressure according to my specific cleaning needs.
- Next, I focused on checking the performance of the high-pressure pump. I ran multiple tests, gradually increasing the pressure to determine the maximum PSI output of the device. During these tests, I monitored factors such as water pressure, flow rate, and any unusual noises or vibrations.
- After evaluating the performance of the pump, I moved on to testing the nozzle and spray gun. I experimented with different nozzle types and sizes to find the optimal spray pattern and pressure for various cleaning tasks. These tests allowed me to fine-tune the device to achieve the desired cleaning efficiency and effectiveness.
- Furthermore, I examined the overall durability and longevity of the pressure washer. I performed longevity tests by running the device continuously for extended periods to ensure it could handle prolonged usage without any performance issues.
Throughout the testing process, I meticulously documented my observations and made necessary adjustments to enhance the device’s performance. By fine-tuning various components and testing them under different conditions, I was able to optimize the pressure washer to provide consistent and reliable cleaning results.
In conclusion, testing and fine-tuning play a crucial role in the creation of an effective high-pressure cleaning device. Through a series of tests and adjustments, I was able to ensure that my pressure washer operates efficiently while delivering excellent cleaning performance. By dedicating time and effort to this phase, I have confidence in the functionality and durability of my electric pressure washer.