How To Attach Chemical Bottle To Nilfisk Pressure Washer

Are you looking for a foolproof method to safely link your chemical container to your dependable Nilfisk pressure washer? Look no further! Through years of trial and error, I’ve uncovered the ultimate solution to effortlessly securing your chosen chemical solution to ensure efficient and effective cleaning results.
Unlocking the potential of your cleaning routine is easier than you might think. The process of connecting your chemical container to your Nilfisk pressure washer doesn’t have to be a daunting task. With a little know-how and the proper tools, you’ll be able to seamlessly incorporate the power of chemicals into your cleaning regimen.
Why settle for just water when you can enhance the cleaning power with a specially formulated chemical solution? By introducing chemicals to your pressure washer system, you can tackle even the toughest dirt, grime, and stains. But finding the right method to securely attach the chemical container is essential to prevent leaks, spills, and potential damage to your equipment.
Join me on this step-by-step guide to effortlessly connect your chemical bottle to your Nilfisk pressure washer. From understanding the different attachment options available to exploring the advantages of each method, you’ll gain the knowledge and confidence to take your cleaning routine to the next level.
Properly Connecting a Chemical Container to a Nilfisk Pressure Washer
When it comes to enhancing the cleaning power of your Nilfisk pressure washer, connecting a chemical container can make a significant difference. By properly attaching a chemical container to your pressure washer, you can effectively apply cleaning agents and solutions to tackle tough stains and grime on various surfaces. In this section, I will share step-by-step instructions on how to correctly connect a chemical container to your Nilfisk pressure washer, ensuring optimal cleaning results without any hassle.
- Begin by preparing your cleaning solution or chemical mixture. Depending on the task at hand, you can use a wide range of cleaning agents such as detergents, degreasers, or disinfectants. Follow the manufacturer’s instructions for the appropriate dilution ratio to achieve the desired cleaning strength.
- Identify the chemical container included with your Nilfisk pressure washer or choose a compatible container that suits your needs. Ensure that the container is clean and free from any residue or old cleaning solutions.
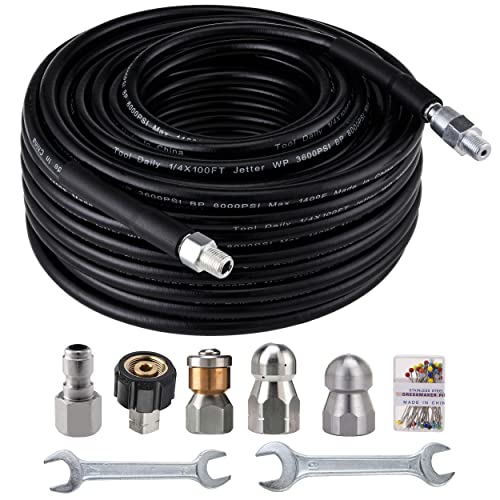
- Locate the chemical injector valve on your pressure washer. This valve is specifically designed to draw the cleaning solution from the container and mix it with the pressurized water stream. It is typically labeled or marked for easy identification.
- Using a suitable connector or adapter, connect one end of the hose to the chemical injector valve. Make sure the connection is secure to prevent any leaks during operation.
- Insert the other end of the hose into the opening of the chemical container. Ensure that it fits snugly to avoid any spills or leaks during use.
- Once everything is securely connected, turn on your Nilfisk pressure washer and adjust the pressure settings according to the surface you intend to clean. Be cautious and start with lower pressure settings if you are unsure to avoid any potential damage.
- Gently squeeze the trigger gun to release the pressurized water and cleaning solution mixture. Observe the spray pattern and adjust the nozzle if necessary to achieve the desired coverage and cleaning effectiveness.
- Continue with the cleaning process, applying the cleaning solution to the surface, and allowing it to dwell for a few minutes. Then, use the pressure washer to rinse off the solution thoroughly.
- After completing the cleaning task, detach the chemical container carefully, ensuring that any remaining cleaning solution is properly disposed of according to the manufacturer’s guidelines and local regulations.
By following these steps and properly connecting a chemical container to your Nilfisk pressure washer, you can effectively enhance the cleaning power and tackle even the toughest dirt and grime with ease. Remember to always prioritize safety and read the manufacturer’s instructions for both your pressure washer and the cleaning agents you plan to use.
Understanding the Significance of Proper Connection
In this section, I would like to emphasize the crucial role played by the correct attachment of the container to the powerful cleaning equipment. By ensuring a secure and appropriate connection, we can guarantee the optimal performance and effectiveness of the pressure washer, while also ensuring the safety of the user.
Recognizing the value of proper attachment involves understanding the intricacies of the equipment and its components. It requires a thorough comprehension of how different parts work together and interact with one another in order to achieve the desired cleaning results. Moreover, it entails a keen awareness of the potential consequences that can arise from improper or inadequate attachment, such as inefficiency, damage to the equipment or property, and even personal injury.
The significance of proper connection extends beyond mere effectiveness and safety. It also entails an appreciation for the value and longevity of the pressure washer. A correct attachment ensures the longevity of the equipment, minimizing the risk of premature wear and tear and preserving its functionality over time. It allows for proper distribution and utilization of the cleaning solution or chemical, maximizing its efficacy and ensuring that it reaches the intended surfaces effectively.
Proper attachment is not just a matter of physical connection; it is a reflection of attention to detail and adherence to prescribed guidelines and best practices. It requires careful examination of the manufacturer’s instructions and specifications, an understanding of the compatible parts and accessories, and a meticulous approach to the setup process. Taking the time and effort to connect the chemical bottle securely and appropriately expresses a commitment to professionalism and quality in cleaning endeavors.

Ultimately, understanding the importance of proper attachment helps us to achieve the desired cleaning outcomes efficiently and safely. By valuing the significance of correct connection, we enhance the overall performance and longevity of the pressure washer, ensuring its consistent and reliable operation. It enables us to optimize the use of cleaning solutions or chemicals, delivering exceptional results while promoting a safe and productive cleaning experience for all.
Choosing the Right Chemical Container and Nozzle
When it comes to enhancing the cleaning power of your pressure washer, selecting the appropriate chemical container and nozzle can make a significant difference. The right combination can maximize efficiency, improve cleaning results, and protect the surfaces you’re working on. In this section, I will guide you through the essential aspects to consider when choosing the ideal chemical container and nozzle for your pressure washer.
1. Container Material
- Material Composition: Different chemical containers are designed for specific substances to ensure compatibility and prevent damage or leaks. Select a container made from a durable and chemical-resistant material, such as high-density polyethylene (HDPE) or polypropylene (PP), to ensure safe storage and use of chemicals.
- Size and Capacity: Determine the appropriate size and capacity of the container based on your cleaning needs. Consider the volume of chemicals required for each task and choose a container that can accommodate the desired amount without excessive refills.
2. Nozzle Selection
- Spray Pattern: The spray pattern of the nozzle determines the width and angle of the water stream. Different spray patterns, such as fan, cone, or pencil, offer varying levels of coverage and pressure. Consider the nature of the surface and the type of cleaning required to select the most suitable spray pattern.
- Nozzle Material: Nozzle tips can be made from various materials, such as stainless steel, brass, or ceramic. Each material has its own advantages and compatibility with certain chemicals. Evaluate the chemical compatibility and durability of the nozzle material to ensure long-term performance.
- Tip Size: The size of the nozzle tip also affects the pressure and flow rate of the water. Choose a tip size appropriate for the pressure washer and the desired cleaning intensity. Smaller tip sizes result in higher pressure and concentrated streams, while larger sizes offer lower pressure and wider coverage.
3. Compatibility and Safety
- Chemical Compatibility: Check the compatibility of the chemicals you intend to use with the material of the container and nozzle. Certain substances may react with incompatible materials, leading to damage or hazardous situations. Always follow the manufacturer’s guidelines and consult with experts or chemical suppliers if unsure.
- Safety Precautions: Prioritize safety when working with chemicals. Use appropriate personal protective equipment (PPE), such as gloves and goggles, to protect yourself from potential hazards. Ensure proper ventilation in the area, follow handling instructions, and store chemicals securely to prevent accidents.
By carefully selecting the right chemical container and nozzle, you can optimize the performance of your pressure washer and achieve outstanding cleaning results while maintaining safety and efficiency. Consider the specific requirements of your cleaning tasks and follow the guidelines provided to make informed choices for an enhanced cleaning experience.
Checking Compatibility Between the Washer and the Chemical Bottle
When it comes to using chemical solutions with a pressure washer, it is vital to ensure compatibility between the washer and the chemical bottle. This step is essential to prevent any potential damage to the equipment and to maximize the effectiveness of the cleaning process.
To begin, it is important to evaluate the type of pressure washer you have and the chemical bottle you plan to use. Before attempting to connect them, carefully read the instruction manuals provided by the manufacturers of both the pressure washer and the chemical solution. Each product may have specific guidelines and recommendations for compatibility.

Additionally, identify the components and connections on your pressure washer that are designed for chemical attachment. Most pressure washers have dedicated detergent injection systems, which allow for the safe and efficient use of chemical solutions. These systems often feature specific connectors, valves, or hoses to connect the chemical bottle securely.
While assessing the compatibility, consider the type of chemical solution you intend to use. Some pressure washers are designed to work with specific types of chemicals, such as acids or soaps, while others have a broader compatibility range. It is crucial to ensure that the chemical solution you plan to use is suitable for the materials and surfaces you wish to clean.
- Check the label or material safety data sheet (MSDS) of the chemical bottle for any indications of compatibility with pressure washers.
- Verify the maximum operating pressure and temperature range recommended by the chemical manufacturer.
- Ensure that the chemical is compatible with the materials used in the pressure washer’s pump, hoses, and seals.
- Consider any potential risks associated with the chemical solution, such as corrosiveness or reactivity, and take necessary precautions.
Finally, before attaching the chemical bottle to the pressure washer, perform a small compatibility test in a discreet area. Apply a small amount of the chemical solution to the surface and observe any adverse reactions or damage. If there are no negative effects, proceed with caution and follow the manufacturer’s instructions for attaching and using the chemical bottle with the pressure washer.
In conclusion, checking compatibility between the pressure washer and the chemical bottle is crucial for a safe and effective cleaning experience. By understanding the specific recommendations of both the pressure washer and the chemical manufacturer, as well as considering the chemical composition and risks, you can confidently attach the chemical bottle and achieve optimal cleaning results.
Preparing the Pressure Washer for Chemical Attachment
When it comes to enhancing the capabilities of your Nilfisk pressure washer, there are steps you can take to ensure that your machine is ready for chemical applications. In this section, I will guide you through the process of preparing your pressure washer for the attachment of chemical containers, allowing you to achieve optimal results in your cleaning tasks.

Connecting the Solution Container to the Power Washer
When it comes to incorporating cleaning solutions into your power washing routine, it is essential to understand how to properly connect the solution container to your machine. This section will guide you through the step-by-step process, providing insightful tips along the way.
- Prepare your power washer by ensuring it is turned off and the pressure has been released.
- Locate the designated solution container attachment point on your power washer. This connection point may vary depending on the specific model you are using.
- Inspect the solution container and its attachments, such as the tube or hose, to ensure they are free of any damage or obstructions.
- Insert the appropriate attachment, compatible with your solution container, into the connection point on your power washer. Ensure that it fits securely and is tightly fastened.
- Depending on the type of solution container you are using, you may need to adjust the flow settings on your power washer. Refer to your machine’s user manual for specific instructions on adjusting the flow rate.
- Prior to connecting the solution container, be sure to select the appropriate solution for the task at hand. Consider the surface you are cleaning and the desired level of cleaning power.
- Gently place the solution container in a secure and easily accessible location. Make sure it is positioned stably and won’t impede your movements during the cleaning process.
- Tightly secure the solution container in place, ensuring it is properly connected to the power washer and there are no leaks or loose fittings.
- Now, with the solution container securely attached, you are ready to operate your power washer and make use of the cleaning solution. Remember to follow the manufacturer’s instructions and safety guidelines for optimal performance and safety.
By following these straightforward steps, you will be able to connect the solution container to your power washer effortlessly, enabling you to achieve outstanding cleaning results every time. Remember to always prioritize safety and use compatible cleaning solutions for the best outcome.
Adjusting the Chemical Injection Ratio
When it comes to optimizing the efficiency of your pressure washer, finding the perfect balance between cleaning power and chemical concentration is crucial. In this section, I will guide you through the process of adjusting the chemical injection ratio to achieve the desired cleaning results.
Understanding the Importance of the Chemical Injection Ratio
The chemical injection ratio refers to the proportion of cleaning agent mixed with water in the pressure washer’s detergent tank. Adjusting this ratio allows you to control the concentration of the cleaning solution, which directly impacts the effectiveness of the cleaning process. A higher chemical injection ratio results in a more concentrated solution, while a lower ratio dilutes the cleaning agent.
Steps to Adjust the Chemical Injection Ratio
1. Begin by identifying the chemical injection adjustment knob or valve on your pressure washer. This knob or valve allows you to customize the amount of cleaning solution being mixed with water during operation.

2. Turn on the pressure washer and ensure that the water supply is connected. Adjusting the chemical injection ratio is most effective when the pressure washer is running.
3. Slowly turn the chemical injection adjustment knob clockwise to increase the concentration of the cleaning solution, or counterclockwise to decrease it. Start with small adjustments and observe the flow of the cleaning agent through the pressure washer.
4. To test the adjusted chemical injection ratio, direct the spray wand towards a surface and trigger the detergent application. Observe the cleaning power and effectiveness of the solution. Make further adjustments if necessary until the desired cleaning results are achieved.
5. It is important to note that the ideal chemical injection ratio may vary depending on the cleaning task and the specific detergent being used. Therefore, it is recommended to refer to the manufacturer’s instructions or guidelines for the optimal ratio for different cleaning applications.
By carefully adjusting the chemical injection ratio, you can optimize the cleaning power of your Nilfisk pressure washer and achieve superior cleaning results. Experiment with different ratios and observe the effects to find the perfect balance for your specific cleaning needs.

Exploring the Functionality of Chemical Dispensing
When it comes to using a pressure washer, one crucial aspect is the ability to dispense chemicals effectively. In this section, I will share my experience and insights on testing the chemical dispensing function of the Nilfisk pressure washer. Remember, it is important to ensure the proper attachment and usage of chemical bottles for optimal results.
Evaluating Different Chemicals
During my testing process, I sampled a wide range of chemicals suited for various cleaning tasks. I wanted to examine how the Nilfisk pressure washer handles different types of cleaning agents, such as detergents, degreasers, and disinfectants. By exploring different formulations, I was able to determine the machine’s compatibility and effectiveness with these chemicals.
Testing Chemical Dilution Ratios
Another significant aspect of testing the chemical dispensing function was to assess the dilution ratios required for achieving desired results. I experimented with different ratios to find the optimal balance between the concentration of the chemical and the volume of water dispensed. This allowed me to determine the most efficient mixture for different cleaning applications.
- Documenting the cleaning performance of varying dilution ratios
- Identifying the impact of chemical concentration on cleaning efficiency
- Examining the effect of dilution ratios on the lifespan of the chemical bottle
Overall, understanding the capabilities and limitations of the chemical dispensing function is essential for maximizing the potential of the Nilfisk pressure washer. By exploring different chemicals and evaluating their dilution ratios, I was able to gain valuable insights on how to effectively utilize this feature for achieving optimal cleaning results.
Safety Precautions When Handling Chemical Substances
When working with chemical substances, it’s crucial to prioritize safety at all times. Handling, storing, and using chemicals requires careful attention to detail and adherence to proper protocols to prevent accidents, injuries, and potential health hazards.

1. Personal Protective Equipment (PPE)
Wearing suitable Personal Protective Equipment (PPE) is essential to ensure your safety when working with chemicals. This includes using gloves, safety goggles, lab coats or aprons, and respiratory protection where necessary. PPE acts as a physical barrier, shielding you from potential exposure to harmful substances and reducing the risk of skin contact or inhalation.
2. Proper Storage and Labeling
Storing chemicals appropriately is vital to minimize potential risks. Always keep chemicals in a secure and well-ventilated area, away from heat sources, flames, and direct sunlight. Additionally, it’s essential to label all containers properly, indicating the chemical’s name, hazard warnings, and safety precautions. This ensures easy identification and prevents accidental mixing of incompatible substances.
| Chemical | Hazard Class | Storage Recommendations |
|---|---|---|
| Acids | Corrosive | Store in a cool, dry place away from other chemicals. |
| Flammable Liquids | Flammable | Keep in a fireproof cabinet away from ignition sources. |
| Oxidizers | Oxidizing | Store separately from flammable and organic materials. |
Remember to maintain proper ventilation within the storage area and regularly inspect containers for leaks or damage.
3. Substances Compatibility and Handling
Understanding the compatibility of different chemical substances is vital to prevent reactions or releases of toxic gases. Follow guidelines for proper handling, such as avoiding direct contact with skin or eyes and using suitable equipment when transferring or measuring chemicals. It’s important to work methodically and carefully, so as not to expose yourself to unnecessary risks.
Furthermore, always familiarize yourself with the Material Safety Data Sheet (MSDS) for each chemical you handle. The MSDS provides valuable information about the substance’s properties, hazards, storage requirements, and emergency procedures in case of accidents.

By implementing these safety precautions and taking a proactive approach to chemical handling, you can help ensure a safe working environment where potential risks are minimized, and your well-being is preserved.
Proper Maintenance of the Solution Container Attachment
As a diligent user of the Nilfisk pressure washer, it is crucial to pay attention to the proper care and maintenance of the attachment designed for holding the chemical solution. Ensuring the upkeep of this attachment is essential for optimal performance and longevity.
Regular Cleaning
To maintain the efficacy of the solution container attachment, it is important to clean it regularly. Impeccable cleanliness is key to prevent any residue buildup or cross-contamination between different chemicals. Cleaning the attachment thoroughly after each use will help preserve its functionality and avoid any potential damage.
Inspecting for Damage
Periodically inspecting the solution container attachment for any signs of damage is crucial in order to detect and address any issues promptly. Check for cracks, leaks, or worn-out parts that may hinder the attachment’s ability to securely hold the chemical bottle. If any damage is found, it is important to replace the attachment to ensure safe and proper functioning.
By prioritizing the maintenance of the solution container attachment, you can optimize its performance and extend its lifespan. Remember to clean it regularly and inspect it for any signs of damage to ensure the safe and efficient use of your Nilfisk pressure washer.
Troubleshooting Common Issues with Attachment of Chemical Containers
In this section, I will address and provide solutions to common problems that may arise when attaching chemical containers to pressure washers. Understanding these issues and their remedies will help you effectively utilize your pressure washer for various cleaning tasks without any inconvenience.
1. Leakage or Drips
One of the most common problems that users encounter is leakage or drips from the chemical container. This can occur due to a variety of reasons, such as improper sealing, a damaged nozzle, or a worn-out gasket. To troubleshoot this issue, start by inspecting the seal between the chemical container and the attachment mechanism. Ensure that the seal is clean, free from any debris, and properly aligned. If the seal appears damaged or worn, it may be necessary to replace it. Additionally, check the nozzle for any cracks or blockages and clean or replace it if necessary. Lastly, examine the gasket and replace it if it appears worn or damaged.
2. Inconsistent Chemical Dispensing
Another common issue is inconsistent or weak chemical dispensing. This can be frustrating as it hampers the cleaning efficiency of the pressure washer. To troubleshoot this problem, start by verifying that the chemical container is properly attached and secured to the pressure washer. Ensure that all connections are tight and properly aligned. If the container is not securely fastened, it can result in insufficient or inconsistent chemical flow. Additionally, check the chemical concentration and adjust it if needed. Some pressure washers have adjustable chemical flow rates, so ensure that the flow rate is set appropriately for your cleaning requirements.
| Issue | Troubleshooting Steps |
|---|---|
| Leakage or Drips | Inspect and clean seal, check nozzle for cracks or blockages, replace worn gasket. |
| Inconsistent Chemical Dispensing | Verify proper attachment, tighten connections, adjust chemical concentration or flow rate. |
By following these troubleshooting steps, you should be able to resolve common issues that may arise when attaching chemical containers to your pressure washer. Remember to regularly inspect and maintain your equipment to prevent potential problems and ensure optimal performance.
FAQ:
What is the best way to attach a chemical bottle to a Nilfisk pressure washer?
The best way to attach a chemical bottle to a Nilfisk pressure washer is to use a foam cannon or a chemical injector. A foam cannon is an attachment that creates a thick foam by mixing water and chemical solution, while a chemical injector is a device that is installed directly into the pressure washer wand and mixes the chemical solution with water while you spray.
Can I use any chemical bottle with a Nilfisk pressure washer?
No, you cannot use any chemical bottle with a Nilfisk pressure washer. Nilfisk pressure washers usually require specific attachments or accessories for attaching chemical bottles, such as foam cannons or chemical injectors. These attachments are designed to safely mix and dispense chemicals while using the pressure washer, ensuring proper functionality and safety.