How To Assemble A Nilfisk Pressure Washer

Discovering the secrets behind assembling a cutting-edge washing apparatus fills me with anticipation and sparks my curiosity to delve deeper into the world of high-performance cleaning devices. The art of creating a state-of-the-art cleaning tool opens up a universe of possibilities where precision, efficiency, and reliability reign supreme. Embarking on this journey provides an opportunity to gain a profound understanding of the intricacies that lie beneath the surface of a Nilfisk pressure washer.
As I venture into the realm of washer construction, I am captivated by the intricate details that come together to form this remarkable mechanism. The synergy of carefully crafted components, harmoniously united, transforms a set of individual parts into an impressively robust cleaning apparatus. Through meticulous attention to design, engineering, and functionality, the process of constructing a Nilfisk pressure washer demands nothing short of excellence.
With each part representing a unique piece of the puzzle, the craft of assembling a pressure washer revolves around the seamless integration of these elements. The diligent positioning of valves, the artful placement of hoses, and the careful alignment of switches are all essential tasks that contribute to the final masterpiece. Every bolt tightened and every wire connected adds to the overall integrity of the machine, ensuring its optimal performance.
In this journey of assembly, I have come to recognize the importance of considering not only the physical aspects but also the safety features that equip a Nilfisk pressure washer. From the inclusion of protective mechanisms to prevent leakage or electrical hazards to the integration of advanced technologies ensuring smooth operation, the construction process is a testament to the commitment to both efficiency and user well-being.
The Significance of Proper Assembly and Maintenance
When it comes to utilizing any type of equipment, whether it’s a household appliance or a professional tool, it is vital to give utmost attention to its proper assembly and maintenance. Skipping or neglecting these essential steps can lead to a multitude of problems and hinder the overall functionality of the equipment.
Quality assembly ensures that all the components of the equipment are securely and accurately connected, enabling it to perform at its maximum potential. In the case of a pressure washer, which relies heavily on water pressure and flow, proper assembly guarantees the reliability of the machine and its ability to deliver the desired results.
Regular maintenance plays a pivotal role in extending the lifespan of the pressure washer. By adhering to a routine maintenance schedule, one can prevent issues such as clogged nozzles, leaks, or loss of pressure. Maintenance tasks, such as cleaning filters, inspecting hoses, and lubricating moving parts, promote the longevity and optimal performance of the pressure washer.
Personally, I have experienced the consequences of neglecting the assembly and maintenance steps with my pressure washer. Initially, I underestimated the importance of correctly assembling the various parts, resulting in water leaks and subpar performance. It was only after thorough research and understanding the significance of proper assembly that I was able to rectify the situation. Additionally, neglecting regular maintenance caused a gradual decline in the machine’s efficiency, ultimately leading to costly repairs.
In conclusion, by comprehending the importance of proper assembly and maintenance, we can ensure the longevity, optimal performance, and cost-effectiveness of our Nilfisk pressure washers.

Safety Precautions
When it comes to safely assembling a Nilfisk pressure washer, there are several important precautions that should be taken into consideration. Not only will adhering to these safety measures help protect yourself and others, but it will also ensure that the assembly process goes as smoothly as possible.
1. Protect Yourself
Always prioritize personal safety by wearing the appropriate protective gear, such as safety goggles and gloves. These items will shield your eyes and hands from any potential injuries that may occur during the assembly process.
2. Secure the Area
Before assembling the pressure washer, make sure the area where the assembly will take place is clear of any obstacles. Keep the workspace neat and organized to avoid tripping hazards and to provide ample space for the assembly process.
Additionally, it is crucial to inspect the surrounding environment to ensure there are no potential dangers, such as flammable materials or electrical sources, that could pose a risk during the assembly process.
Remember: A safe and secure environment is the foundation for successful and accident-free assembly of the Nilfisk pressure washer.

Ensuring personal safety and proper handling of equipment
When it comes to successfully operating any equipment, including a pressure washer, ensuring personal safety should always be the utmost priority. Taking proper precautions and handling the equipment in a responsible manner not only keeps you safe but also extends the life of the machinery. In this section, I will outline some key guidelines and best practices for maintaining personal safety while using a pressure washer.
Protective clothing: Wearing the appropriate protective clothing is crucial to minimize the risk of potential injuries. This includes safety goggles or glasses to safeguard your eyes from any debris or chemicals, gloves to protect your hands, and sturdy footwear to prevent any foot injuries.
Area preparation: Before commencing any pressure washing activity, it is essential to properly prepare the area. Remove any obstacles or loose objects that could be potentially hazardous during the operation. Clearing the workspace from clutter ensures a safer environment for both the operator and those nearby.
Equipment inspection: Regularly inspecting the pressure washer and all its components guarantees that it is in good working condition. Check the hoses, nozzles, and spray gun for any signs of damage or wear. Ensure that all connections are tight and secure before starting the machine.
Proper handling techniques: Understanding and implementing correct handling techniques greatly minimizes the risk of accidents. Always hold the spray gun with both hands, maintaining a firm grip. Keep the nozzle at a safe distance from your body and others, as the high-pressure jet can cause severe harm if not handled correctly.

Power source safety: When using a pressure washer, it is vital to follow proper electrical safety procedures. Avoid exposing the machine or its electrical components to water or wet conditions. Use a ground fault circuit interrupter (GFCI) when connecting the pressure washer to an electrical outlet to prevent electrical shocks.
Chemical handling precautions: If using chemicals or detergents with your pressure washer, always read the manufacturer’s instructions and guidelines. Wear appropriate protective gear and ensure proper ventilation when working with chemicals. Follow the recommended dilution ratios, and never mix different chemicals together.
Regular maintenance: In addition to adhering to safety guidelines, regular maintenance plays a crucial role in ensuring the longevity and efficiency of the pressure washer. This includes routine cleaning, checking for any leaks, and promptly addressing any mechanical issues.
By being mindful of personal safety and practicing proper handling techniques, you can confidently operate your pressure washer and achieve optimal results while minimizing any potential risks. Remember, safety first!
Unboxing and Checking Components
When unboxing and checking the components of your new pressure washer, the excitement of receiving a new gadget is always present. In this section, I will guide you through the process of unpacking your Nilfisk pressure washer and ensuring that all the necessary parts are included.

Firstly, upon opening the box, you will find a number of items neatly packed inside. It is essential to carefully unpack each component to avoid any damage or misplacement. Take your time and handle each item with care.
- Start by locating the main unit of the pressure washer. This is the central piece that houses the motor and controls. It should be clearly labeled or identifiable, usually larger in size and heavier than the rest of the components.
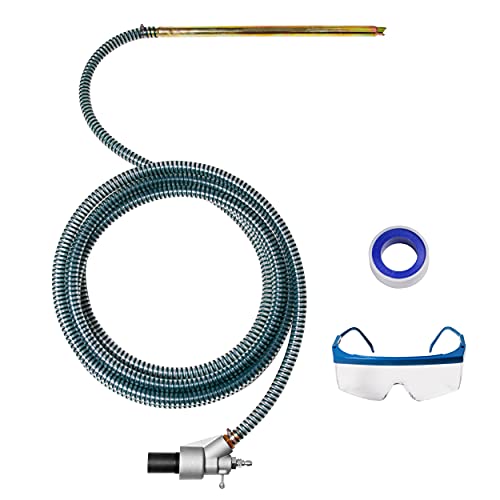
- Next, check for the high-pressure hose. This is a long, flexible tube that connects the pressure washer to the water source. Ensure that the hose is free of any knots or kinks, as this may restrict water flow during operation.
- After that, search for the spray gun, which is used to control the water flow and pressure. The spray gun is typically fitted with a safety lock and various adjustable nozzles to cater to different cleaning needs.
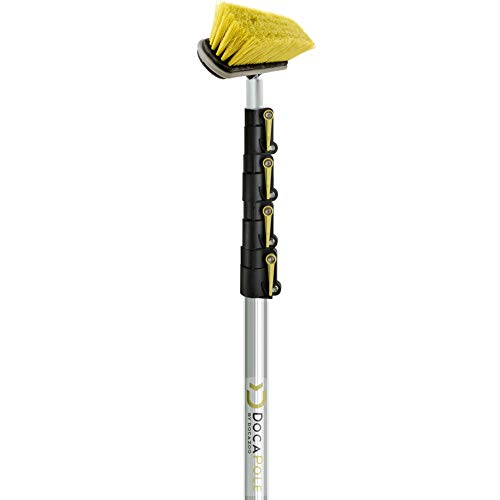
- Additionally, look for any included accessories or attachments, such as brushes, extension wands, or foam applicators. These accessories can enhance the versatility of your pressure washer and enable you to tackle a wider range of cleaning tasks.
- Lastly, inspect the package for any user manuals, safety instructions, or warranty documentation. Familiarizing yourself with these resources will ensure safe and efficient operation of your pressure washer.
Once you have carefully examined each component and verified that all the necessary parts are present, you are ready to move on to the next step of assembling your Nilfisk pressure washer. Stay tuned for the following section, where we will guide you through the assembly process in detail.
Verifying contents and inspecting for any damage
When it comes to assembling a Nilfisk pressure washer, one of the first steps is to ensure that all the necessary parts and components are present and in good condition. This involves verifying the contents of the packaging and inspecting each item for any signs of damage or defects. It is essential to carry out this step to guarantee a smooth and successful assembly process, as well as to ensure the optimal performance and longevity of the pressure washer.
Verifying the contents: To begin, carefully examine the contents of the package to make sure that all the expected components are included. This can usually be done by referring to the provided instruction manual or checklist. The packaging may contain various parts such as the main unit, pressure hose, nozzles, sprayer gun, power cord, and accessories. It is important to confirm that each item is present to avoid any complications during the assembly process.
Inspecting for any damage: After verifying the contents, it is crucial to inspect each item for any signs of damage or defects. This includes checking for cracks, dents, scratches, or any other physical abnormalities. Pay close attention to fragile components such as the nozzle tips or the sprayer gun, as they are more prone to damage. If any damage is detected, it is recommended to contact the supplier or manufacturer for assistance or replacement parts.

By meticulously verifying the contents and inspecting for any damage, you can ensure a hassle-free assembly process and a reliable Nilfisk pressure washer. This step sets the foundation for a successful experience and allows you to address any potential issues before they become a problem. Remember, attention to detail is key when it comes to assembling and using any machinery or equipment.
Step-by-Step Assembly Guide
When it comes to putting together a powerful cleaning tool like the Nilfisk Pressure Washer, having a detailed step-by-step guide can make the process smoother and more efficient. In this section, I will walk you through the assembly process, providing clear instructions and tips for each step.
Prepare the necessary tools
Before diving into the assembly, it’s essential to gather all the required tools and components. Make sure you have a screwdriver, wrench, and any other specified tools mentioned in the user manual. Having them within reach will save you time and frustration during the assembly process.
Start with the base
The first step in assembling your Nilfisk Pressure Washer is to start with the base. Place it on a flat and stable surface, ensuring it’s steady and secure. Follow the user manual’s instructions to attach any provided support legs or brackets, using the appropriate screws and fasteners. Tighten them firmly but avoid overtightening to prevent damaging the parts.
Next, locate the fittings for connecting the hose and spray gun to the pressure washer. These fittings may vary depending on the model, so consult the user manual to identify and properly fit the hose and spray gun connections.

After attaching the fittings, proceed to connect the high-pressure hose to the pressure washer. Ensure a tight fit, using any provided locking mechanisms or clamps. Verify that all connections are secure and leak-proof.
If your Nilfisk Pressure Washer comes with any additional attachments or accessories, such as foam sprayers or rotary brushes, consult the user manual to identify the correct attachment points and securely install them according to the provided instructions.
Finally, check all the assembled parts to ensure they are properly secured and everything is in place. It’s crucial to double-check for any loose screws or fittings that may compromise the washer’s performance or safety.
By following this step-by-step assembly guide, you can confidently assemble your Nilfisk Pressure Washer and be ready to tackle your cleaning tasks with ease and efficiency.
Detailing the process of constructing a high-performance pressure cleaner
When it comes to piecing together a top-notch pressure washer that excels in power and durability, attention to detail and precision are paramount. In this section, I will guide you through the step-by-step process of assembling a cutting-edge pressure cleaning system that guarantees exceptional performance and longevity.

Gathering the necessary components
To begin your assembly journey, it’s essential to procure all the essential components required for constructing your state-of-the-art pressure cleaner. These include a sturdy frame, a high-pressure hose, a reliable motor, a top-quality spray gun, durable nozzles, and various other parts that contribute to the overall functionality and efficiency of the machine.
Constructing the pressure cleaning system
Once all the components are at your disposal, it’s time to embark on the construction process. Begin by securely attaching the frame, providing a stable foundation for the pressure washer. Next, carefully connect the high-pressure hose to both the frame and the motor, ensuring a tight seal to prevent any leakage during operation.
Proceeding further, carefully mount the powerful motor onto the frame, securing it firmly to guarantee optimal stability during usage. Then, attach the top-quality spray gun to the designated connecting point, ensuring a strong and secure grip. This will be your primary interface for initiating and controlling the high-pressure spray.
Afterward, install the durable nozzles onto the spray gun, selecting the appropriate nozzle for your specific cleaning requirements. These interchangeable nozzles allow you to adjust the spray pattern and pressure according to the task at hand, providing versatility and efficiency in your cleaning endeavors.
Lastly, double-check all connections and fasteners, ensuring that everything is properly tightened and secure. It is essential to conduct a thorough quality check to guarantee the longevity and efficiency of your assembled pressure cleaner.
By following these step-by-step instructions, you can confidently construct a top-of-the-line pressure washer that embraces the cutting-edge technology and engineering prowess of a Nilfisk pressure washer. Remember, attention to detail and precision are key during the assembly process to achieve maximum performance and satisfaction in your cleaning endeavors.
Tips for Proper Setup
When it comes to putting together a Nilfisk pressure washer, there are a few key factors to keep in mind for a successful setup. In this section, I will share some valuable tips and insights that I have personally found useful in my experience with assembling and using pressure washers.
1. Organize Your Parts
Before starting the assembly process, it’s essential to carefully organize all the components and parts that come with your Nilfisk pressure washer. This will make the setup much more efficient and prevent any confusion or frustration later on. Lay out all the pieces in a clean, well-lit area and keep them easily accessible as you work through the assembly steps.
2. Follow the Instruction Manual
While it may seem tempting to skip reading the instruction manual and rely on your own intuition, I highly recommend following the manufacturer’s guidelines step-by-step. The instruction manual is specifically designed to guide you through the assembly process and ensure that you assemble your pressure washer correctly. Take the time to read and understand each instruction before proceeding to the next step.
3. Pay Attention to Safety Precautions
When assembling your Nilfisk pressure washer, prioritize safety. Familiarize yourself with the safety precautions outlined in the instruction manual and follow them diligently. This includes wearing appropriate protective gear such as safety glasses and gloves. By taking these precautions, you can prevent accidents and potential injuries while assembling and using your pressure washer.
4. Connect Pieces Securely
One common mistake during pressure washer assembly is not connecting the various parts securely. Ensure that all connections, such as hoses, nozzles, and attachments, are securely fastened according to the manufacturer’s instructions. Loose connections can result in leaks or reduced performance, so double-check all connections before using your pressure washer.
5. Test for Proper Functioning
Once you have completed the assembly and connected all the necessary components, it’s crucial to test your Nilfisk pressure washer for proper functioning. Follow the instructions in the manual for starting and operating the machine, paying particular attention to any troubleshooting steps if required. Testing the pressure washer will help identify any issues or adjustments needed before you start using it for your cleaning tasks.
6. Regular Maintenance
Finally, to ensure the longevity and optimal performance of your Nilfisk pressure washer, establish a routine maintenance schedule. This may include cleaning the filters, inspecting hoses for any signs of damage, and replacing worn-out parts as necessary. By maintaining your pressure washer regularly, you can extend its lifespan and enjoy reliable cleaning power for years to come.
Following these tips for a proper setup of your Nilfisk pressure washer will not only make the assembly process smoother, but it will also help you maximize its performance and ensure safe operation. Remember to refer to the instruction manual and prioritize safety throughout the setup and use of your pressure washer.