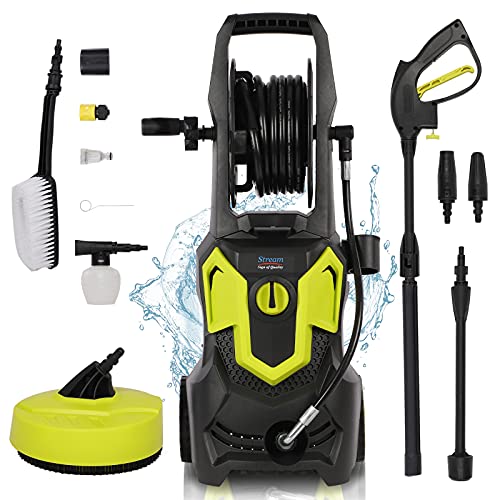
How To Adjust Psi On Pressure Washer

Are you a homeowner or a professional who relies on the exceptional cleaning power of a specialized tool to keep your surroundings spick and span? If so, then you must be familiar with the pivotal role that water pressure plays in ensuring optimal performance. However, did you know that adjusting the force of your cleaning device can significantly enhance its efficiency and efficacy?
In this comprehensive guide, I will delve into the intricacies of fine-tuning water pressure, sharing invaluable insights and practical tips that will revolutionize the way you tackle dirt and grime. Prepare to unlock the potential of your cleaning device as I unravel the secrets behind achieving impeccable results.
Discover the art of calibration:
Calibrating the water pressure of your cleaning device is a skill that can make the difference between a lackluster cleaning experience and achieving remarkable results. By harnessing this art, you gain the power to customize the force generated by your tool, allowing you to conquer even the most stubborn of stains. Get ready to elevate your cleaning prowess by understanding the intricacies of calibrating water pressure.
Mastering Control: Adjusting PSI for Optimal Performance
When it comes to unleashing the full power of your pressure cleaning equipment, achieving the ideal PSI setting plays a critical role. As a seasoned pressure washing enthusiast, I have found that honing in on the perfect pressure level can make all the difference in tackling various outdoor cleaning tasks effectively. In this guide, I will share my personal insights on mastering the art of adjusting PSI on your pressure washer, ensuring maximum performance and outstanding results every time.
Understanding the Pressure Spectrum
One of the first steps towards mastering PSI adjustment is to have a firm grasp on the pressure spectrum. Instead of viewing pressure as a mere numerical value, envision it as a range stretching from gentle mist to high-impact spray. By recognizing the different pressure zones within this spectrum, you can tailor your pressure washer’s output to suit specific cleaning jobs.
Calibrating PSI to Task Requirements
With a comprehensive understanding of the pressure spectrum, it’s time to delve into the art of calibrating PSI to meet the requirements of each cleaning task. Just as a painter would select different brush sizes for various strokes, a pressure washing aficionado must fine-tune the pressure setting to achieve optimal results.
For more delicate surfaces such as vehicles or windows, dialing down the pressure to a lower setting, often referred to as a “gentle cascade,” is paramount to prevent unintended damage. On the other hand, when dealing with ingrained dirt or stubborn stains on sturdy surfaces like driveways or sidewalks, cranking up the pressure to unleash a “focused torrent” can provide the deep cleaning power needed.
While experimenting with different PSI levels is inevitable, it is crucial to approach adjustments methodically, taking into account the surface material, grime intensity, and any manufacturer recommendations specific to your pressure washer model.
Remember, as you journey through the realm of pressure washing, mastering the art of PSI adjustment is not an exact science but more of an acquired skill. Over time, with hands-on experience and a willingness to adapt, you will develop an instinct for selecting the perfect PSI setting, transforming your pressure washer into a versatile tool that always delivers exceptional results.

Understanding the Significance of PSI in High-Pressure Cleaning
When it comes to the effective cleaning of surfaces, understanding the importance of PSI, or pounds per square inch, in pressure washing is crucial. PSI is the measurement used to determine the force or power behind a pressure washer, and it plays a significant role in achieving optimal cleaning results.
1. The Power Behind the Clean
PSI is the driving force that determines how efficiently a pressure washer can remove dirt, grime, and stains from various surfaces. The higher the PSI, the more forceful the water stream, allowing for a deeper and more thorough cleaning. It is important to understand the specific PSI requirements for different cleaning tasks to ensure successful results.
2. Finding the Right Balance
While high PSI can be beneficial for certain surfaces and tasks, it is essential to strike a balance to avoid causing damage. Different surfaces and materials have specific PSI limits that should not be exceeded. Understanding these limits helps prevent issues such as surface etching, paint stripping, or structural damage. It is advisable to refer to manufacturer recommendations or seek professional advice for determining the appropriate PSI range for a specific cleaning project.
- Listen to Your Pressure Washer
- Consider the Surface Type
- Keep Safety in Mind
- Regular Maintenance and Inspections
By following these guidelines, you can ensure the safe and effective use of a pressure washer while leveraging the power of PSI to achieve remarkable cleaning results without compromising on the integrity of the surfaces.
Choosing the Perfect Power Sprayer to Suit Your Requirements
When it comes to finding the ideal power sprayer, it is crucial to consider your specific needs and preferences. Selecting the right pressure washer can make a significant difference in achieving satisfactory results for various tasks, such as cleaning your car, deck, or patio. In this section, I aim to guide you through the process of choosing a power sprayer that perfectly fits your requirements.

Determining Your Cleaning Objectives
Before making a decision, it is important to clearly define your cleaning objectives. Consider the surfaces or objects you plan to clean and the level of dirt or grime they usually accumulate. This will help you assess the level of pressure and water flow required.
Understanding Power Sprayer Specifications
To ensure you make an informed choice, it is vital to understand the key specifications of power sprayers. These specifications include water pressure, measured in pounds per square inch (psi), and water flow rate, measured in gallons per minute (GPM). By examining these factors, you can determine the power and performance capabilities of different models.
| Pressure Level | Intensity of Cleaning | Typical Applications |
|---|---|---|
| Low Pressure (less than 2000 psi) | Gentle | Delicate surfaces such as vehicles, windows, and garden furniture |
| Medium Pressure (2000-2800 psi) | Moderate | Decks, patios, pathways, fences, and driveways |
| High Pressure (above 2800 psi) | Powerful | Tough stains, grease, and heavy-duty cleaning |
Additionally, consider the versatility of the power sprayer, ease of use, and any additional features or accessories that may enhance your cleaning experience.
By taking into account your specific cleaning objectives, understanding the different power sprayer specifications, and considering other relevant factors, you can confidently select the perfect power sprayer that will meet your needs and deliver excellent results. Remember, choosing the right power sprayer ensures an efficient and effective cleaning process, saving you both time and effort.
Familiarizing Yourself with the PSI Adjustment Mechanism
As someone who frequently works with power washers, it is essential to understand how to familiarize yourself with the mechanism used to adjust the pressure of the water flow. By comprehending the intricacies of the PSI adjustment system, you will gain the knowledge and confidence required to optimize the performance of your power washer.

Understanding the Principles
Before delving into the specifics of adjusting the water pressure, it is crucial to have a basic understanding of the principles behind this mechanism. The PSI (pounds per square inch) adjustment determines the force with which the water is expelled from the nozzle of the power washer. By making modifications to this pressure, you can tailor the water flow to suit different cleaning tasks, ensuring effective and efficient results.
It is worth noting that the pressure adjustment mechanism may vary slightly depending on the make and model of your power washer. However, the fundamental principles remain the same across most machines. By following the instructions provided by the manufacturer, you can gain a comprehensive understanding of the specific PSI adjustment mechanism of your power washer.
The PSI Adjustment Process
Now that we have a basic understanding of the principles behind the PSI adjustment mechanism, let’s dive into the process itself. To adjust the water pressure, follow these steps:
| Step | Description |
|---|---|
| 1 | Start by locating the PSI adjustment knob or dial on your power washer. It is typically positioned near the water inlet or on the control panel. |
| 2 | Carefully turn the knob or dial clockwise to increase the pressure or counterclockwise to decrease it. Make adjustments gradually to find the optimal PSI for your cleaning task. |
| 3 | Keep in mind that the desired PSI may vary depending on the surface or object you are cleaning. For delicate materials, such as cars or painted surfaces, lower pressure is recommended. For tougher stains or outdoor surfaces, higher pressure may be necessary. |
| 4 | After making the necessary adjustments, test the water pressure by spraying a small area. Evaluate the results and fine-tune the PSI accordingly, if needed. |
By following these steps and familiarizing yourself with the PSI adjustment mechanism of your power washer, you will become proficient in optimizing the water pressure for different cleaning tasks. Remember, safety should always be prioritized, so start with lower pressure settings and gradually increase if required. Now, let’s put this knowledge into practice and achieve outstanding cleaning results with your power washer!
Checking the Current PSI Setting on Your Pressure Washer
As a passionate pressure washer user, one of the most important aspects of maintaining optimal performance is ensuring that the current pounds per square inch (PSI) setting is accurate. Without the correct PSI, your pressure washer may not effectively clean the desired surface or could potentially cause damage. In this section, I will guide you through the process of checking the current PSI setting on your pressure washer, providing you with the confidence to tackle any cleaning task with precision.

1. Locate the Pressure Control Knob
In order to check the current PSI setting, you first need to identify the pressure control knob on your pressure washer. This knob is typically located near the handle or control panel and is responsible for adjusting the water pressure. It may be labeled as ‘pressure adjustment’ or something similar.
2. Examine the Current PSI Reading
Once you have located the pressure control knob, it’s time to examine the current PSI reading. Some pressure washers have a built-in digital display that shows the exact PSI, while others may have a gauge or dial. Take a moment to familiarize yourself with the display or gauge to ensure you understand how to read the current PSI accurately.
- If your pressure washer has a digital display, the PSI reading should be clearly visible. Take note of the current PSI value.
- If your pressure washer has a gauge or dial, it may have markings indicating the PSI range. Carefully observe the position of the needle and note the corresponding PSI value.
3. Compare the Current PSI to the Recommended Range
Now that you know the current PSI setting, it’s important to ensure that it falls within the recommended range for your specific cleaning task. Different surfaces and cleaning requirements may require different PSI settings. Refer to the manufacturer’s guidelines or consult the user manual to determine the appropriate PSI range for your desired cleaning task.
- If the current PSI falls within the recommended range, you can proceed with confidence, knowing that your pressure washer is set to deliver optimal cleaning power.
- If the current PSI is below the recommended range, you may need to adjust the pressure control knob clockwise to increase the pressure. Remember to make gradual adjustments and recheck the PSI reading until it falls within the desired range.
- If the current PSI is above the recommended range, you may need to turn the pressure control knob counterclockwise to decrease the pressure. Again, make gradual adjustments and verify the PSI reading until it aligns with the specified range.
By regularly checking the current PSI setting on your pressure washer and making necessary adjustments, you can ensure optimal cleaning performance and prolong the lifespan of your equipment. Remember to always prioritize safety and follow the manufacturer’s guidelines for proper operation and maintenance of your pressure washer.
Determining the Optimal Pressure for Effective Cleaning
When it comes to cleaning tasks, finding the ideal pressure is crucial for achieving the best results. The right amount of pressure will ensure that the desired level of cleanliness is achieved without causing any damage to the surfaces being cleaned. In this section, I will share some insights on how to determine the optimal PSI (pounds per square inch) for various cleaning tasks, allowing you to achieve efficient and effective cleaning outcomes.

Understanding the Importance of PSI
Before diving into determining the ideal PSI, it is essential to understand the significance of this measurement in pressure washing. PSI refers to the force with which water is expelled from the pressure washer. It directly impacts the cleaning power and effectiveness in removing dirt, grime, and other stubborn stains. However, it is important to note that different surfaces and cleaning tasks require different levels of pressure to ensure gentle yet thorough cleaning.
Factors to Consider When Determining PSI
Several factors come into play when determining the optimal PSI for a particular cleaning task. One important factor is the type of surface being cleaned. Delicate surfaces such as wood or paint require lower PSI to prevent any damage, while tougher surfaces like concrete or metal may demand higher pressure to effectively remove deep-seated dirt.
Another factor to consider is the level of dirt or grime accumulated. Heavily soiled surfaces may need higher pressure to penetrate and remove tough stains, whereas lighter dirt may require less pressure. Additionally, the distance between the pressure washer nozzle and the surface being cleaned also plays a role in determining the optimal PSI. A closer distance generally requires lower PSI, while a greater distance may require higher pressure to maintain cleaning effectiveness.
It is important to keep in mind that proper safety precautions, such as wearing protective gear and performing a test spot, should always be followed when adjusting the PSI. Carefully assess the specific cleaning task at hand, taking into account the surface type, level of dirt, and recommended PSI ranges provided by the pressure washer manufacturer.
Conclusion:

Determining the ideal PSI for your cleaning task requires careful consideration of factors such as surface type, level of dirt, and recommended PSI ranges. By understanding the significance of PSI and adjusting accordingly, you can achieve optimal cleaning results while ensuring the safety and integrity of the surfaces being cleaned.
A Step-by-Step Guide to Adjusting the PSI on Your Power Washer
As an avid user of power washers, I understand the importance of adjusting the pressure to suit different cleaning tasks. In this guide, I will share my step-by-step method for easily adjusting the PSI (pounds per square inch) on your power washer. By following these simple instructions, you will be able to control the pressure output, ensuring optimal and efficient cleaning results.
- Start by locating the pressure adjustment knob or dial on your power washer. This can usually be found near the pump or on the control panel.
- Before making any adjustments, make sure your power washer is turned off and the hose is disconnected from the water source. Safety should always be a top priority!
- Once you have located the pressure adjustment knob, turn it clockwise to increase the PSI or counterclockwise to decrease it. Remember, PSI refers to the amount of pressure applied by the water stream for cleaning purposes.
- It is important to know the specific PSI requirements for the task at hand. For example, delicate surfaces such as painted surfaces or fragile materials may require a lower PSI to avoid damage, while stubborn stains or heavy-duty cleaning may necessitate a higher PSI for more effective results.
- After adjusting the pressure to your desired level, connect the hose to the water source and switch on the power washer. Gradually increase the pressure as needed, keeping an eye on the spray pattern and the effectiveness of the cleaning.
- If you find that the pressure is still too high or too low, repeat the adjustment process to fine-tune the PSI. It may take a few attempts to find the perfect pressure setting for your specific cleaning needs.
- Always be mindful of your surroundings and the surfaces you are cleaning. If you notice any damage or adverse effects, immediately decrease the pressure and reassess the situation.
Remember, adjusting the PSI on your power washer is an essential skill that allows you to tailor the cleaning process to different surfaces and tasks. By following this step-by-step guide, you can confidently adjust the pressure to achieve optimal cleaning results while ensuring the safety and integrity of the surfaces you are cleaning.
Testing the Pressure Washer After Adjusting the PSI
Once I have made the necessary adjustments to the pressure settings on my machine, it is crucial to conduct a thorough test to ensure that everything is working properly. In this section, I will discuss the process of testing the pressure washer after making adjustments to the pounds per square inch (PSI).
First and foremost, I need to ensure that all safety precautions are properly in place before testing the pressure washer. This includes wearing appropriate protective gear such as safety glasses and gloves. Safety is always my top priority when working with any machinery.

I will start by priming the pressure washer to ensure that the water is flowing smoothly through the machine. By doing this, I can eliminate any air pockets and guarantee a consistent water supply during the testing process.
Next, I will select a suitable testing area away from any delicate surfaces or objects that could potentially be damaged by the high-pressure water. It is important to choose a location with enough space to move the wand around comfortably.
Before I begin testing, I will always double-check the PSI setting to confirm that it matches my desired pressure level. This can be done by referring to the pressure gauge on the pressure washer or using an external pressure gauge if necessary.
When I am ready to start testing, I will point the wand towards the testing area and pull the trigger to release the water. I will observe the pressure and ensure that it is consistent throughout the testing process. If I notice any irregularities or fluctuations, I will stop immediately and make the necessary adjustments.
An essential aspect of testing the pressure washer is also examining the performance of the machine against different surfaces and grime levels. By testing on various surfaces such as concrete, wood, or metal, I can assess the effectiveness of the pressure and determine if any further adjustments are needed.
Throughout the testing process, I will pay close attention to any changes in the sound, vibrations, or performance of the pressure washer. If I notice any unusual noises or movements, I will stop the testing and inspect the machine for any potential issues.
Once I have completed the testing process, I will evaluate the overall performance of the pressure washer and its ability to meet my specific cleaning needs. If I am satisfied with the results, I can confidently proceed with using the pressure washer for my intended tasks.
In conclusion, testing the pressure washer after adjusting the PSI is a crucial step to ensure its optimal performance. By following the proper testing procedures and paying attention to any irregularities, I can maintain a safe and effective pressure washing experience.
Troubleshooting Common Issues with Adjusting Pressure on a Power Cleaner
In this section, I will discuss some common problems that you may encounter when attempting to modify the pressure settings on your power cleaning device. Adjusting the force at which water is expelled from the machine is a crucial aspect of achieving optimal cleaning results in various tasks. However, it is not uncommon for users to encounter challenges when attempting to make adjustments. In this troubleshooting guide, I will share my experience and offer solutions to help you overcome these issues.
1. Insufficient Pressure: One common problem that users face when adjusting the force is not achieving enough pressure. In such cases, the water expelled may not be powerful enough to effectively clean the desired surface. To tackle this issue, it is essential to check if the nozzle or spray wand is clogged. Debris, such as dirt or grime, can accumulate and restrict the flow of water. Cleaning or replacing the nozzle or spray wand can help restore the desired pressure.
2. Fluctuating Pressure: Another common issue is experiencing fluctuations in pressure while using the power cleaner. This can occur due to various reasons, such as air trapped in the water supply or a malfunctioning unloader valve. To address this problem, try purging any air from the system by running the power cleaner without the nozzle attached. If the issue persists, inspect the unloader valve for any signs of damage or wear and consider replacing it if necessary.
3. Inconsistent Pressure: Some users may find that the pressure from their power cleaner is inconsistent, with occasional drops or surges. This issue can be related to a faulty pressure regulator or an insufficient water supply. Start by checking the water source, ensuring it provides a steady flow and is not restricted. If the water supply is adequate, inspect the pressure regulator for any damage or debris build-up. Cleaning or replacing the pressure regulator may help stabilize the pressure output.
4. Excessive Pressure: Occasionally, users may encounter the problem of excessive pressure, where the force of the water expelled is too high for the intended task. This can potentially damage delicate surfaces or cause injury. If facing this issue, begin by checking the pressure control valve, adjusting it to the desired level. Additionally, ensure that the nozzle size corresponds to the desired pressure range. If the problem persists, consider using an appropriate nozzle or consult a professional for further assistance.
Remember, proper maintenance and regular inspection of your power cleaner can help prevent these issues and ensure optimal performance. If problems persist despite troubleshooting efforts, it is recommended to seek professional assistance to avoid any potential damage or accidents.
Safety Precautions to Keep in Mind When Adjusting Pressure
When it comes to modifying the pressure of your cleaning equipment, it is essential to prioritize safety. Proper precautions can help prevent accidents, injury, and potential damage to both yourself and the surrounding area. In this section, I will outline some important safety measures to bear in mind when adjusting the psi of your pressure washer.
- Protective Gear: Before making any adjustments, always ensure that you are wearing the appropriate protective gear such as safety goggles, gloves, and closed-toe shoes. This will help shield you from any potential hazards, including flying debris or chemical splashes.
- Thorough Inspection: Before beginning any adjustments, thoroughly inspect your pressure washer for any signs of damage or wear. Check the hoses, nozzles, and connections for any cracks, leaks, or unusual wear and tear. If you notice any issues, address them before proceeding.
- Work Area Preparation: Make sure your work area is clear of any obstacles that may pose a tripping hazard. Remove any debris, objects, or loose items that could interfere with the operation of the pressure washer.
- Read the Manual: Familiarize yourself with the manufacturer’s instructions and guidelines for adjusting the pressure of your specific model. Understanding the proper steps and precautions recommended by the manufacturer is crucial in ensuring a safe and effective adjustment process.
- Gradual Pressure Adjustment: When modifying the psi, it is advisable to make gradual changes rather than drastic adjustments. This allows you to monitor the effects of each modification and prevent potential damage from sudden, excessive pressure.
- Proper Nozzle Selection: Selecting the appropriate nozzle for your desired pressure level is essential. Using a nozzle with a smaller opening will increase the pressure, while a larger opening will decrease it. Always consult the manufacturer’s recommendations for nozzle selection to ensure safe and accurate adjustments.
- Maintain Good Posture: When making adjustments, it is important to maintain proper posture and body mechanics. Avoid bending, stooping, or twisting in awkward positions that may cause strain or injury. Use both hands to make adjustments and maintain a stable stance.
By following these safety precautions, you can make the necessary adjustments to your pressure washer’s psi confidently and efficiently, while minimizing the risk of accidents or mishaps. Prioritizing safety is paramount in any DIY maintenance task, and adjusting pressure is no exception.
Maintenance Tips to Ensure Optimal Performance of Pressure Washer
As a seasoned user of pressure washers, I have discovered that regular maintenance plays a crucial role in maintaining optimal performance and extending the lifespan of the equipment. In this section, I will share some valuable tips that will help you ensure the best PSI performance of your pressure washer, thus enhancing its efficiency and effectiveness in various cleaning tasks.
Inspect and Clean the Nozzle
One of the key components that directly affects the PSI output of a pressure washer is the nozzle. Over time, debris and mineral buildup can hinder the water flow and reduce the pressure. Hence, it is essential to inspect the nozzle regularly and clean it thoroughly using a small brush and water. This will help to remove any blockages and ensure a consistent and powerful spray.
Check and Replace Worn Seals
Seals are crucial for maintaining the pressure and preventing water leaks in the pressure washer. Regularly inspect all seals, including those in the hose connections and wand fittings, and look for signs of wear, cracks, or damage. If any seals are worn out or damaged, it is important to replace them promptly to prevent any loss in PSI performance and avoid any potential water leakage during operation.
Moreover, it is advisable to apply a silicone lubricant on the seals to keep them in good condition and provide them with better protection against wear and tear. This simple step can significantly contribute to maintaining optimal PSI performance in the long run.
Regularly Clean and Replace Filters
The filters in your pressure washer are responsible for preventing particles and debris from entering the system, which can affect the water flow and reduce the pressure. It is important to clean and rinse the filters regularly, following the manufacturer’s guidelines, to ensure they are free from any clogs or obstructions. Additionally, filters have a limited lifespan, so replacing them at the recommended intervals is essential for maintaining optimal PSI levels and preventing potential damage to the pressure washer.
By following these maintenance tips diligently, you can ensure the optimal PSI performance of your pressure washer, allowing you to tackle various cleaning tasks with ease and efficiency. Remember, a well-maintained pressure washer not only delivers superior performance but also helps you prolong its lifespan, making it a worthwhile investment.