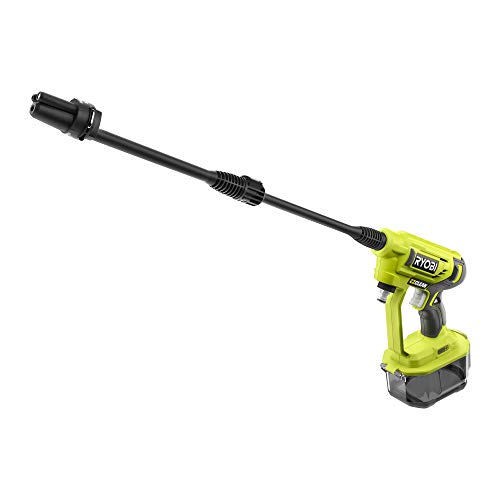
How Do You Attach A Hose To A Pressure Washer

Have you ever found yourself in need of a reliable and efficient method to connect a pipe to a high-pressure cleansing gadget? If so, you’re in luck! I’m here to share with you the foolproof technique for securely fastening a tube to a formidable washer.
Picture this: a sunny day, the birds chirping, and a layer of grime covering your patio or deck. You grab your trusty pressure washer, ready to tackle the dirt and restore the pristine condition of your outdoor space. But wait, how do you go about connecting the necessary hose to this powerful machine?
Well, fear not, because I’m about to divulge the ultimate strategy for achieving a tight seal between the hose and your pressure washer. This method will ensure that no water leakage occurs, guaranteeing maximum efficiency and effectiveness in your cleaning endeavors.
Proper Techniques for Connecting a Tube to a High-Pressure Cleaning Device
When it comes to assembling the necessary components for operating a high-pressure cleaning machine, a crucial step is connecting the water tube to the device properly. This section will guide you through the various steps involved in attaching the tubing without overlooking any important details.
Gather the Essential Tools
Before you commence the process of connecting the hose to your powerful cleaning machine, it is vital to gather the necessary tools. You will need a wrench, which will allow you to fasten and secure the coupling tightly. Additionally, ensure you have an adjustable wrench on hand to adjust the nozzle connection, if required.
Step-by-Step Procedure
Follow these step-by-step instructions for a successful connection:
| Step | Description |
|---|---|
| 1 | First, locate the water inlet port on the high-pressure cleaning device. This is usually indicated by an arrow or another identifiable mark. |
| 2 | Inspect the end of the water hose to ensure it is clean and free from debris. Remove any blockages or dirt before proceeding. |
| 3 | Apply a small amount of lubricant, such as petroleum jelly, to the male connector of the hose to aid in a smooth connection. |
| 4 | Carefully insert the male end of the water hose into the water inlet port of the cleaning device. Rotate the hose clockwise to create a secure connection. |
| 5 | Using a wrench, tighten the coupling, ensuring a firm connection without over-tightening, which may damage the o-ring or gasket. |
| 6 | Finally, inspect the connection for any signs of leakage. If there are any leaks, adjust the coupling or apply Teflon tape to prevent water from escaping. |
By following these simple guidelines, you can successfully connect a water hose to your high-pressure cleaning device, enabling you to perform various cleaning tasks efficiently and effectively.
Understanding the Components
In this section, we will discuss the various components involved in connecting a hose to a pressure washer. Please note that the following information is based on my personal experience and should serve as a general guide.
1. Hose
The hose is an essential part of the pressure washer setup. It acts as a conduit for transferring water from a water source to the pressure washer unit. The hose is typically made of durable materials like PVC or rubber to withstand high water pressure and usage. It comes in various lengths and diameters, allowing for different applications and water flow rates.
2. Couplings and Connectors
Couplings and connectors play a crucial role in attaching the hose to both the water source and the pressure washer unit. These fittings ensure a secure and watertight connection, preventing leaks and ensuring proper water flow. Common types of couplings and connectors include quick-connect fittings, threaded fittings, and garden hose adapters, depending on the configuration of your pressure washer and water source.

3. O-rings and Washers
O-rings and washers are small yet important components that provide a seal between different parts of the pressure washer setup. They are often used in couplings, connectors, and hose connections to prevent water leakage. Regular inspection and replacement of worn-out O-rings and washers are necessary to maintain the efficiency and functionality of the pressure washer system.
4. Trigger Gun and Wand
The trigger gun and wand are parts of the pressure washer that allow you to control the flow and direction of the water. The trigger gun serves as a handle to activate or deactivate the water flow, while the wand is an extension that directs the high-pressure water towards the cleaning surface. These components often connect to the pressure washer unit via specialized fittings or connectors.
5. Safety Features
Many pressure washers come with built-in safety features to protect the user and prevent potential accidents. These can include safety locks on the trigger gun to prevent accidental activation, thermal sensors to shut off the pressure washer in case of overheating, and pressure relief valves to release excess pressure. Understanding and familiarizing yourself with these safety features is essential for safe and effective pressure washer operation.
- Remember to always follow the manufacturer’s instructions and safety guidelines when attaching a hose to a pressure washer.
- Inspect all components for any signs of damage or wear before use.
- Choose the appropriate hose length, diameter, and fittings to suit your specific pressure washer setup and cleaning needs.
- Ensure all connections are properly tightened to prevent leaks.
- Regular maintenance and replacement of worn-out components are essential for optimal performance and longevity of your pressure washer system.
By understanding the various components involved in attaching a hose to a pressure washer, you can ensure a proper and efficient setup, leading to effective cleaning results. Remember to prioritize safety and maintenance to prolong the lifespan of your pressure washer and avoid any potential issues.
Selecting the Right Hose
When it comes to attaching a hose to a pressure washer, it is essential to choose the right hose for the job. Selecting the correct hose can make a significant difference in the performance and efficiency of your pressure washer, ensuring optimal results without any compromise on safety.

Consider the Pressure Rating
One of the crucial factors to consider when selecting a hose for your pressure washer is the pressure rating. The pressure rating indicates the maximum amount of pressure the hose can withstand without bursting or leaking. It is important to choose a hose with a pressure rating that matches or exceeds the maximum pressure output of your pressure washer. This ensures that the hose can handle the intense pressure without any risk of damage.
Choose the Right Hose Diameter
Another important aspect to consider is the diameter of the hose. Hose diameters typically range from 1/4 inch to 3/4 inch. The larger the diameter, the greater the volume of water that can flow through the hose, allowing for higher water pressure from your pressure washer. However, it is essential to check the specifications of your pressure washer and select a hose diameter that is compatible with its flow rate. Using a hose with a diameter too small can lead to decreased water flow and diminished performance.
- Flexibility and Durability: It is important to choose a hose that is flexible enough to maneuver around obstacles and reach different areas of your cleaning project. At the same time, the hose should be durable enough to withstand wear and tear, including exposure to harsh chemicals or extreme weather conditions.
- Length: Consider the length of the hose you need based on your cleaning requirements. Longer hoses can provide more reach, but excessive length can lead to a drop in water pressure. Assess the distance you need to cover and choose a hose length that strikes a balance between reach and water pressure.
- Material: Select a hose made from high-quality materials, such as reinforced rubber or polyurethane, that can withstand the demands of pressure washing. These materials offer durability and flexibility, ensuring a longer lifespan for your hose.
By considering these factors, you can confidently select the right hose for your pressure washer, ensuring efficient and safe cleaning operations for a variety of tasks.
Check the Thread Type
When it comes to connecting a hose to a pressure washer, one important aspect to consider is the thread type. The thread type refers to the pattern of ridges and grooves on the fittings that allow them to screw together securely.
Before attaching a hose to a pressure washer, it is crucial to identify and match the thread type of both the hose and the pressure washer. Using incompatible thread types can result in leaks or damage to the equipment.

Identify the thread type of the hose: Start by examining the fitting at the end of the hose. You may find different types of threads, such as NPT (National Pipe Thread), BSP (British Standard Pipe), or Metric. Refer to the manufacturer’s manual or documentation to determine the exact thread type of your hose.
Identify the thread type of the pressure washer: Similar to the hose, inspect the fitting on the pressure washer. Look for any markings or specifications provided by the manufacturer that indicate the thread type. If unsure, you can consult the pressure washer’s manual or contact the manufacturer for assistance.
Match the thread types: Once you have identified the thread types of both the hose and the pressure washer, ensure they are compatible. If they have the same thread type, you can proceed with attaching the hose. If not, you will need an adapter or a different hose that has the correct thread type compatible with your pressure washer.
Remember, using the correct thread type is essential for a secure and leak-free connection when attaching a hose to a pressure washer. Taking the time to check and match the thread types will help ensure proper functionality and prevent any potential issues.
Connecting the Hose to the Pressure Washer
When it comes to setting up your pressure washer for use, one crucial step is connecting the hose to the machine. This simple yet important process ensures that water flows smoothly through the pressure washer, allowing you to effectively clean various surfaces and objects. In this section, I will guide you through the process of attaching the hose to the pressure washer, discussing the necessary steps and providing useful tips along the way.

- Start by locating the inlet connection point on your pressure washer. This is where the hose will be attached. It is usually marked with a symbol or labeled clearly for easy identification.
- Inspect the hose for any damages or blockages. Check for bends, kinks, or cracks that may impede water flow. If you notice any issues, it is advisable to replace the hose to ensure optimal performance.
- Ensure that the hose connector and the pressure washer inlet are clean and free from debris. You can use a soft cloth or brush to remove any dirt or obstructions that may affect the connection.
- Next, take the hose connector and align it with the pressure washer inlet. Gently push the connector onto the inlet until you hear or feel a click or snap, indicating a secure connection.
- Once the hose connector is attached, give it a slight tug to ensure it is firmly in place. This will help prevent any accidental disconnections during operation.
- Before turning on the pressure washer, make sure that all connections are tightly secured. Check for any leaks or water drips around the hose connector and the pressure washer inlet. If you notice any leaks, tighten the connection further or replace any faulty parts.
- Once everything is properly connected and secured, you can turn on the pressure washer and start using it for your cleaning tasks.
Remember, the proper attachment of the hose to the pressure washer is crucial for efficient and safe operation. Take your time to follow these steps carefully, and always refer to the manufacturer’s instructions for specific guidelines related to your pressure washer model. By connecting the hose correctly, you can ensure a seamless cleaning experience and maintain the longevity of your pressure washer.
Tightening the Connections
When it comes to setting up your pressure washer, one crucial step is ensuring that all the connections are tightly secured. Properly tightened connections are essential for the efficient and effective operation of your pressure washer system. In this section, I will guide you through the process of tightening the various connections involved, ensuring that your pressure washer is ready to deliver powerful and consistent performance.
1. Attaching the Hose to the Gun
To begin, it is important to secure the connection between the hose and the gun nozzle. Start by ensuring that both ends of the hose are clean and free from any debris or dirt. Then, align the notches on the gun with the grooves on the hose connector and push the two together until they click into place. Once connected, twist the collar clockwise until it is snug and tight. Avoid over-tightening, as this may damage the threads or create leaks. Confirm that the connection is secure by giving it a gentle tug, ensuring it doesn’t come loose.
2. Connecting the Hose to the Pressure Washer
Next, let’s move on to attaching the hose to the pressure washer itself. Locate the inlet on the pressure washer unit and inspect it for any debris or obstructions. Clean if necessary. Align the grooves on the hose connector with the notches on the pressure washer inlet and push the two together firmly. Once connected, twist the collar clockwise until it is snug and tight. Again, be cautious not to over-tighten. Give the connection a small tug to confirm that it is secure.
Note: Depending on the pressure washer model, additional fittings or adapters may be required to connect the hose to the pressure washer. Make sure to check the manufacturer’s instructions for specific guidance.

| Connection | Recommended Tightening Method |
|---|---|
| Hose to Gun | Twist the collar clockwise until snug |
| Hose to Pressure Washer | Twist the collar clockwise until tight |
By following these simple steps, you can ensure that all the connections on your pressure washer are securely tightened, minimizing the risk of leaks and ensuring optimal performance. Remember to periodically check the connections for any signs of wear or looseness, and tighten them if necessary. With properly tightened connections, you can confidently tackle any cleaning task with your pressure washer.
Testing for Leaks
Introduction:
Ensuring the proper functioning of your pressure washer requires thorough testing for any potential leaks.
When it comes to connecting a hose to a pressure washer, it is essential to check for any leaks that may compromise its effectiveness. Testing for leaks is an important step in the maintenance and upkeep of your pressure washer, ensuring optimal performance and preventing potential damage.
Inspecting the Fittings:

The first step in testing for leaks involves a careful examination of the fittings that connect the hose to the pressure washer.
Start by inspecting the hose connection point on both the pressure washer and the nozzle end of the hose. Look for any signs of damage, such as cracks, breaks, or wear. Ensure that the fittings are tightly secured, using a wrench if necessary, to create a strong and leak-free connection.
Applying Water Pressure:
Once the fittings have been inspected, it is time to apply water pressure and check for any signs of leakage.
Turn on the pressure washer and gradually increase the water pressure. Pay close attention to the hose connections, as well as any other potential areas where leaks might occur. Look for any visible water dripping, spraying, or escaping from the fittings. Additionally, listen for any unusual sounds, such as hissing or air escaping, which may indicate a leak.

Fixing Leaks:
If any leaks are detected during the testing process, it is crucial to take prompt action to address and fix the issue.
Depending on the severity of the leak, there are several possible solutions. For minor leaks, tightening the fittings further or applying plumber’s tape can often solve the problem. However, if the leak persists or is more significant, it may be necessary to replace the fittings or consult a professional for assistance.
In conclusion, thorough testing for leaks is a vital part of maintaining your pressure washer’s functionality. By inspecting the fittings, applying water pressure, and addressing any leaks promptly, you can ensure optimal performance and extend the lifespan of your pressure washer.
Proper Hose Length and Positioning
When it comes to connecting a tube to a power cleaner, selecting the appropriate length and ensuring the correct positioning is crucial for optimal performance. It’s important to consider the length of the hose and its position relative to the pressure washer to achieve efficient operation and avoid potential issues.
Firstly, let’s discuss the ideal hose length for your pressure washing needs. The length of the hose plays a significant role in determining the flexibility and convenience of your cleaning tasks. Too short a hose may limit your reach and require constant repositioning of the pressure washer, leading to interruptions and reduced productivity. On the other hand, a hose that is excessively long might hamper water flow, resulting in pressure loss and decreased cleaning power.
To determine the appropriate hose length, consider the scope of your cleaning projects. Measure the distance between your water source and the farthest point you need to reach, accounting for additional length needed for maneuverability. Remember that a longer hose may require heavier-duty material to maintain proper pressure and avoid leakage.
Next, let’s delve into the importance of hose positioning. Proper positioning ensures efficient water flow and minimizes the risk of damage to the hose or its connections. Positioning the hose in a straight line, free from any kinks or bends, helps maintain the integrity of the water supply, enabling consistent pressure throughout your cleaning tasks.
In addition to the straight line, it’s crucial to avoid placing the hose near sharp corners or areas with heavy foot traffic, as this can lead to accidental damage or tripping hazards. Keeping the hose elevated and away from potential obstructions or rough surfaces is also essential in preventing abrasions or cuts, which can compromise its durability over time.
Lastly, always prioritize safety when connecting and positioning the hose. Ensure that all connections are secure, and check for any signs of leaks or damage before starting the pressure washer. Regularly inspect the hose for wear and tear, and replace it if necessary to prevent accidents or decreased performance.
By carefully assessing the appropriate hose length and positioning, you can maximize the efficiency and effectiveness of your pressure washer, ensuring seamless performance for all your cleaning needs.
Tips for Maintaining the Hose
In this section, I will share some valuable tips on how to ensure the longevity and optimal performance of your pressure washer hose. Proper maintenance of the hose is crucial to avoid any potential damage or reduced functionality. By following these suggestions, you can save time and money in the long run.
1. Regular Inspection: It is important to inspect your pressure washer hose regularly to identify any signs of wear and tear. Look for cracks, bulges, or leaks that may affect its functionality. By catching these issues early on, you can prevent further damage and ensure the safety of your equipment.
2. Proper Storage: When you are done using your pressure washer, make sure to store the hose properly. Avoid leaving it exposed to extreme temperatures, direct sunlight, or harsh chemicals. Coiling the hose neatly and keeping it in a clean and dry area will help prolong its lifespan.
3. Avoid Kinks: Kinks in the hose can hinder water flow and cause pressure loss. When using the pressure washer, make sure the hose is free from any twists or bends that may restrict water movement. Straightening out any kinks before and during operation will ensure optimal performance.
4. Use the Right Attachments: Different tasks may require different attachments for your pressure washer hose. Make sure to use the appropriate nozzles and connectors for specific cleaning jobs. Using the wrong attachments can generate excessive pressure or reduce the effectiveness of the machine.
5. Clean After Use: After each use, it is essential to clean the hose thoroughly. Remove any debris, dirt, or chemical residues that may accumulate during the cleaning process. This will prevent clogging and ensure the hose remains in good condition for future use.
6. Avoid Tugging: Pulling or tugging on the hose can put unnecessary strain and stress on the connections. Instead, use a gentle and controlled motion when moving the pressure washer around. This will minimize the risk of damaging the hose or causing leaks.
7. Replace When Needed: Despite proper maintenance, there may come a time when the hose needs to be replaced. If you notice significant damage, such as severe cracks or leaks that cannot be repaired, it is best to invest in a new hose. Continuing to use a damaged hose can compromise the performance and safety of your pressure washer.
By following these tips, you can ensure that your pressure washer hose remains in top condition, allowing you to complete your cleaning tasks efficiently and effectively.
Troubleshooting Common Issues
When it comes to connecting a hose to a pressure washer, there can be some common issues that arise. In this section, I will discuss these problems and provide some troubleshooting tips to help you overcome them.
- Leaking Connections: One of the most common problems with attaching a hose to a pressure washer is having leaks at the connections. This can be caused by loose fittings or worn-out seals. To fix this issue, make sure all connections are tightly secured and inspect the seals for any signs of damage or wear. Replace any faulty seals to ensure a proper seal and prevent leaks.
- Low Water Pressure: Another issue that may occur is having low water pressure when the hose is attached to the pressure washer. This can be caused by a blockage in the hose or insufficient water flow from the source. Check for any kinks or obstructions in the hose and ensure that the water source is providing adequate pressure. Clear any blockages and adjust the water flow accordingly to improve the pressure.
- Nozzle Problems: Sometimes, you may face issues with the nozzle not delivering a steady and strong stream of water. This can be due to a clogged or worn-out nozzle. Remove the nozzle and clean it thoroughly to remove any debris or buildup that may be causing the issue. If the nozzle is damaged, replace it with a new one to ensure optimal performance.
- Inadequate Hose Length: The length of the hose can also be a common issue, especially if it is not long enough to reach the desired cleaning area. If you find that the hose is too short, consider using extension hoses or relocating the pressure washer closer to the cleaning area. This will provide you with the necessary reach to complete your cleaning tasks effectively.
By addressing these common issues, you can ensure a successful and hassle-free connection of your hose to the pressure washer. Remember to regularly inspect and maintain your equipment to prevent any potential problems from occurring in the future.